I usually start at what ever point, (jets/power valves )the carb came with and let the plugs and a/f ratio and an IR temp gun on the headers tell me the necessary changes, if I had to guess Id start with 70 jets and 5.5 pvs front and rear, fuel pressure at 5 psi and set the floats to the bottom of the inspection ports and go from there!
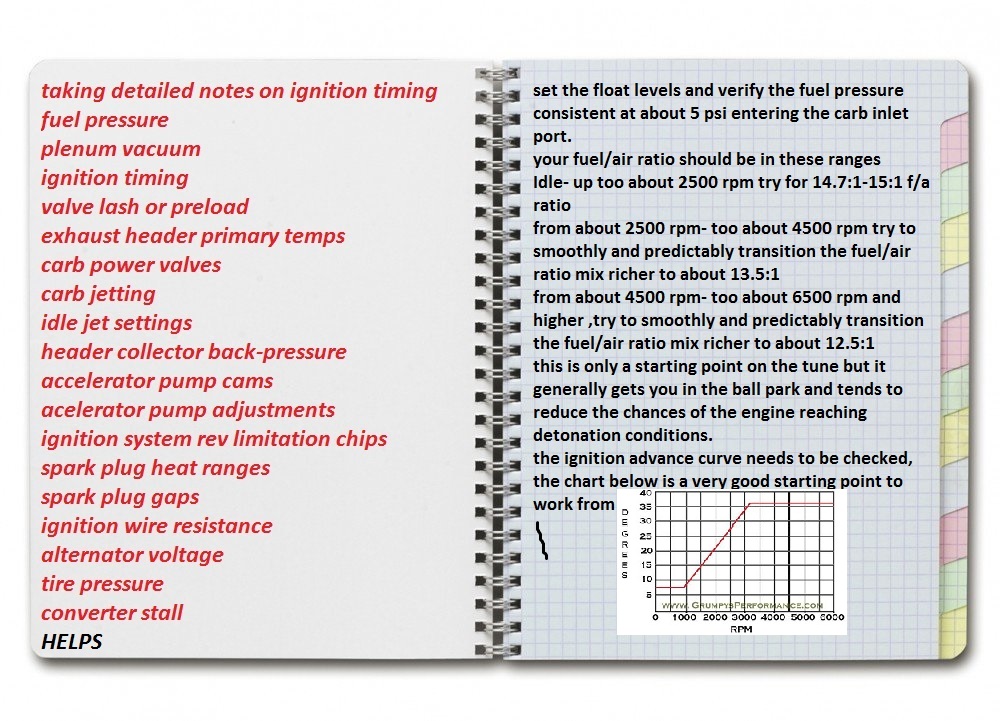
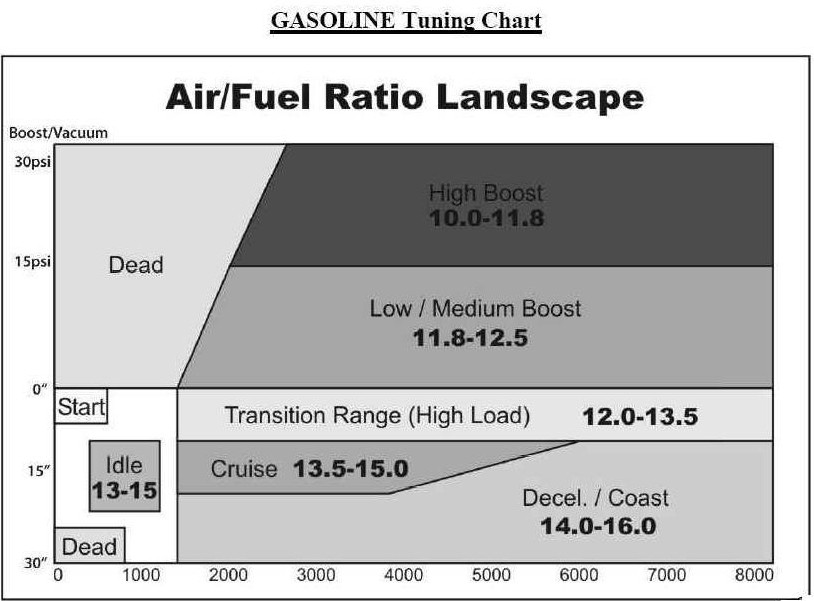
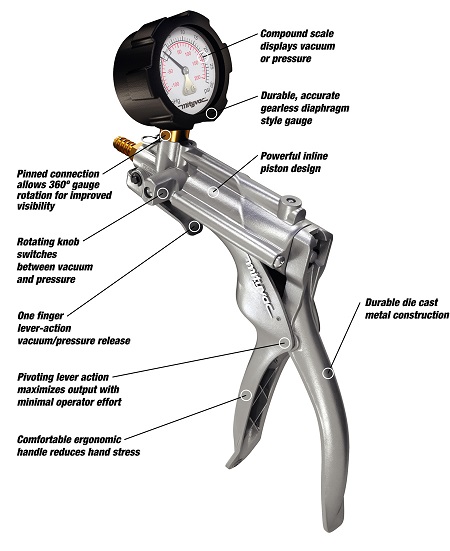
read thru this stuff below while keeping in mind the basic goal is a 13.5-14.5:1 mid rpm cruise a/f ratio and about that same ratio at idle, with about 12.8:1-13.5:1 at wide open throttle, a vacuum gauge and a fuel pressure gauge,(I like to try for 5.0- 5.5 psi on the FP regulator) having your floats set correctly(just damp lower sight hole threads) and your ignition timing correct (all in at about 3200rpm at about 36-38 degrees total advance)and about 6-10 degrees BTDC at 900rpm idle)are mandatory
max power is usually at between 12.4-12.6:1 max mileage is usually at about 15:1
on a street car engine, 14.7:1 is where all the available fuel gets burned
I generally try to get about 13:1-13.5:1 at idle and part throttle, cruise at about 14:1 at 70mph in over drive and have it run at about 12.7-12.8:1 at wot
as a compromise, that gives decent mileage and keeps the plugs clean, that generally requires playing with the power valves and jets in a Holley so that your basically running a bit lean on the jets and having the accelerator pump, and power valves add fuel over most of the carbs flow range if the vacuum drops and have power valves richen the mix during transition, and wot phases
keep in mind this generally requires different jetting and power valves in the front/back
and consistent fuel pressure, and float levels
which a decent fuel pressure regulator and some basic tuning skills will help with.
LETS ASSUME YOU NEED A 4%-6% richer fuel ratio, how do you calculate the correct increased jet size?
posting.php?mode=edit&f=44&p=1123
viewtopic.php?f=55&t=1639
http://gottafishcarburetors.com/CFM Formula.html
http://wallaceracing.com/intakecfm.php
http://www.bob2000.com/carb.htm
http://www.mortec.com/carbtip1.htm
http://www.corvettefever.com/techarticl ... index.html
http://www.classictrucks.com/tech/0806c ... index.html
http://bgsoflex.com/holley.html
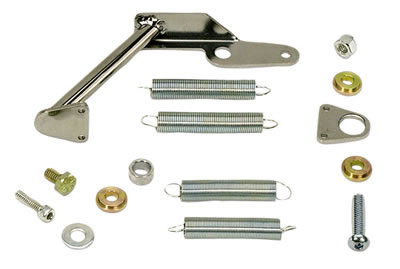
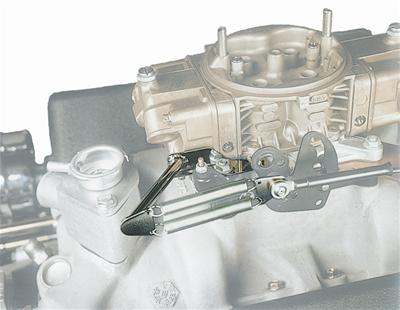
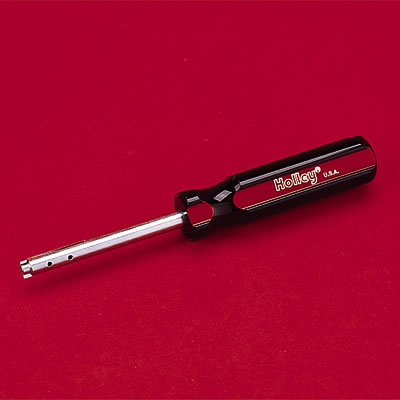
ID buy TWO of these
http://store.summitracing.com/partdetail.asp?autofilter=1&part=SUM-210230&N=700+4294861568+4294860208+115&autoview=sku
accellerator pump cams
http://store.summitracing.com/partdetai ... toview=sku
http://store.summitracing.com/partdetai ... toview=sku
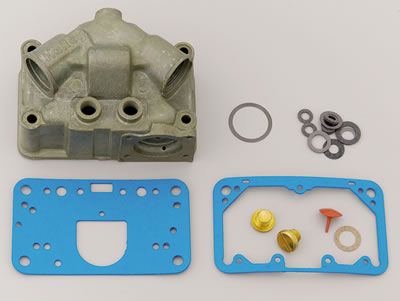
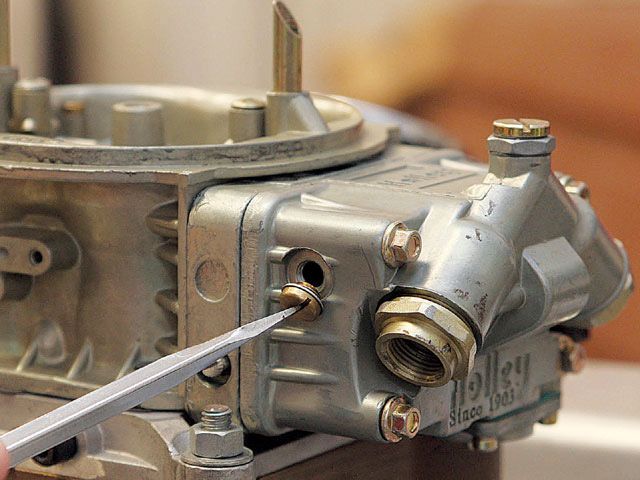
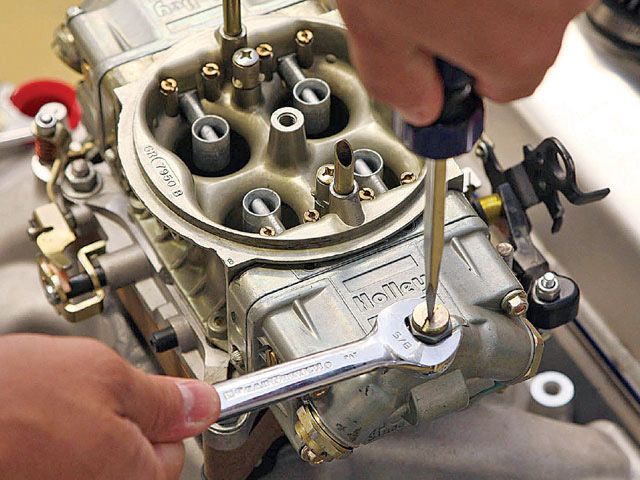
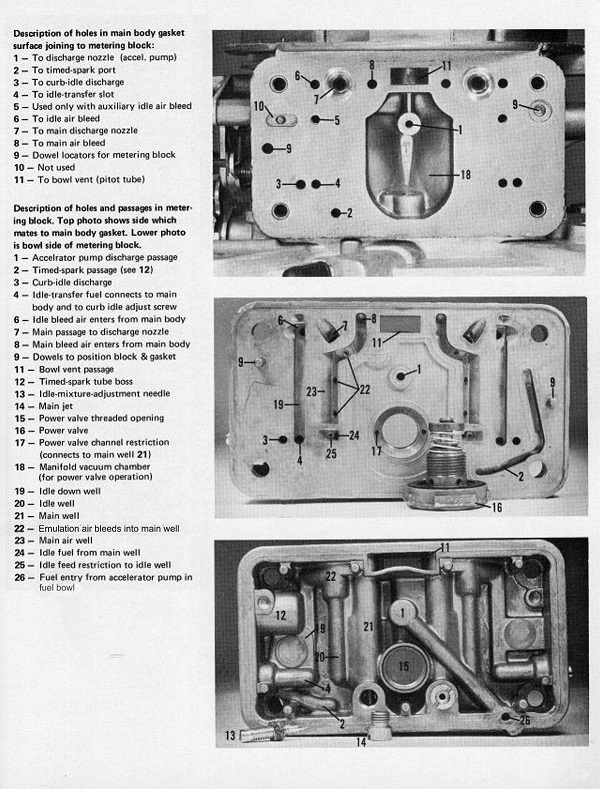
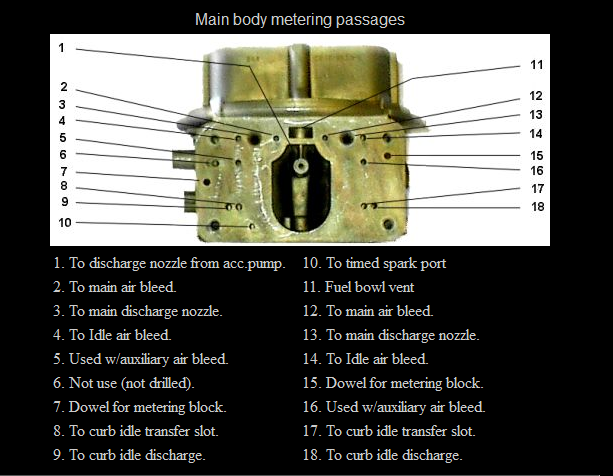
keep in mind theres lots of small passages that can get clogged and theres several different fuel bowl gaskets, these vary by manufacturer and carb model, so be sure you use the correct gasket on the meter block and fuel bowl, if you leave debris in the fuel bowl or use the wrong gaskets they can block passages and the carb won,t function
AS ALWAYS YOUR GOING TO MISS A TON OF INFO IF YOU SKIP THE SUB LINKS
read thru this stuff below while keeping in mind the basic goal is a 13.5-14.5:1 mid rpm cruise a/f ratio and about that same ratio at idle, with about 12.8:1-13.5:1 at wide open throttle, a vacuum gauge and a fuel pressure gauge,(I like to try for 5.0- 5.5 psi on the FP regulator) having your floats set correctly(just damp lower sight hole threads) and your ignition timing correct (all in at about 3200rpm at about 36-38 degrees total advance)and about 6-10 degrees BTDC at 900rpm idle)are mandatory
max power is usually at between 12.4-12.6:1 max mileage is usually at about 15:1
on a street car engine, 14.7:1 is where all the available fuel gets burned
I generally try to get about 13:1-13.5:1 at idle and part throttle, cruise at about 14:1 at 70mph in over drive and have it run at about 12.7-12.8:1 at wot
as a compromise, that gives decent mileage and keeps the plugs clean, that generally requires playing with the power valves and jets in a Holley so that your basically running a bit lean on the jets and having the accelerator pump, and power valves add fuel over most of the carbs flow range if the vacuum drops and have power valves richen the mix during transition, and wot phases
keep in mind this generally requires different jetting and power valves in the front/back
and consistent fuel pressure, and float levels
which a decent fuel pressure regulator and some basic tuning skills will help with.
LETS ASSUME YOU NEED A 4%-6% richer fuel ratio, how do you calculate the correct increased jet size?
TRRC said:I'll take a stab at the math behind this question...
https://www.summitracing.com/search...r=Ascending&keyword=holley air bleed jet sets
https://www.summitracing.com/search...r=Ascending&keyword=holley air bleed jet sets
https://www.summitracing.com/parts/hly-36-181
https://www.summitracing.com/parts/hly-36-201
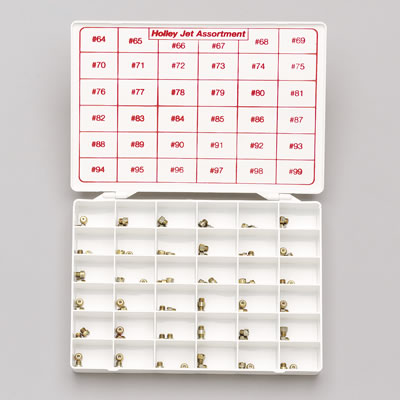
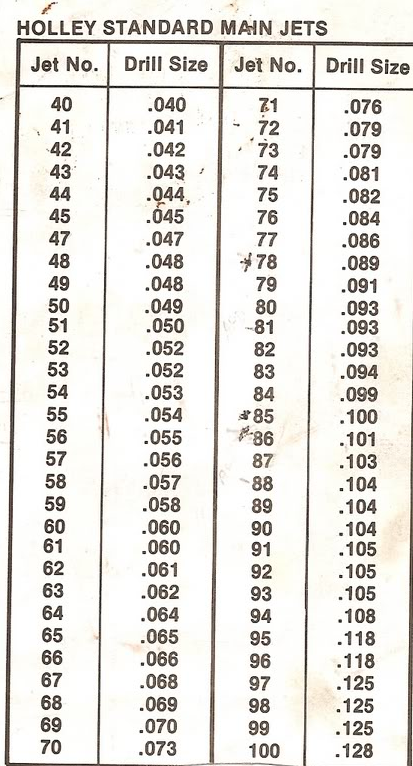
- First you have to find a chart that lists or measure the hole size in the jets that you are currently running. (EX. Holley 83 jet has a 0.094" diameter hole through it)
- Next divide the diameter by 2 to get the radius. (EX. 0.094/2= 0.047")
- Then find the surface area of that circle SA = pi x r^2 (EX. 3.1415962 x (0.047^2) = 0.00693978 square inches
- Next add the surface area of all the jets in your carb together (EX. for a carb with 83 jets all the way around 0.00693978 x 4 = 0.02775912 square inches. Note if your carb has staggered jets then you would need to find the ratio of the surface area front to back to maintain the same ratio with the new jet size)
- Next take the surface area and add the percent you want to change it (EX. 0.02775912 x 10⁴% = 0.0288694848 square inches)
- Then just work the math backwards at this point (EX. 0.0288694848 / 4 = 0.00721737712 square inches
- 0.00721737712 / pi = 0.00229735801
- square root of 0.00229735801 = 0.0479376269" radius
- 0.0479376269 x 2 = 0.09586152538" diameter
- Round that off to 0.096" and on the chart that falls between an 83 and 84 Jet so you would go up one size in this example to get yourself close.
posting.php?mode=edit&f=44&p=1123
viewtopic.php?f=55&t=1639
http://gottafishcarburetors.com/CFM Formula.html
http://wallaceracing.com/intakecfm.php
http://www.bob2000.com/carb.htm
http://www.mortec.com/carbtip1.htm
http://www.corvettefever.com/techarticl ... index.html
http://www.classictrucks.com/tech/0806c ... index.html
http://bgsoflex.com/holley.html
ID buy TWO of these
http://store.summitracing.com/partdetail.asp?autofilter=1&part=SUM-210230&N=700+4294861568+4294860208+115&autoview=sku
accellerator pump cams
http://store.summitracing.com/partdetai ... toview=sku
http://store.summitracing.com/partdetai ... toview=sku
keep in mind theres lots of small passages that can get clogged and theres several different fuel bowl gaskets, these vary by manufacturer and carb model, so be sure you use the correct gasket on the meter block and fuel bowl, if you leave debris in the fuel bowl or use the wrong gaskets they can block passages and the carb won,t function
AS ALWAYS YOUR GOING TO MISS A TON OF INFO IF YOU SKIP THE SUB LINKS
Last edited by a moderator: