first DON,T PAY FOR IT ...DO IT YOURSELF!!!
IT WILL COST LESS EVEN AFTER PAYING FOR THE TOOLS AT MOST GARAGES.
youll find that youll gain basic skills, own new tools and PAY LESS MONEY[/b] :
When testing EACH CYLINDER,with the leak down test gauge make sure the adapters firmly seated and a bit of oil on the threads won,t hurt either, try and find a quiet and well lit place to test, and do a vacuum test also
viewtopic.php?f=62&t=882&p=1390&hilit=propane+leaks#p1390
during the leak-down testing procedure,Listen at the intake manifold for intake valve leakage.
during the leak-down testing procedure,Listen at the exhaust manifold for exhaust valve leakage
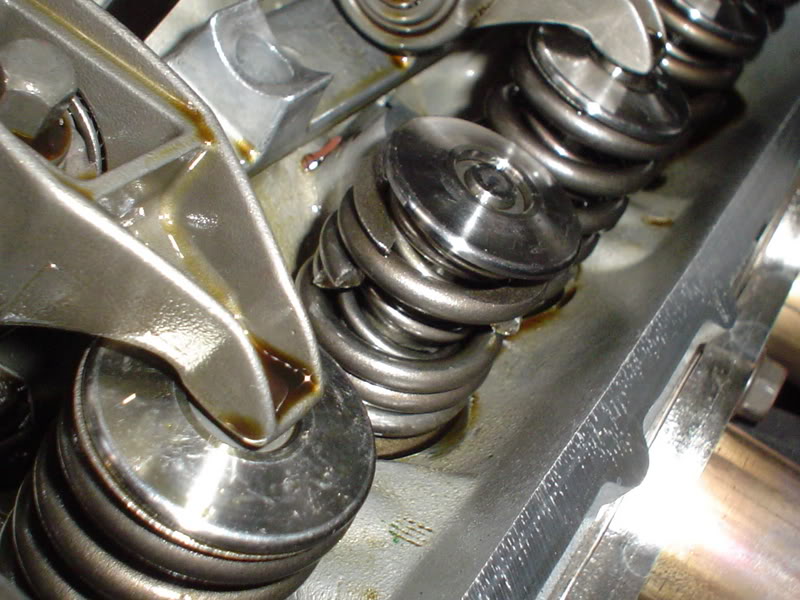
during the leak-down testing procedure,Listen at the valve covers or oil fill cap for ring leakage--you'll always have some, but its usually not huge on an engine in good shape, retest after squirting a bit of oil into the cylinder on each cylinder,does it change the reading or sound?.
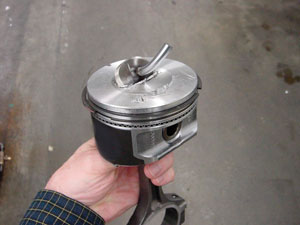
if your experiencing high rates of crank case pressure chances are good its the result of pressurized gases getting past the ring to bore seal at some point in the pistons travel
during the leak-down testing procedure,Listen and visually check for bubble in the radiator coolant, at the radiator cap for air leakage into the cooling system.
http://www.goodson.com/Dual-Gauge-Leak-Down-Tester/
ANY leakage into the exhaust, intake, or radiator is cause for concern.
read these links 90% of the info you needs in the links
LOOK FOR LOOSE OR CORRODED ELECTRICAL WIRING CONNECTORS, in THE WIRING HARNESS, and VERIFY YOUR FIRING ORDER, YEAH I KNOW YOUR SURE ITS CORRECT, CHECK IT CAREFULLY AGAIN, YOUR NOID TEST LIGHT AND MULTI- METER CAN SAVE YOU A GREAT DEAL OF PROBLEMS AND SCRATCHING YOUR HEAD IF YOU TEST BASIC ELECTRICAL CONNECTIONS< RESISTANCE AND VOLTAGE, CHECK YOUR SENSORS AND GROUNDS, A SHOP MANUALS MANDATORY, HEAT SENSORS AND IGNITION MODULES AND OIL PRESSURE SENSORS HAVE A LONG TRACK RECORD OF FAILING OR PARTIALLY AND INTERMITTENTLY NOT FUNCTIONING
http://www.carcraft.com/techarticles/116_0406_cylinder_leakdown_tester/index.html
http://www.nichols.nu/tip420.htm
http://www.hotrod.com/techarticles/engi ... rs_tested/
http://www.globaltoolsupply.com/cgi-local/SoftCart.exe/online-store/scstore/p-P1-275.html?E+scstore
http://www.tavia.com/cat8.html#3
http://vmaxoutlaw.com/tech/leakdown_tester.htm
http://www.motorcycleproject.com/motorcycle/text/leakdown.html
http://www.summitracing.com/parts/pro-66839/overview/
http://www.summitracing.com/parts/otc-5609/overview/

http://goodvibesracing.com/Leakdown Tester.htm
1) For most accurate results, engine should be up to operating temperture.
2) Remove all spark plugs.
3) Rotate crankshaft until piston being tested is at top dead center of compression stroke.
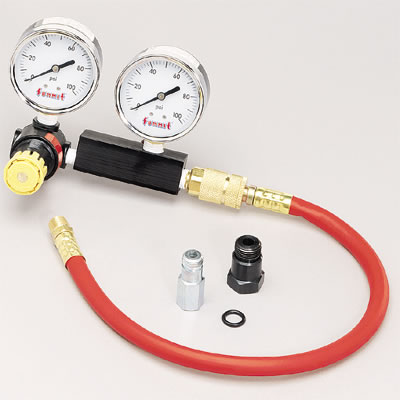
4) Screw the spark plug adaptor hose into spark plug hole making the sure the o-ring is seated properly.
5) Connect the spark plug adaptor hose to the coupler of the leakdown tester.
6) Connect leakdown tester to a good source of compressed air, preferably a filtered and water trapped source.
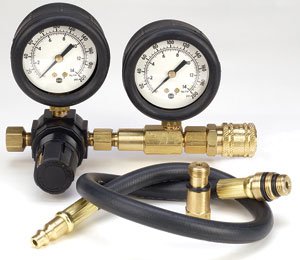
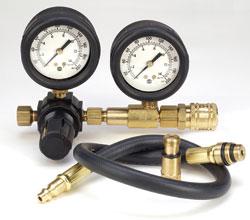
7) Adjust the regulator on the leakdown tester so the the LEFT HAND GAUGE indicates at least 10 pounds less than your sorce pressure. The leakdown percentage conversion table shown below is based on regulated pressures of 100, 90, or 75 psi.
8) Read the RIGHT HAND GAUGE (differential gauge), then look up gauge reading on the conversion table below to get actual leakdown percentage. After noting percentage of leakage, turn the regulator knob counter-clockwise to relieve the pressure. This reduces the shock to the gauges. If you ever get an unrealistically low pressure reading on the right hand gauge, there is a finite possibilty that something is blocking the small orfice located within the hex tube located between the regulator and the main body of the leakdown tester.
9)To remove any obstruction that may be lodged in the metering orfice, unscrew the hose coupling assembly from the aluminum body. Ultilizing a 1" wrench, remove the knob assembly from the regulator. Blow compressed air in the opposite direction (from the coupling end) to clear the orfice. Re-assemble the regulator and the coupling.
NOTE: DO NOT ATTEMPT TO REMOVE THE BRASS HEX NIPPLE BETWEEN THE REGULATOR AND THE ALUMINUM BODY. DAMAGE MAY RESULT.
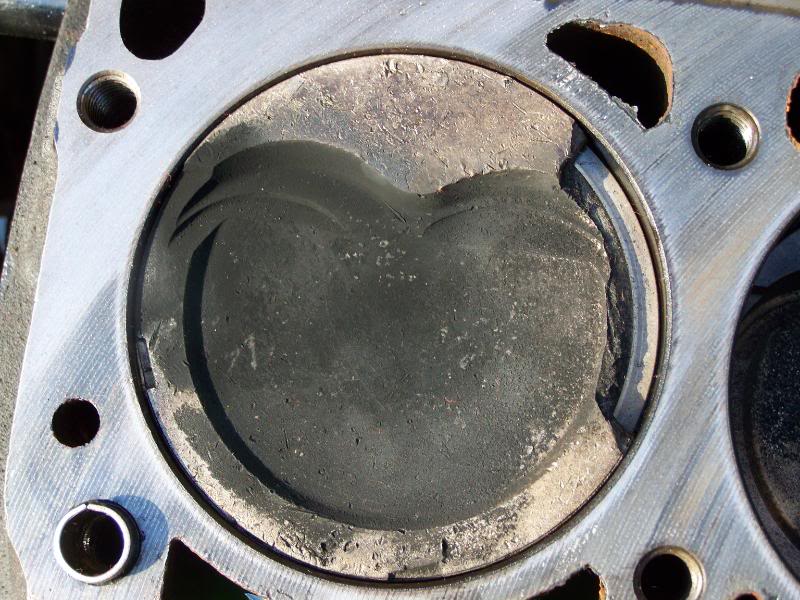
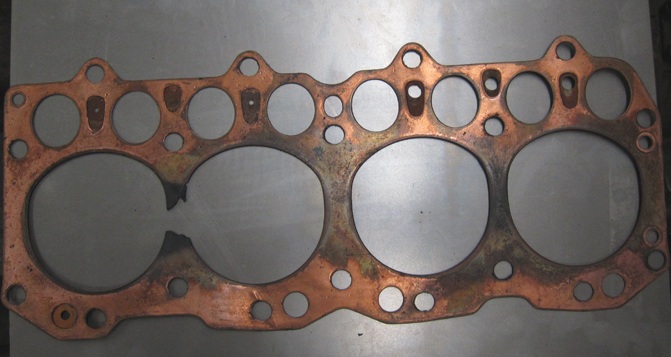
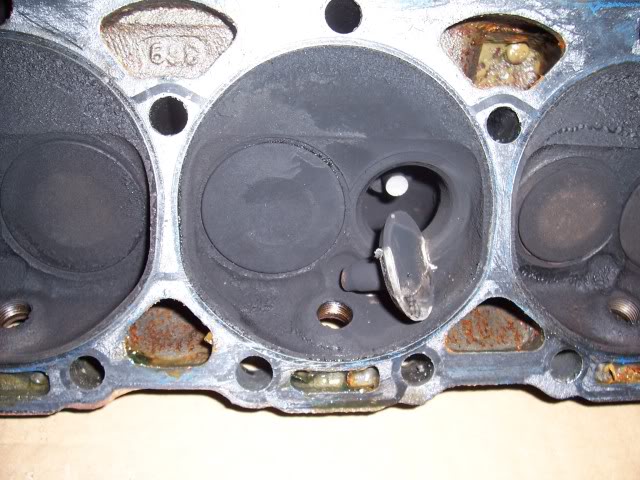
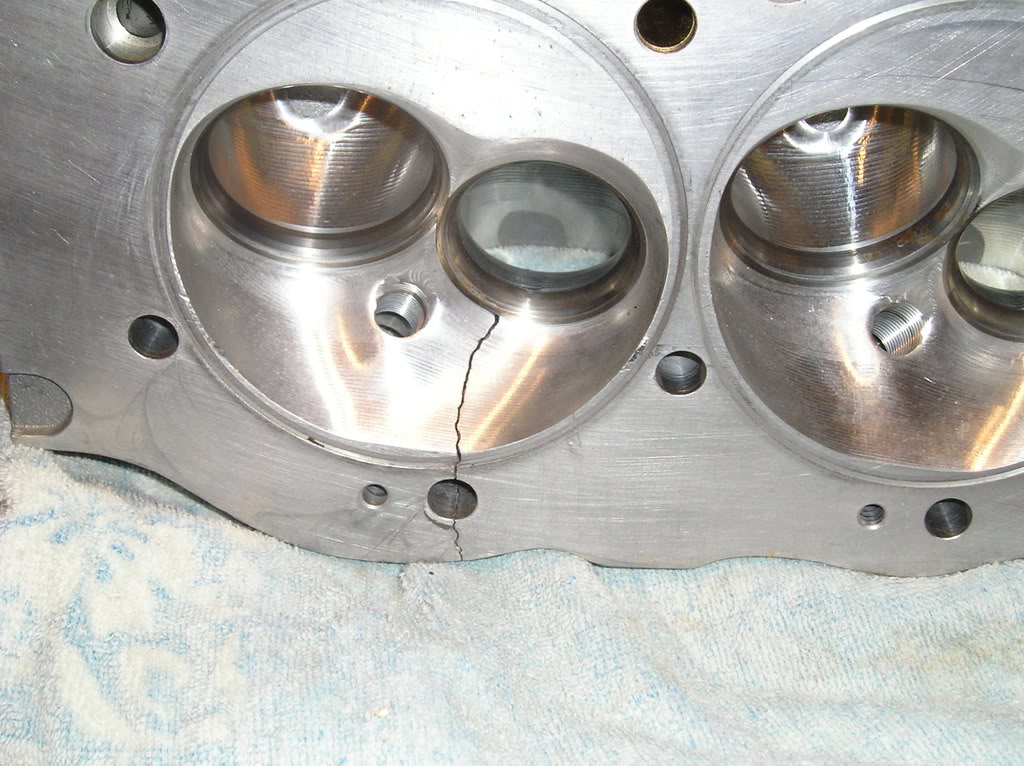
when the test is done correctly results normally fall in the 2%-15% range and if testing shows 35% -100% its usually indicating a broken ring, burnt valve, bad head gasket, or a detonation damaged piston,etc. now if the piston was not at tdc, or a valve might be badly adjusted because the guy didn,t bother to lock the engines rotation durring the testing or remove the rocker tension, results are going to be suspect.
heating the engine up by running it prior to testing seems to help the test results slightly but it makes working on the engine durring testing a huge P.I.T.A. so its rarely done.
squirting some 20w50 oil into a cylinder than retesting will generally give you some indication of the leaks source if the results change because oil will tend to seal rings boosting results but not valves
IT WILL COST LESS EVEN AFTER PAYING FOR THE TOOLS AT MOST GARAGES.
youll find that youll gain basic skills, own new tools and PAY LESS MONEY[/b] :
When testing EACH CYLINDER,with the leak down test gauge make sure the adapters firmly seated and a bit of oil on the threads won,t hurt either, try and find a quiet and well lit place to test, and do a vacuum test also
viewtopic.php?f=62&t=882&p=1390&hilit=propane+leaks#p1390
during the leak-down testing procedure,Listen at the intake manifold for intake valve leakage.
during the leak-down testing procedure,Listen at the exhaust manifold for exhaust valve leakage
during the leak-down testing procedure,Listen at the valve covers or oil fill cap for ring leakage--you'll always have some, but its usually not huge on an engine in good shape, retest after squirting a bit of oil into the cylinder on each cylinder,does it change the reading or sound?.
if your experiencing high rates of crank case pressure chances are good its the result of pressurized gases getting past the ring to bore seal at some point in the pistons travel
during the leak-down testing procedure,Listen and visually check for bubble in the radiator coolant, at the radiator cap for air leakage into the cooling system.
http://www.goodson.com/Dual-Gauge-Leak-Down-Tester/
ANY leakage into the exhaust, intake, or radiator is cause for concern.
read these links 90% of the info you needs in the links
LOOK FOR LOOSE OR CORRODED ELECTRICAL WIRING CONNECTORS, in THE WIRING HARNESS, and VERIFY YOUR FIRING ORDER, YEAH I KNOW YOUR SURE ITS CORRECT, CHECK IT CAREFULLY AGAIN, YOUR NOID TEST LIGHT AND MULTI- METER CAN SAVE YOU A GREAT DEAL OF PROBLEMS AND SCRATCHING YOUR HEAD IF YOU TEST BASIC ELECTRICAL CONNECTIONS< RESISTANCE AND VOLTAGE, CHECK YOUR SENSORS AND GROUNDS, A SHOP MANUALS MANDATORY, HEAT SENSORS AND IGNITION MODULES AND OIL PRESSURE SENSORS HAVE A LONG TRACK RECORD OF FAILING OR PARTIALLY AND INTERMITTENTLY NOT FUNCTIONING
http://www.carcraft.com/techarticles/116_0406_cylinder_leakdown_tester/index.html
http://www.nichols.nu/tip420.htm
http://www.hotrod.com/techarticles/engi ... rs_tested/
http://www.globaltoolsupply.com/cgi-local/SoftCart.exe/online-store/scstore/p-P1-275.html?E+scstore
http://www.tavia.com/cat8.html#3
http://vmaxoutlaw.com/tech/leakdown_tester.htm
http://www.motorcycleproject.com/motorcycle/text/leakdown.html
http://www.summitracing.com/parts/pro-66839/overview/
http://www.summitracing.com/parts/otc-5609/overview/
http://goodvibesracing.com/Leakdown Tester.htm
1) For most accurate results, engine should be up to operating temperture.
2) Remove all spark plugs.
3) Rotate crankshaft until piston being tested is at top dead center of compression stroke.
4) Screw the spark plug adaptor hose into spark plug hole making the sure the o-ring is seated properly.
5) Connect the spark plug adaptor hose to the coupler of the leakdown tester.
6) Connect leakdown tester to a good source of compressed air, preferably a filtered and water trapped source.
7) Adjust the regulator on the leakdown tester so the the LEFT HAND GAUGE indicates at least 10 pounds less than your sorce pressure. The leakdown percentage conversion table shown below is based on regulated pressures of 100, 90, or 75 psi.
8) Read the RIGHT HAND GAUGE (differential gauge), then look up gauge reading on the conversion table below to get actual leakdown percentage. After noting percentage of leakage, turn the regulator knob counter-clockwise to relieve the pressure. This reduces the shock to the gauges. If you ever get an unrealistically low pressure reading on the right hand gauge, there is a finite possibilty that something is blocking the small orfice located within the hex tube located between the regulator and the main body of the leakdown tester.
9)To remove any obstruction that may be lodged in the metering orfice, unscrew the hose coupling assembly from the aluminum body. Ultilizing a 1" wrench, remove the knob assembly from the regulator. Blow compressed air in the opposite direction (from the coupling end) to clear the orfice. Re-assemble the regulator and the coupling.
NOTE: DO NOT ATTEMPT TO REMOVE THE BRASS HEX NIPPLE BETWEEN THE REGULATOR AND THE ALUMINUM BODY. DAMAGE MAY RESULT.
when the test is done correctly results normally fall in the 2%-15% range and if testing shows 35% -100% its usually indicating a broken ring, burnt valve, bad head gasket, or a detonation damaged piston,etc. now if the piston was not at tdc, or a valve might be badly adjusted because the guy didn,t bother to lock the engines rotation durring the testing or remove the rocker tension, results are going to be suspect.
heating the engine up by running it prior to testing seems to help the test results slightly but it makes working on the engine durring testing a huge P.I.T.A. so its rarely done.
squirting some 20w50 oil into a cylinder than retesting will generally give you some indication of the leaks source if the results change because oil will tend to seal rings boosting results but not valves
Last edited by a moderator: