I know you never feel good when you've done it! I know I seldom do, but the truth is your not learning much if your not doing something you've never done before and you tend to do that by "getting in over your head in projects"
the fact is you can,t learn new skills with out trying new projects,
at some point you get frustrated,you NEED the correct tools and a shop manual,if you don,t know how to do something,have yet to do the research, or buy the correct parts, and when you get frustrated you don,t think clearly about dropping back to a step by step basic approach where your simply verifying each sub components function or your just trying to do something with the wrong tool or in such a tight space you can,t easily access the problem.
go have a brandy, or a couple beers and hit it again tomorrow at that point.
you know what I mean, we all do it, it can be something fairly minor like when, you bust off an exhaust manifold bolt and your forced to learn how to remove it, with tools you never used before, or something more complex like when the car stops, and you need to trouble shoot the cause, and its the ignition, that shorted out or the clutch,that burned up or a transmission that sheared a sun gear, or clutch pack, at first your creative with new cussing then you look at the checking balance and realize that if its going to be repaired YOUR going to be doing a good deal of the work!
It could be something that you didn,t expect, like your helping a buddy replace a clutch and he drops his muncie transmission, busting off a mount pad , bending the input shaft and now your going to get a crash course in transmission component replacement.
but the truth is that all those screw-ups just add to your skill level and knowledge and in many cases the tools in your tool chest simply because you've been FORCED into learning new shills and acquiring new tools.
eventually youll look back on some of the stuff you did early in your career and wonder, and be in awe of how stupid you could have been, now that you know how to fix problems in 30 minutes that originally made you crazy for weeks.
example
when I was 18 years old, I had the brakes on my 1965 Pontiac lemans , suddenly go out one day, to the point it took both feet firmly on the brake petal to get the car to stop, I drove the car like that for two days ,having to leave a great deal of stopping distance until I had an older mechanic friend come over and locate a cracked booster vacuum line, the brakes nearly put me thru the windshield the first time I used them after that was replaced. but it taught me to inspect vacuum lines and look for cracked and loose connections and to ask questions and to read a factory shop manual (which Id never seen before my older friend brought one over)
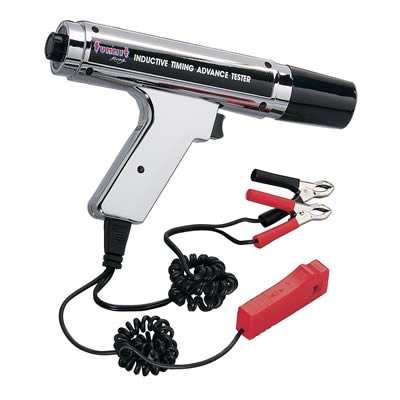
example I installed a corvette dual point distributor in my first 427 big block and it took me a few days to get the car running correctly, it was only after reading the fine print in the shop manual, and carefully looking at the diagrams, that I realized how to use a dwell meter, and what to look for on it.
example
I had a friend install a new ISKY RACE CAM, in his 327, it sure sounded radical but the car ran like crap, he drove the car for several months before we convinced him to install a milder cam, it was only during the new cam installation process, of swapping to a milder cam that we found he had wiped 4 cam lobes during previous cam swap And the previous break-in process, because none of us understood how to check for or even understood (SPRING BIND) or rocker geometry at the time, but we LEARNED... and after we learned we could not believe how stupid we had been to ignore obvious symptoms.
the truth is we all learn by getting in to areas we are not familiar with, and while its best to have older more experienced friends show you how to do new things they are not always going to be available or have the skills required so your bound to be learning a few things the hard way IE, looking the info up in a shop manual, on the internet or possibly stooping to actually going back and reading the directions or calling the manufacturer or parts supplier for info!
none of us knows even 10% of the stuff that relates to this automotive hobby, but we all can learn a great deal and we all can help the others who may have far more skill in some areas we are novices at, I know I did most of the work on a a cam swap for a guy , teaching him how to do it ,that knew how to replace seat upholstery, in exchange for showing me how to replace interior and seat covers
I did a BRAKE JOB on a guys car that taught me a great deal about constant flow fuel injection tuning, and I learned what little I know about body work and paint prep from a guy that loved doing that body prep and paint work stuff, but was scared silly, he would make a huge mistake if he got under the hood with engine tune-ups
most guys don,t realize how many times it comes in very, VERY handy to have a few local friends, especially if they are rather experienced!
and it sure helps if they have a selection of tools and are willing to help, so in most cases its to your benefit to help as many of those local guys as you can, to gain both experience and access too tools you might not otherwise have.
None of us has even 10% of the skills to do everything thats required on a top quality car build, obviously skills and levels of experience from setting up a rear differential,setting up brakes, transmission rebuilds, differential shortening,metal panel replacement, paint and body work,engine builds,tuning, suspension set-up welding , etc.
related threads
having done some similar projects, totally rebuilding a car and doing engine swaps, repairing and modifying body work and replacing the suspension and exhaust and I know the time and effort required is amazing and just the small parts tools required, the welding skills, trips to get supplies, and time spent looking for the harder to find parts and waiting on simple stuff like getting the correct welding rods and shield gas, sand paper, paint,fasteners,solvents disposable bits, nozzles , brushes and hydraulic fittings, and mask filters tape, adds up far faster than those of us that have not done this type of work could ever understand, then theres always the minor screw-ups that need to be corrected,and the time spent looking for the small part or supplies you purchased two months ago On sale for 1/2 price, you bought in bulk that you can,t locate until the day after you give up looking for them, and buy more! and the people that drop by with projects you really can,t avoid that screw up your (free time)


on the PLUS SIDE, if your a tool junkie like I am theres always an endless list of new or better, tools you can easily justify buying... just no cash to do so!
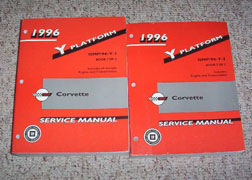
you ABSOLUTELY NEED A SHOP MANUAL FOR YOUR CAR,YEAR,MAKE,MODEL
http://www.helminc.com/helm
http://www.themotorbookstore.com/resmchstvi.html
this is exceptionally useful for newer guys
viewtopic.php?f=87&t=3183
viewtopic.php?f=87&t=3527
viewtopic.php?f=87&t=339&p=6868&hilit=started+hobby#p6868
viewtopic.php?f=87&t=2648
viewtopic.php?f=50&t=8365&p=29115#p29115
viewtopic.php?f=53&t=4294&p=11325&hilit=books#p11325
viewtopic.php?f=87&t=4523
viewtopic.php?f=55&t=10310
viewtopic.php?f=50&t=5726&p=17448#p17448
viewtopic.php?f=44&t=3020&p=7962&hilit=finding+machine#p7962
viewtopic.php?f=87&t=1162&p=2379&hilit=clubs+help#p2379
viewtopic.php?f=50&t=4925
viewtopic.php?f=50&t=11026
viewtopic.php?f=50&t=5180
viewtopic.php?f=71&t=945&p=2690&hilit=pinion+tools#p2690
viewtopic.php?f=27&t=4069&p=12519&hilit=shop+tools#p12519
viewtopic.php?f=44&t=808
viewtopic.php?f=50&t=6853
viewtopic.php?f=38&t=3899&p=11095&hilit=getting+started#p11095
the fact is you can,t learn new skills with out trying new projects,
at some point you get frustrated,you NEED the correct tools and a shop manual,if you don,t know how to do something,have yet to do the research, or buy the correct parts, and when you get frustrated you don,t think clearly about dropping back to a step by step basic approach where your simply verifying each sub components function or your just trying to do something with the wrong tool or in such a tight space you can,t easily access the problem.
go have a brandy, or a couple beers and hit it again tomorrow at that point.
you know what I mean, we all do it, it can be something fairly minor like when, you bust off an exhaust manifold bolt and your forced to learn how to remove it, with tools you never used before, or something more complex like when the car stops, and you need to trouble shoot the cause, and its the ignition, that shorted out or the clutch,that burned up or a transmission that sheared a sun gear, or clutch pack, at first your creative with new cussing then you look at the checking balance and realize that if its going to be repaired YOUR going to be doing a good deal of the work!
It could be something that you didn,t expect, like your helping a buddy replace a clutch and he drops his muncie transmission, busting off a mount pad , bending the input shaft and now your going to get a crash course in transmission component replacement.
but the truth is that all those screw-ups just add to your skill level and knowledge and in many cases the tools in your tool chest simply because you've been FORCED into learning new shills and acquiring new tools.
eventually youll look back on some of the stuff you did early in your career and wonder, and be in awe of how stupid you could have been, now that you know how to fix problems in 30 minutes that originally made you crazy for weeks.
example
when I was 18 years old, I had the brakes on my 1965 Pontiac lemans , suddenly go out one day, to the point it took both feet firmly on the brake petal to get the car to stop, I drove the car like that for two days ,having to leave a great deal of stopping distance until I had an older mechanic friend come over and locate a cracked booster vacuum line, the brakes nearly put me thru the windshield the first time I used them after that was replaced. but it taught me to inspect vacuum lines and look for cracked and loose connections and to ask questions and to read a factory shop manual (which Id never seen before my older friend brought one over)
example I installed a corvette dual point distributor in my first 427 big block and it took me a few days to get the car running correctly, it was only after reading the fine print in the shop manual, and carefully looking at the diagrams, that I realized how to use a dwell meter, and what to look for on it.
example
I had a friend install a new ISKY RACE CAM, in his 327, it sure sounded radical but the car ran like crap, he drove the car for several months before we convinced him to install a milder cam, it was only during the new cam installation process, of swapping to a milder cam that we found he had wiped 4 cam lobes during previous cam swap And the previous break-in process, because none of us understood how to check for or even understood (SPRING BIND) or rocker geometry at the time, but we LEARNED... and after we learned we could not believe how stupid we had been to ignore obvious symptoms.
the truth is we all learn by getting in to areas we are not familiar with, and while its best to have older more experienced friends show you how to do new things they are not always going to be available or have the skills required so your bound to be learning a few things the hard way IE, looking the info up in a shop manual, on the internet or possibly stooping to actually going back and reading the directions or calling the manufacturer or parts supplier for info!
none of us knows even 10% of the stuff that relates to this automotive hobby, but we all can learn a great deal and we all can help the others who may have far more skill in some areas we are novices at, I know I did most of the work on a a cam swap for a guy , teaching him how to do it ,that knew how to replace seat upholstery, in exchange for showing me how to replace interior and seat covers
I did a BRAKE JOB on a guys car that taught me a great deal about constant flow fuel injection tuning, and I learned what little I know about body work and paint prep from a guy that loved doing that body prep and paint work stuff, but was scared silly, he would make a huge mistake if he got under the hood with engine tune-ups
most guys don,t realize how many times it comes in very, VERY handy to have a few local friends, especially if they are rather experienced!
and it sure helps if they have a selection of tools and are willing to help, so in most cases its to your benefit to help as many of those local guys as you can, to gain both experience and access too tools you might not otherwise have.
None of us has even 10% of the skills to do everything thats required on a top quality car build, obviously skills and levels of experience from setting up a rear differential,setting up brakes, transmission rebuilds, differential shortening,metal panel replacement, paint and body work,engine builds,tuning, suspension set-up welding , etc.
related threads
having done some similar projects, totally rebuilding a car and doing engine swaps, repairing and modifying body work and replacing the suspension and exhaust and I know the time and effort required is amazing and just the small parts tools required, the welding skills, trips to get supplies, and time spent looking for the harder to find parts and waiting on simple stuff like getting the correct welding rods and shield gas, sand paper, paint,fasteners,solvents disposable bits, nozzles , brushes and hydraulic fittings, and mask filters tape, adds up far faster than those of us that have not done this type of work could ever understand, then theres always the minor screw-ups that need to be corrected,and the time spent looking for the small part or supplies you purchased two months ago On sale for 1/2 price, you bought in bulk that you can,t locate until the day after you give up looking for them, and buy more! and the people that drop by with projects you really can,t avoid that screw up your (free time)
on the PLUS SIDE, if your a tool junkie like I am theres always an endless list of new or better, tools you can easily justify buying... just no cash to do so!
you ABSOLUTELY NEED A SHOP MANUAL FOR YOUR CAR,YEAR,MAKE,MODEL
http://www.helminc.com/helm
http://www.themotorbookstore.com/resmchstvi.html
this is exceptionally useful for newer guys
viewtopic.php?f=87&t=3183
viewtopic.php?f=87&t=3527
viewtopic.php?f=87&t=339&p=6868&hilit=started+hobby#p6868
viewtopic.php?f=87&t=2648
viewtopic.php?f=50&t=8365&p=29115#p29115
viewtopic.php?f=53&t=4294&p=11325&hilit=books#p11325
viewtopic.php?f=87&t=4523
viewtopic.php?f=55&t=10310
viewtopic.php?f=50&t=5726&p=17448#p17448
viewtopic.php?f=44&t=3020&p=7962&hilit=finding+machine#p7962
viewtopic.php?f=87&t=1162&p=2379&hilit=clubs+help#p2379
viewtopic.php?f=50&t=4925
viewtopic.php?f=50&t=11026
viewtopic.php?f=50&t=5180
viewtopic.php?f=71&t=945&p=2690&hilit=pinion+tools#p2690
viewtopic.php?f=27&t=4069&p=12519&hilit=shop+tools#p12519
viewtopic.php?f=44&t=808
viewtopic.php?f=50&t=6853
viewtopic.php?f=38&t=3899&p=11095&hilit=getting+started#p11095
Last edited by a moderator:

")