DIY Engine Break-In Stand - Stand Delivered
Written by Thomas A. DeMauro on January 19, 2011 Contributors: Randall D Allen, Randall D. Allen Three Ways To Build An Engine Break-In Stand And Save Money

View All 30 Photos
Share This Article
Facebook Twitter Google+ Email
Building or refurbishing an engine is one of the most exciting endeavors a hobbyist can undertake. Whether it's a complete new long-block assembly that you researched and painstakingly blueprinted, or an original '65 389 Tri-Power that you stored from your Great One, there are few things more disappointing than installing an engine in your Pontiac and having to pull it back out when a problem is encountered during break-in. Even for seasoned engine builders, oil leaks and component failure occasionally occurs.

2/30
Performing a specific break-in procedure before you install the engine may save costly headaches, as it serves many purposes, including breaking in the cam, seating the piston rings and testing the powerplant's seals and operation at low speeds. Options for the hobbyist or car club are to either purchase a commercially-available engine break-in stand that will cost $875-$1,250 or build your own for roughly half of that.
http://garage.grumpysperformance.com/index.php?threads/engine-test-run-stand.930/#post-40966
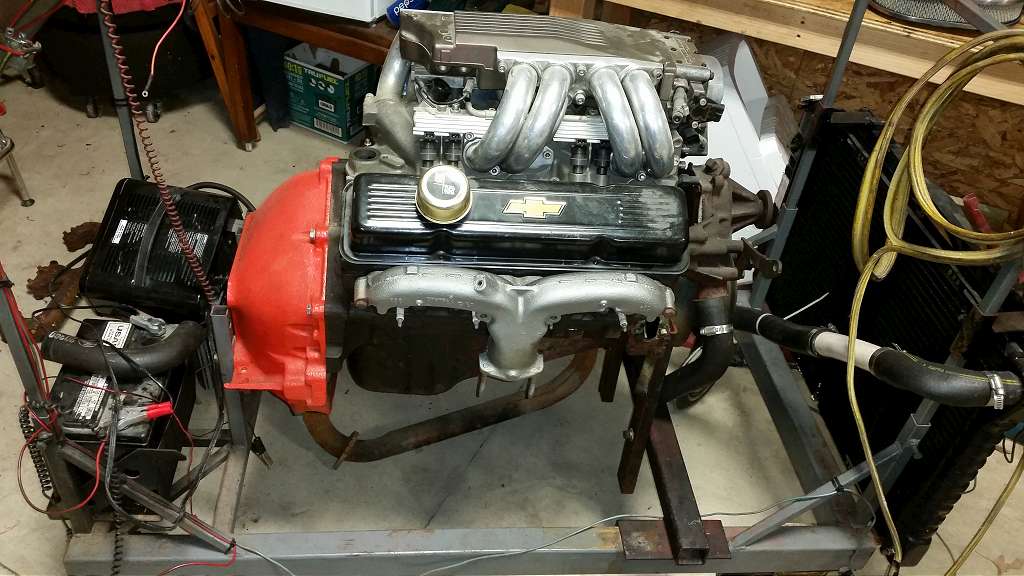
Engine break-in stands have been around a long time, but what works for a relatively light-weight engine, such as a 550-pound small-block Chevrolet, might be marginal for a Pontiac that often tips the scales at around 650-675 pounds. Various designs of break-in stands are available-some are good and others not so much. The converted T-oriented engine stand with an apparatus welded to the front is cheap to produce, but marginal for handling a Pontiac's weight from a strength perspective.

3/30 Since used steel wasn't available, our steel and aluminum products were bought from Commercial Metals Company's facility in Dallas, Texas. A total of 20 feet of the square tubing (PN 6002-0505; retail $50) and 10 feet of the steel plate (PN 6007-0037; retail $29.58) were purchased. Steve DuSold began by placing the square tubing in a chop saw (to be cut on the 2-inch-wide side). He then used a tape measure to mark a 5-foot length, and a square to draw a straight line to mark it.
The engine break-in stand outlined here can be constructed for hundreds of dollars less and is safe. Though labor intensive, it's relatively easy to build. According to Steve DuSold of DuSold Enterprises: "An engine break-in stand is a great tool to have at the shop and has saved our customers hundreds of hours of labor by catching problems in an engine build that would require it to be removed from the car and serviced. As primarily a custom paint and restoration business, we encourage our customers to either have the engine destined for their restoration tested in an engine dyno cell or run on a break-in stand to avoid potential rework. The design of the engine stand outlined here is built specifically for Pontiacs, but it can easily be adapted for other engine brands."
You'll notice plenty of measuring, cutting, and welding in this story. If it looks too intimidating for you to attempt on your own, fear not, as this engine break-in stand will also be made available in kit form. If you know how to weld but would rather not do all the measuring and cutting, you can buy a pre-cut kit from DuSold that you weld together and source the ancillary components (radiator, fan, gauges, and so on). If you're not a welder, you can purchase another kit from DuSold that is already welded-all you have to do is source the ancillary parts and wheels and bolt them all on. Pricing for these kits will be discussed in Part II.

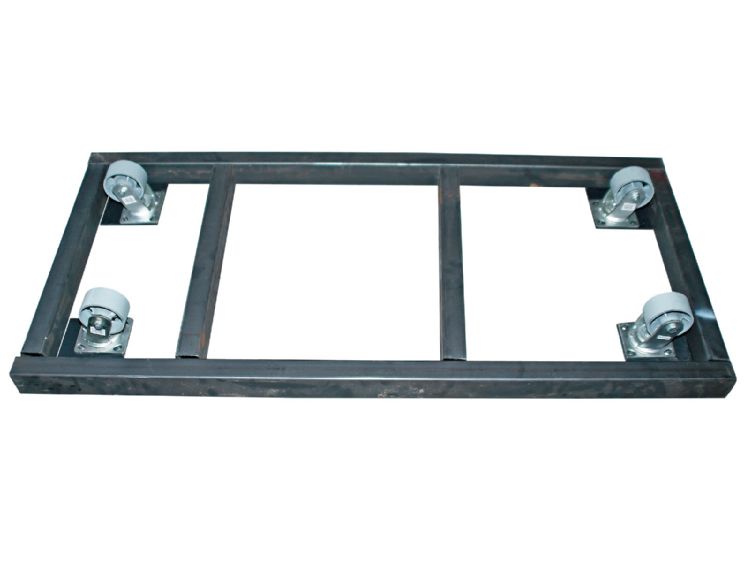
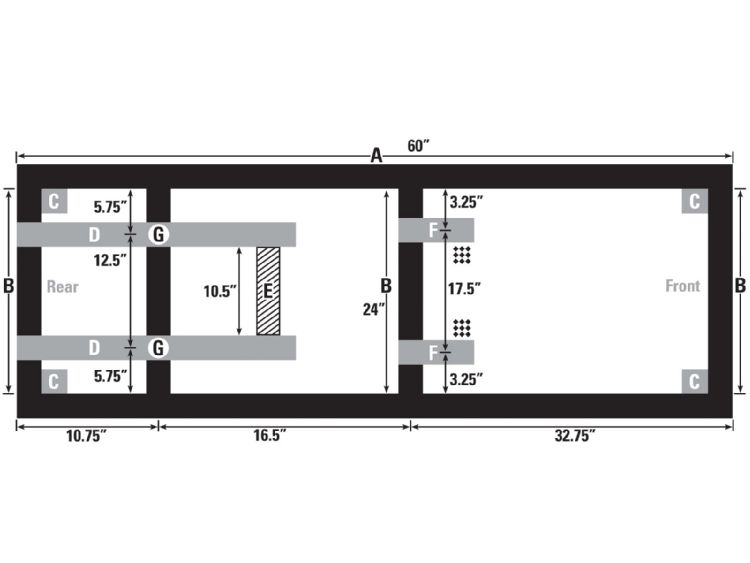
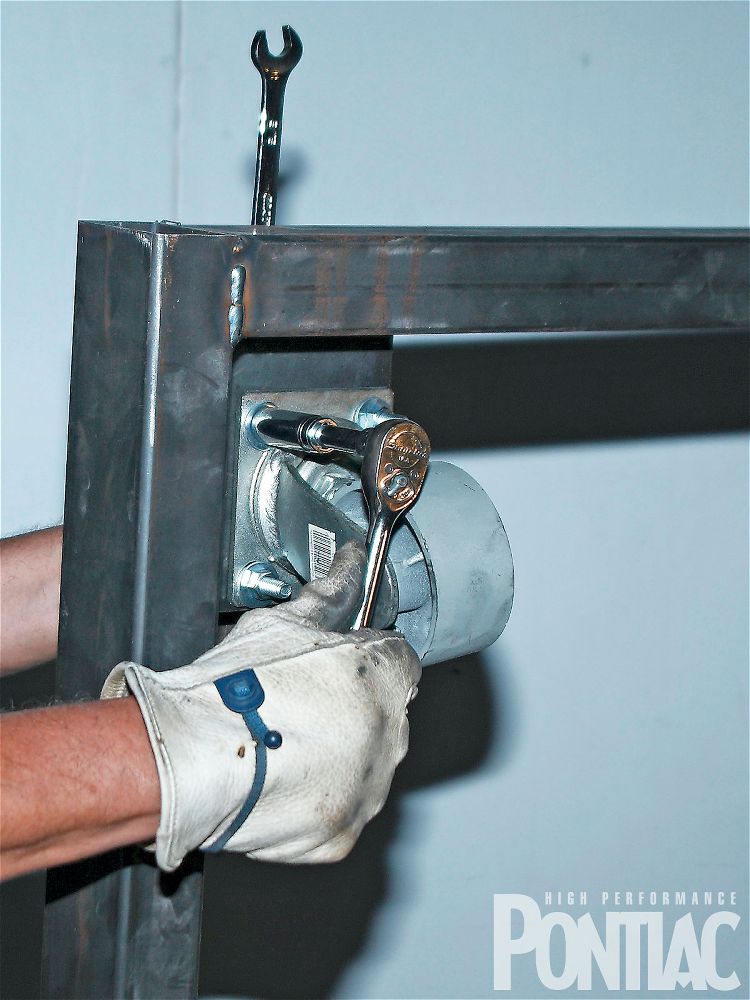
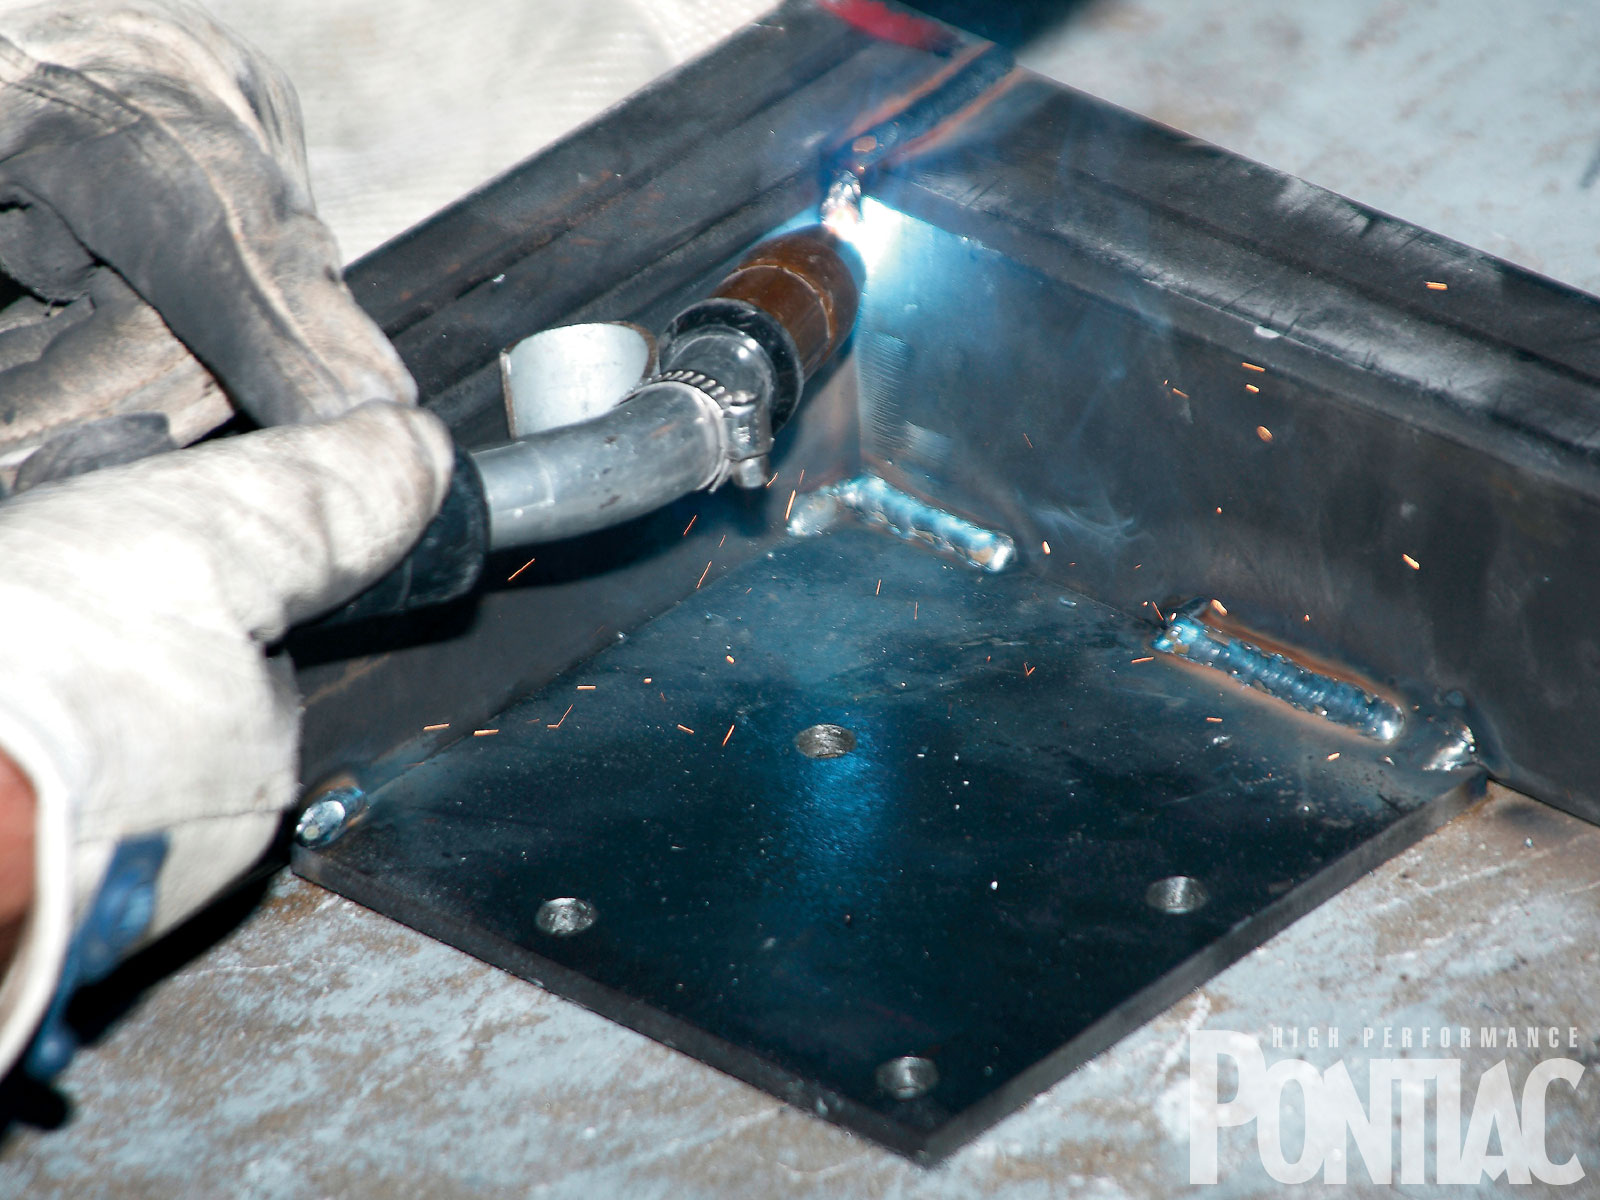
4/30 The base of the stand can be built from either new or used steel. The diagram and legend below indicates the materials and measurements used. However, the motor-mount plates and engine-stand-to-motor-mount plates are not included here, and a steel plate measuring 3/8-inch-thick was used for the ends of the engine bar (E). (The drawing is not to scale-go by the measurements.) <br /><br /> <strong>A</strong> - Side beams, 2x3 square tubing, 60 inches, quantity 2<br /> <strong>B</strong> - Cross beams, 2x3 square tubing, 24 inches, quantity 4<br /> <strong>C</strong> - Wheel mount plates, 6x6 inches, 1/4-inch-thick, quantity 4<br /> <strong>D</strong> - Angled support beams, 2x2 square tubing, 25 inches, quantity 2<br /> <strong>E</strong> - Engine bar, 2x2 square tubing, 10.5 inches, quantity 1<br /> <strong>F</strong> - Motor-mount upright supports, 2x2 square tubing, 10.5 inches, quantity 2<br /> <strong>G</strong> - Upright supports to angled support beams, 2x2 square tubing, 16.75 inches, quantity 2
Follow along as we build the basic architecture of the stand in Part I, finish with the ancillary components, and conclude with the basic procedures to safely break in your engine in Part II.
Tools & Supplies
20-foot, 2x3-inch square tubing, 9-gauge
(3.0 x 3.0 x 0.15625)
24-ft, 2x2-inch square tubing, 3-gauge
(2.0 x 2.0 x 0.250)
10-foot, 1/4x6-inch flat steel, 3-gauge
1-foot, 3/8x2x6-inch flat steel
Swivel casters, steel (qty 4), 4.0 x 2.0
3/8x1.5-inch-long grade 5 bolts, flat washers and nuts (qty 16), swivel steel casters
3/8x2.5-inch-long grade 5 bolts, flat washers and nuts (qty 2), frame motor plate
3/8x2.5-inch-long grade 8 socket head cap screws (qty 2), motor plate to block
7/16x1.0-inch-long grade 5 bolts (qty 4), motor mount plates to engine block
7/16x3.0-inch-long grade 8 socket head cap screws and nuts (qty 2 each), plates between frame and motor-mount plates
Measuring tools (tape measure, caliper(s), square(s), angle gauge)
Drill bits
Welder
Tap set
Wrench and sockets (standard and Allen)
Cutting, grinding ,and filing tools
Marking pen, scribe
C-clamps
Jack (truck, bottle, and so on)
Engine hoist
Grease gun and grease
Conclusion
For hobbyists who would like to build their own break-in stand, it will take a number of weekends and the proper tools to complete the job. Shop equipment such as chopsaws and mills for drilling operations aren't necessary, but be forewarned that cutting and drilling in thick-wall metal is time consuming. In addition, cutting angles and double-checking your work is paramount to success.

29/30 The template was placed on a steel plate, the length was marked, and the cut was made on the bandsaw. The process was repeated on the passenger side.
According to Steve DuSold: "From a welding perspective, only MIG, TIG, or stick-welding will produce the intensity of heat and the penetrating welds necessary for thick-walled steel. Hobbyists who are not experienced welders or don't have the right equipment should ask a friend to complete the project or hire a machine shop and/or welder.
From a build perspective, it took us approximately 15 hours to design and build it to this point, with over half of the labor spent in the cutting and drilling operations." It should take you less time since you won't have to design it, or take notes and photos for a magazine article.
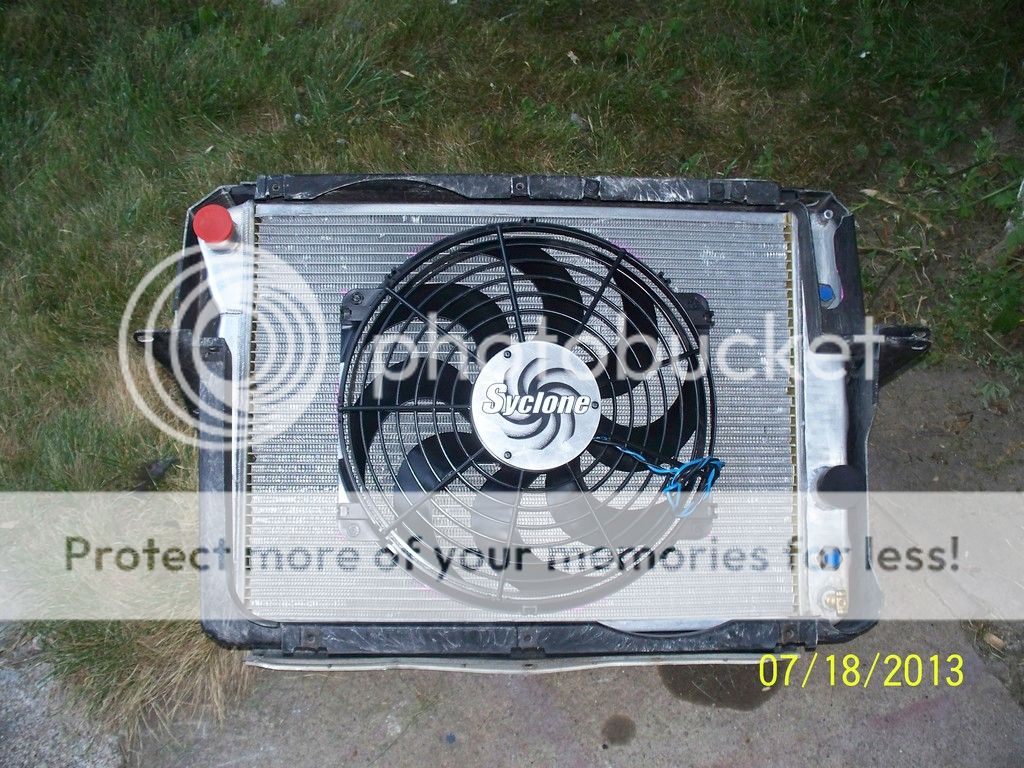
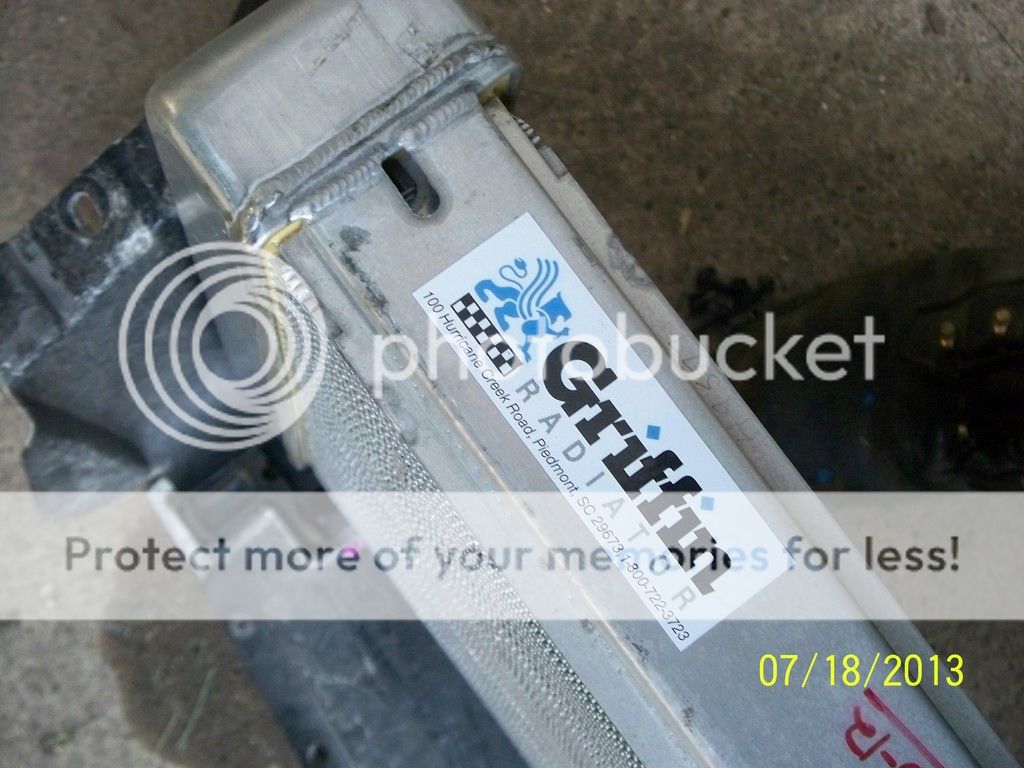
Hang on as the tough part is over. In Part II, the dashboard, radiator, electric fan, battery, and gas-tank subassembly builds are detailed. Once the stand is built, the ancillary components, such as the fuel, ignition, battery cables, wiring for the gauges, and electric fan, will be wrapped up so an engine can be loaded onto it and the procedures outlined to successfully break it in. For safety purposes, we will forego using a water pump-driven fan and rely on a SPAL electric fan for our cooling needs and Sunpro gauges to monitor the engine vitals.

30/30 The individual plates were then bolted in (using the aforementioned Grade 8 bolt and nut) and welded to the motor-mount plates on each side. Once done, the jack was removed and the full weight of the engine was supported by the break-in stand. After sizing up the overall design thus far, we decided that cutting and capping the angled uprights (see lead photo) just above the crossbar and fabricating bolt-in vertical uprights for the dashboard would improve the stand by positioning the dash better for the operator, allowing it to be removable and providing easier access to the back of the engine. We'll cover the details of this upgrade in Part II.
Don't get psyched out of this project because of the detailed labor you see here. As stated in the introduction, there are easier options. If you prefer to avoid the measuring, cutting, and welding, you can buy the aforementioned kit and add your own fuel tank, battery, cooling system, and gauges and still feel like you built something and saved money in the process. Chances are you'll quickly become the most popular guy amongst your local Pontiac friends.
Sources
SPAL USA
Ankeyny, IA
800-345-0327 FREE
http://www.spalusa.com
DuSold Enterprises
Lewisville, TX 75057
972-436-5151
www.dusoldenterprises.com
Actron-Sunpro Gauges
800-228-7667 FREE
www.sunpro.com
Read more:
http://www.hotrod.com/how-to/additional-how-to/hppp-1103-diy-engine-break-in-stand/#ixzz3ejsGFPac
Follow us:
@HotRodMagazine on Twitter |
HotRodMag on Facebook