odd starter related problem

grumpyvette

Administrator
Staff member
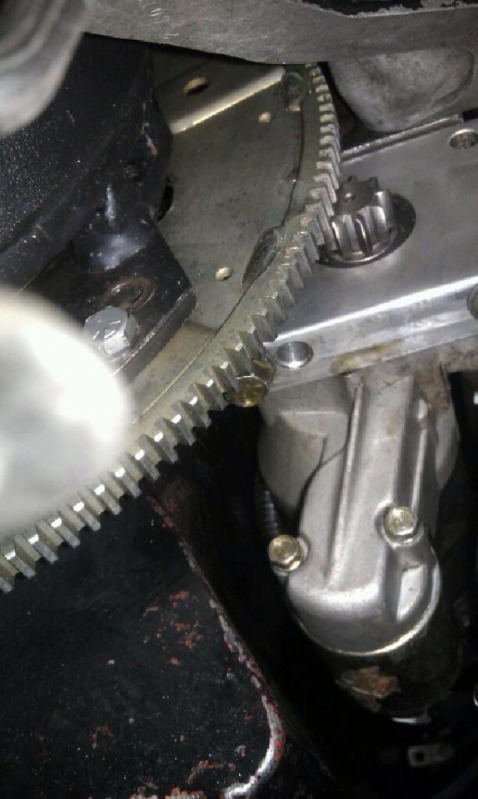
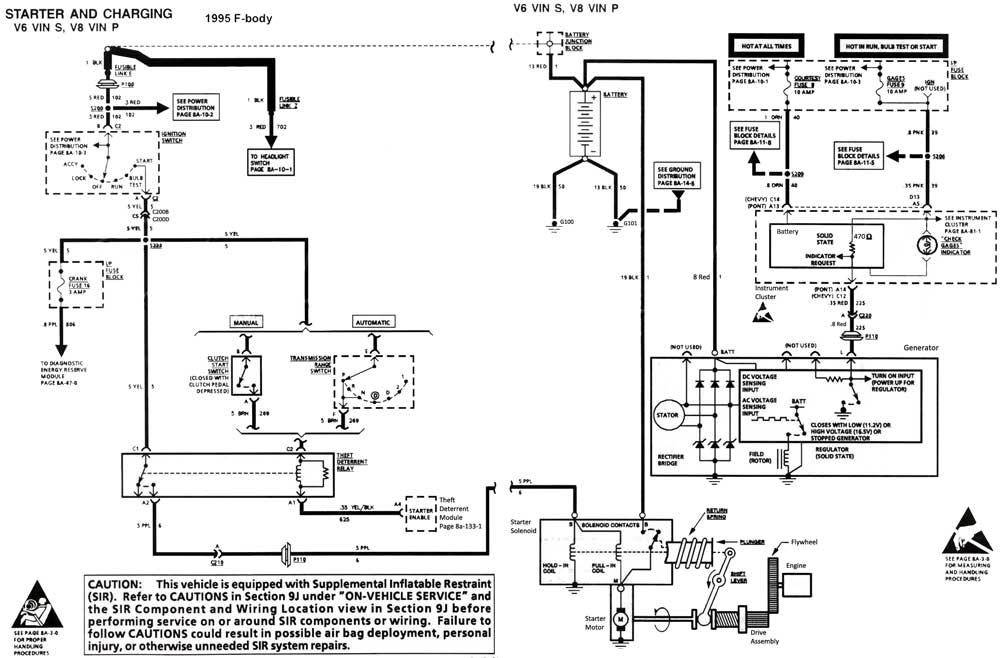
my neighbor has a 1995 corvette , he just called to tell me that his battery was dead, he jumped the battery to get it started and now the starter stays engaged, the starter spins the engine but, even with the key removed the only way to get the starter to stop was pulling off the battery cable...any ideas gentlemen before I go over to try to trouble shoot this rather odd problem?

REPLACING A C4 CORVETTE BATTERY VIDEO
http://www.youtube.com/watch?feature=pl ... 03-roWP2A#!
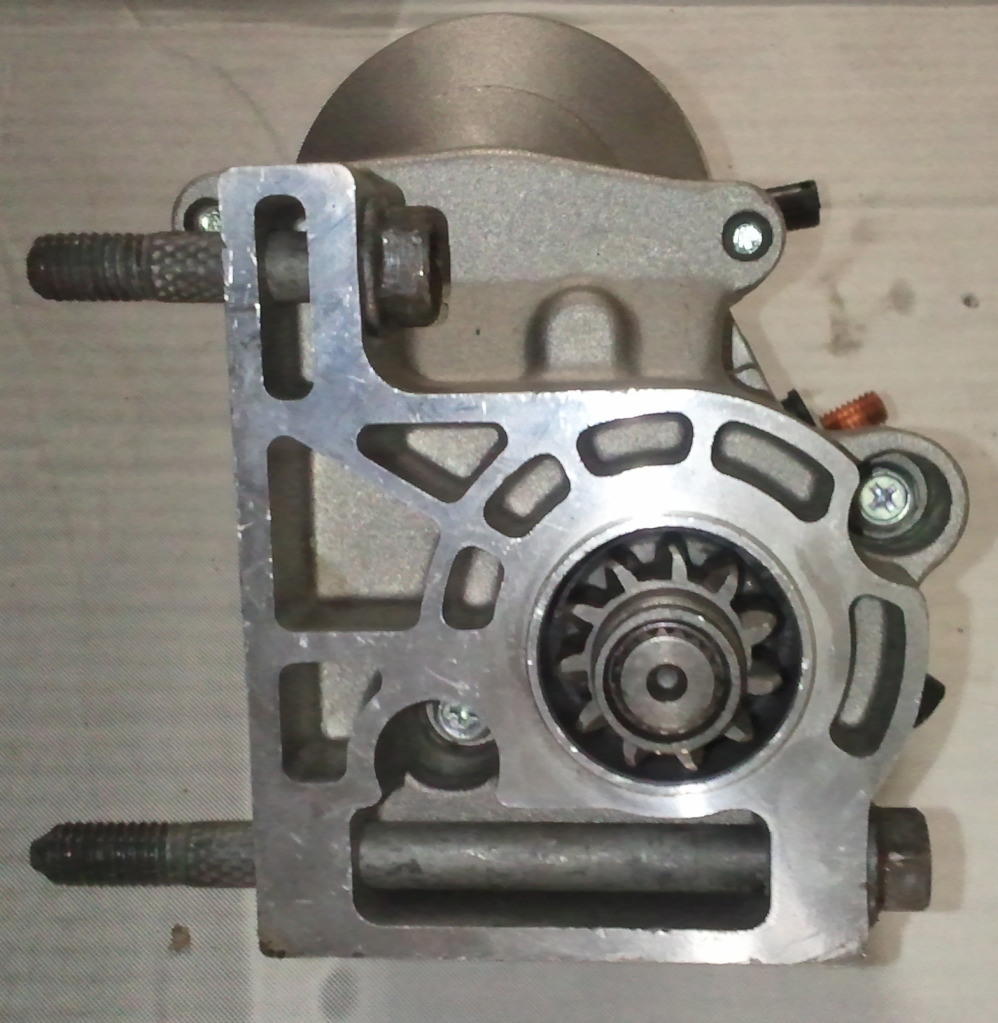
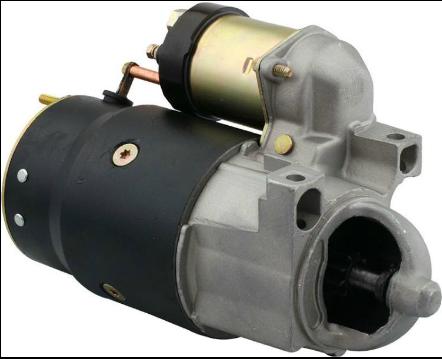
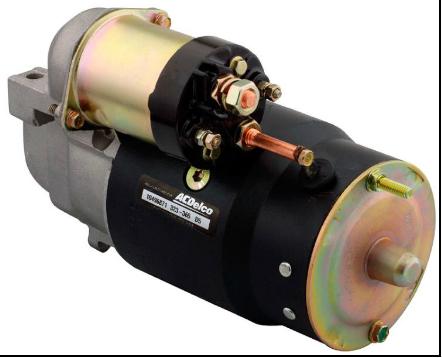
as soon as he gives me access, Ill push it over and put it up on my lift or bring 4 of my 12 ton jack stands , a mechanics creeper and a floor jack over to his garage and see whats wrong, I called and his wife says he went out to buy a new starter, just so we have it if its required because he knows the starters at least 15 years old, because he had the car that long and never changed it.

any ideas or bets on whats wrong guys?

yes I know I'm insane but I enjoy fixing problems like this, and I enjoy a bit of companionship while I'm working under the car on a creeper, it sure brings back decades of memories ...especially if I don,t need to pay for parts

http://custombatterycables.com/product_info.htm

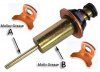
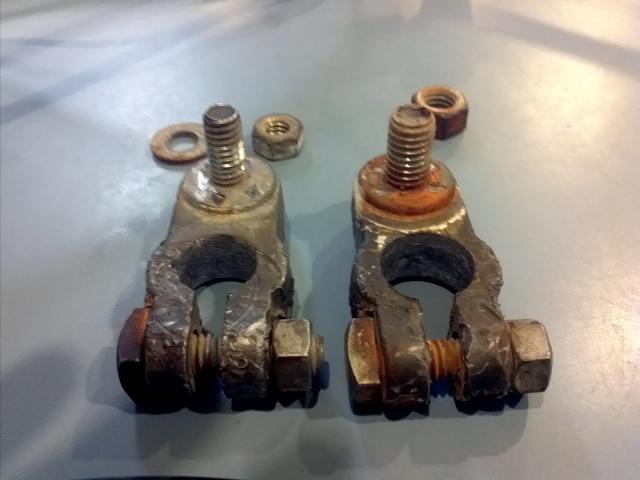
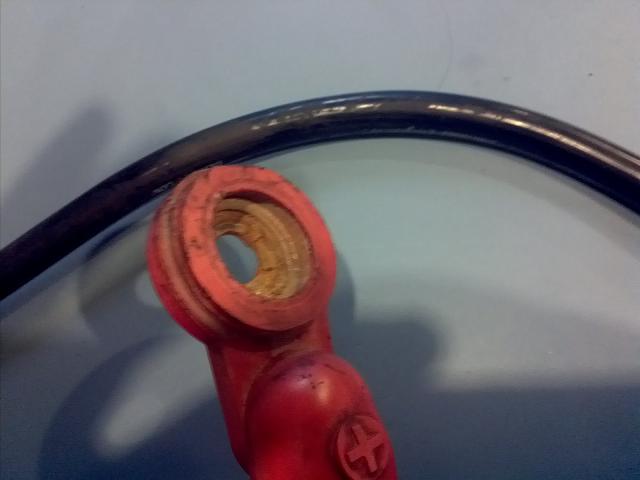
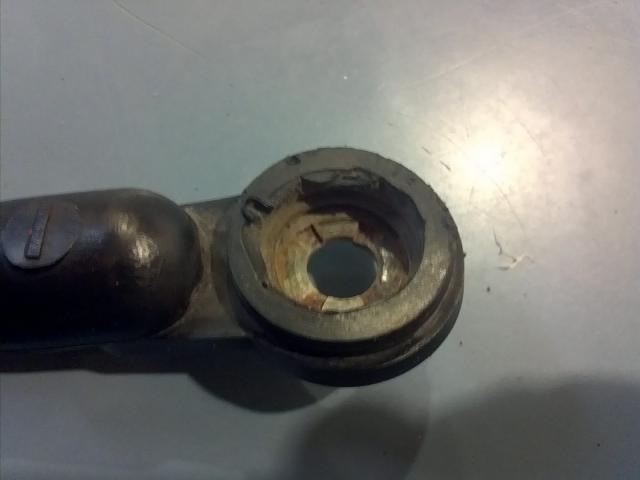
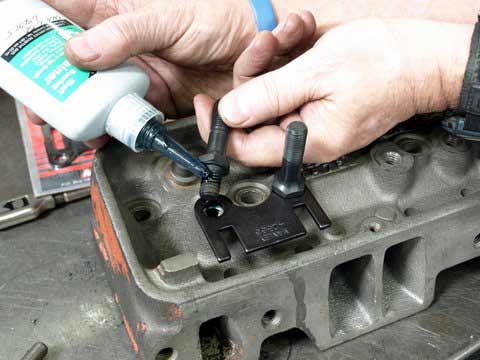
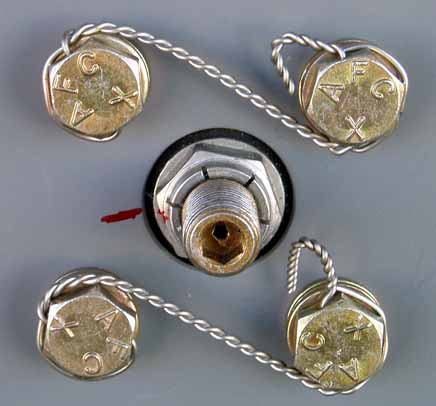
having heavy gauge COPPER battery and ground connection cables with the correct ends, and a 140 amp-to-200 amp alternator goes a long way towards
reducing potential battery and starter related issues


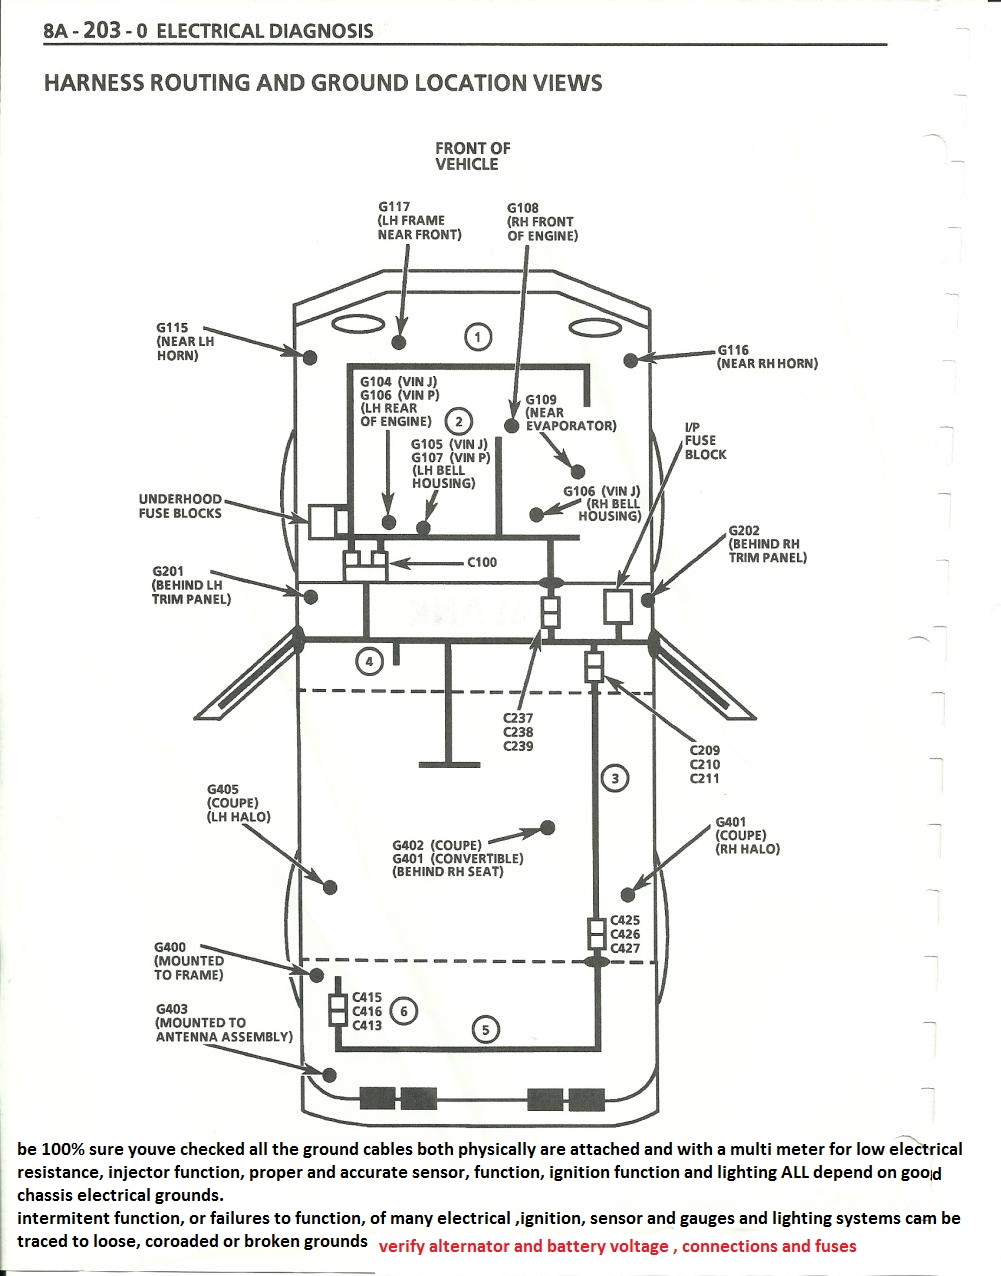
BTW FAULTY GROUNDS, IN MANY CARS AND ESPECIALLY NEWER CORVETTES CAUSE MANY ELECTRICAL ISSUES SO IF YOU HAVE INTERMITTENT ELECTRICAL ISSUES CHECK THEM CAREFULLY
Grounds00021a.jpg


HERES SOME INFO POSTED ELSWARE
"Most grounds are on the drivers side of the block above the oil filter or on the rear of the drivers side cylinder head . There are also a few on the frame under the battery tray , and a couple on the top of the frame about 12" back from the radiator, housing.,as well as one on the drivers side behind the kick panel and one passenger side behind kick panel. There are more Ones under the battery tray are the most likely to be corroded in my experience.
LCD dash ground is behind drivers kick panel . There are also several electrical grounds down just above the oil filter and one behind the passenger kick panel for the ECM. and a couple on the rear of the drivers side cylinder head, Grounds are a constant issue on most c4's. Hope this helps."
 
Last edited by a moderator:
What happens when he reconnects the battery cable ???......Nothing or does it start turning over again ???

If it starts turning over again without the key, then it sounds like the ignition switch, if you have to turn the key again before it turns over without stopping, then I would guess the solenoid is sticking.
 
What happens when he reconnects the battery cable ???......Nothing or does it start turning over again ???

I HAVE NOT personally tested it yet but he said it just starts the starter turning as soon as the cables re-connected regardless of if the ignition keys in, out or jiggled, that has zero effect, if the battery is connected the starters engaged


"HERES A REPLY I GOT ELSEWARE
I bet when you pull the started out and put it on the bench it works perfect. And if you were to put it back in the car it will fail again..."


I REPLIED
Isn,t that standard for corvette repairs?, ....everything electrically related works flawlessly when bench tested up until it needs to work after being re-installed? most corvette mechanics I know will tell you easily 40% of the electrical parts work that way on any corvette over 10 years old
 
The part that has me wondering is why this happened when he jumped the battery......is it just a coincidence or is it directly related to the problem ?
 
you can test if it's the ignition switch or the solenoid by testing a wire like on the choke that would be hot with the key in start position. If you have the key out and the starter is on when the battery cables are attached if that circuit is dead it's the solenoid and if hot it'd be the ignition switch that's faulty
 
grumpyvette said:
for anyone who cares, the starter was totally screwed, electrically shorted internally,and had to be replaced, we tried several tests but it came down to the starter itself was shot!
jumping the car may or may not have had much to do with the starters condition or failure
Doesn't the current have to go thru the solenoid before it gets to the starter motor?

Wouldn't the solenoid have to be bad also?
 
your 100% correct but that doesn,t mean logic has anything to do with decisions made,
solenoid and starter come together, in a package deal, the auto parts stores won,t sell separately so ,he decided on purchasing a whole newly rebuilt starter and solenoid with a lifetime guarantee from auto zone ,it cost him $156 . a new starter from G.M. is over $300
I strongly suggested he buy the contact parts for $35, but hes not mechanically inclined and seems to think anything he ever touches will burst into flames if he were to rebuild it

you can buy standard chevy starters at a decent price

http://www.dbelectrical.com/p-1304-chev ... mt200.aspx


READ THRU THIS THREAD
viewtopic.php?f=70&t=458&p=2911&hilit=starters#p2911
 
after watching what my neighbor went thru replacing his LT1 starter and knowing what he paid (well over $150 ) and knowing my LT1 corvettes also over 15 years old I ordered the repair parts for my starter because it also is of similar age and I figured rebuilding it seems like a no-brainer for $35
I pulled my starter and disassembled and inspected it, its just not a huge job and if your careful and pay attention to how things come apart its reasonably easy to do with the instructions posted below...
Id add that youll need two cans of spray brake cleaner to remove all grease and road tar, oil sand etc from the starter once its removed
383653.jpg

because its far easier to work with dry grease free parts

and that it helps a great deal to work slowly and carefully as theres a few small parts and you need to keep the insulating washers and lock washers etc in the correct order so it helps to do only one electrical contact at a time, then move to the other side and use a q-tip of moly grease on the plunger surfaces, to put a VERY LIGHT barely detectable film of grease, on the plunger surface , sure wont hurt its ease of movement,you put a VERY LIGHT FILM COATING on BOTH plunger surfaces, it should be barely visible,the lower narrow spring guide is not as critical to keeping it light, but it is very important to keep the film almost non visible on the larger diam. upper plunger body to prevent the electrical contacts from getting any on them,

StarterPlunger01.jpg
youll need a 9/16 swivel socket and a 10" extension to get easy access and to dis-assemble and reassemble the block mount bolts and a flex shaft screw driver with a 4" extension added for the small 1/4 drive 7mm socket required helps gain easy access to the solenoid connection wire nuts, and I found beveling the first thread on the starter mount bolts to a 45 degree angle sure helps get the bolts started and some lock-tite on the threads keeps them from easily vibrating loose.
youll need a 12mm and 14mm box or open end wrench for some electrical component connections
the whole job takes under 45 minutes so its not like its a major project and standard tools do the job


Flex-Driver.jpg


swivelsocket.jpg


http://www.nationsautoelectric.com/Nippondenso.html

need any assistance at 888-334-2632 REBUILD CONTACTS COST $35

nip1.jpg

nip2.jpg

nip3.jpg


if your serious about having a bolt holding something like an accessory, STARTER, Alternator, or bracket or u-joint strap etc. remain securely fastened , theres two steps you can take to assure it won,t come loose unless you want it too
step one
use a clean, and well degreased bolt and threads, and apply a decent thread locker to the threads, then torque them to the intended torque
STUD-18.jpg

loc-tite.jpg

step two
USE DRILLED SAFETY WIRE LOCKS
viewtopic.php?f=50&t=4306&p=26502&hilit=safety+wire#p26502

spinner5-w.jpg

if you use BOTH youll find bolts stay exactly where you left them
 
I hard wire the solenoid on my starter and use a remote solenoid so the heat from the headers doesn't bother it and if I am working in the area or wiring the starter there is no hot wire to worry about
 
grumpyvette said:
then move to the other side and a q-tip of molly gears on the plunger sure wont hurt its ease of movement,
Did your fingers grow a mind of their own, is that Moly Grease ? :)

Seriously, it's not completely clear where you are talking about putting grease......is it "A", "B" or both ???


Attachments

  • StarterPlunger01.jpg
    StarterPlunger01.jpg
    14.4 KB · Views: 207
you put a VERY LIGHT FILM COATING on BOTH plunger surfaces, it should be barely visible,the lower narrow spring guide is not as critical to keeping it light, but it is very important to keep the film almost non visible on the larger diam. upper plunger body to prevent the electrical contacts from getting any on them, sorry for the confusion and the typo
 
btw the most common electrically related problem I see on a consistent basis is corroded or badly rusted or defective battery connections and grounds so before you go crazy its a good idea to replace those as a first step in any electrical problem diagnoses

bc1a.jpg

bc2a.jpg

bc3a.jpg


Grounds00021a.jpg
 
Last edited by a moderator:
HERES SOME INFO OFF THE INTERNET, that theres TWO distinctly different LT1 starters being sold

"Well here is what I have found out so far. I measured the mounting plate on both the AZ and Napa starters. The below link has pictures of the Napa starter measurements. The long side AZ 3 9/16 Napa 3 9/32. The short side AZ 15/16 Napa 23/32. The top of the gear to the on Napa 1 13/16, AZ 2". All were measured form the flat surface that touches the block. The Napa starter is definitely different then the AZ starter and it would seam that the AZ is correct. Tomorrow I will compare the Napa to an O'Reilly's starter and one from the junk yard to see if I can find some consistency. I am providing this info because some one else will wind up with this same issue

Thanks everyone. Here is the latest.
Went to O'Reilly's today and compared the starters. The O'Reilly's one was a rebuilt one with AC Delco stamped on the mounting block. I went ahead and got this one and returned the Napa starter. The O'Reilly's starter matches the measurements of the AZ one. If you have to get one from Napa and you have a 1988-92, use the measurements I supplied above, to make sure you have the correct starter. Trust me it will save you time. Check out all the pictures here."

Starter2s.jpg
 
NOW HERES SOMETHING IVE NEVER SEEN BEFORE, a guy complains his new starter won,t engage the flex plate, the alignments screwed, up, thats the first time Ive ever seen anyone install a mini started with the solenoid below the starter motor
upsidedown.jpg


It never occurred to me anyone could install it upside down


ministar.JPG
 
Back
Top