this might not be for your year car exactly but its similar
ENGINE REMOVAL / ASSEMBLY
Removal
step by step
start by BUYING A SHOP MANUAL AND READING THRU THE PROCEDURE<
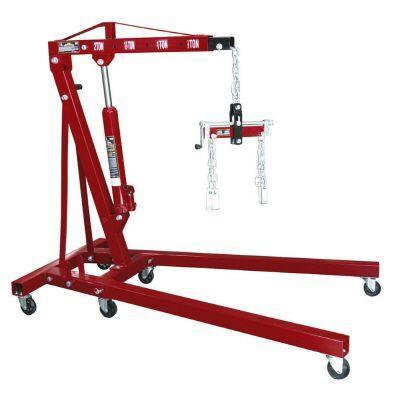
ITS always best to have a helper and a few basic safety tools like a fire extinguisher, cell phone, and use decent JACK STANDS, a LIFT and a DECENT ENGINE CRANE
working on a flat concrete surface and driving the corvette up on decent ramps to give you jack / frame clearance , AND THINK THRU ANYTHING THAT WILL GET YOU POTENTIALLY HURT.
OK first you DON,T raise a vette one corner at a time! you drive it up on the ramps to get clearance for the jack then slide the floor jack under the center of the front (CROSS MEMBER) and lift the front and place BOTH front 12 ton jack stands, then the angle allows you to either use a second floor jack or move the front floor jack to the rear of the vette, and lift the whole back and place both REAR 12 ton jack stands.
now personally I usually leave the rear jack stands and the jack holding the rear up ,and the 12 ton jack stands on the front with the tires hanging just above the ramps, that way theres almost no chance the vette can fall, even if some component were to fail.
Ill ALSO point out I have and have always used two floor jacks, twin rino ramps and 4 12 ton jack stand WHEN I was under the corvette as I don,t want to be doing bench presses with a vette!
Disconnect battery ground cable.
Drain cooling system.
Remove air cleaner.
Remove serpentine belt.
Remove braces at the back of A/C compressor.
Disconnect wires at A/C compressor.
Disconnect fuel feed and return lines at TBI units.
Remove A/C compressor mounting bracket nuts and bolts.
Disconnect heater hoses at the block.
Disconnect fuel line clip at fuel pump cover plate.
Disconnect upper radiator hose at thermostat outlet.
Remove A/C compressor to mounting bracket bolt and ove compressor aside.
Remove mounting bracket.
Disconnect CFI harness at engine.
Disconnect cruise, detent and accelerator cables.
Remove distributor shield.
Remove distributor cap.
Remove 4 wire connector at distributor.
Disconnect detent cable bracket at intake.
Remove distributor.
Disconnect wires at oil pressure sending unit.
Remove oil pressure sending unit.
Disconnect necessary vacuum hoses.
Disconnect power steering hoses at rack and pinion.
Remove crankshaft pulley.
Disconnect bulkhead connector and necessary harness connectors.
Disconnect AIR hoses at converter check valve.
Move fuel lines aside.
Disconnect radiator hose at water pump.
Disconnect upper radiator hose at power steering reservoir bracket.
Raise vehicle.
Disconnect AIR pipe at exhaust manifold.
Remove AIR pipe at converter.
Disconnect "Y" pipe hanger.
Disconnect heat shields at "Y" pipe and converter.
Disconnect oxygen sensor wire.
Remove exhaust bolts at manifold.
Remove "Y" pipe at converter bolts.
Remove "Y" pipe.
Remove flywheel cover.
Remove torque converter bolts.
Loosen motor mount through bolts.
Remove motor mount to engine block bolts.
Remove bell housing bolts.
Disconnect knock sensor wire.
Disconnect ground cable at block.
Disconnect positive battery cable at battery and harness.
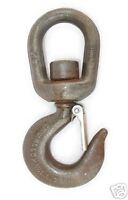
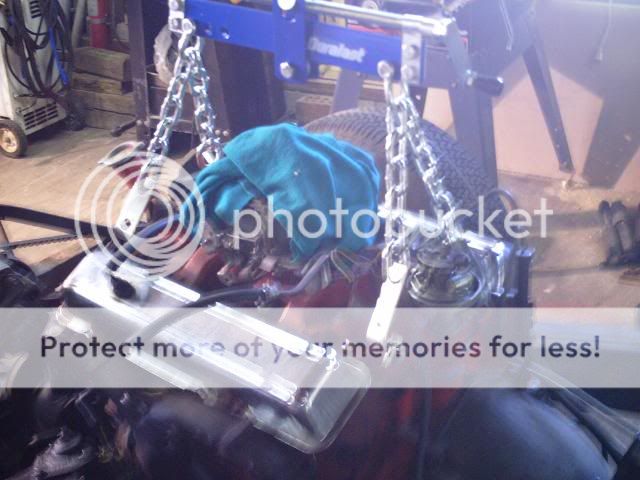
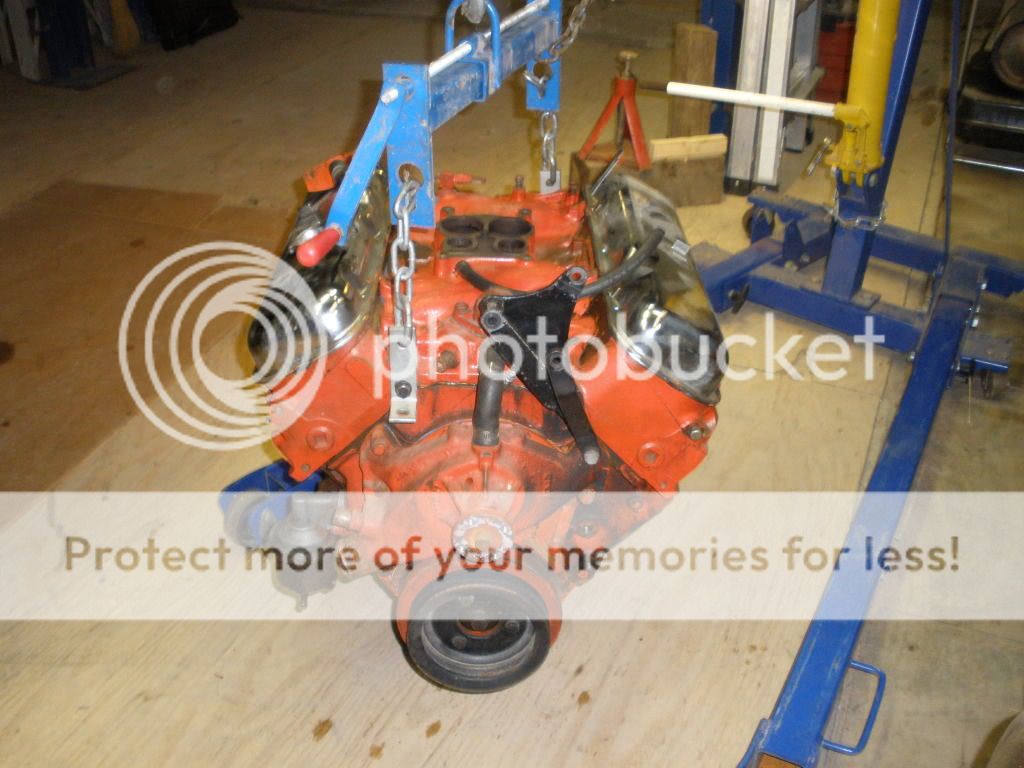
Remove right rear intake manifold bolt and install lift hook.
Support transmission with jack.
Install lifting device and lift engine enough to remove CFI ground at rear of left cylinder head.
Remove engine from vehicle.
Installation
For installation, reverse Removal procedures.
ENGINE REMOVAL / ASSEMBLY
Removal
step by step
start by BUYING A SHOP MANUAL AND READING THRU THE PROCEDURE<
ITS always best to have a helper and a few basic safety tools like a fire extinguisher, cell phone, and use decent JACK STANDS, a LIFT and a DECENT ENGINE CRANE
working on a flat concrete surface and driving the corvette up on decent ramps to give you jack / frame clearance , AND THINK THRU ANYTHING THAT WILL GET YOU POTENTIALLY HURT.
OK first you DON,T raise a vette one corner at a time! you drive it up on the ramps to get clearance for the jack then slide the floor jack under the center of the front (CROSS MEMBER) and lift the front and place BOTH front 12 ton jack stands, then the angle allows you to either use a second floor jack or move the front floor jack to the rear of the vette, and lift the whole back and place both REAR 12 ton jack stands.
now personally I usually leave the rear jack stands and the jack holding the rear up ,and the 12 ton jack stands on the front with the tires hanging just above the ramps, that way theres almost no chance the vette can fall, even if some component were to fail.
Ill ALSO point out I have and have always used two floor jacks, twin rino ramps and 4 12 ton jack stand WHEN I was under the corvette as I don,t want to be doing bench presses with a vette!
Disconnect battery ground cable.
Drain cooling system.
Remove air cleaner.
Remove serpentine belt.
Remove braces at the back of A/C compressor.
Disconnect wires at A/C compressor.
Disconnect fuel feed and return lines at TBI units.
Remove A/C compressor mounting bracket nuts and bolts.
Disconnect heater hoses at the block.
Disconnect fuel line clip at fuel pump cover plate.
Disconnect upper radiator hose at thermostat outlet.
Remove A/C compressor to mounting bracket bolt and ove compressor aside.
Remove mounting bracket.
Disconnect CFI harness at engine.
Disconnect cruise, detent and accelerator cables.
Remove distributor shield.
Remove distributor cap.
Remove 4 wire connector at distributor.
Disconnect detent cable bracket at intake.
Remove distributor.
Disconnect wires at oil pressure sending unit.
Remove oil pressure sending unit.
Disconnect necessary vacuum hoses.
Disconnect power steering hoses at rack and pinion.
Remove crankshaft pulley.
Disconnect bulkhead connector and necessary harness connectors.
Disconnect AIR hoses at converter check valve.
Move fuel lines aside.
Disconnect radiator hose at water pump.
Disconnect upper radiator hose at power steering reservoir bracket.
Raise vehicle.
Disconnect AIR pipe at exhaust manifold.
Remove AIR pipe at converter.
Disconnect "Y" pipe hanger.
Disconnect heat shields at "Y" pipe and converter.
Disconnect oxygen sensor wire.
Remove exhaust bolts at manifold.
Remove "Y" pipe at converter bolts.
Remove "Y" pipe.
Remove flywheel cover.
Remove torque converter bolts.
Loosen motor mount through bolts.
Remove motor mount to engine block bolts.
Remove bell housing bolts.
Disconnect knock sensor wire.
Disconnect ground cable at block.
Disconnect positive battery cable at battery and harness.
Remove right rear intake manifold bolt and install lift hook.
Support transmission with jack.
Install lifting device and lift engine enough to remove CFI ground at rear of left cylinder head.
Remove engine from vehicle.
Installation
For installation, reverse Removal procedures.