where to start tuning?

grumpyvette

Administrator
Staff member
Grumpy, Here's one for you...

SBC 383 stroker using a Victor Jr. intake, Holley mechanical 750 double pumper, isky hydraulic roller cam and Dart 205 aluminum (Conquest) heads, along with 6 inch rods, forged wiesco pistons, at about a 10.5:1 compression ratio...

On the carb, what should I start with on the jetting, and also cams/squirters or other recommendations on running in the carb properly... This will be a track day road course car. Also running a carter helper pump from the fuel cell out to a surge canister, then onto a Mallory pump to a return style regulator with vaccum port.

Mike[/QUOTE]

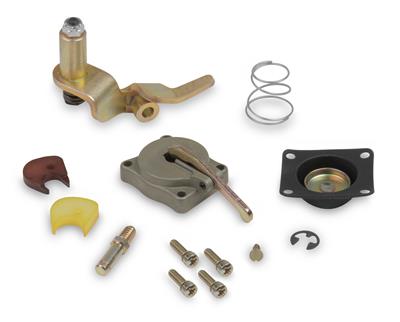
I usually start at what ever point, (jets/power valves )the carb came with and let the plugs and a/f ratio and an IR temp gun on the headers tell me the necessary changes, if I had to guess Id start with 70 jets and 5.5 pvs front and rear, fuel pressure at 5 psi and set the floats to the bottom of the inspection ports and go from there!

read thru this stuff below while keeping in mind the basic goal is a 13.5-14.5:1 mid rpm cruise a/f ratio and about that same ratio at idle, with about 12.8:1-13.5:1 at wide open throttle, a vacuum gauge and a fuel pressure gauge,(I like to try for 5.0- 5.5 psi on the FP regulator) having your floats set correctly(just damp lower sight hole threads) and your ignition timing correct (all in at about 3200rpm at about 36-38 degrees total advance)and about 6-10 degrees BTDC at 900rpm idle)are mandatory

http://www.bob2000.com/carb.htm

http://www.mortec.com/carbtip1.htm

MORE USEFUL INFO

viewtopic.php?f=44&t=773

viewtopic.php?f=44&t=777
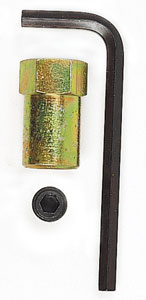
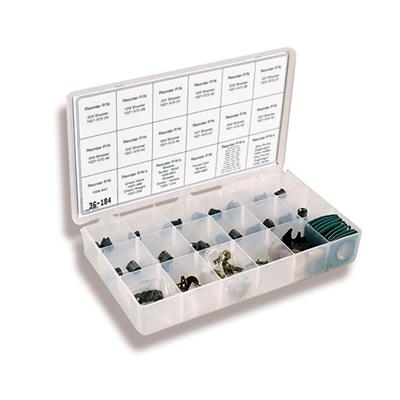
ID buy TWO of these

http://store.summitracing.com/partd...&N=700+4294861568+4294860208+115&autoview=sku
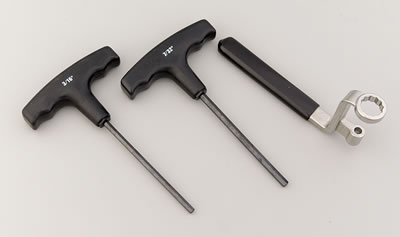
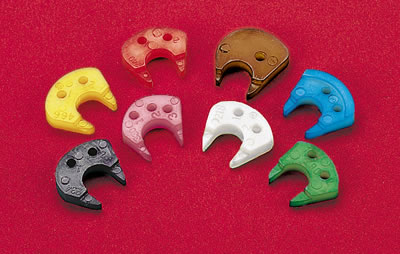
accellerator pump cams
medium%20pump%20cam%20intro.jpg


http://store.summitracing.com/partdetai ... toview=sku
hly-20-11.jpg


http://store.summitracing.com/partdetai ... toview=sku
hly-20-12_cp.jpg


http://store.summitracing.com/partdetai ... toview=sku
hly-36-184.jpg


viewtopic.php?f=50&t=383&p=1637&hilit=infrared#p1637

viewtopic.php?f=81&t=1189&p=2447&hilit=sparkplug#p2447

LEARING TO READ PLUGS AND HAVING A INFRARED TEMP GUN, AND AN AIR/FUEL RATIO METER HELPS DURING TUNING
 
http://www.professionalequipment.com/xq/ASP/ProductID.3461/id.22/subID.177/qx/default.htm

heres the one I use...(ABOVE)...now ILL grant you , that you can buy a whole lot cheaper tool for checking tires, but I use mine basically for reading header temps, to detect mixture or ignition problems or missing cylinders and you may not want to spend the money,
heres a cheap one (below)

http://www.professionalequipment.com/xq/ASP/ProductID.2433/id.22/subID.177/qx/default.htm

heres a far better one but still less expensive
(below)


http://www.professionalequipment.com/xq/ASP/ProductID.1443/id.22/subID.177/qx/default.htm
at times they are WELL WORTH THE MONEY in lowering the time and effort required in diagnoseing problems, and yeah! you do get what you PAID FOR in the better models
 
ok how do i adjust them now?

http://www.thedirtforum.com/chevyvalves.htm

http://www.2quicknovas.com/happyvalves.html


http://www.centuryperformance.com/valveadjustment.asp


http://www.boostandfuel.com/support/setting_valves.htm

http://www.carcraft.com/techarticles/87998/index2.html

http://www.angelfire.com/fl4/pontiacdude428/valveadj.html

btw if your totally new at this the tappet feeler gauge measures the lash clearance between the valve and rocker on solid lifter cams

I just don,t think adjusting the valves without the oil pressure and the block up to operating temp. is the best way to adjust valves , but yes you can do it just fine with several methods discribed above

how do you adjust valves at idle without the mess of oil getting all over the engine and headers

HIT A FEW YARD SALES, SWAP MEETS UNTILL YOU FIND A DIRT CHEAP SET OF TALL CAST VALVE COVERS LIKE THESE, the CONDITION THEY ARE IN ,WITHIN REASONABLE LIMITS OF COURSE IS NOT THAT IMPORTANT
3504249.jpg

you simply cut the ribbed center section out of the valve cover, and glue the synthetic valve cover gaskets on them in the normal location,
when you go to adjust the valves you first remove the standard valve covers and install your VALVE ADJUSTMENT COVERS, they retain about 80%-90% of the oil that would normally be lost over the edge of the cylinder head while adjusting a running engine, they also catch much of the splashed oil, just leave a 1/4"-3/8" of the rolled top for strenth around the perimiter of the top surface. I bought my set for $10, they were old and slightly discolored but I could not care less! I took them home and used a drill and saber saw to remove the center ribbed area, theres several brands that are very similar in appearance, all will work! and Ive used them for over 25 years, if I remember correctly they are mickey thompson brand


now if the lifters are hydrolic of course you just back the adjustment nuts off the rocker studs with a wrench, slowly until the rocker JUST starts clicking , then slowly tighten the nut just up to the point that the clicking stops then add 1/4 to 3/8 turn to preload the lifter and move to the next rocker and repeat, the only differance with solid lifters is you use a feeler gauge inserted between the valve tip and rocker after they click slightly,to measure the lash distance recomended on the cam spec. card (normally .016-.028 thousands) and you tighten them just to the point at idle that the clicking stops... then you remove the feeler gauge and move to the next rocker
if your useing jam nuts dont forget to lock the allen key


720920.jpg


Valve Adjustment: ENGINE OFF!

with #1 cylinder Intake Valve at full valve lift .... Adjust #6 Intake Valve
with #8 cylinder Intake Valve at full valve lift .... Adjust #5 Intake Valve
with #4 cylinder Intake Valve at full valve lift .... Adjust #7 Intake Valve
with #3 cylinder Intake Valve at full valve lift .... Adjust #2 Intake Valve
with #6 cylinder Intake Valve at full valve lift .... Adjust #1 Intake Valve
with #5 cylinder Intake Valve at full valve lift .... Adjust #8 Intake Valve
with #7 cylinder Intake Valve at full valve lift .... Adjust #4 Intake Valve
with #2 cylinder Intake Valve at full valve lift .... Adjust #3 Intake Valve

Exhaust Valve Adjustment: ENGINE OFF!

If you have noticed, this is the same procedure as the intake valves listed above, just that you are now adjusting the exhaust valves the same way.

with #1 cylinder Exhaust Valve at full valve lift .... Adjust #6 Exhaust Valve
with #8 cylinder Exhaust Valve at full valve lift .... Adjust #5 Exhaust Valve
with #4 cylinder Exhaust Valve at full valve lift .... Adjust #7 Exhaust Valve
with #3 cylinder Exhaust Valve at full valve lift .... Adjust #2 Exhaust Valve
with #6 cylinder Exhaust Valve at full valve lift .... Adjust #1 Exhaust Valve
with #5 cylinder Exhaust Valve at full valve lift .... Adjust #8 Exhaust Valve
with #7 cylinder Exhaust Valve at full valve lift .... Adjust #4 Exhaust Valve
with #2 cylinder Exhaust Valve at full valve lift .... Adjust #3 Exhaust Valve

or if your really lazy (you can use this method on hydrolic lifters)install the tall cut valve covers and just turn the engine about 20 degrees or 1/8th turn,(start anywhere )and take the slack out of any loose rockers, repeat for 720 degrees,(twice around) then go back and give each rocker nut one turn OUT(LOOSER) and start the engine,(yeah it will be messy and noisy) and then go back and turn each rocker IN (TIGHTER) untill it just quits clicking plus 1/3rd of a turn past that point

BTW many chevy rocker studs use a thread pitch of about .040 thousands per turn so once your very familiar with your solid lifter engines needs and the cam lash clearance you need and once you verify the pitch rate of the threads you can adjust solids surprisingly close to correctly by running them in till they quit clicking, then OUT about 1/3-1/2 a turn to get the correct lash rather than IN like on a hydrolic lifter to add preload,naturally youll need to verify with a feeler gauge.

NATURALLY you need to know the threads per inch on the rocker studs and a quick check with your calculator will give you the necessary info on the clearance a full turn of the adjustment nut advances or loosens the rocker, and be aware that this is not exact but a fast way to get close at the track
 
Ive tried all the methods listed above.....but I keep coming back the the first method Ive used for 40 years...

I may be old school,but IVE never had a problem adjusting solid lifters,and will continue to do so with this method, keep in mind, I set my lash with a feeler tappet gauge at engine idle speeds, by backing the rocker nut off a bit on the rocker stud untill the rocker clicks and I can slide the tappet gauge between the rocker and valve tip, then tighten it at idle just to the point the clicking stops then I remove the tappet gauge
esentuallt the methods similar to the way I set hyrolic lifters, but on hydrolics you don,t use a feeler/tappet gauge and once the rocker nuts tightened to the point the rocker stops clicking you add an aditional 1/4 turn for preload

http://www.cadvision.com/blanchas/54pon ... ppets.html


G_27994G_CL_1.jpg


http://store.summitracing.com/partdetai ... toview=sku

http://www.sjdiscounttools.com/lis68050.html
sum-906781_w.jpg

http://store.summitracing.com/partdetai ... toview=sku
 
Back
Top