be sure your fighting the correct fight!

frank, called to talk about a loose rocker on his 383 SBC , it seems he has adjusted it about once a week over the last month but it won,t stay adjusted, a quick trip over to look at the car, and help him get it adjusted and diagnosed, relieved the cause, I laid a yard stick on the rocker studs and it was very obvious that the one stud was working loose and pulling out of the head casting, when you add stiffer valve springs on stock heads with stock pressed in rocker studs thats always a potential problem, so hes got to get that repaired or replace the heads or have the heads rocker studs threaded

related info

viewtopic.php?f=52&t=2746&p=7513&hilit=rocker+studs#p7513

viewtopic.php?f=52&t=689&p=7416&hilit=rocker+studs#p7416
 
I had a customer at a dealership who was convinced their engine was seized.

Got a quote for a new engine installed from the service writer and I got the job.

They didnt want to believe the alternator being froze up with a serp belt would make the engine not turn over.

I saved them about 3 grand.
 
this may help some guys, the kid with the 1987 camaro comes by and hes got his dads help and hes replaced the injectors and bad sensors and the cars running much better but after it runs about 10-12 minutes, then it stalls and its hard to start, and he said the fuel pump gets a bit louder, his gas gauge doesn,t seem to work consistently so when he opens the tank he tells me there was a big whooshing sound, I ask him if the fuel tank was sucking in or pushing air out when the cap was opened and he didn,t know, I strongly suspect pressure because most gas caps are vented with a valve too allow air into but , are designed so they don,t allow gas fumes out of the tank, but its obvious the tanks not vented properly, the previous owner removed the charcoal canister and evap lines and plugged the vent line back to the tank, it took some time to find it, but once we did and took out the vent line plug, he took it for a test drive, and stated it used to stall or run like crap after about 10 minutes, now it seems to be fine, the problem seems to have been cured, and the fuel tank no longer builds pressure or a vacuum.
now any fuel tank need to be properly vented and the emission stuff probably should not be removed on a street car.
in fact I looked over his vacuum lines and most of them were plugged off, so were going to need to get those back to factory config .

vacuumlines.gif
 
heres a classic, I get a call from FRANK out in colorado, hes helping his neighbor whose got a 1985 corvette thats overheating since he replaced a defective water pump, he was afraid it was a blown head gasket, but after checking a few things it was determined he had installed a standard small block water pump on the corvette, not realizing that the serpentine belt system on the corvette was REVERSE ROTATION


related info

beltroutewe.jpg


viewtopic.php?f=57&t=149

viewtopic.php?f=32&t=2799

viewtopic.php?f=32&t=258
 
one of my friends recently purchased an older 1985 corvette, and hes been trying to get it road worthy, the previous owner recently rebuilt the engine, and it runs ok but its got a persistent oil leak which he assumed was the oil pan gasket but which proved to a really rather silly mistake, the previous owner rebuilt the engine but installed the flexible lip on the rear main seal facing the flywheel not facing forward,now surprisingly doing it that way only resulting in a minor but constant oil drip.

rearseal1.JPG

heres the seal correctly installed (this rear main cap pictures not from his car, obviously this picture shows a well worn bearing)


related info
viewtopic.php?f=51&t=1718&p=11956&hilit=rear+seal#p11956
 
youll love this one, a buddy calls up, hes doing his first cam swap on his 1968 sbc camaro, he has removed the intake, lifters, timing set,rockers etc. but can,t pull the cam out, more than about 1" , after a few questions I ask if hes running a manual fuel pump, short story the fuel pump push rods jamming the cam from coming out until the pump is removed to remove the pressure holding it against the cam.
hey thats a fairly common mistake on the first cam swap youve ever done.

while your worrying about your new billet steel roller cam tearing up your old soft distributor gear, you might want to think about swapping to a bronze tip fuel pump push-rod to prevent excessive wear on that expensive billet steel cam core on the front end ,
4607rod.jpg
 
Last edited by a moderator:
many times its the simple crap youve over looked that makes a big difference.
AL calls me for advice, seems his car suddenly stopped having any decent upper rpm power, it just seems to nose over as the rpms increase, then he tells me he tried a 2" open carb spacer , to get a bit more top end hp, well I question him and I find out he had the problem with the loss of upper rpm power ever since he rebuilt his carb (750 cfm holley) but its not the carb because he tried it on a buddys engine and it made really good hp, well a few more questions and I tell him to drop bye and I look things over, turns out the problem is a simple use of the wrong carb gasket, thats hanging up the carb secondaries preventing them from opening more than about 30% of wide open throttle, simply using an exacto knife to trim the carb gasket and checking the throttle linkage and float levels proved to be all that was required to get his car running like it used to.
 
the wife gets back from a run to the grocery store and informs me the air conditioning in the cars making noise and no longer cooling, well its HOT OUT, and this is not high on my " honey do list" its 98F today in the shade, and the shops only slightly cooler after all the fans are spinning, and I'm not overly happy to hear this, or be researching the air conditioning malfunction, but I start with the basics checking pressures and using a multi meter, and the shop manual, checking fuses etc. well after I bring the car out to the shop and see that the condensers, compressor etc. seem to be working, the duct work fan seems to be blowing.... VERY WEAKLY, but working, yet the cars not being cooled, I start isolating potential problem areas, pulling the lower dash and find the duct work on the air conditioners sucked in about 2 dozen kleenex tissues, that are blocking the transfer doors in the duct work, from the area back behind the glove compartment area, where the air conditioner sucks in cab air circulation. naturally removing a bunch of shredded tissues helps a great deal and Im very happy its not a huge repair bill!

BTW if you happen to have a similar problem this info may help you

merc1.jpg

merc2.jpg

merc3.jpg

merc4.jpg

merc5.jpg
 
one of my neighbors kids has an older nova with a 307 sbc that recently started making intermittent engine noise that sounded like something obviously was loose in the engine, we put it up on the lift and it became rather obvious after a few tests that the starter or flex-plate or torque converter was the source, it turned out to be a couple busted welds on the flex plate , now it sounded similar to a rod knock at times so just be aware that thats a possibility, if your engine starts making noise ISOLATE and diagnose BEFORE PANIC SETS IN, it might be something reasonably easy to repair, Ive also had lube starved rocker balls on stock rockers start knocking loud enough that you would swear its a loose rod bearing.


now this is just a picture of the internet and her flex-plate was not that bad but it more than likely would have been given more time
brokenflexplate.jpg

OEM flex plates are far thinner and more flexible than the SFI certified flex-plates , so they are far more likely to crack and split over time,
but the FLEX is the result of transmission bell housing mis-alignment
Ive had more than a few guys I know think they blew up engines who on engine dis- assembly found cracked or damaged flex plates were the cause of the engine noise

a couple clear pictures would surely help, the flex plate is by design, bolted to both the crank flange and torque converter , and the torque converter is slid into the transmission and seated .
in a correctly clearances, drive train assembly the torque converter is fully seated in the transmission and the transmission bell housing is bolted to the engine leaving about 1/8" of forward/backward slack which is only removed by sliding the torque converter forward as its bolted to the flex plate during final assembly.
if it binds (the torque converter to the flex plate) before the bolts locking them together are in place and torqued to spec,theres usually a problem with components that are being used or the assembly process

FlexPlateInstalled_4573.jpg

400d.jpg

weights on flex plates generally face the block

http://www.agcoauto.com/content/news/p2_articleid/220
crft1.jpg

crft2.jpg

crft3.jpg

crft4.jpg

crft5.jpg

transline.jpg

As misalignment increases, the flexplate flexes more.This continual flexing eventually causes the metal to fatigue and the flexplate cracks.Misalignment should be less than .008 of an inch and the less the better. When the engine and transmission are manufactured, holes are drilled for bolts to attach them to each other. These holes are larger than the attaching bolts and do not align the two components.Precision dowel pins,that fit very tightly, hold the engine and transmission in alignment.

The dowel pins must be present to align the engine and transmission
http://garage.grumpysperformance.co...rrectly-installing-bellhousings.584/#post-785
lak-15907_w

Due to manufacturers’ machining tolerances of engine blocks in relationship to dowel pin location, it is quite possible for
the crankshaft centerline and bellhousing bore to be misaligned. With the transmission installed in a misaligned condition,
several problems can occur, such as pilot bearing and main shaft bearing wear, difficulty in shifting, and in extreme cases
breakage of transmission gears and cases. While most housings will fall within the allowable limits, it is good insurance to
check for register bore runout whenever any housing or engine block is installed. Most factory service manuals will outline
the checking procedure, but will not give correctional measures necessary to ensure trouble-free standard transmission
operation, short of trial and error with switching of various O.E. housings.
NOTE: ADJUSTABLE DOWELS ARE USED TO DIAL IN BELLHOUSINGS BECAUSE THE ENGINE BLOCKS CASTED FROM THE
OEM FACTORY CAN BE OUT OF TOLERANCE. SO, YOU WILL NEED TO ALIGN ENGINE AND BELLHOUSING.
Offset dowel pins are available from Lakewood Industries to ensure correct adapter housing installation. For checking, you
will need a dial indicator (preferably
INSTRUCTIONS
1. Remove clutch assembly from flywheel and install bellhousing on engine block.
(It is easier when you leave the clutch assembly off the flywheel.)
2. Install dial indicator base on the flywheel and adjust plunger to contact the register
bore of the housing. (See photo.)
3. Rotate the flywheel and note indicator reading. Misalignment is one-half of the
indicator reading (maximum allowable is .005”).
4. To correct off-center condition, select the offset dowel pin pair that is closest to onehalf
of the indicator reading. (i.e., if reading is .016”, 1/2R=.008” use .007” dowels.
If reading is .024”, 1/2R=.012” use .014” dowels).
5. Remove stock dowel pins by driving from back side or pulling with gripper
pliers.
6. Clean engine block dowel holes and coat lightly with lubricant.
7. Lubricate dowel pins and install in block. The slot in the dowel pins indicates the
direction of maximum offset. They should be installed parallel to one another,
and in pairs (both .007” or both .014” and .021”).
8. Install and tighten bellhousing securely. Remount the dial indicator and recheck
the register bore runout (Repeat step 3).
9. To make small corrections or adjustments to the alignment, you will need to
remove the bellhousing and drive the offset dowels out of the block. Reposition
the dowels using the slot as a reference point and re-install. Re-check register
bore run-out.Repeat this procedure until the register bore is within limits
 
Last edited by a moderator:
you guys will love this, I found a deal at a yard sale on a new chrome air cleaner assembly and air filter, that some guy bought and never installed for $20, I grabbed it!!
I put the new larger air cleaner assembly on my kids car and its got a slightly different drop base thats a bit lower that allows me to use 14" x 3" filter vs the old 14"x 2.25" air filter, I figure the extra surface areas going to allow the engine to breath a bit better, so its bound to run better...right? wrong!!! its easily down 40-50hp, I,m rather surprised so I look things over, pull the air cleaner assembly, check and find the carburetor fully opens, nothing but the air cleaner and filter has changed yet I'm down significantly on power, its not until the second time I check under the hood,that I notice that with the new air cleaner base INSTALLED the throttle linkage only opens to about 3/4 of WOT. DUHHH!
 
bob! I doubt you can find ANYONE who has been in this hobby for very long that has not had a similar experience re-guarding , some part install that needed to be" tweaked" before it would allow the car to function correctly once it was installed!
 
bob said:
you guys will love this, I found a deal at a yard sale on a new chrome air cleaner assembly and air filter, that some guy bought and never installed for $20, I grabbed it!!
I put the new larger air cleaner assembly on my kids car and its got a slightly different drop base thats a bit lower that allows me to use 14" x 3" filter vs the old 14"x 2.25" air filter, I figure the extra surface areas going to allow the engine to breath a bit better, so its bound to run better...right? wrong!!! its easily down 40-50hp, I,m rather surprised so I look things over, pull the air cleaner assembly, check and find the carburetor fully opens, nothing but the air cleaner and filter has changed yet I'm down significantly on power, its not until the second time I check under the hood,that I notice that with the new air cleaner base INSTALLED the throttle linkage only opens to about 3/4 of WOT. DUHHH!
Nice of you Bob to post here for the world to see.
beer.gif
At least you didn't give up and go back to the original air cleaner without knowing why !

I've only made ONE mistake in my life......I thought I was wrong, but I was right!
 
youll never believe this one

sister-in-law,s audi starts running rough in hot weather,
she brings it to the dealer ... who tells her its going to cost $2000 PLUS to replace the gas tank, because its not allowing fuel flow, a new tune-up, some injector cleaner, new oil change, air filter,new fuel filter, plugs, and gas cap all for under $200 cures the problem.

Im sure, they will tell her the defective gas tank was caused by not lubricating the tail pipe bearings, its all her fault!
 
one of my friends calls me up to tell me about a real p.i.t.a. problem he was having with an intermittent ignition miss that never was consistent on his 1970 GTO
hes got some aftermarket HEI type ignition that was driving him insane because it would run crappy for the first few minutes to occasionally, hours of run time then suddenly it would correct itself and run flawlessly for days until the next time he drove the car,after it sat for a few days, it acted like the plugs needed to get hot or, the car had water in the fuel tank,or moisture in the ignition components that needed to burn off once the engine got up to temperature, or something but because once it started running correctly it was nearly impossible to locate the problem, and it almost always seemed to clear up.well a step by step check and verify approach did lead to the answer.
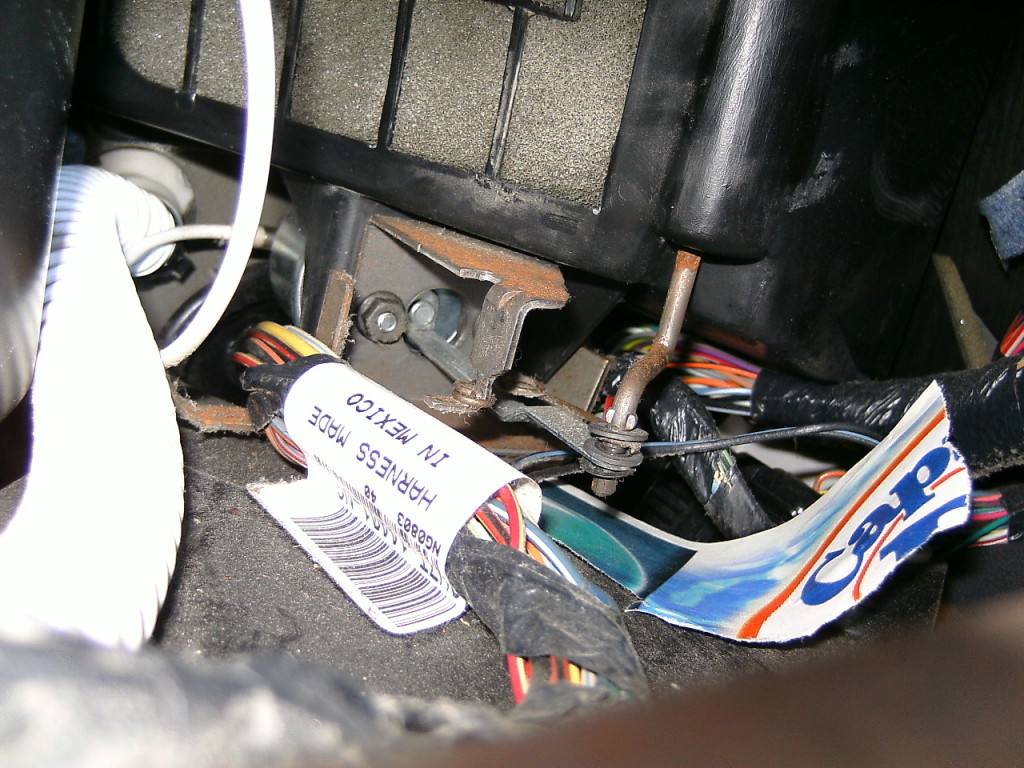
anytime your dealing with a potentially electrically related problem ,Id suggest you start by cleaning the battery terminals and cable connections carefully, a great many problems blamed on battery's and fuses are basically high resistance or intermittent connections, then use a multi meter to see what your dealing with
he had swapped plugs and rotor, distributor caps , ignition wire, etc. played with the ignition advance curve several times.
this intermittent issue really started to bug the crap out of him so he followed some of my advice in one of the threads and measured the battery voltage, did an alternator check, cleaned the ground connections, measured the ignition wires, and a dozen other things and took notes then went back and measured things again once it started running correctly which eventually led him to the problem..the problem was that the ignition was VERY susceptible to input voltage changes and the battery had some weak cells it was 5 years old and it took 15-30 minute's before the alternator charging the system gave it a charge level high enough to allow the ignition to function flawlessly , one the battery was fully charged everything functioned, but if the weak cells was drawing to much power and drawing down the voltage , the ignition ran like crap.
he eventually noticed a correlation between batter registered voltage and the miss.
he eventually found this out as the battery charge took longer and longer and he noticed the direct relationship , once he had over 13.3 volts everything ran great , below 13 volts it ran like crap, he swapped to a new battery and the problem went away.
one reason it was difficult to track down was he had an auxiliary electric cooling fan that would draw a good deal of current, when it ran and that was sensor controlled and only came on if coolant temps exceeded 220F that fan would draw the battery charge level down, over time, and only slowly over time if the car sat idling, if the car was cruising it rarely came on and even when it did the engine speed seemed to spin the alternator fast enough, that the alternator speed plus moving air flow caused that fan rarely turned on if the weather was reasonably cool.
once he realized the problem he also upgraded the alternator and says it made a noticeable difference in how the car starts and runs even with the new battery.
 
thankfully some problems sound far worse than they are! :cry:
my wife tells me the car started running like crap :shock: and making a noise like a bucket of marbles bouncing in the clothes drier, Im thinking :roll:
(OH! CRAP I CAN,T AFFORD THIS NOW)
I look at the engine carefully when she gets home, about 1/4 of the inner edge of the serpentine belts frayed, shreds are whipping around as it rotates and the reason is that the the belt tensioner bearings have failed so the belt tension-er wheel is riding at an angle , a new belt tensioner, a quick diagnoses, a trip to the local NAPA DEALER, getting screwed for $93 for a belt tensioner and new serpentine belt, a few minutes replacing the parts, a new belt and plugging the MAF sensor back in that a flying bit of serpentine belt unplugged resolved the problem...THANK YOU LORD! :mrgreen:
 
bill called and asked me to look at his truck, it has leaked oil since he did an oil change yesterday, and he says the filters good and snug, well I get it up on the lift and the cause is rather obvious, theres two oil seal ring gaskets, its obvious the old one stayed stuck to the oil filter mount and came off the old filter and he screwed on the new oil filter that has its own gasket, when the two compressed against each other the seal was not maintained as one squished out of alignment,
lubeygasket.jpg

if youve changed a few dozen oil filters youve most likely seen one of those gaskets stick, and you sure won,t be the first guy to install a filter with either two gaskets or no gasket and have a resulting leak in either case.
that minor mistake cracks me up and brings back memories of a neighbor who used a spare oil filter from his previous car on his new truck, who had a similar rather messy smokey problem when the wrong filter failed to seal correctly, hey we all screw up at times its how we learn!
 
I'm sure theres not a single person out there that has not overlooked the obvious stuff at times, I was over at a friends house for a few minutes while he tried to start his new Pontiac 428 engine in his 1966 GTO, that he spent the last three years partly rebuilding, and this week he has the engine installed that he rebuilt,but after cranking it, and not getting any effective response from the engine unless I used starter fluid into the Holley 750cfm vac secondary carburetor , I suggested he check his fuel pressure and float levels, I get this stupid smile and then he says hold on, and goes rushing out to his other cars trunk, and returns with two 5 gallon cans of fresh high test gas, and a long funnel, he then filled the completely empty fuel tank with fresh fuel and after only a few seconds the carburetor started to get fuel, struggled then fired up, its amazing how much better breaking in a cam seems to go with fuel reaching the carburetor ......hey we all get excited , I had him stop and verify the oil, coolant levels and trans fluid levels , and brake fluid and vacuum hoses, firing order and ignition timing, and had him run a garden hose over the radiator to increase cooling capacity while the car sat in his drive way,after that, then once it fired up we very quickly lashed the valves, (he will need to go back and fine adjust it once the cams broken in but !'m sure its very close) and had that really great sewing machine sound of a big Pontiac V8 with a solid lifter flat tappet cam, and watched oil dribble from the rockers, at idle, just for a few seconds then, we replaced the valve covers,and he spent 20 minutes running the engine between 2300rpm-3000rpm, and took it for a short drive. just to be sure!
 
It's always funny when it's someone else or sometimes later we can look back and laugh at ourselves.

I rebuilt the top end of my motorcycle at 15 years old. All excited to see it run with double the HP (yah right). Put fuel in it and tried to start it.....nothing. My dad was there offering help when he could, but not paying alot of attention. I knew there was 3 things you needed for it to run, compression, spark and fuel. Checked all those things yet nothing, I was SO UPSET that I couldn't take it anymore after a couple of hours and went inside to steam. About 15 minutes later my dad came inside and asked me which container I used to put gas in the tank. CRAP, I GRABBED THE KEROSENE. We used kerosene to clean parts with then.

Drained the kerosene out and put gasoline in and it fired up. Damn motorcycle wouldn't run on kerosene!

 
Bob came by with a buddy of his that has a 1967 Pontiac GTO, with a slightly modified 455 Pontiac engine,(better edelbrock heads, intake headers and crane cam upgrades, plus a 4.11:1 rear gear ratio,and 4l80e trans, the car had an annoying ignition miss, which was tracked down to fouled spark plugs, that he had only had in the car for about 12,000 miles, but he freely admitted adding several cans of both octane booster and injector clearer to the same tank of gas as he thought when the miss started it might be a partly clogged carburetor.
additives can be useful, but pouring 2 cans of octane booster and two cans of injector cleaner in the same tank of gas is not likely to promote good results.
luckily he was down to a 1/4 tank so after swapping and gaping plugs I had him fill the tank with fresh fuel and the car is back running as it should.
 
Back
Top