You are using an out of date browser. It may not display this or other websites correctly.
You should upgrade or use an alternative browser.
You should upgrade or use an alternative browser.
My Cam Research for the Experts Eye
- Thread starter TXChevy
- Start date
Yes, I think the Powermaster starters are pretty good. I may consider one but I really want to retain the front brace.
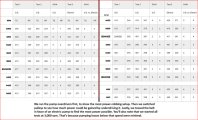
If consideration is given (like in my case) to go from the 10MT (direct drive) starter to a PG (gear reduction) style starter in the GM line, this pdf may be of interest.....
If consideration is given (like in my case) to go from the 10MT (direct drive) starter to a PG (gear reduction) style starter in the GM line, this pdf may be of interest.....
Attachments
Pulled the lift brackets off, test fit alternator. I also final-set the front mounts. Those green round pads under the mounts are cut from 200psi rated isolation pads, 4 per mount.
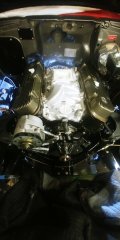
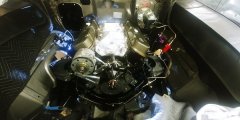
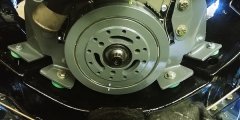
The alternator bracket set up is pretty nice. Seems rigid. I like that it eliminates the stock big steel top bracket that uses an intake bolt. I never liked that.
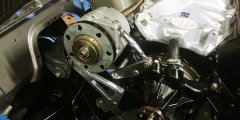


The alternator bracket set up is pretty nice. Seems rigid. I like that it eliminates the stock big steel top bracket that uses an intake bolt. I never liked that.

Last edited:
I know this isn't cam/valvetrain but I thought here and there I'd include some glimpses into other work needed to run that engine.
Trunk mount battery box that I made from 3/16 and 1/8 plate. Very strong and rigid when bolted into place. The rear panel is removable so it's easier to slide the battery in and out. There will be a plastic tray inside even though I'm planning to use an AGM battery. I used rivet nuts everywhere so it's easy to bolt into place and remove the panel or components. Wiring and cables haven't been put into place yet.
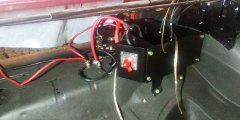
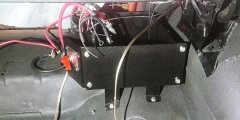
Side panels have kill switch, power feed circuit breaker and starter solenoid. Main battery cable is direct to the starter and is only hot when cranking.
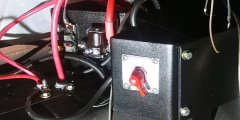
Starter cable with heat sleeving. It will get an additional isolation anchor.
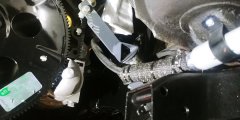
I always run power cables in gray pvc conduit under the car, I don't like them exposed. No issues with exhaust or muffler heat. One conduit is for starter cable, the other is for alternator charge cable to battery and also for body power from battery (thru main circuit breaker).
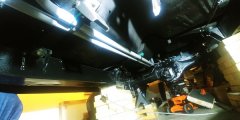
Trunk mount battery box that I made from 3/16 and 1/8 plate. Very strong and rigid when bolted into place. The rear panel is removable so it's easier to slide the battery in and out. There will be a plastic tray inside even though I'm planning to use an AGM battery. I used rivet nuts everywhere so it's easy to bolt into place and remove the panel or components. Wiring and cables haven't been put into place yet.


Side panels have kill switch, power feed circuit breaker and starter solenoid. Main battery cable is direct to the starter and is only hot when cranking.

Starter cable with heat sleeving. It will get an additional isolation anchor.

I always run power cables in gray pvc conduit under the car, I don't like them exposed. No issues with exhaust or muffler heat. One conduit is for starter cable, the other is for alternator charge cable to battery and also for body power from battery (thru main circuit breaker).

Last edited:
Here's some info on starter bolts....
This all pertains to the MT series of starters, not the PG series that take the metric shank size and shorter 4.33" bolts.
I wanted to ensure that I had the proper bolts in place so I did some research on what I needed. Probably splitting hairs but that's what I do sometimes lol. The main issue as you know is ensuring that the knurling properly locks into the block to hold the starter firmly in place.
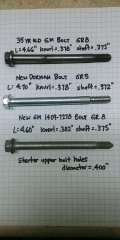
I'm installing new GM 14097278 bolts. In the picture, you can see a comparison I did of the original GM bolt, new Dorman bolt, and new GM bolt.
It's not a perfect world as there is some clearance between the starter bolt hole (.400") and the new GM bolt (.382") but it will have to do. I think that the perfect setup is the bolt locking into the starter bolt hole as well as into the block, but I think this will be fine. Note that the new GM bolt knurling is a larger diameter than the original GM bolt - I would expect this from the numerous times the original bolt has been used. Also note that the new Dorman bolt is no better in sizing than the 35 year old GM bolt.
As a footnote, a reminder that the bolts that came with the chinese min-starter I bought (and am not using) were complete junk. Not graded at all, probably a GR2 without any knurling at all - just basic hardware store bolts.
This all pertains to the MT series of starters, not the PG series that take the metric shank size and shorter 4.33" bolts.
I wanted to ensure that I had the proper bolts in place so I did some research on what I needed. Probably splitting hairs but that's what I do sometimes lol. The main issue as you know is ensuring that the knurling properly locks into the block to hold the starter firmly in place.
I'm installing new GM 14097278 bolts. In the picture, you can see a comparison I did of the original GM bolt, new Dorman bolt, and new GM bolt.
It's not a perfect world as there is some clearance between the starter bolt hole (.400") and the new GM bolt (.382") but it will have to do. I think that the perfect setup is the bolt locking into the starter bolt hole as well as into the block, but I think this will be fine. Note that the new GM bolt knurling is a larger diameter than the original GM bolt - I would expect this from the numerous times the original bolt has been used. Also note that the new Dorman bolt is no better in sizing than the 35 year old GM bolt.

As a footnote, a reminder that the bolts that came with the chinese min-starter I bought (and am not using) were complete junk. Not graded at all, probably a GR2 without any knurling at all - just basic hardware store bolts.
Last edited:
I like it! I enjoy diving into the details like you have done. I just have never thought about this before.Probably splitting hairs but that's what I do sometimes
Are you saying that the knurling should extend into BOTH the block and the starter housing ?The main issue as you know is ensuring that the knurling properly locks into the block to hold the starter firmly in place.
WHAT ..... you're not going to create a sleeve to go over the bolt and take up the rest of the clearance ???It's not a perfect world as there is some clearance between the starter bolt hole (.400") and the new GM bolt (.382") but it will have to do.
Lol no sleeve - it's all good enough.
To tell the truth I don't remember any bolts locking into an MT series starter housing. The key factor to my understanding is that the bolts key into the block via the knurling. I've observed that the knurling on the MT series starter bolts is a single step so unless the starter housing bolt holes are the same as the block there will be the small clearance I noted.
But I have read on the PG starters that they take a metric size (not metric threaded) bolt. I had a couple of new GM "metric" bolts and looking at the picture you can see a 2 step knurling. They do have a slightly larger shank diameter than the MT series bolts. I got them to use on that mini-starter. They did lock into the block (they have 3/8 SAE threads) and also the starter housing but I can't verify that's the same case for a GM PG style starter. My understanding is that these "metric" bolts are needed for the larger bolt holes in PG starter housings.
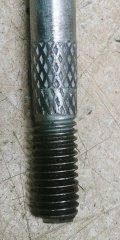
My main takeaway is that for MT series starters a front brace is required plus knurled bolts locked into the block to create a rigid attachment for the starter to the block. The block bolt holes have a slightly larger diameter at the entry to match the bolt knurling - failure to use the right bolts and to not use a brace can lead to starter shifting and cracking or breaking the pad mount at the block. Especially with a higher compression engine kickback.
I may be overreacting but to me this is a big deal and I wanted to minimize anything happening. I figure there's a good reason GM put the knurling in place.
To tell the truth I don't remember any bolts locking into an MT series starter housing. The key factor to my understanding is that the bolts key into the block via the knurling. I've observed that the knurling on the MT series starter bolts is a single step so unless the starter housing bolt holes are the same as the block there will be the small clearance I noted.
But I have read on the PG starters that they take a metric size (not metric threaded) bolt. I had a couple of new GM "metric" bolts and looking at the picture you can see a 2 step knurling. They do have a slightly larger shank diameter than the MT series bolts. I got them to use on that mini-starter. They did lock into the block (they have 3/8 SAE threads) and also the starter housing but I can't verify that's the same case for a GM PG style starter. My understanding is that these "metric" bolts are needed for the larger bolt holes in PG starter housings.

My main takeaway is that for MT series starters a front brace is required plus knurled bolts locked into the block to create a rigid attachment for the starter to the block. The block bolt holes have a slightly larger diameter at the entry to match the bolt knurling - failure to use the right bolts and to not use a brace can lead to starter shifting and cracking or breaking the pad mount at the block. Especially with a higher compression engine kickback.
I may be overreacting but to me this is a big deal and I wanted to minimize anything happening. I figure there's a good reason GM put the knurling in place.
Last edited:
Pretty nice throttle bracket, not expensive at all. 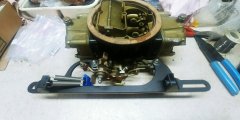
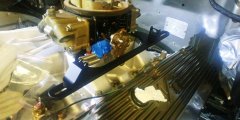
Working on engine wiring harness that will route down either side of the intake. I thought the available th400 kickdown switches looked clunky and were way overpriced so I made my own using a standard microswitch. Bought a pack of them so I've got lifetime spares lol.
Throttle at idle.
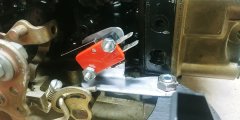
Throttle at kickdown point (within about 1/8" of full throttle). I can adjust the bracket back and forth to change kickdown point if needed.
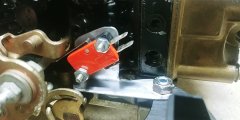
I'll post some pics of the wiring harness and support brackets I'm making - I didn't find any that met my specific needs so I'll do my own.
Fuel splitter from the regulator so I can run two separate 6AN hoses across to the Holley.
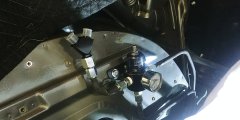
We've got holidays and a remodel project so I'm back in the slow lane on the car but still making a little progress almost every day.
Just info, my preferred vendors for cables and electrical:
Ceautoelectrical.com
Batterycablesusa.com
I also use delcity and waytek, plus Amazon but you have to be selective with quality on Amazon.
AN fuel fittings and braided ptfe hose assemblies:
Hoseandfittings.com


Working on engine wiring harness that will route down either side of the intake. I thought the available th400 kickdown switches looked clunky and were way overpriced so I made my own using a standard microswitch. Bought a pack of them so I've got lifetime spares lol.
Throttle at idle.

Throttle at kickdown point (within about 1/8" of full throttle). I can adjust the bracket back and forth to change kickdown point if needed.

I'll post some pics of the wiring harness and support brackets I'm making - I didn't find any that met my specific needs so I'll do my own.
Fuel splitter from the regulator so I can run two separate 6AN hoses across to the Holley.

We've got holidays and a remodel project so I'm back in the slow lane on the car but still making a little progress almost every day.
Just info, my preferred vendors for cables and electrical:
Ceautoelectrical.com
Batterycablesusa.com
I also use delcity and waytek, plus Amazon but you have to be selective with quality on Amazon.
AN fuel fittings and braided ptfe hose assemblies:
Hoseandfittings.com
Last edited:
I really like the www.batterycablesusa.com , I hadn't run across a place where you could order the ends and custom lengths together.
BTW, did you mean https://ceautoelectricsupply.com/ for the first link ?
BTW, did you mean https://ceautoelectricsupply.com/ for the first link ?
Yes sorry about that.
Very pleased with the custom length battery/power cables I've gotten, quality materials and accurate lengths. I can make them as well but they're actually pretty competitive on cost especially on larger gauge stuff.
On the fuel hoses, due to fixed locations of components and hard line fittings it's important to me to get exact lengths. The hose and fitting place has sent those exact lengths I needed and they explain how to measure to include angled fittings. So for example, I got accurate lengths for braided fuel hoses with straight end fitting at one end and 90 fitting at the other.
Slow progress as usual for me. Lots of small stuff done.
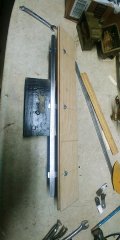
I didn't like aftermarket engine harness supports so I made my own. I wanted to use the top bolts on the valve covers so I made a jig to ensure the tabs for the harness rails were in the right spots. .125 flat bar and 18ga tabs.
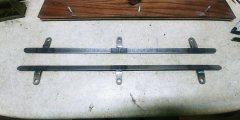
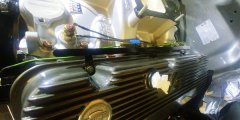
Got them welded up and painted, they fit great and will allow me to keep loomed wiring up off the intake. Tabs were bent as needed to get the rails level with the engine.
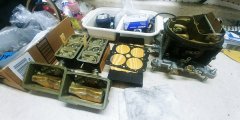
Also got some 850 re-assembly ready to start when new maintenance parts show up.
I didn't like aftermarket engine harness supports so I made my own. I wanted to use the top bolts on the valve covers so I made a jig to ensure the tabs for the harness rails were in the right spots. .125 flat bar and 18ga tabs.

Got them welded up and painted, they fit great and will allow me to keep loomed wiring up off the intake. Tabs were bent as needed to get the rails level with the engine.


Also got some 850 re-assembly ready to start when new maintenance parts show up.

Last edited:
Yes, black clipped tiewraps give a neat appearance.
Long time gone between months of remodeling, travel and minor hand surgery. But hey it's a hobby right?
I've picked up again on that long awaited startup.
Finishing up rebuilding the Holley 850VS. That and the installation of flex supply lines to each bowl finishes the fuel system. Rather than a single fuel rail I prefer two individual lines from regulator to carb.
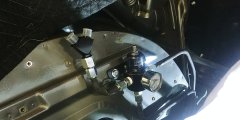
I've mentioned that in the past I had a forever problem with slow overheat or barely keeping cool, especially in summer. So I'm paying extra attention to all cooling factors.
I've already installed slightly different head gaskets based on Felpro tech advice and a higher volume water pump. Radiator is an aluminum crossflow 2 row with 1in tubes. Should be more efficient than a smaller tube 3 row, using 15lb cap, 160d thermostat and overflow container.
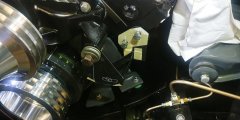
Here's something I noticed. I had always used a single belt, since no ac or PS. In the pic you can hopefully see that the belt only contacts about 25% of the WP pulley. It's a new pulley but same thing with old steel pulley. I think that partial slippage may have caused the WP to not run consistently, causing less circulation.
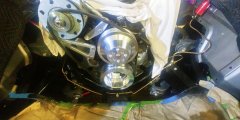
What I decided to do was add a second belt in the next set of grooves. Belt from BAL to WP only. This would ensure that there was no slippage but that belt would need a tensioner. General idea below.
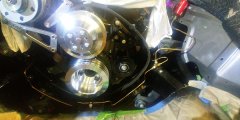
I found a decent quality idler/tensioner Hayden 5950 to use. You can sort of see it here, sorry for dark background.
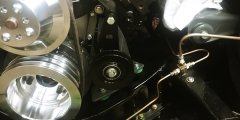
I'm making a support bracket for it, as it needs solid attachment to resist pull and twist. Using .25 thick steel.
I'm not interested in a serpentine system because of cost, this v belt setup will work fine. I think that older vettes had something similar but it's expensive for just a basic pulley.
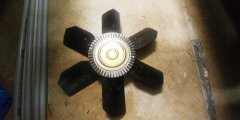
I'll be using twin Spal fans but for start up I'm installing a simple steel fan with thermo clutch. All the electrical is in place - this is just for convenience.
I'm also paying attention to the HEI advance curve as it can also impact tuning. Last time I graphed out a number of different curves, using the Dave Ray method of controlling the adjustable vac advance canister. Startup will be set to a basic curve then I'll tune it further along with carb adjustment/tuning as needed.
Long time gone between months of remodeling, travel and minor hand surgery. But hey it's a hobby right?
I've picked up again on that long awaited startup.
Finishing up rebuilding the Holley 850VS. That and the installation of flex supply lines to each bowl finishes the fuel system. Rather than a single fuel rail I prefer two individual lines from regulator to carb.

I've mentioned that in the past I had a forever problem with slow overheat or barely keeping cool, especially in summer. So I'm paying extra attention to all cooling factors.
I've already installed slightly different head gaskets based on Felpro tech advice and a higher volume water pump. Radiator is an aluminum crossflow 2 row with 1in tubes. Should be more efficient than a smaller tube 3 row, using 15lb cap, 160d thermostat and overflow container.
Here's something I noticed. I had always used a single belt, since no ac or PS. In the pic you can hopefully see that the belt only contacts about 25% of the WP pulley. It's a new pulley but same thing with old steel pulley. I think that partial slippage may have caused the WP to not run consistently, causing less circulation.

What I decided to do was add a second belt in the next set of grooves. Belt from BAL to WP only. This would ensure that there was no slippage but that belt would need a tensioner. General idea below.

I found a decent quality idler/tensioner Hayden 5950 to use. You can sort of see it here, sorry for dark background.

I'm making a support bracket for it, as it needs solid attachment to resist pull and twist. Using .25 thick steel.


I'm not interested in a serpentine system because of cost, this v belt setup will work fine. I think that older vettes had something similar but it's expensive for just a basic pulley.
I'll be using twin Spal fans but for start up I'm installing a simple steel fan with thermo clutch. All the electrical is in place - this is just for convenience.

I'm also paying attention to the HEI advance curve as it can also impact tuning. Last time I graphed out a number of different curves, using the Dave Ray method of controlling the adjustable vac advance canister. Startup will be set to a basic curve then I'll tune it further along with carb adjustment/tuning as needed.
Last edited:
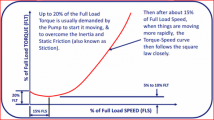
I think you are 100% right by adding another belt to the WP. Especially as rpmIn the pic you can hopefully see that the belt only contacts about 25% of the WP pulley.
increases so does the torque required to turn it.

Understanding Centrifugal Pump and Motor Torque-Speed Curves
Your centrifugal pump motor needs to produce enough torque to start the pump & bring it to operating speed. Contact us for help selecting the right motor.
Pump Torque Calculator - Online Calculator - Engineering Units
Pump Torque Calculator based on P = pump power, hp N = pump speed, rpm in Imperial Units and P = pump power, kW N = pump speed, rpm in SI Units

Water Pump Tech
Super Chevy technical article on how to get your water pump to run effeciently
.
Man that's great info, thanks.
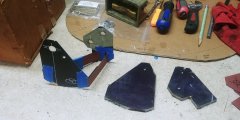
Got that bracket done, since these pics it's now primered and painted. Very solid.
A bit fiddly to get the bits all lined up and tacked into place - I bolted the 2 plates onto the engine then held the bars in position to tack them. Fits very well, I'm really happy with it.
I did paper mockup first.
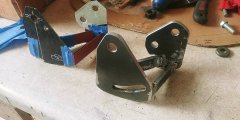
The blue tape is the pulley bracket - pulley is removed while I made sure everything fit. Easy now to simply tension the pulley and lock it down.
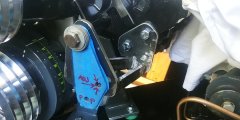
Got that bracket done, since these pics it's now primered and painted. Very solid.
A bit fiddly to get the bits all lined up and tacked into place - I bolted the 2 plates onto the engine then held the bars in position to tack them. Fits very well, I'm really happy with it.
I did paper mockup first.

The blue tape is the pulley bracket - pulley is removed while I made sure everything fit. Easy now to simply tension the pulley and lock it down.

Last edited:
Yes, I noticed that in your post above #457. Always good to work thru an idea before committing to the final bracketI did paper mockup first.
So how did you come up this tensioner? What did it fit?I found a decent quality idler/tensioner Hayden 5950 to use.
What are you working with .... plasma cutter and MIG welder? As always very nice work !!!
.
