- Home
- Forums
- Technical Articles/muscle cars
- American Muscle Cars
- Engine: Repairs , Modifications , Trouble Shooting
You are using an out of date browser. It may not display this or other websites correctly.
You should upgrade or use an alternative browser.
You should upgrade or use an alternative browser.
LT1 and a T56 in a 55 Chevy
- Thread starter 2Loose
- Start date
Loves302Chevy
"One test is worth a thousand expert opinions."
I know it worked because obviously the pins came out, but isn't this the WRONG way of doing this.With a buddy helping me, we welded large nuts on the old dowel pins, and while they were hot, put an impact gun on them, and twisted them while a buddy pounded on them through a hole in front of them with a long, heavy duty punch. They slowly began to turn and eventually came out. This one was almost all the way out. I do this right after welding, while they are still hot.
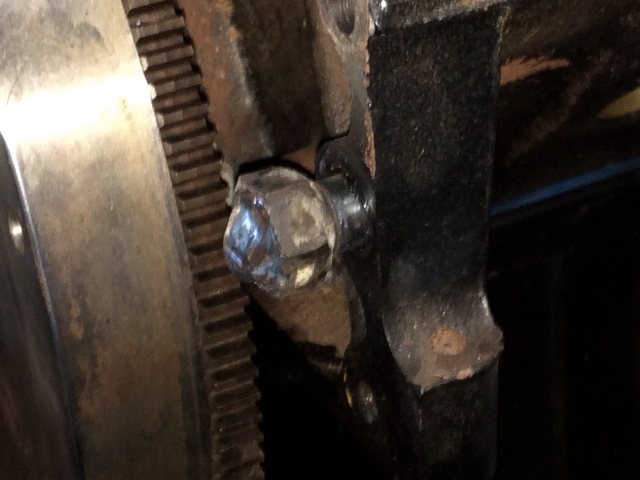
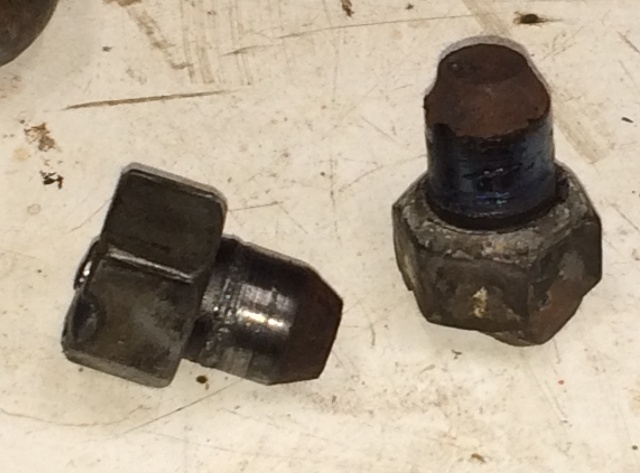
Then I cleaned out the holes, applied a small amount of silicone grease to the inside of the holes, and tapped the long dowel pins in all the way....

Heating the pin expands it, making it tighter in the block. I would have heated the block area around
the pin, while trying to keep the pin cooler at the same time. This would have expanded the cast
iron around the pin and it should have come with a few light taps with the punch.
Someone correct me if I'm wrong.
8
87vette81big
Guest
Willy is a Retired Mechanical Engineer Mike & an Old Time Street Racer & Drag Racer Mike.
He is Handy.
Also gets into bad Mishaps time to time.
He is Handy.
Also gets into bad Mishaps time to time.
2Loose
reliable source of info
Actually I agree with that, I'd have to go back and look at the pix, or the block, but I seem to remember that those were blind holes and we couldn't get to the back of them to punch them out? But that sounds right to heat the block. I just have had this vid in my head from years back with my Dad and his brothers doing just what I did, welding a big nut on and twisting it out.
Maybe I'm the "big nut"...
Just ask my wife....
Today:
Quite a few hours with #100 gray wet/dry sand paper, then smoothing with #600, took out about 0.0008" to 0.0010", then did an assemble with just the flanged hub and assembly lube....
assembly lube on the 7/16 sae threads inside the crank snout also, used a 5" by 7/16" bolt and kept adding spacer to push this on, tight but not abnormal in my experience...
the difference between a good hot rodder or engineer, and an average ones skill level is both due to accumulated experience, and the ability to think on your feet, stop and look over any problem,and think through the options and possible potential consequences, of those optional route to solving an issue, rather than almost universally assuming the BIGGER HAMMER APPROACH, will work, as almost a mandatory response to finding somethings not working as you expect it too.
the use a BIGGER HAMMER, and if it breaks it just obviously needed to be replaced attitude, probably results in 10%-20% of part resales
the use a BIGGER HAMMER, and if it breaks it just obviously needed to be replaced attitude, probably results in 10%-20% of part resales
2Loose
reliable source of info
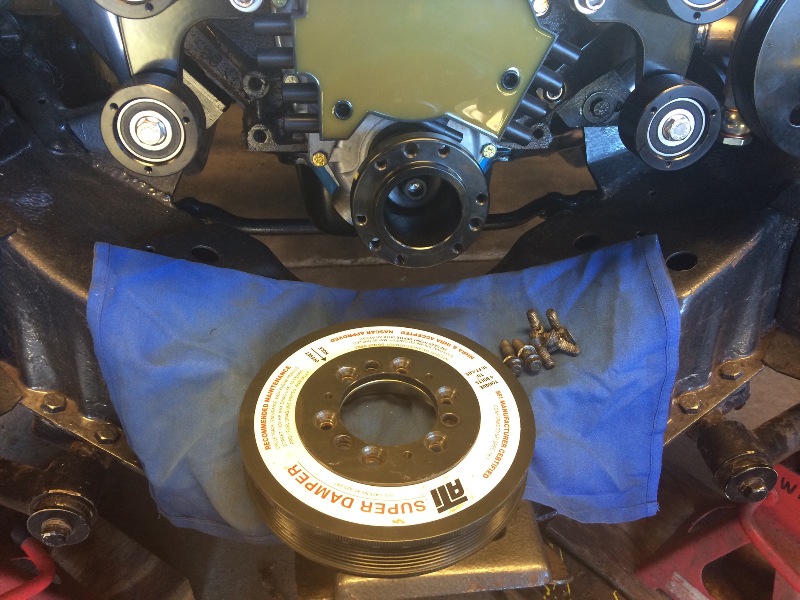
One of the reasons I removed the balancer from the hub for this assembly attempt, was so I could heat the hub if it got stuck during the install process. But I didn't need to do that. I don't like to heat them usually in order to get an install, as that makes the future removal process even more difficult.
A buddy with a lot of machine shop experience convinced me we could do it manually right here in my shop with abrasive paper, so we started working on it with the #100 grit paper. The hub is black anodized, inside and out, and that anodizing was the first to come off, then we were working on shiny metal. It took awhile, working our way around the inside of the hub to try to keep it as even as we could, and working the paper both in an "in and out" motion for awhile, then a circular motion around the inside. Taking measurements as we went.
I have an aftermarket stroker crank in this LT1, with a 0.030" cylinder bore the displacement is 396 ci. My read on my crank snout OD is 1.2460", and the interference fit spec. is 0.009" to 0.0012". The crank snout is back inside the timing chain cover, so a bit difficult to get at it to try to take a little bit off the OD. My read on the hub ID was 1.2440", so I decided to try to take out 0.0010", getting the hub ID opened up to 1.2250" for a 0.0010" interference fit.
The final measurements after polishing with the #600 paper showed that we had taken out between 0.0008" and 0.0010" depending on where we measured. So we decided to give it a shot and it went right on, with a normal amount of effort.
ATI also recommends installing a new OEM center bolt in the crank and torquing it to spec. So I'm now in the hunt for a new center bolt.
Aloha,
Willy
PS: A supply of Negra Modelo in the shop frig helped also....
Well, it was a warm day....
2Loose
reliable source of info
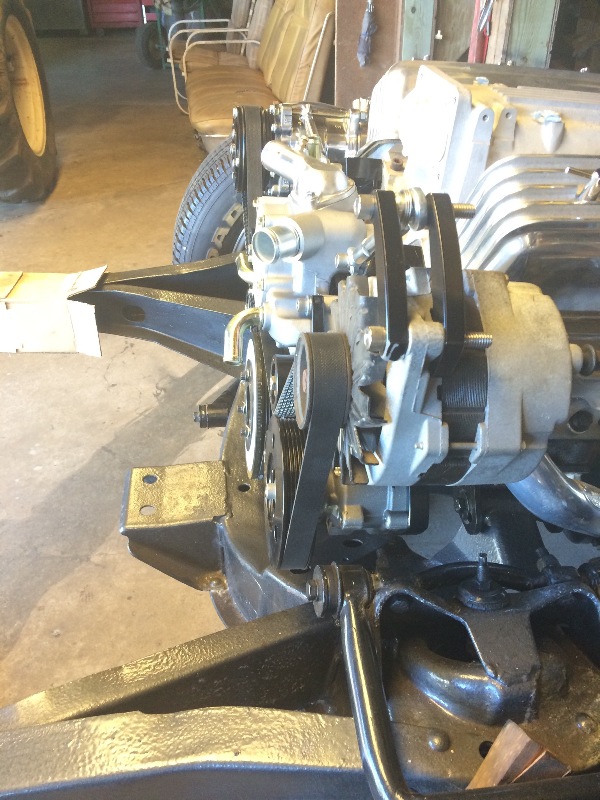
The balancer is back on the hub, the serpentine belt is back on, and everything lines up just as it should...
more pix HERE (scroll down)....
more pix HERE (scroll down)....
8
87vette81big
Guest
I don't know why the simple things to complete have to be such a Pain In The Ass Willie.
8
87vette81big
Guest
Building a 10 second ET to 8 second ET Drag Car is even worse at times.
2Loose
reliable source of info
I bet!Building a 10 second ET to 8 second ET Drag Car is even worse at times.
All I wanted was an old fashioned 55 chevy street gasser that would run 10's when I built "Patches", running a stick, but got real tired of rebuilding that Doug Nash I had, so have settled for just a rowdy street machine these days...
I did get a couple of consistent 11.17 runs out of it before I gave up, and that was with lots of smoke off the line....
Loves302Chevy
"One test is worth a thousand expert opinions."
Sorry Willy, I'm glad you got it to fit, but no pats on your back for not using a balancer installer,
or at least a threaded rod, washer & nut to pull the hub on. Shame on you. You already broke the
first bolt off in the crankshaft and had to drill it out. Someone as talented as you are should know better.
So should your buddy with a lot of machine shop experience. Too many beers maybe???
The trick is to LEARN from your mistakes.
2Loose
reliable source of info
Oh, Man,
your sound just like my 2 am conversations with myself,
Yup, no arguments here....
I wanted grade 8 threaded rod, but couldn't find any,
Figured if I used a longer bolt, and lots of different thickness spacers,
And started inside the first half of about 2" of internal thread,
With a 7/16" SAE thread, with 30 wgt the first time and second time,
But the bolts broke, mostly because I was really, really crankin'
on em to get the balancer to go on....
It shouldn't of been that tight. Coulda heated it, but then it's
super tight when it cools, for a future pull off....
And I just used the second inch inside the crank snout to pull,
it should, and did, work.
It was definitely a thou too tight the first two times around...
Cut the interference down from 2-1/2 thou +/-
to 0.0010" +/- 0.0002" which is within ATI's
posted tolerance.
The older Camaro LT1 balancer goes on with this method ok,
so I thought this Corvette unit would also, but I was wrong.
This go around, I bought a new grade 8 bolt and pulled it right on
using the second inch in the crank,
and had no problem...
But the hub fit was definitely looser this time around....
Aloha,
Willy
PS, I also used assembly lube on the crank snout, the internal threads,
the bolt, and the friction area between the bolt head and the first washer/spacer of my stack of spacers. Used 1" hex nuts and a lot of flat washers, maybe shoulda made pix of that method too, and it is really ok to use that method, but the grade 8 or better threaded rod method really is a better method.
Loves302Chevy
"One test is worth a thousand expert opinions."
Well, I really am glad you are back on track. Look forward to reading further,
especially about how your rear suspension works.
That March front drive setup looks nice - too bad they get so much $$$ for it.
I will take the time to fabricate my own brackets.
Has anybody noticed that you never see March's stuff used anywhere???
especially about how your rear suspension works.
That March front drive setup looks nice - too bad they get so much $$$ for it.
I will take the time to fabricate my own brackets.
Has anybody noticed that you never see March's stuff used anywhere???
8
87vette81big
Guest
March is used on many show cars & Display type car projects.
Sometimes on Drag Cars too.
Some Pontiac guys use the March Pulley system.
Its expensive for sure.
Drag racing has advanced past March hardware .
Everything is usually hand fabricated on the top runners.
Poor guys use stock and make do.
Willie has a Bad Azz 1955 Gasser Chevy Mike.
Blown Super Charged Olds 425 ci V8.
I am sure it Runs Hard.
My 1965 Olds 425 in my '63 GP Runs Great.
Didn't cost 5,000-20,000 cash either.
Loves302Chevy
"One test is worth a thousand expert opinions."
You ended up getting a super deal, right place at the right time.
That and having the brains & experience to know what to look for.
Good for you.
That and having the brains & experience to know what to look for.
Good for you.
Loves302Chevy
"One test is worth a thousand expert opinions."
Here is your next mod for your 1965 Olds 425 in the '63 GP. Yes, I know this one is a HEMI.

A Model T because you like things older than you are.
Here is the ONLY image on Google for a Blown Gran Prix. Something to work towards with yours.

A Model T because you like things older than you are.
Here is the ONLY image on Google for a Blown Gran Prix. Something to work towards with yours.
8
87vette81big
Guest
I would like
to build a T bucket Mike.
Its a Pipe dream right now.
They Are Kool.
to build a T bucket Mike.
Its a Pipe dream right now.
They Are Kool.