OldVetteFan said:I began hearing a clicking sound from the rear of my '95, and thought it might be either a halfshaft ujoint or the hub bearing. The noise occurred on starts, and I could also occasionally hear it if I unloaded the drivetrain at low speed (this is a six speed manual car).
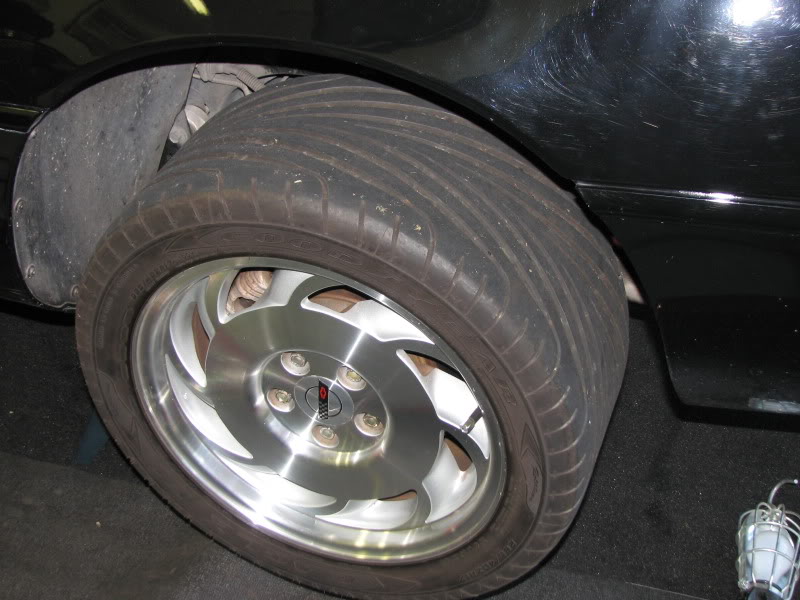
The easy way to check is to get the tires off the ground, and grasp the tire at the 6 and 12 position. With the tire off the ground, try moving the tire back and forth. My passenger side exhibited some movement - I could feel it, but not see it. The driver side not only exhibited movement I could feel - I could also SEE it move back and forth!
So, I obtained two hub assemblies and four ujoints for the half shafts. My theory is that since I need to remove the half shaft, I might was well replace the joints at the same time.
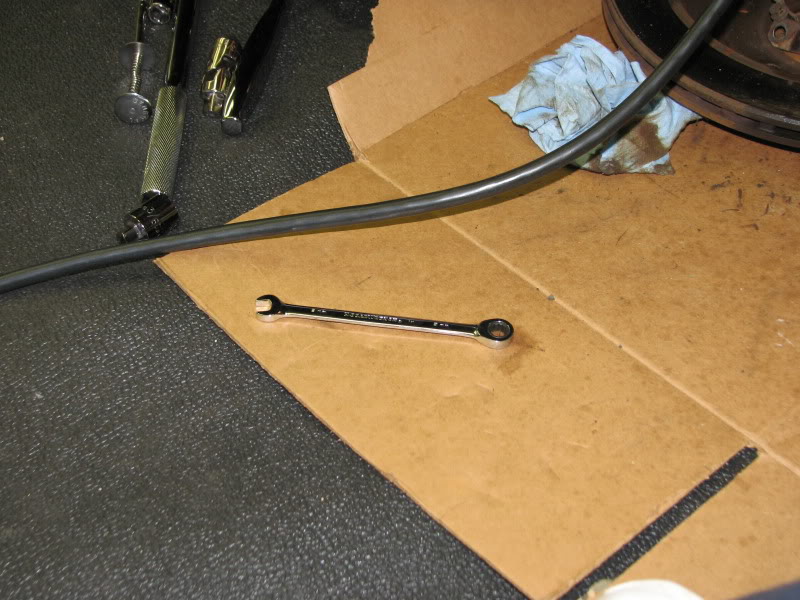
Here are the tools you'll need for the job:
8 mm socket
10 mm socket
18 mm socket
2 21 mm sockets (or one wrench & one socket)
2 24 mm sockets (or one wrench & one socket)
36 mm socket
Large breaker bar + pipe to provide even more leverage
Anti sieze
WD40 or equivalent rust/corrosion buster
Wood block and hammer (when the WD40 doesn't work)
Small pliers (pulling cotter pins)
T55 Torx bit
Torque Wrench (capable of at least 200 ft-lbs)
A few LONG 3/8" drive extensions
NOT NEEDED: 8 mm Gearwrench wrench (ask me how I know ...)
The basic procedure is fairly straitforward:
1 - Loosen stub axle nut
2 - Remove caliper and caliper mounting bracket
3 - Detach tie rod end, camber rod, and spring
4 - Remove half shaft
5 - Remove stub axle
6 - Remove old hub
7 - Reassemble in reverse order
Of course, the devil is in the details ...
1 - Loosening Stub Axle Nut
The stub axle nut is very tightly installed to start with, and time provides an opportunity for corrosion to work its way into the threads, thus making it even tighter.
I removed the wheel, popped out the cover, and reinstalled the wheel, so that I could remove the nut with the full weight of the car helping me. This is where you'll need your 36 mm socket.
I initially tried to looen the nut with just my breaker bar, but I couldn't budge it, so out came the persuader.
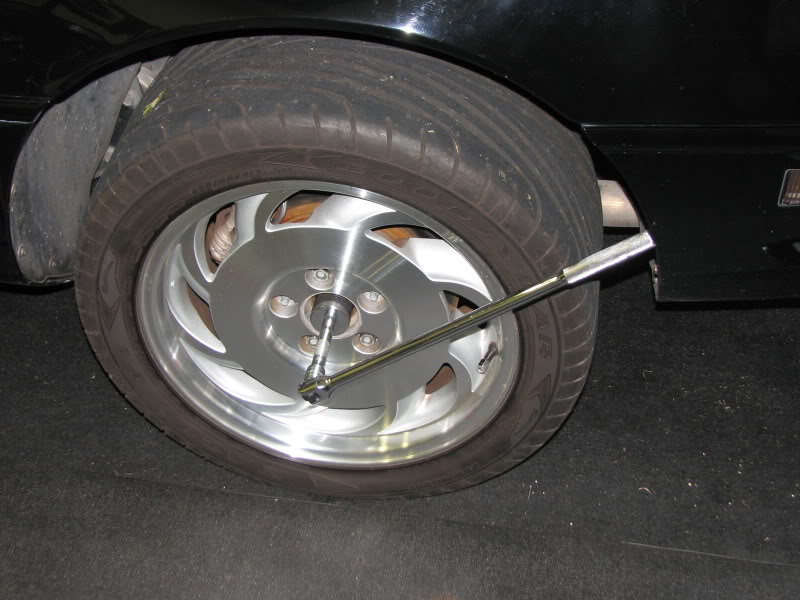
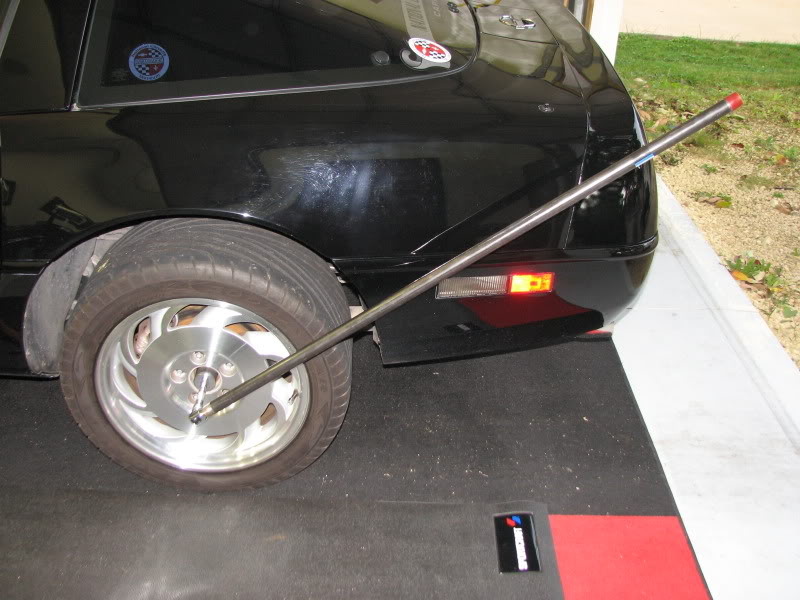
I used a four foot persuader, and it worked just fine.
I then put the car on jackstands front and rear, trying to ensure that I had plenty of crawl around space under the car.

There is a flat washer hiding behind the axle nut - don't forget to take it off!

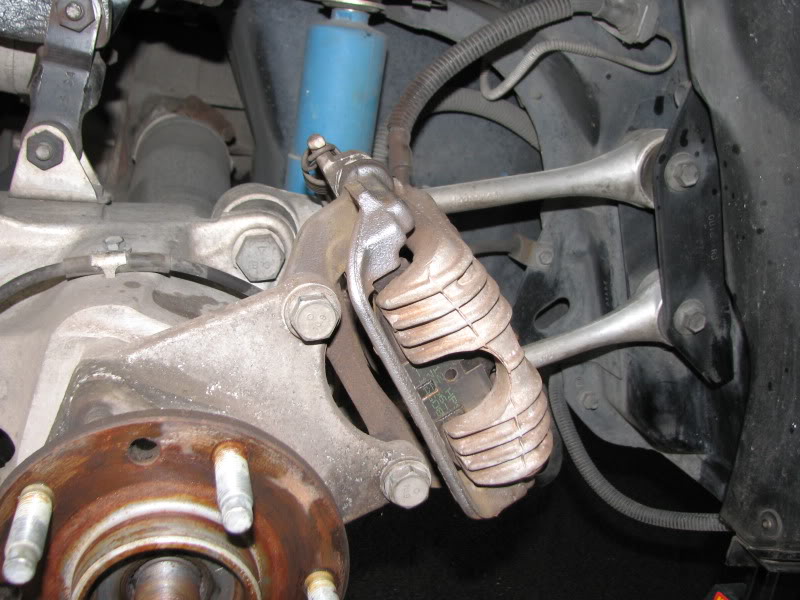
2 - Removing Caliper/Caliper Bracket
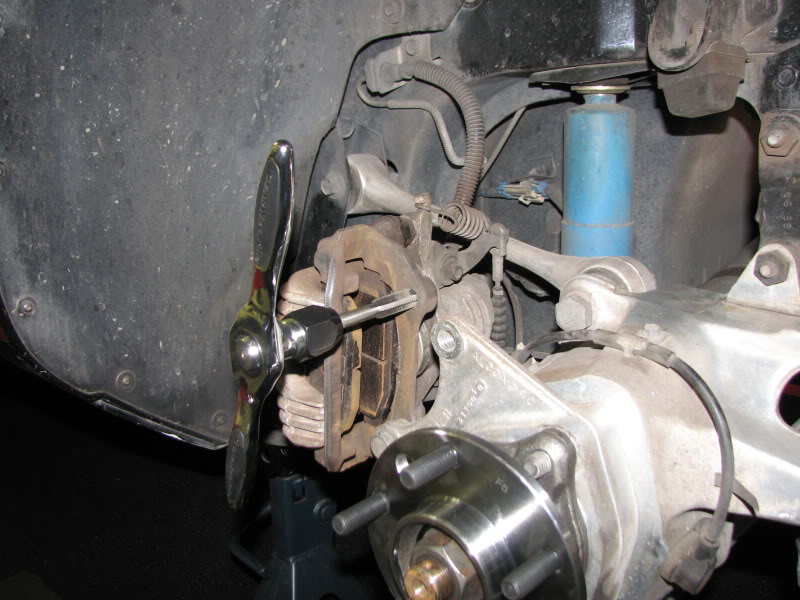
I removed the caliper bracket by loosening two 18 mm bolts located on the backside of the caliper. Once the caliper is removed, you can set it to the side. Make sure that the caliper is properly supported - don't let it hang down by the rubber hose, as you'll damage the line.
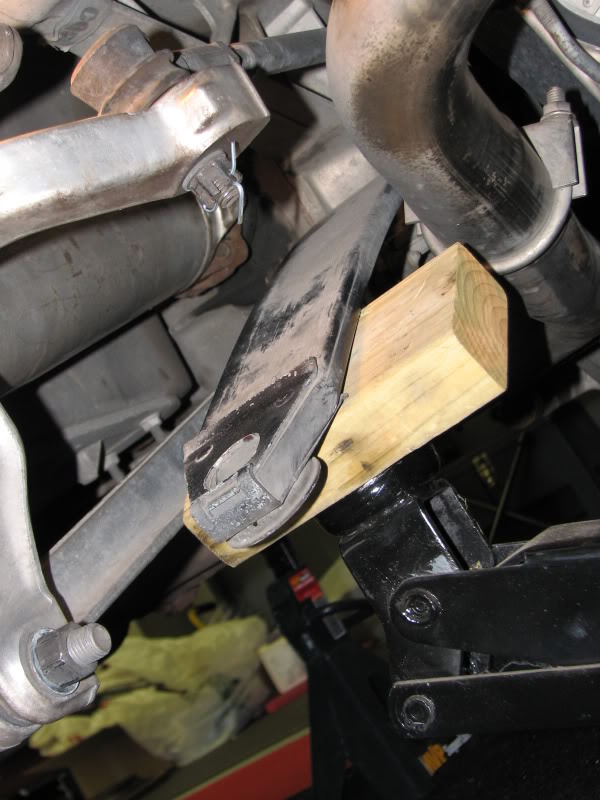
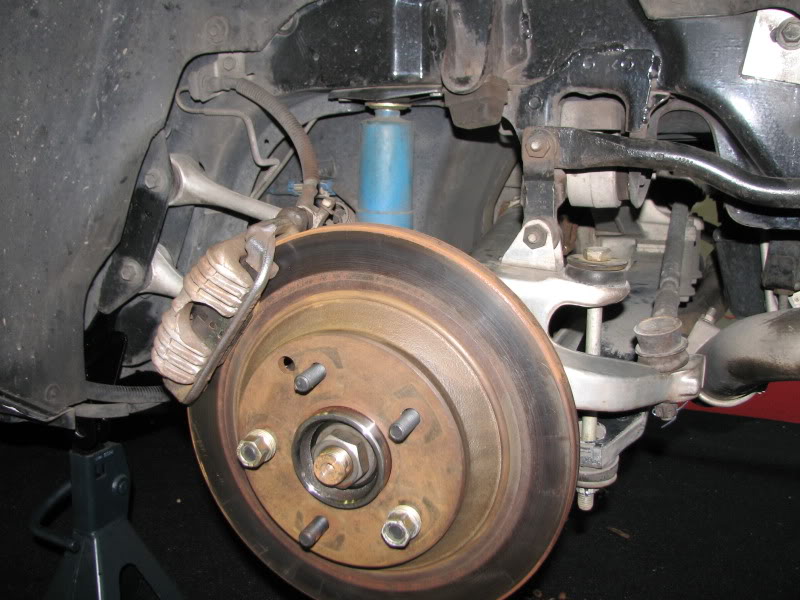
Once I disconnected the calipers, I thought that the rotor would be easy to remove. Wrong! The rotors have been on that car for nearly 15 years, and the rotors and hubs were quite attached to each other. I treated the rotors with AeroKroil, waited overnight, and then popped them off with a block of wood and a hammer.
Rotor Out of the Way ... Ready for the Next Step
I wasn't realy thrilled with the way the caliper/bracket fit on the suspension - so I thought of using the mounting bracket as a temporary mount - like so ...
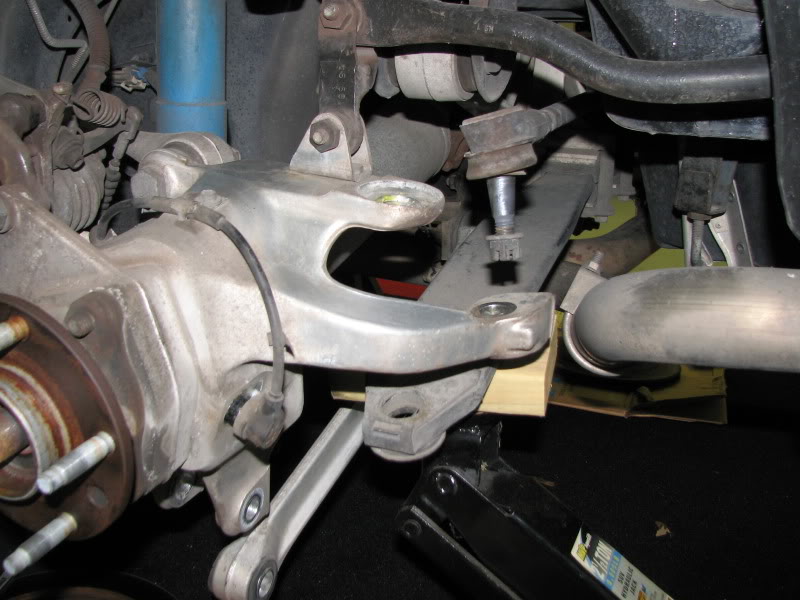
3 - Detaching Suspension Stuff
The next step involves detaching enough suspension components to allow removing the halfshafts. Once those are out of the way, then the hub can be removed. The Factory Service Manual doesn't require half shaft removal, but I think the job would be much harder that way. Since I couldn't accurately judge the condition of the half shaft u-joints, I elected to remove and replace them.
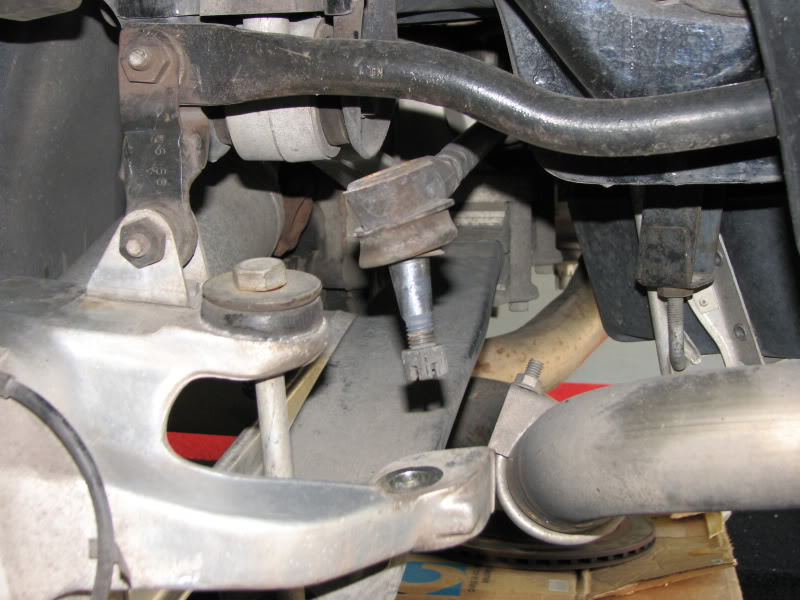
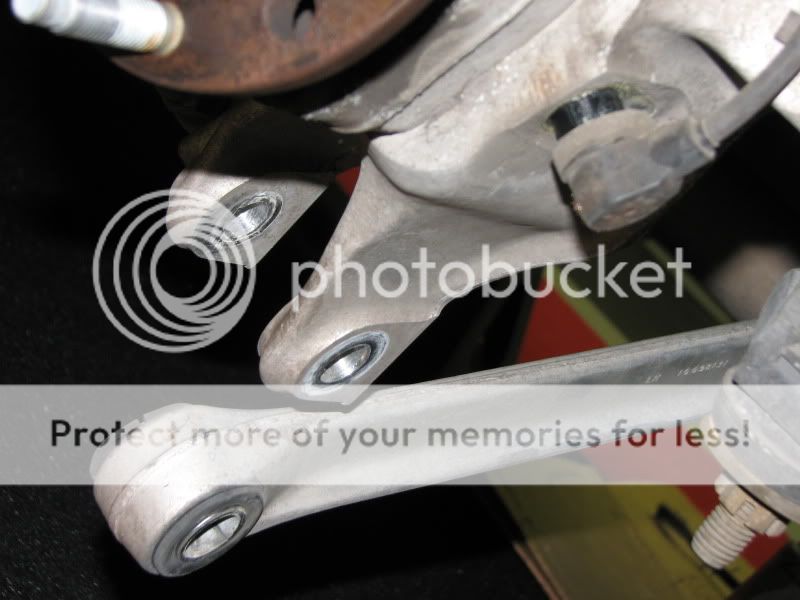
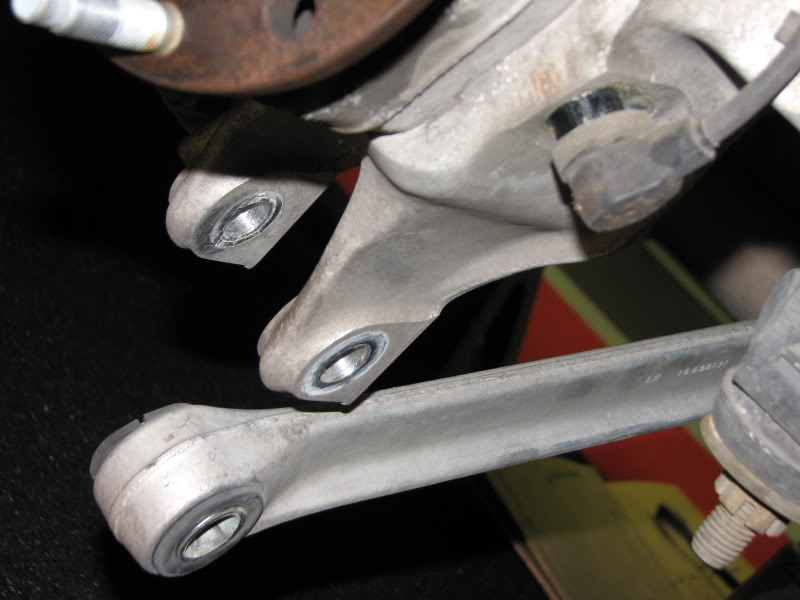
To accomplish this, the lower camber strut rod, tie rod end, and spring all need to be detached.
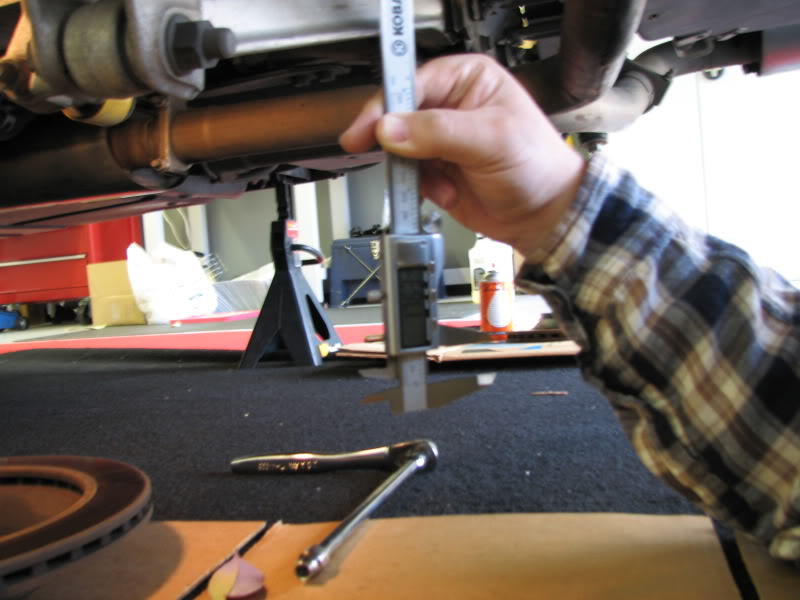
In order to get the ride height back to the original point, I considered counting threads from the bottom of the spring bolt. But then I got out my digital caliper and measured the distance from the bottom of the spring bolt to the nut.
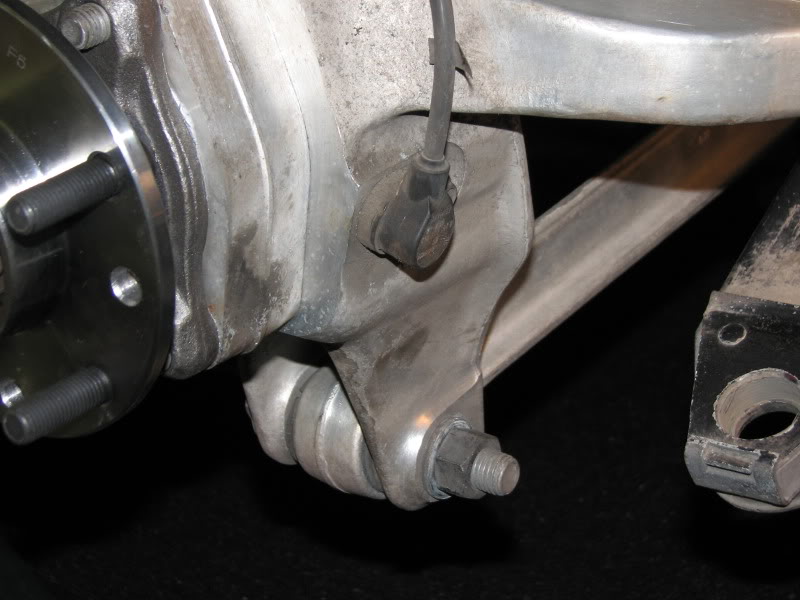
That done, I then removed the tie rod end.
I wanted to make sure that the wheel speed sensor wasn't damaged during the process, so I loosened the mounting nut (10 mm), and slid the sensor part way out. I only wanted to get it away from the axle gear, so I left it in.

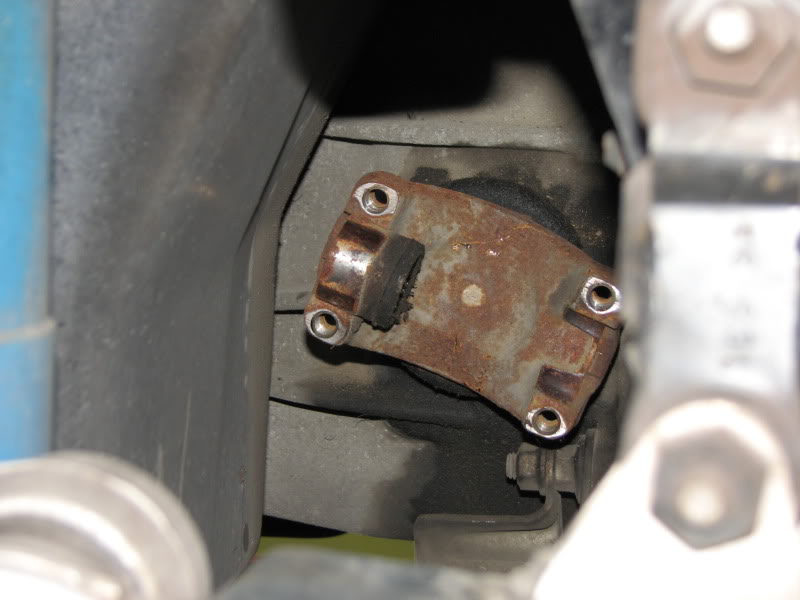
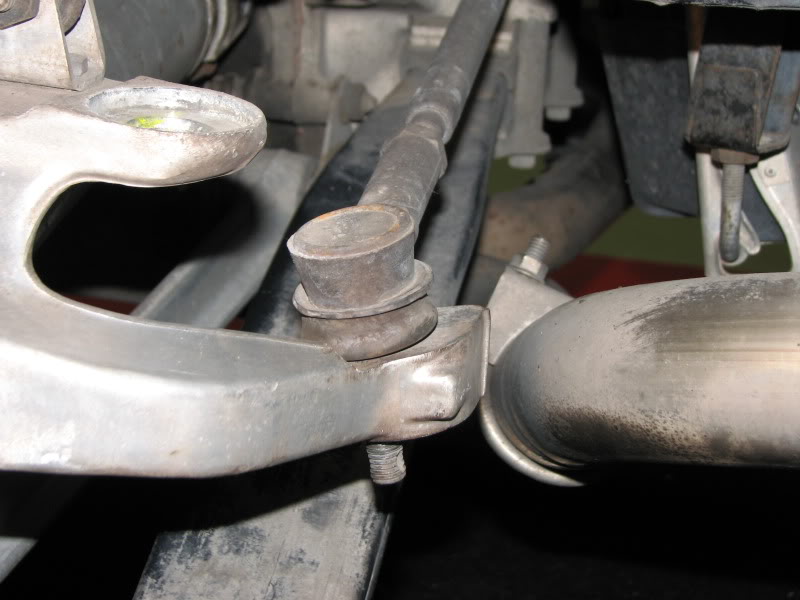
I then removed the camber strut rod. Some places I researched recommended disconnecting the strut from the camber adjustment point. Of course, that requires that you also carefully mark the position of the camber adjustment. I thought it would be a lot easier to simply remove it from the other end. These are 24 mm diameter.
It didn't take much convincing to remove this - I used a short block of wood and my hammer to drive it out.
Side Note: Now I'm really considering a project to replace those original bushings with polyurethane units. It looks like it would be a fun project!
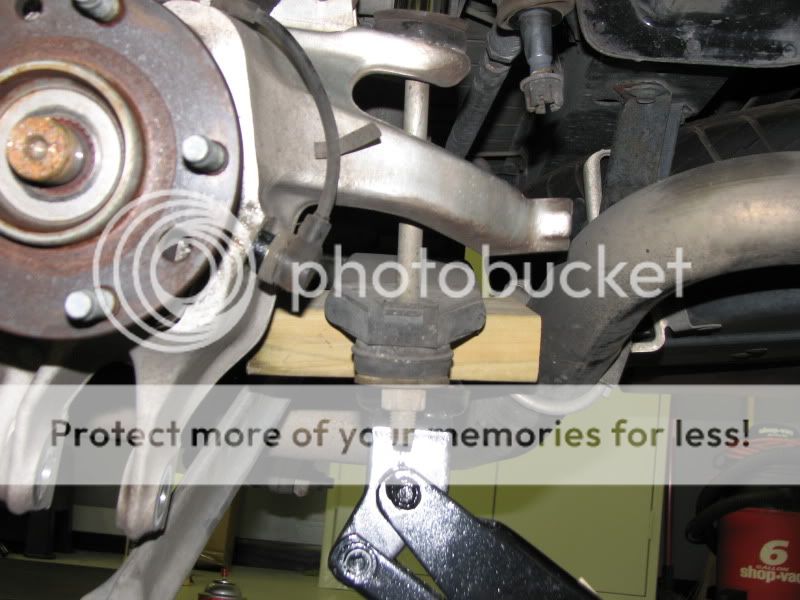
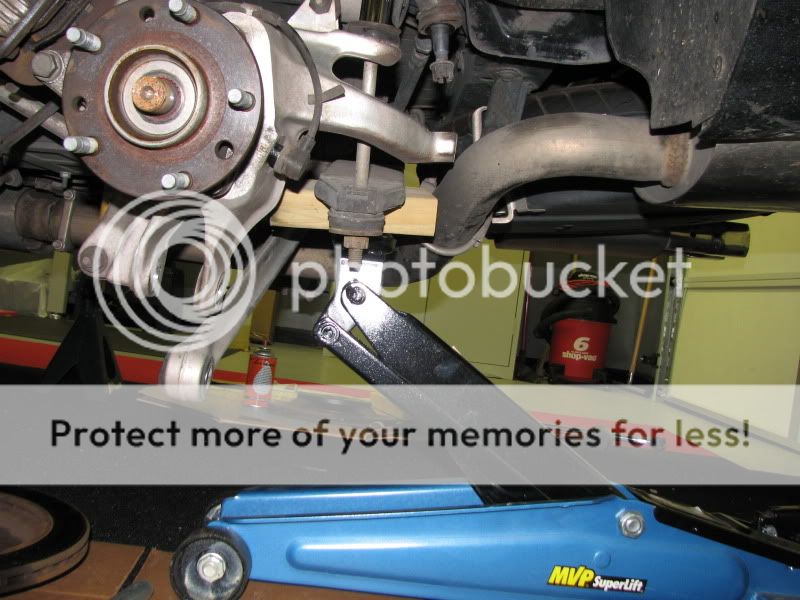
OK - now to disconnect the spring. The basic concept is to use a jack to take the tension off the spring, thus allowing you to remove the spring retainer bolt.


4/5 - Removing Half Shaft & Axle
I initially thought that I would remove the half shaft, then contend with removing the axle. In practice, I found that it was just as easy to remove this as a unit.
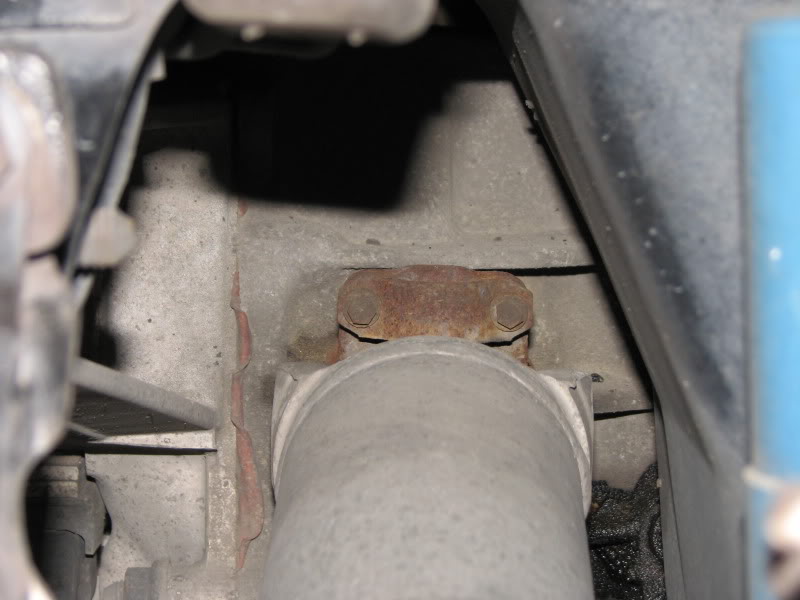
The first step was to loosen the 8 mm bolts hoding the u-joint straps in place. I loosened the inner strap bolts first. My approach was to line them up like this ...
Then, with the car in gear (actually, the first time it was with my son holding on to the pasenger side hub), I took my 3/8" drive ratchet and long extensions to reach in and loosen things up.

Once I broke the inner straps loose, I got under the car and loosened up the straps on the outer joints. Those were harder to get to.
I wasn't sure what was going to happen after I removed the straps from the u-joints, but I didn't really expect the u-joints to be frozen to both the axle and the differential! As a 'just in case' measure, I put the 36 mm axle retaining nut back on the end of the axle, and used a pry bar to break the inner joint away from the differential. Once it let go, I removed the nut from the axle, and not seeing any easy way to break the u-joint free of the axle, I just pulled the entire assembly out.
Side Note: About that 8 mm Gearwrench ... While I was under the car loosening the outer strap, I looked up and there was the slightly loosened strap from the inner side. I had a quick vision of removing those bolts and straps while I could easily see them, so put my trusty Gearwrench on the bolt, and made two swings ... then it occurred to me that the BOLT and the WRENCH were heading straight for the SHAFT, and I was going to get SHAFTED if I didn't get that wrench OFF the BOLT before it moved too far ... since my Gearwrench isn't one of the nifty reversible kinds! It was very nearly stuck in place, and I had to do some major grunting and groaning to get the stupid wrench off the bolt head! DON'T DO THIS ...
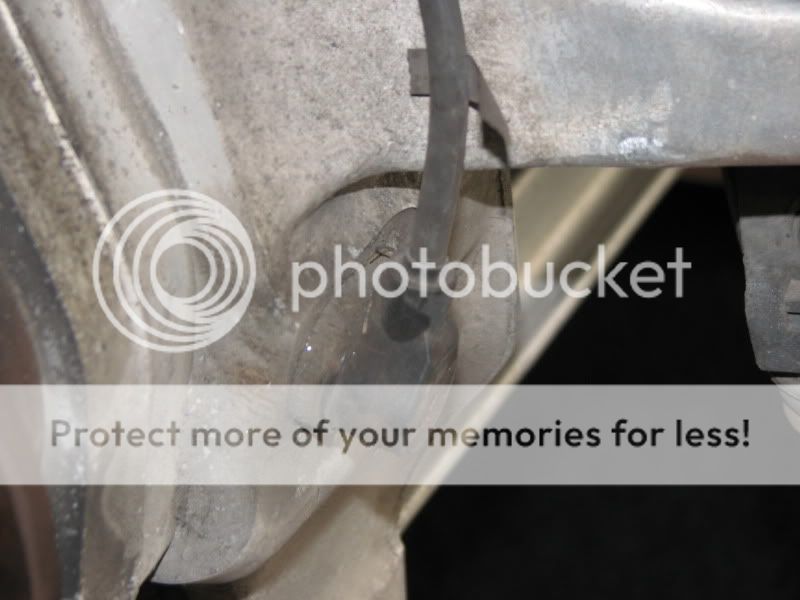
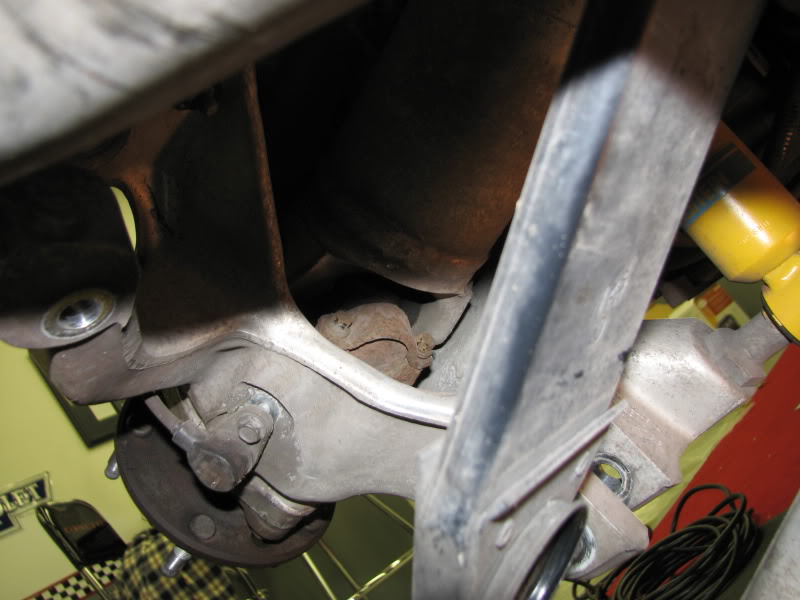
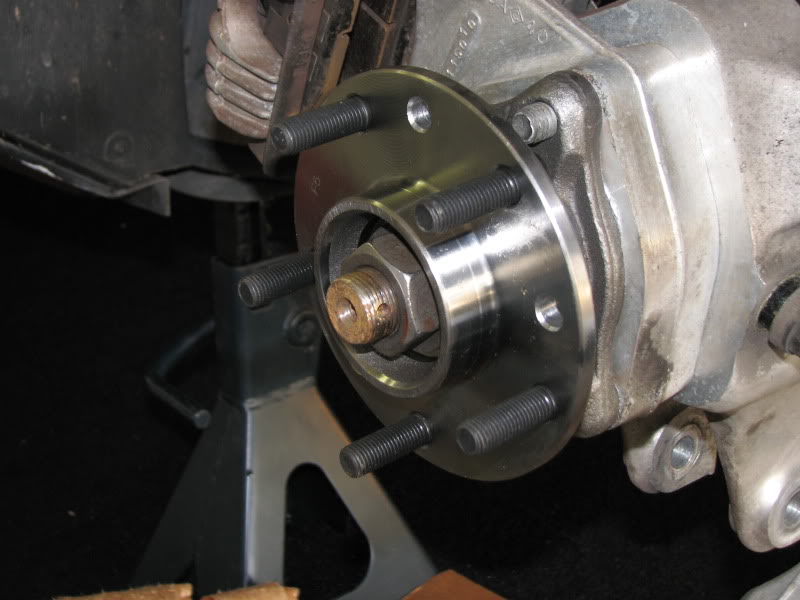
OK - back to the job ... Now that the shaft and axle were out of the way, the only thing left behind was this u-joint cap ...
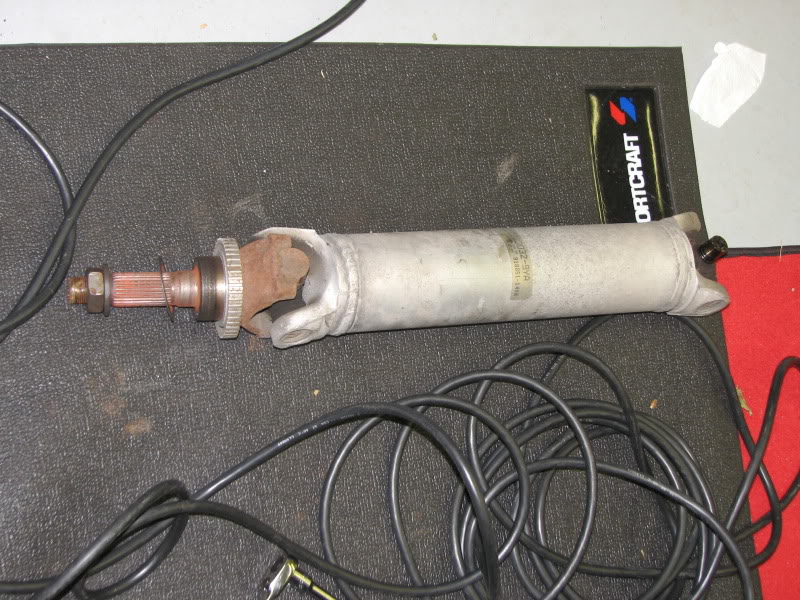
I took the shaft/axle assembly to the workbench and a couple of quick hammer blows on the old u-joint cap separated the axle from the shaft.

A quick inspection of the caps, needle bearings, and u-joints revealed a good amount of wear, so replacing the u-joints was a worthy investment. In the interests of time, I took the half shaft to a friend of mine to replace the u-joints while I went back under the car.
- Home
- Forums
- Technical Articles/muscle cars
- C1-C6 Corvettes
- Drive Train and Tires: Repairs and Modifications
You are using an out of date browser. It may not display this or other websites correctly.
You should upgrade or use an alternative browser.
You should upgrade or use an alternative browser.
rear hub /c4 corvette replacement
- Thread starter grumpyvette
- Start date
OldVetteFan said:6 - Remove Hub
You need a T55 Torx bit to remove the hub bolts. They are located inside the suspension member, and can be very, very stubborn.
I had my Torx bit attached to a long extension and my 24" breaker bar. I was really wishing that I'd jacked the car up another two inches, as getting to the lower Torx bolt was a bit tighter than I wanted.
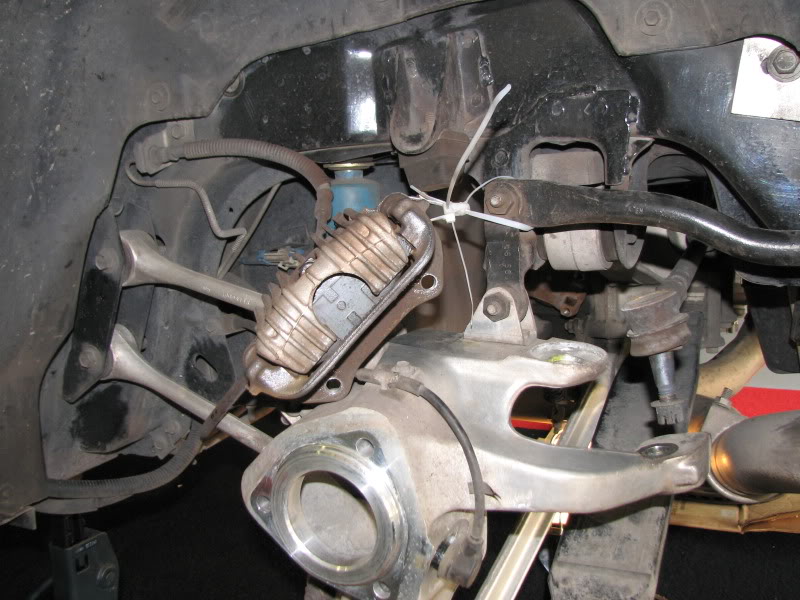
Remember that nifty idea I had to put the calipers back on the mounting bracket? What I didn't realize was that the caliper mounting bracket isn't part of the suspension member - it's held in place by the Torx bolts that secure the hubs. So when I got the three hub bolts loose, I couldn't figure out why the bolts were so reluctant to come out (I was still under the car). After I got the first bolt loose, I was working on the second one when I noticed something moving. So I crawled out from underneath the car and saw the problem. I then removed the caliper from the mounting bracket, and zip tied it.
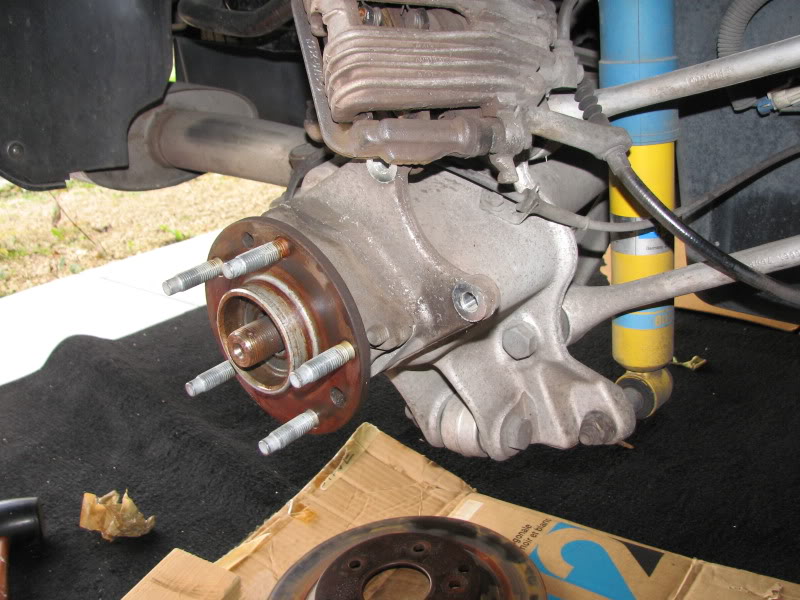
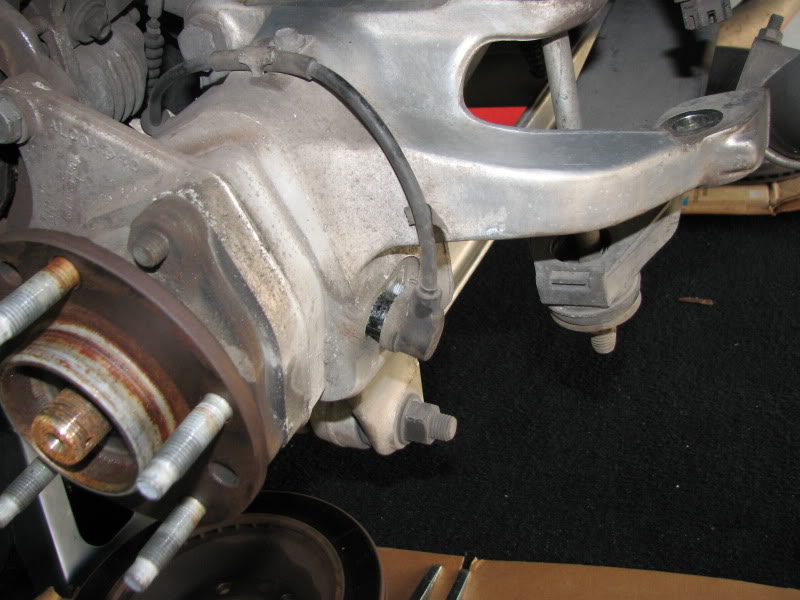
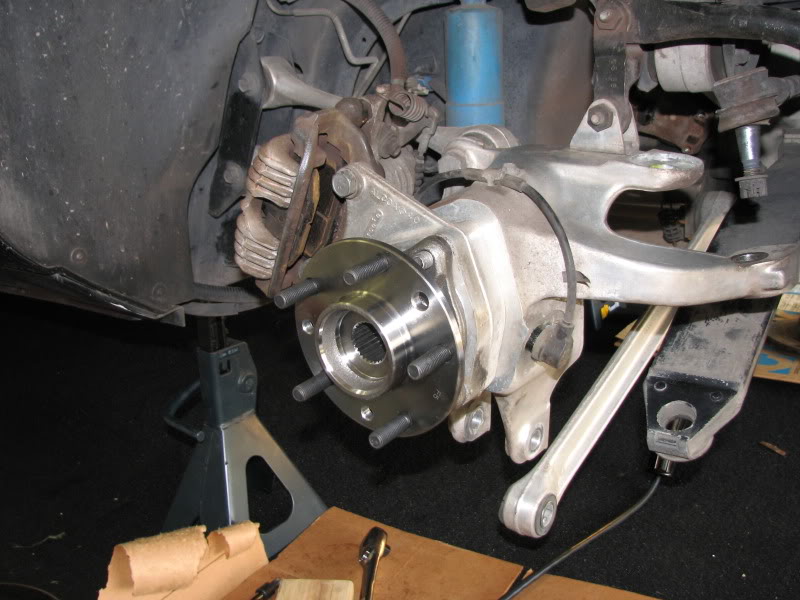
This picture shows the hub and mounting bracket removed, with the caliper assembly zip tied.
This picture shows the mounting bracket installed, with the Torx bolts ready to accept the new hub. I liberally applied anti-sieze to the Torx bolts along the shaft and on the threads.
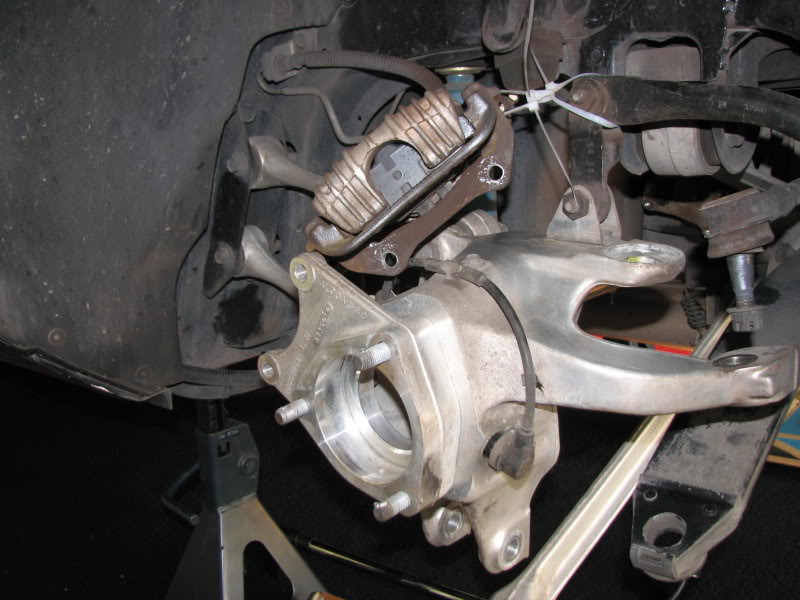
I then installed the new hub, and torqued the Torx bolts to 67 ft-lbs, as recommended.
I coated the axle with anti-sieze, replaced the old inner washers (GM P/N 14076924 @ $7.60 each), and installed the axles in the hub.
7 - Reassembly
The hardest part of reassembly for me was getting the half shafts back in. I had the caps taped (no dreaded fallout here!), and it became a simple struggle for mechanical dominance, as I insisted that the machine conform to my will. Once the shaft is in place, you want to ensure that each cap is secured in the tang on each yoke, as shown below.
I snugged up all eight strap bolts, checked tang to cap fit one last time, and then torqued the strap bolts to 20 ft lbs. I also put Locktite Blue on the threads to keep them in place.
With the shaft in, I tightened up the wheel speed sensor, and reinstalled the camber strut. I torqed the strut bolt to 100 ft lbs.
The tie rod end goes in next. I used my trusty block of wood and very light hammer blows to drive it back in place. Then on goes the nut and new cotter pin.
Then it was time to raise the spring and put the spring bolt back in.

I set the distance between the end of the bolt and the nut as previously measured with my digital caliper, and installed a new cotter pin on that one too.
I then cleaned out the threads on the caliper mount (as well as the caliper mounting bolts).
I used a wire brush (on a drill), cleaner, and Brakekleen to prep the rotors, and installed them and the calipers back in their proper place.
A buddy of mine has a 250 ft-lb torque wrench, so I used that to tighten the axle nut to 175 ft-lb. The FSM calls for 164 ft-lb, but I've also heard that 200 ft-lb is now recommended. I decided that 175 ft-lb was plenty.
I then put on the nut lock and new cotter pin, and installed the wheel - and I was ready to go! Well, I was ready to go after I completed the other side!
I've put close to 40 miles on the car since the job was done, and I'm happy to report that the clicking/popping noise is gone.
DONT FORGET TO CHECK TIRE PRESSURE SENSORS
88959446
SENSOR,TIRE PRESS IND(LEFT FRONT WHEEL)
Location: Driver Side
Y(UJ6) 01 -- -- Discontinued
10161856
SENSOR,TIRE PRESS IND(LEFT FRONT)
Y(UJ6) 01 -- -- Discontinued
88959444
SENSOR,TIRE PRESS IND(LEFT REAR WHEEL)
Location: Driver Side
Y(UJ6) 01 -- -- Discontinued
88959445
SENSOR,TIRE PRESS IND(RIGHT FRONT WHEEL)
Location: Passenger Side
Y(UJ6) 01 -- -- Discontinued
88959447
SENSOR,TIRE PRESS IND(RIGHT REAR WHEEL)
Location: Passenger Side
Y(UJ6)
Steven
Keep in mind both the bearings, and suspension bushings and ball joints, and u-joints and the grease being used must be both compatible and the grease should be refreshed and refilled at least once or twice a year on anything thats driven much, I've always used this, for most application's,
with ZERO ISSUES FOR DECADES,on several different axles.
drive shaft splines and even many wheel bearing assemblies,
and at about $6 a can its not too expensive and lasts for years
no its obviously not the recommended lubricant you asked about but I've found it functions very well.
I've even used it on trailed wheel bearings and never lost one even on almost yearly trips from florida to colorado pulling a loaded trailer
http://garage.grumpysperformance.com/index.php?threads/greasing-ball-joints-etc.3150/#post-66996
http://garage.grumpysperformance.com/index.php?threads/c4-vette-alignment-specs.14542/
Last edited by a moderator: