2Loose
reliable source of info
Hi to all you gearheads out there....
Not sure if I should post this here or not, but as this is a general build thread on a blown '67 Olds 425 motor it really didn't fit in any of the specific forums above. If you want to move it, Grumpy, please do so and let me know where it ends up!!! Maybe there could be a page just for general motor builds???
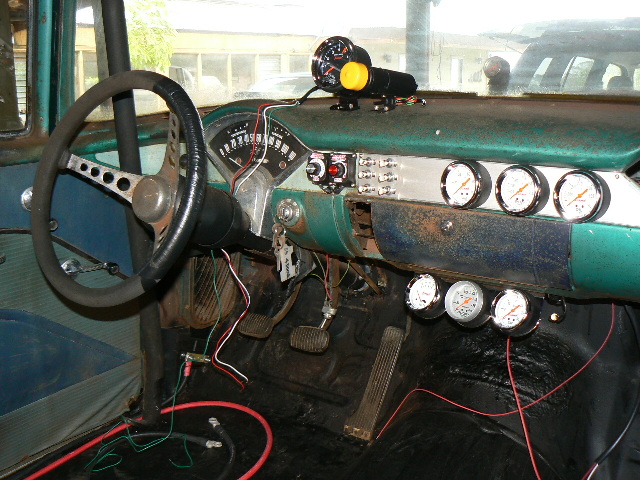
My 55 Chevy gasser project has been in the wiring stage, as eventually I want it to be street legal, I bought a Ron Francis "Bare Bonz" kit and have been trying to do a fairly complete and professional wiring job. That is nearly complete, and need to do some hook ups in front that require the motor be installed with fenderwell headers, fuel system, etc so I can route the wires neatly and safely around all that....
And I like to build my motors just as close to firing them up for the first time as I can, don't like to build a motor and then let it sit, like to get them running ASAP.....
So, had this '67 Olds 425 block that had been in our family beach cruiser, a Delta 88, for many years, the Hawaiian Rust took care of that car, it just fell apart, pulled the motor and Th400 and some other parts and the rest went to the recycler.
Had the block machined for .030 over forged JE pistons, align bored the mains, squared off the decks, polished the OEM forged crank (425 blocks have same bore as 455 blocks, but a slightly shorter stroke, and they use a great quality forged crank! The 455 cranks are cast iron....). The main webs are just not suited to a change to 4 bolt setups, too thin, but a machine shop in Illinois makes a really nice girdle that ties all the mains together and in addition ties them to the block pan rails. Machine work was done to enable use of one of these girdles....
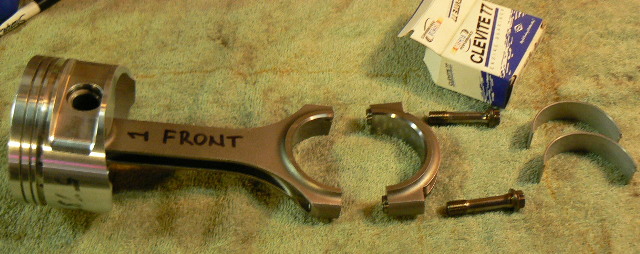
K1 forged rods were used, the 425 uses 7" rods, I like that, gives good piston top center "duration" during the combustion process which I believe builds better power during the power stroke. The bore and stroke of this motor with the .030 machine shop work is now 4.155" by 3.975", a bore to stroke ratio of 1.045, just slightly over square, a nice combo....
Had a pair of Edelbrock Performer RPM aluminum heads, they use a 2.072" intake and a 1.68" exhaust. Using a JE dished piston with 8:1 CR in this application. Special ordered a hyd. roller Comp Cam with .317 intake and .323 exhaust, and a duration at .050 of 230 intake, 236 exhaust, with a lobe separation angle of 113 degrees, should be a great blower cam for both street and strip! Using the ford 351W spec rockers from Comp (that's what fits the Edelbrock heads for the Olds), using the new Ultra Pro Magnum XD rockers in 1.7 ratio gives me a final lift of .539 intake and .549 exhaust, looks good to me! The springs I'm using are good to .575 before I get to coil bind, so I think I am good to go here! Also using the Comp hydraulic roller lifters. Checked the spring stacks and had to shim most to get the spec'd 1.800", 120 lbs seat pressure.
A buddy of mine here on Maui is a retired top fuel techie from the mainland, and knows head porting front and backwards.....
He ported my heads, did a nice, mild "street and strip" job for me, nothing too radical, they came out looking quite nice, although they have not been flow benched!
The manifold for the 6/71 blower is an older design Offy dual 4bbl, from Don Hampton, he machines out the insides of the two carb mounts opening it up to a single plenum, and welds in the blower mount plate, does a nice job! Port matched that intake to the heads to get a best fit....
Found a nice pair of used Mighty Demon 650's, set up for blower application, on the evilbuy site, the previous owner was upgrading to larger carbs for his 8/71 blown BBC!
When I ordered the blower from Don, I had him put on a slightly longer snout, so I can run two V-pulleys behind the lower blower pulley, for street use! Alternator only for now, but want to add AC later on....
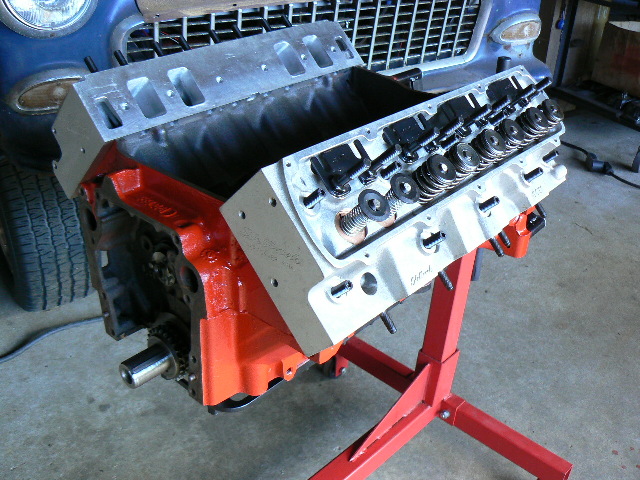
Have the block now on the stand, set up with one head, with #1 piston and valves, light springs, cam, #1 lifters, will degree the setup and see just how much valve/piston clearance I have with no head gasket (can add that in later) and set my cam straight up. Think that cam came ground 4 degrees advanced anyway, so nice to just check that out and see what's what with my setup!!!
Have a set of the Cometic head gaskets, kinda spendy, but with the blower setup I wanted those heads sealed off good! Am using ARP 7/16" studs on the heads, could have upgraded to the 1/2", but I think these will be just fine! It's interesting that ARP recommends, with aluminum heads, and using ARP moly lube, torquing the head stud nuts to only 65 ft-lbs! That's because the aluminum heads tend to grow a lot when they warm up, increasing the fastener loading! When rechecking the original torque, they also suggest letting the motor cool down overnight to make sure I'm back at ambient temp. when resetting the 65 ft-lbs torque! That also means I need to let my motor warm up completely before I start "sticking my foot in it...." each and every day!!! :roll:
I'm only planning on running about 5 lbs boost with pump gas, but I can always "up" my boost and run race gas later on if I want more power, retuning the Demons as needed. But with ladder bars and at most 12" wide slicks, we'll see just how well this rig hooks up with pump gas! I'll be real happy with 10's at the track, get into the nines and I have to get a license and hang a window net, lots of stuff I just as soon not do! I do have a fresh NHRA chassis cert good to 8.50's, the inspector was happy with the job I did on the chassis and cage setup!
Here's a couple of pix, more at the link....
LINK TO MOTOR BUILD PAGE....
http://home.roadrunner.com/~tooloose/
Much Aloha to All....
Willy
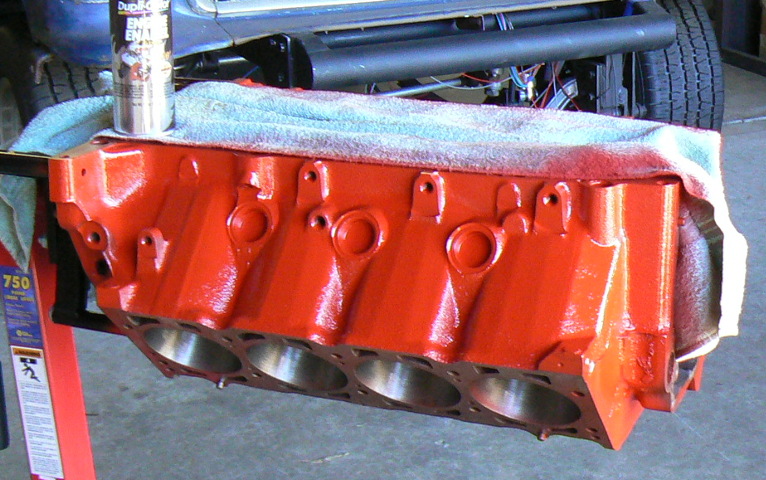
Scrubbing, cleaning and painting....
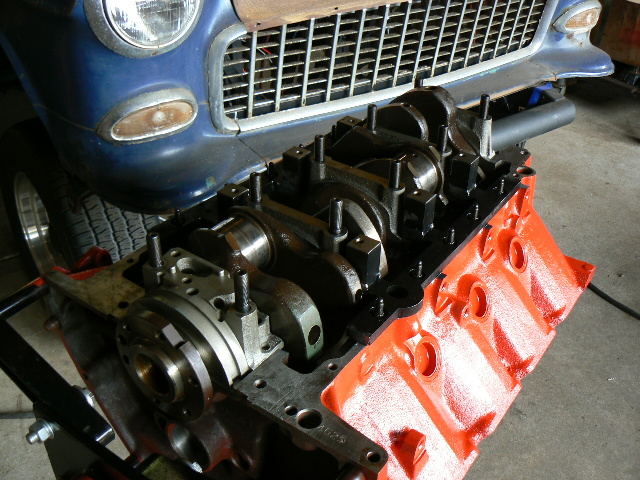
Fitting the bearings, crank and girdle....
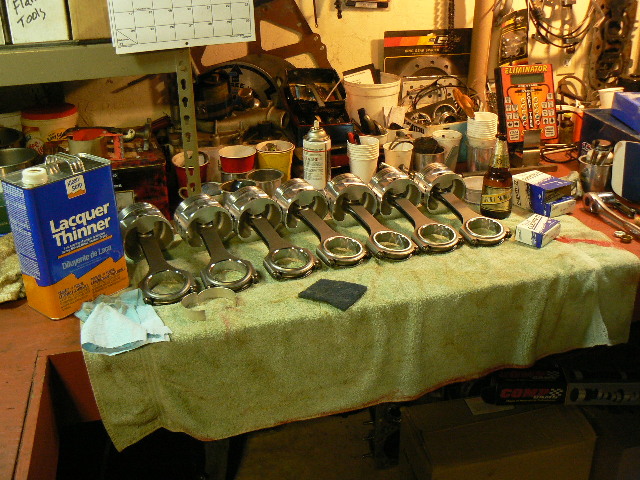
Assembling the rods and pistons....
Not sure if I should post this here or not, but as this is a general build thread on a blown '67 Olds 425 motor it really didn't fit in any of the specific forums above. If you want to move it, Grumpy, please do so and let me know where it ends up!!! Maybe there could be a page just for general motor builds???
My 55 Chevy gasser project has been in the wiring stage, as eventually I want it to be street legal, I bought a Ron Francis "Bare Bonz" kit and have been trying to do a fairly complete and professional wiring job. That is nearly complete, and need to do some hook ups in front that require the motor be installed with fenderwell headers, fuel system, etc so I can route the wires neatly and safely around all that....
And I like to build my motors just as close to firing them up for the first time as I can, don't like to build a motor and then let it sit, like to get them running ASAP.....
So, had this '67 Olds 425 block that had been in our family beach cruiser, a Delta 88, for many years, the Hawaiian Rust took care of that car, it just fell apart, pulled the motor and Th400 and some other parts and the rest went to the recycler.
Had the block machined for .030 over forged JE pistons, align bored the mains, squared off the decks, polished the OEM forged crank (425 blocks have same bore as 455 blocks, but a slightly shorter stroke, and they use a great quality forged crank! The 455 cranks are cast iron....). The main webs are just not suited to a change to 4 bolt setups, too thin, but a machine shop in Illinois makes a really nice girdle that ties all the mains together and in addition ties them to the block pan rails. Machine work was done to enable use of one of these girdles....
K1 forged rods were used, the 425 uses 7" rods, I like that, gives good piston top center "duration" during the combustion process which I believe builds better power during the power stroke. The bore and stroke of this motor with the .030 machine shop work is now 4.155" by 3.975", a bore to stroke ratio of 1.045, just slightly over square, a nice combo....
Had a pair of Edelbrock Performer RPM aluminum heads, they use a 2.072" intake and a 1.68" exhaust. Using a JE dished piston with 8:1 CR in this application. Special ordered a hyd. roller Comp Cam with .317 intake and .323 exhaust, and a duration at .050 of 230 intake, 236 exhaust, with a lobe separation angle of 113 degrees, should be a great blower cam for both street and strip! Using the ford 351W spec rockers from Comp (that's what fits the Edelbrock heads for the Olds), using the new Ultra Pro Magnum XD rockers in 1.7 ratio gives me a final lift of .539 intake and .549 exhaust, looks good to me! The springs I'm using are good to .575 before I get to coil bind, so I think I am good to go here! Also using the Comp hydraulic roller lifters. Checked the spring stacks and had to shim most to get the spec'd 1.800", 120 lbs seat pressure.
A buddy of mine here on Maui is a retired top fuel techie from the mainland, and knows head porting front and backwards.....
He ported my heads, did a nice, mild "street and strip" job for me, nothing too radical, they came out looking quite nice, although they have not been flow benched!
The manifold for the 6/71 blower is an older design Offy dual 4bbl, from Don Hampton, he machines out the insides of the two carb mounts opening it up to a single plenum, and welds in the blower mount plate, does a nice job! Port matched that intake to the heads to get a best fit....
Found a nice pair of used Mighty Demon 650's, set up for blower application, on the evilbuy site, the previous owner was upgrading to larger carbs for his 8/71 blown BBC!
When I ordered the blower from Don, I had him put on a slightly longer snout, so I can run two V-pulleys behind the lower blower pulley, for street use! Alternator only for now, but want to add AC later on....
Have the block now on the stand, set up with one head, with #1 piston and valves, light springs, cam, #1 lifters, will degree the setup and see just how much valve/piston clearance I have with no head gasket (can add that in later) and set my cam straight up. Think that cam came ground 4 degrees advanced anyway, so nice to just check that out and see what's what with my setup!!!
Have a set of the Cometic head gaskets, kinda spendy, but with the blower setup I wanted those heads sealed off good! Am using ARP 7/16" studs on the heads, could have upgraded to the 1/2", but I think these will be just fine! It's interesting that ARP recommends, with aluminum heads, and using ARP moly lube, torquing the head stud nuts to only 65 ft-lbs! That's because the aluminum heads tend to grow a lot when they warm up, increasing the fastener loading! When rechecking the original torque, they also suggest letting the motor cool down overnight to make sure I'm back at ambient temp. when resetting the 65 ft-lbs torque! That also means I need to let my motor warm up completely before I start "sticking my foot in it...." each and every day!!! :roll:
I'm only planning on running about 5 lbs boost with pump gas, but I can always "up" my boost and run race gas later on if I want more power, retuning the Demons as needed. But with ladder bars and at most 12" wide slicks, we'll see just how well this rig hooks up with pump gas! I'll be real happy with 10's at the track, get into the nines and I have to get a license and hang a window net, lots of stuff I just as soon not do! I do have a fresh NHRA chassis cert good to 8.50's, the inspector was happy with the job I did on the chassis and cage setup!
Here's a couple of pix, more at the link....
LINK TO MOTOR BUILD PAGE....
http://home.roadrunner.com/~tooloose/
Much Aloha to All....
Willy
Scrubbing, cleaning and painting....
Fitting the bearings, crank and girdle....
Assembling the rods and pistons....