My Cam Research for the Experts Eye

keep in mind thats its very common for most of the rings to tend to slowly rotate at different rotational speeds while the engine runs
thus I would hardly be surprised if the gap locations change constantly


Thanks again. Yes I know the rings will rotate , I'm just using the diagram as a start point for initial installation.

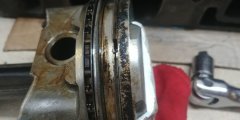
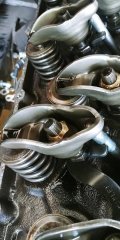
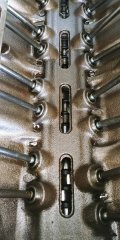
Incidentally I had these pics I took at first disassembly of this engine. Except for an intake gasket change in 2000, it had not been apart since 1987.
I promise you these are actual pics of the internal condition. This should help answer questions about the value of frequent oil and filter changes.
I'm lucky I had a very good engine to work with.

20211013_122019_resized.jpg
20200730_115922_resized.jpg

20200730_115911_resized.jpg
 
Last edited:
impressively sludge free,
for the time and usage!
yeah I fully agree, frequent oil & filter changes, are a great way to extend engine life spans.
use of synthetic oils and some MMO,in the mix as it has extra solvents and friction reducers,
can also help reduce sludge build-up
 
Incidentally I had these pics I took at first disassembly of this engine. Except for an intake gasket change in 2000, it had not been apart since 1987.
How many miles are on the engine when the pics were taken ? That would be more important than time when it's a fair weather car.
 
Very good point! I should have added it had a bit over 60k miles. Oil changes were never over 3k miles, usually time based vs miles. But on my other vehicles I go with 3k intervals anyway.
So it had an easy life except for sitting. This was evidenced by more wear in the bottom half of the main bearings. As it sat the crank/piston weight would bear directly on the bearing lower half. So any startup would put wear on that lower dry half till oil pressure floated the crank.
I'm re-using the Milodon oil pump, it's in great shape. Bottom of the oil pan had some light deposits as you might expect from oil particulates settling.
I recently did the chevy oil pump pickup o-ring replacement on our 2010 Roadtrek RV (3500 Express chassis/6.0) @74k miles. Always regular oil changes, super clean on there.
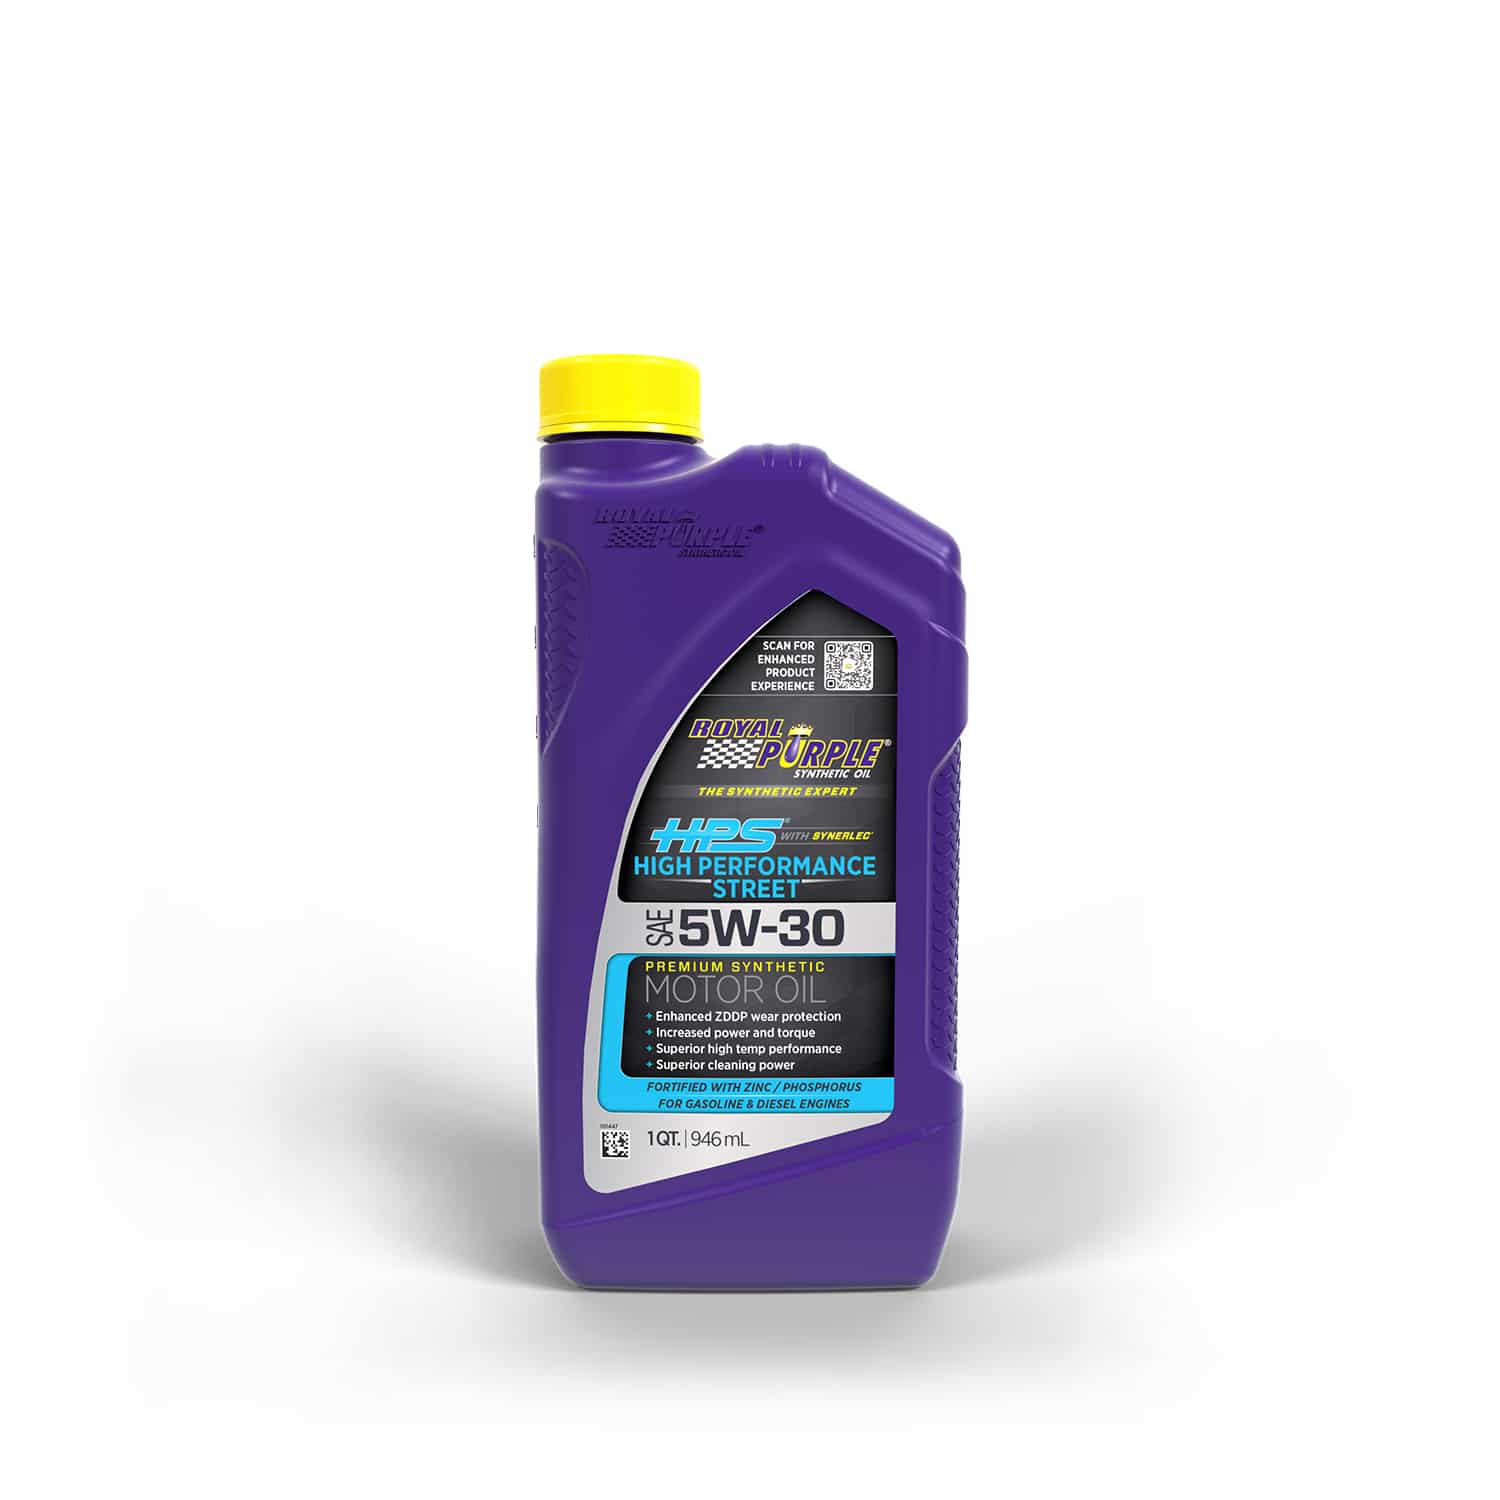
Anyway back to this engine - even though it's a hyd roller cam I believe that a good oil choice would be Valvoline VR1 10w30?
 
Oil changes were never over 3k miles,
You should save it and sell it on Ebay as lightly used !!!

Sounds very similar to the oil I'm using in the TBucket. Since we are NOT bound by a catalytic converter we can use an oil high in ZDDP.


1644016528425.png

Are you putting magnets in the engine/oil pan, I can't remember if you said ?
 
Are you putting magnets in the engine/oil pan, I can't remember if you said ?
Yes, I decided to use hi temp versions that Grumpy had recommended but just in the oil pan. I'm also using a magnetic drain plug, I think that should be enough.
For now I decided against valley screens and mags in the valley. I know there's a benefit but my overriding concern was the risk of something coming loose, even a hard piece of epoxy could do damage.
I know I can use either a 30 or 40 weight oil but with the tight bearing clearances I think the 30 wt will be fine, especially since I know this engine will get frequent changes.
I'm also reading around p 70 of your build (oil discussion).:thumbsup:
 
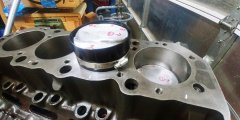
I hope that next week I'll get the pistons installed.
Like everybody else, there's always stuff coming up that needs attention or fixing.

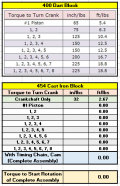
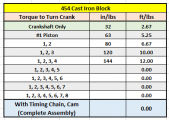
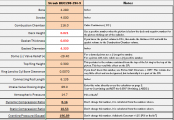
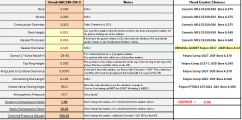
Rick, I've set up a chart to record the rotational readings, will be interesting.

1644692569180.png
 
I prefer to work with a checklist, and even with that, I can still make a mistake as shown with the rear main seal. But for me, having one is of benefit. So I've been working through a checklist for the piston installation, everything from ring gaps to orientation, rod orientation, cap tightening sequence, etc.

I've already gotten the ring gaps done, but I wanted to be 1000% sure that the 1-2 rings are installed with the correct side up. The oil control ring pack can be installed without a specific up-down face orientation.

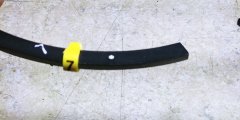
The top ring is easy, it has the dot side up. It does not have any obvious chamfer to it, so having the mark is critical. Each ring has been tagged to the specific cylinder it was gapped for.
20220213_095821_HDR_resized.jpg

20220213_100646_HDR_resized.jpg

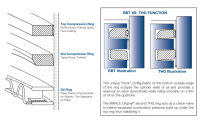
The second ring was not marked but it does have a chamfer. There are two types of second rings, RBT and THG. Per the instructions, this is an RBT ring (reverse-twist, taper faced) and has an inside chamfer. Both the instructions and the Mahle catalog show that the chamfer faces down. You can hopefully see the chamfer in the left upper corner of the ring in the picture. So in this case the "left" side on the picture will be installed facing down.

20220213_100758_HDR_resized.jpg

From the catalog:

1644770909761.png
 
Last edited:
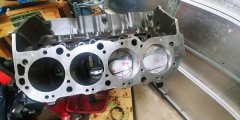
4 pistons installed, triple checked ring orientation, rod chamfer direction, etc.

I used this Summit ring compressor - it's tapered aluminum with a slight range size. It worked so well that at first I wasn't sure if all was good lol. I've got a Lisle band compressor that I've used in past years with the rachet plier type handles, but the compressor I used today far outshines it. Excellent little tool and much less than a dedicated bore compressor.

20220217_153011_HDR_resized.jpg

So far so good.

20220217_163538_HDR_resized.jpg

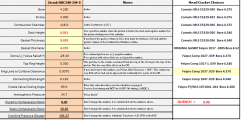
Rick, here's the readings so far. I took the average of 3 readings per cylinder (none of them were very far apart) just to be sure that I applied the same process to turning the crank evenly.
I think that the numbers reflect a honed block with fresh rings, not a new bored block - my guess is that there's a bit more clearance in there. This engine had great compression to the day I pulled it apart so it wasn't a surprise that it just needed a fresh hone and rings.
Everything turns nicely, got that shoosh sound from the pistons :)

1645142591412.png
 
Last edited:
Those numbers are very similar, sometimes yours are slightly higher and sometimes mine are slightly higher. The difference is never more that 6 in/lbs. Now you installed the cam, but did you installed the chain, you are showing zero at the bottom of your table ???
 
No, I've not finished installing the pistons or the timing chain. Only the first four pistons are in - as I proceed I'll fill out the rest of the table :thumbsup:
Then when my chart is done, I'll also repost yours next to it for easy comparison.

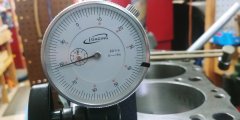
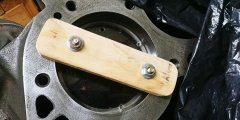
I also checked deck clearance on a couple of pistons, if I'm reading the gauge right it's .0209, rounded to .021? That's top of piston (not the dome) distance below the deck.

1182022132247.jpg

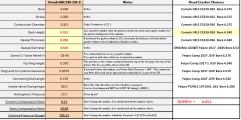
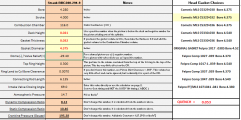
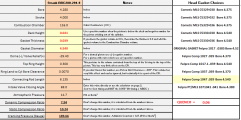
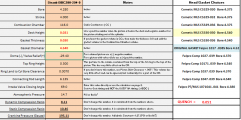
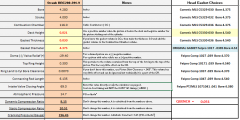
In looking back at the calc sheet from Rick, I plugged in the .021 deck clearance value (we had used .014 before) and it slightly reduced the DCR to 8.16 from 8.29. That's using the gasket data as shown - does this look reasonable for the head gasket? I'm getting ready to order them along with additional parts. I'll also go back through Grumpy's links for more info.
Grumpys gasket info

I've had success using Felpro Permatorque head gaskets, any reason to change that brand? I see a lot of Cometic usage with good results.

I was also going back and forth between ARP head bolts vs. ARP studs. Almost every bolt goes into a water jacket and I will use Permatex #2 sealant for the threads, zero leakage problems over 30 years when I used this last time - is there a particular reason to not use the Permatex or to use studs? If I had to remove a head with engine in the car, I would need to move the brake booster to get the heads off the studs, but that's not a huge deal. I assume the studs thread into the block a certain distance and then stop, also realize there is less pull on the block threads. Cost of studs is about double - Summit has them for $219 vs about $100 for bolts. For me, if the bolts do the job then I don't have to have the studs. Prior use was with bolts that had no problems and the block threads look good (I've chased and cleaned them).

Thank you for help on many continued questions!

1645214082176.png
 
Last edited:
In looking back at the calc sheet from Rick, I plugged in the .021 deck clearance value (we had used .014 before) and it slightly reduced the DCR to 8.16 from 8.29. That's using the gasket data as shown - does this look reasonable for the head gasket?
I would like to see the quench distance a little smaller and there seems to be some options, but not all are in stock at Summit. So you might have to go direct to SCE or JEGS. Most are .021" and .027" thick. I'm not sure if you would be comfortable at .042" quench with a .021 gasket.

What octane is available in your area? If it's 93 then you might be OK. But if you go this route, I would retard the cam 2°, so your IVC would be 71°. See Engine #3

Your best compromise would be the a .027" head gasket, giving you a quench distance of .048". My experience is very limited, so please wait to see how Grumpy feels, he might be perfectly fine with a .051" quench distance.


DCR_Straub_HeadGaskets.jpg
.
 
Last edited:
Thanks Rick, I can tell I need to study up on this.

Just as basic reference the head gasket that was used before was Felpro 1017 - 4.52" bore, Comp Thick .0385", Comp Vol 10.4cc
 
.051 quench is a bit more than the perfect/ ideal, or minimum possible quench,
but I would not be overly concerned, in fact your well within the preferred quench range,
your sure splitting hairs and I'd be very unconcerned here!
your trying for maybe .045-.050 as perfect quench so your more than close enough,
more than close enough to squeeze by in that application,:like:
with zero concerns , in fact anything under .060 should work, I would be happy with that in a BBC.
Id rather go that route than use a much thinner head gasket to reduce the distance significantly,
as ID be more concerned with potential piston to valve contact than quench issues.


Head attachment - I think that for my application the ARP hex bolt set (w/washers) will work ok and I can use Permatex #2 on the threads for water jacket sealing.

Head Gaskets - I've been looking at Cometic and Felpro gaskets. The block surface is flat but was not machined so I don't know what the RA is. With that in mind, I don't know if Composition or MLS type gasket may be more forgiving, or if it's not a big deal in my case.

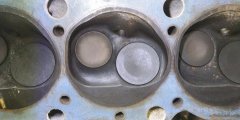
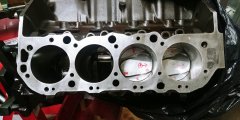
The original Felpro 1017 had a comp. thickness .0385" and gasket bore 4.520" - you can see the outline here on the head:

119202214116.jpg

I wanted to ask your opinion first on the gasket bore sizing. My basic choices are in the 4.3xx" and 4.5xx" range. I'm concerned that if I went with the 4.3xx range the wire edge of the gasket may be too close to the combustion chamber? I also see that the gasket bore is not concentric, so I assume that the gasket bore sizing is at the narrowest point?

Here's some gasket considerations, it looks like the Cometic C5330-030 may yield better results, but will the Cometic MLS be suited to sealing the deck surface vs. FP composition type?

Cometic 1:
1645303939567.png

Cometic 2:
1645302900188.png

Original Felpro:
1645302805145.png

Felpro 1:
1645303599456.png

Felpro 2:
1645303662859.png

I'm also keeping in mind the coolant passage setup on my(1969) block to ensure that this consideration is also included in gasket selection:

1192022123127.jpg
 

Attachments

  • 1645302671190.png
    1645302671190.png
    39.2 KB · Views: 3
  • 1645302542321.png
    1645302542321.png
    39.1 KB · Views: 0
  • 1645302473596.png
    1645302473596.png
    39.2 KB · Views: 5
Last edited:
just so I understand... what is your true bore diam."
if its 4.280, the 4.370-4.375 gasket should be fine
 
just so I understand... what is your true bore diam."
if its 4.280, the 4.370-4.375 gasket should be fine
Yes it's 4.28, I should have mentioned that too.

This is what the surface looks like - it's flat but not machined. I went over it again with wet 600 grit but essentially it's got staining showing. To me the staining is in "valleys" so I can't call the surface RA equal to a straight 600 grit finish. Going back and forth trying to figure out best material for sealing. If a composite gasket will work as well or better, then there's not really a need for the higher cost MLS. Just want to spend wisely.
20220106_131151_HDR_resized.jpg
 
Last edited:
Back
Top