"The 14 Car" Performance therapy project

I've been busy working on other peoples projects and some of my own other projects however it's time to get some work done on my bird and get it back together! The only part of the prizes I hadn't ordered yet were the Rushforth wheels.

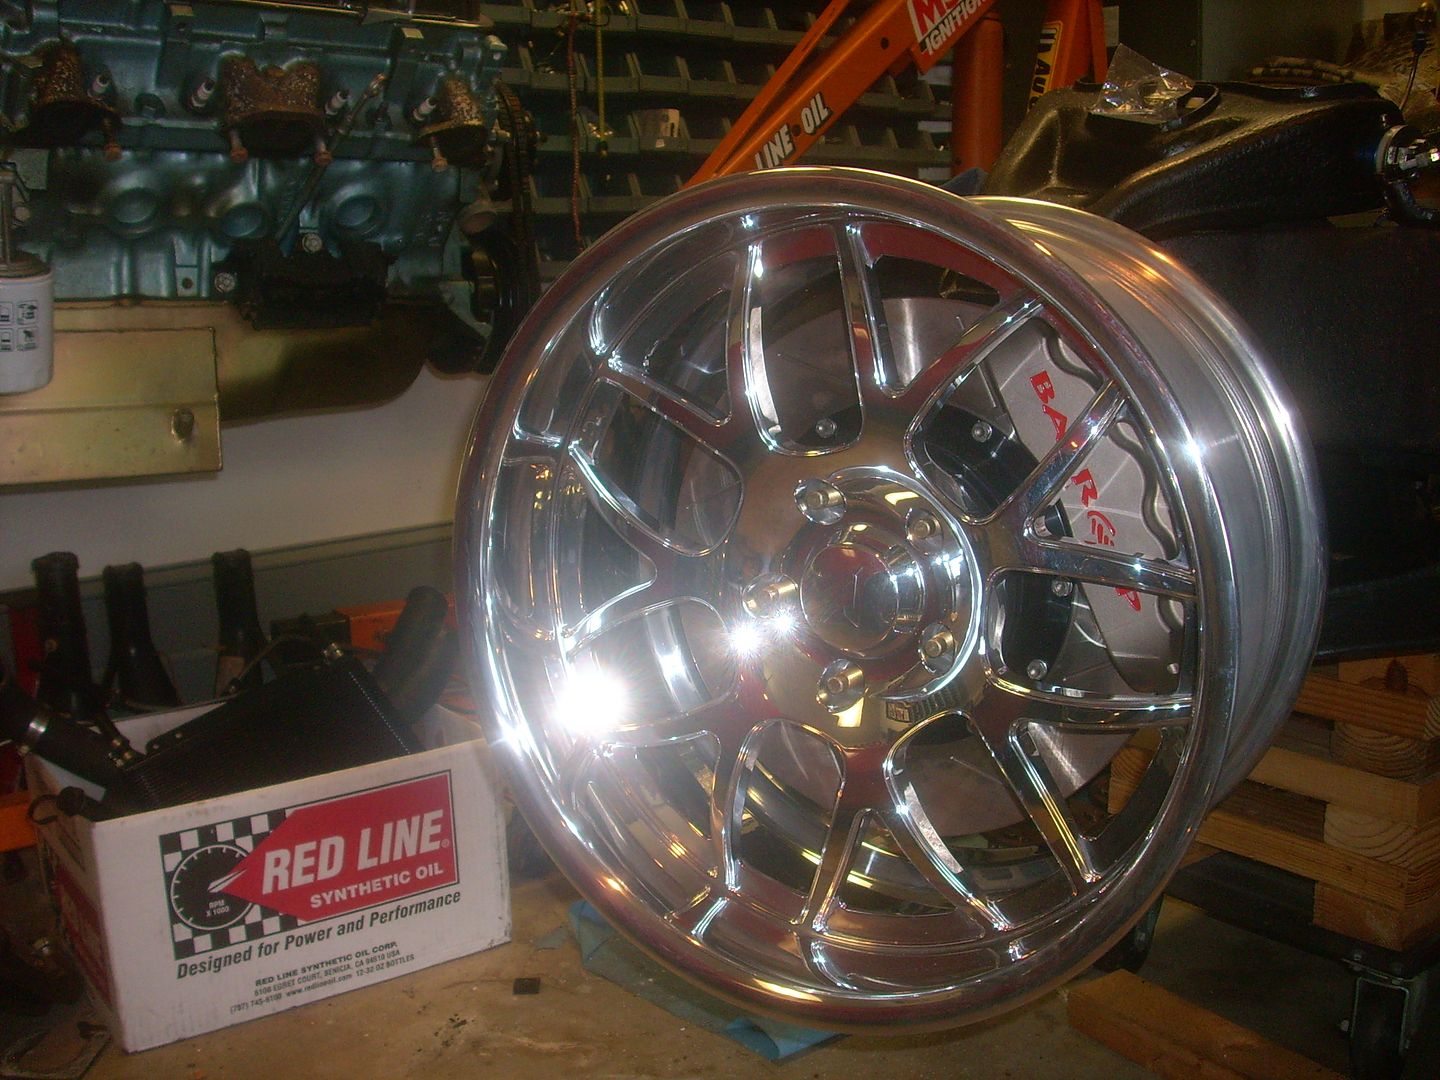
I decided that figuring out the backspacing I think will work for the new wheels and ordering them would give me incentive. So I ordered 18 X 10's with 6" backspacing up front and 5.5 backspacing in the rear. The 285/295 tires are Yokohama AO 48's which are a DOT legal race compound tire designed for track day use. I expected a wait time of 8-10 weeks which is not unusual for custom wheels and figured I'd use the time to start working on the car. Imagine my surprise when I got a tracking # within a week! I better get moving!

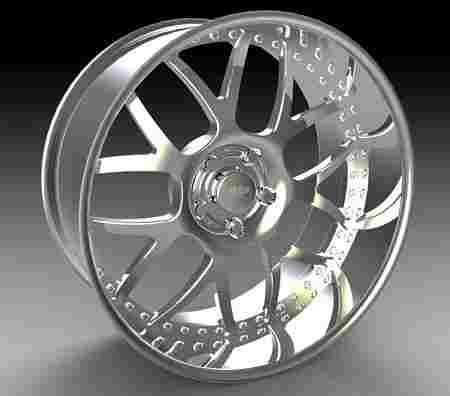
For those who've never bought custom aftermarket wheels like these Rushforth Night Trains there are other options besides the backspacing. You can get different finishes/colors, regular or hidden valve stems, exposed or hidden hardware etc. My wheels are the model shown below but will appear a bit different. Will post pics of mine when I get them.

NightTrain1s_medium.jpg
 
I test fitted one of the Rushforth Night Trains on the front to check clearance of the 18 X 10's and so far it looks like they'll work out nicely.

008-4.jpg


006-4.jpg


Haven't gotten the tires mounted yet but been working a bit on the rear disc install. First thing was to spruce up the paint from jacking the car on the rear. Since this car gets tracked and I might wreck it one day I just make the underside look nice but no powder coating or more expensive appearance things. So I "fixed" the paint by giving the affected areas the Krylon touch with the same semi flat black I've been using on the car the last 20 years.

It's going to be very tricky getting the parking brakes installed with Moser tapered axles and big Ford axle housing ends on a GM 10 bolt. I'm contemplating removing the axle bearings and trying to slide the complete backing plate/park brake assembly on as a unit then reinstall the bearing and then install the whole shabang at once. Anyone who's ever tried this combo please let me know if you've got a tip to make the install easier.

002-36.jpg


003-20.jpg


009-11.jpg


008-8.jpg


010-15.jpg


011-15.jpg


005-14.jpg
 
I was working on the rear axle doing the rear disc install (more on that later) and then our weather here turned to the time of year where it's the best time to do bodywork so I shelved everything else temporarily to concentrate on the bodywork portion of the project.

I'm replacing several pieces on my car with "better" ones than I could find (or afford) when I first painted the car 20 years ago. I collected these pieces over 20 years and am finally painting them since the cars apart anyway.

1st up is a deck lid. The one on my car now was the original esprit lid without spoiler which isn't as straight as I'd like. I had drilled holes and mounted pieces from 3 different spoilers on the car at the time. I parted a 76? TA back in the 90's and saved the deck lid and spoiler for use now. Spoiler will be modified. I didn't completely strip the inside of the trunk because it's a lot of work few will ever see and not being in the sun the paint isn't cracked. I did strip the edge and smoothed a dew dents.

002-43.jpg


005-Copy-1.jpg


002-7.jpg


The trunk filler on my car wasn't as good as the one on the parted car so it came along for the ride and got stripped as well.

007-18.jpg


The hood on my car was originally a stock flat hood someone did a nice job of cutting a shaker hole in before I ever had it. I bought a stock TA hood long ago and have kept it waiting for paint. Because my job involves a lot of underhood restoration projects and customers will want a peek at my own car I'm kinda forced to do a nicer job than I would normally do to a car that might get stuffed into a tire wall at a track. So I stripped and smoothed the complete inside and outside of the hood. I've got over 20 hours in it so far!

The hood was media blasted and primed before I bought it a long time ago so I wanted to start with bare metal. While using a DA to strip it I mark all the high and low spots so I don't miss any then sand out the paint before hammer/dolly work and thin filler.

008-7.jpg


010-4.jpg


010-5.jpg
 
I love the way you modified an old bed frame to fabricate that rolling differential stand, that shows one of the prime skills every hot rodder needs, the ability to take whats available and turn it into something useful

diffstand1.jpg

diffstand2.jpg

diffstand3.jpg


every shop needs some basic tools and while every shop may not have them, you can bet every shop would be better off if they had them available

A DECENT DRILL PRESS
g7946_det1.jpg


http://www.grizzly.com/products/Combo-Lathe-Mill/G9729
A DECENT WELDER
252mig.jpg

AND A DECENT WORK BENCH SURE HELP
worktable+with+vice1275438480.jpg

a decent vise
97100.gif

a sturdy engine stand
ntenginestand1.jpg

and a sturdy engine crane with engine tilter
abfb_400.jpg
 
OMG i just found page 2 :O, am going to enjoy this :)
Thanks for taking the time to make this project topic :)
Nice trans am :!
 
grumpyvette said:
I love the way you modified an old bed frame to fabricate that rolling differential stand, that shows one of the prime skills every hot rodder needs, the ability to take whats available and turn it into something useful

every shop needs some basic tools and while every shop may not have them, you can bet every shop would be better off if they had them available

Glad you guys are enjoying this thread!

I built a lot of things for my shop out of discarded items like the bed frame/rear end stand. There's also shipping skids into work bench, roll bar into paint stand, kitchen cabinet displays into work tables, appliance display into sandblast cabinet table, as well as re purposed commercial benches, slatwall, gridwall and other items.

There's a long story behind building my current work spaces and starting over so to speak. Due to circumstances I started the garage/shop build with the thought that I should be able to walk away with the tools and lights and give away or leave anything I built. So over the last 3+ years I turned about 1/3 of my house into shop areas without spending hardly any money. Full story here http://grassrootsmotorsports.com/forum/ ... 721/page1/

As for the shop tools Grump mentioned I've got all the ones mentioned plus many more. Most acquired in recent years as used items to replace ones stolen in two separate incidents.
 
Living close to the Atlantic we get an ocean breeze most days. Since it was calm today I took the opportunity to spray some primer on pieces that were ready for some paint.

My high tech mixing station.

002-11.jpg


My fabulous tropical spray booth. Yes, I need to mow the lawn (weeds) but it's bodywork season!

001-13.jpg


Some neighborhood quacks stopped by to offer assistance (beg for food). While some guys have a shop dog or cat the ducks have decided it's fun to stop by my house get a bread snack and check out whatever I'm working on. They'll stand in front of the garage if the doors open but not come in, however if I'm outside they get underfoot and sometimes get banished like they did today ahahaha.

003-12.jpg


004-6.jpg


All primed inside and out with high build sandable primer. Ya ya I know "Whats that Fox body notch trunklid doing in the mix?" It snuck in and will be painted white.

008-9.jpg


007-7.jpg
 
I decided to modify a rear spoiler with the hope of increasing downforce. I will be making a front spoiler extension & splitter so hopefully this will balance it out a bit. I'm adding fiberglass to a stock rear 3 piece spoiler to make it about 1" - 1 1/4" taller.

So far I've got about 80 bucks in materials and it looks like it'll work. I used some roofing flashing to make a sort of mold on one side of the spoiler to support the fiberglass & resin.

011-5.jpg


After building up one side with several layers of fiberglass I removed the flashing and added several layers to the other side.

001-14.jpg


Then sanded with an air tool with rough twist lock 3" pads to create the curves and zip off the excess.

001-15.jpg


After another coat of fiberglass resin and another rough sanding *I'll smooth out the surface with a skim coat of bondo and prep for paint.
 
The rear spoiler is roughed in and will get finish work done later while mounted to the car. I started working on the front bumper I'll be using. I want a bumper without the jack hole slots for a cleaner look.

Starting with a core I bought many years ago I soda blasted it to get off most of the old primer & paint that someone put on it. Then mounted it to my "whatdayacallit" body/paint contraption while bolted to a board to make it easy to work on. This way I can spin the bumper to work on top/bottom and the part doesn't keep flexing like they do when trying to work on regular bodywork stands.

There was a section that had lifted from the metal core which happens to many of the 70-73 bumpers. So I drilled holes in the affected area, scraped inside to loosen rust/dirt etc. and then blew out the junk with an air hose. Then pumped panel bond into the void through the holes and clamped overnight.

After the panel bond was dry I ground off the paint sticks and excess panel bond and used 3M flexible parts repair material to fill the voids and other bumps cuts etc. on the bumper.


Jack hole slot removal. Prep slots by roughing up and chamfering the rubber around the slots with dremel tool. Panel bonded a thin piece of aluminum to inside of bumper, let dry. Filled slots 1/2 way with panel bond , let dry. rough up panel bond and use #M flexible part repair material, let dry. Sand & fill with 3M till smooth.


Nice work.
Your goals are to reach 200 mph.
You have to be carefull not to create to much aerodynamic drag.
Rear spolier downforce is a good idea.
If built wrong or too tall it will slow the car down tremendous.
Air brakes on all the time.
An Adjustable NASCAR Style Rear Spoiler may be required.
Used in 8-second 5.0 Stang drag Racers & 6-second Drag Cars with over 2000 Hp.
Lowering the car cuts aeordynamic drag tremendous expodential & Adds downforce automatic.
Grumpy Recommends 5" Min.
It needs to be 3"- 1" to be effective 160-300 mph.
Held back by Oil pan to ground clearance.
Means Dry Sump with a 4-5 stage Weaver or Moroso Race Oil system.
11-18 quarts total on a Big Block Pontiac V8.
There are ways to cheat & add more antisquat to the stock 1970-1/2 Trans Am rear suspension.
I did it to my TA.
Works Awesome.
 
87vette81big said:
Nice work.
Your goals are to reach 200 mph.
You have to be carefull not to create to much aerodynamic drag.
Rear spolier downforce is a good idea.
If built wrong or too tall it will slow the car down tremendous.
Air brakes on all the time.
An Adjustable NASCAR Style Rear Spoiler may be required.
Used in 8-second 5.0 Stang drag Racers & 6-second Drag Cars with over 2000 Hp.
Lowering the car cuts aeordynamic drag tremendous expodential & Adds downforce automatic.
Grumpy Recommends 5" Min.
It needs to be 3"- 1" to be effective 160-300 mph.
Held back by Oil pan to ground clearance.
Means Dry Sump with a 4-5 stage Weaver or Moroso Race Oil system.
11-18 quarts total on a Big Block Pontiac V8.
There are ways to cheat & add more antisquat to the stock 1970-1/2 Trans Am rear suspension.
I did it to my TA.
Works Awesome.

Reaching 200 at one of the mile events is just one thing I'd like to do but whether I actually hit 200 doesn't really matter much, the fun for me is running flat out for a mile safely. I'm only licensed to 150 MPH so I'll need to move up 3 grades with qualifying passes if/when the car and I am capable of 200 at some point. Dade/Collier airport has stopped issuing permits to hold races here in FL and the NC track closed. The closest mile tracks now are in Maine, Ohio, and Texas so it'll be a while before I get to any of them

I am doing the Adams mod to the rear spring front mounts for anti-squat. I've discussed my uses of the car and modification plans with the chassis engineer who actually came up with it for Herbs car, Harry Quackenboss. I'm also adding PTFB spherical front spring eyes at the same time. I've considered a centering device like a Watts link but it's not in the budget for this go round of upgrades.

Road course track days are my favorite type of event so most of my efforts are to enable the car to be better than the driver there. I'll have at least 2 possibly 3 different spoiler/diffuser combinations for the rear and probably 3 different configurations for the front splash pan/air dam/splitter. Different set ups will be used for road courses, land speed races, open road races, and drags.

I run a dry sump capable Canton road race pan as a wet sump now and will probably switch to dry sump when I build the new engine.
 
Watts link not required.
I did Adams Mod.
Works.
Rear Sway bar 1970TA. Works.
Effective to 175-180. Did it.
 
Lowered my 70 TA.
Just 2" ground clearance at Hooker Super Comp Round Port TA Headers.

Stock 70 TA spoilers.
 
High spring rate front coils & rear leafs required.
Speed in mind & handling above 160 mph
 
Were you clocked at over 160 on track? I ran my bird through the traps several times at 160 MPH on the stock speedo at the ECTA mile in NC. Timing traps indicated 136 MPH. At the time I was running original stock 2.72 rear, original stock T-350 with a shift kit, and very close to stock diameter tires. Discussions with others indicates the old stock speedo's in F bodies aren't accurate in the upper ranges.

I've been clocked by police with radar (on track) at 158 MPH but I know I wasn't going that fast unless the MSD electronics lie. Max speed right now is 152-3.

The suspension I had in the car will remain essentially the the same when I reassemble the car this time. It works fine for what I do with the car and the current power level. I had 315 35 17 rear tires and would experience a slight rub under extreme circumstances. Only time it would happen was while cornering at high speed on a road track AND hitting the curbing too hard at the apex at the same time. This only occurred on certain corners at certain tracks and I'm running a slightly narrower 295 30 18 tire this time so while there will be the same lateral movement of the rear I doubt there'll be any rub. In either case the expense of a locating device isn't warranted for now.

The suspension in this car is almost all aftermarket stuff. Hotchkis springs, sways, tie rod adjusters, along with Bilsteins they sell valved to work with their products. The upper & lower control arms are stock with Global West Del-A-Lum bushings and have GW offset upper control arm shafts. Tubular control arms designed to improve castor and - camber were not available when I did the suspension. I'd really like a set of PTFB arms that would allow me another degree of - camber and more castor.....Maybe some day.

I was at 2 3/4" clearance to the low point on the exhaust before. Hopefully the new exhaust will sit a bit higher allowing me to drop the car a little. Because of the use of the car I need a little more suspension travel than a street/strip car or a land speed only car. We'll see how the car handles with the aero mods but I suspect I'll need slightly stiffer springs. I've got several other aero mods in mind not mentioned previously.
 
Another thing that annoys me about the early 2nd gen front bumpers is the strip across the bottom where the grill supports attach. It's ugly and is seen from the front so I painted that section of my other bumper flat black in an attempt to make it disappear in the shadow. For this bumper I've cut it off and will make new lower supports for the grills.

I've got 2 front splash pans and am currently working on the one that was on the car before stripping, doing some metal work, and prepping for paint as it was stock. The other one will be modified later to see if an idea I have will work.

I Also stripped the center section of the front spoiler for paint prep. Over the past 20 years it had gotten a few bumps & bruises and seen a lot of flexing at high speed events from air pressure. The angle of the spoiler would be straight down over about 125 MPH and the repeated flexing caused paint cracking/peeling problems. I will be adding reinforcements to prevent the flexing in the future..


I'd installed 1/2" wheel studs in the rear axles a while back so while working on body panels I also got everything together to install the Baer discs on the rear. I had Moser tapered axles with Moser Ford style housing ends for drum brake application welded to a 8.5" GM housing so switching to disc brakes with an internal drum parking brake in the rotor hats is an unusual swap.

It turned out to be a bit of a puzzle to figure out how to actually assemble and required some minor fabrication to make it all work. Rather than explain I'll just post pics since it's unlikely very many people will be in the same situation since most people do the disc upgrade at the time they install axles etc. and wouldn't be in my situation since they'd get housing ends welded on for disc brake applications.


Back in the beginning of this thread I mentioned i was going to reinforce the core support where the body mounts attach. They typically get rusty & soft on the early 2nd gen bird core supports. The one I'm using is one of the best I've seen but it had started rusting there like they all do. I decided to make a sheet metal patch panel for above & below the original sheetmetal and plug weld them in to make the piece stronger than the original.


Back
Top