You are using an out of date browser. It may not display this or other websites correctly.
You should upgrade or use an alternative browser.
You should upgrade or use an alternative browser.
"The 14 Car" Performance therapy project
- Thread starter NOT A TA
- Start date
NOT A TA
reliable source of info
Because I do this stuff for a living I'm constantly at Fastenal, local auto paint suppliers, Harbor Freight, The Depot & Lowes, local parts houses, etc. so I pick up consumables I might be low on or if things I use a lot are on sale.
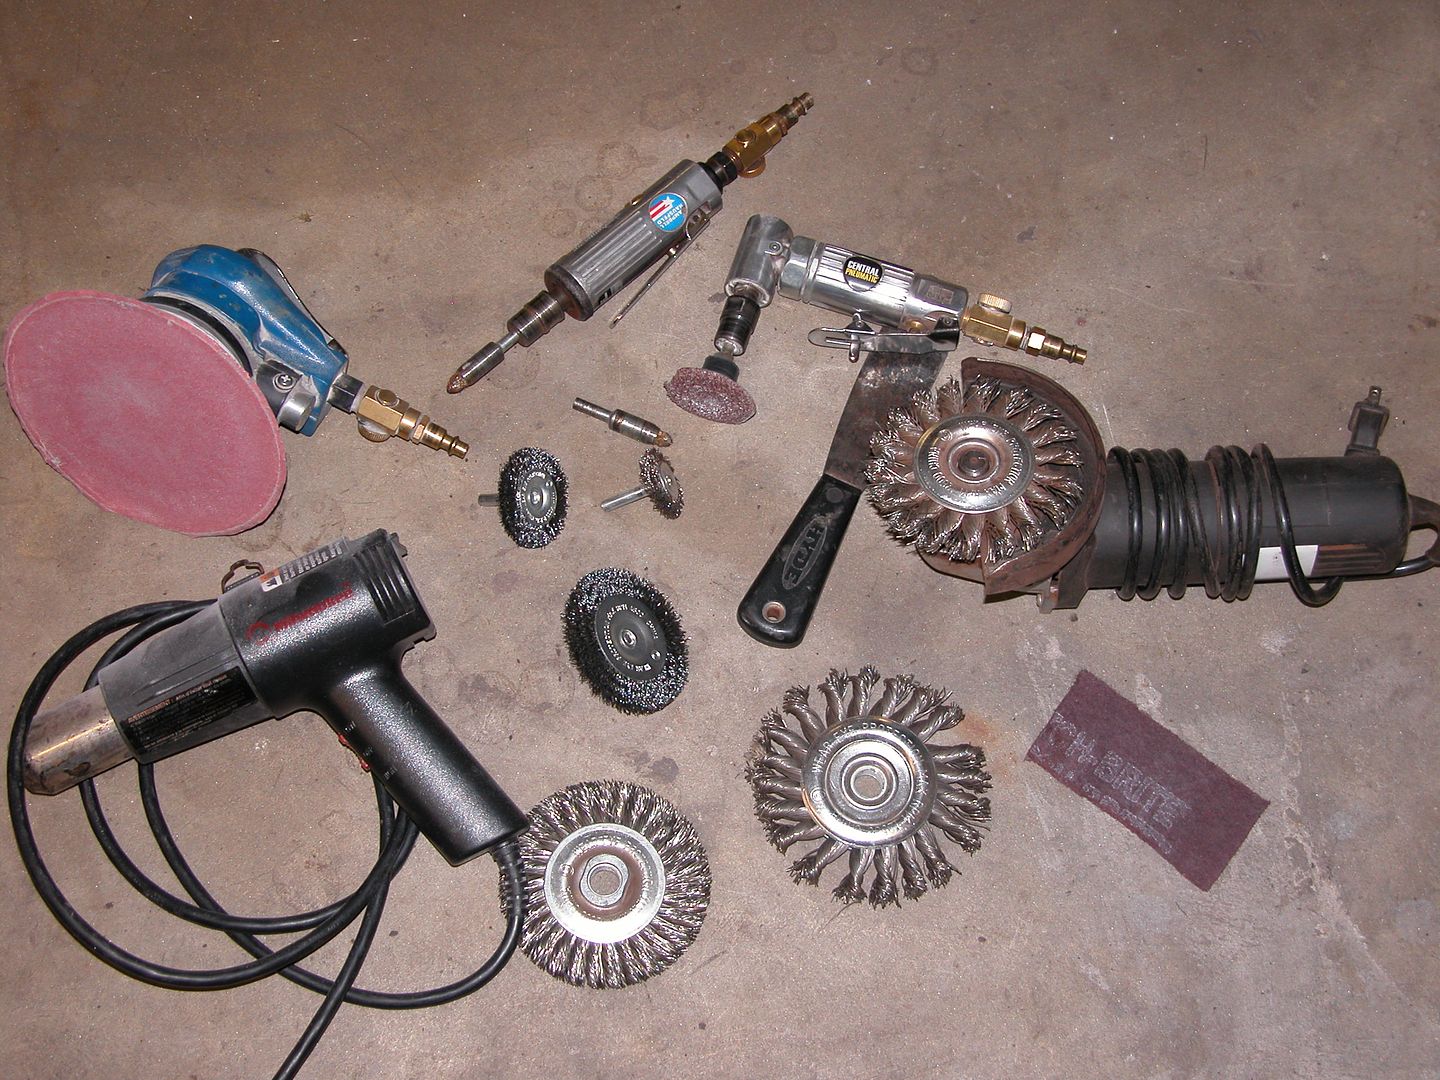
I'm stripping this one mechanically (for certain reasons). Here's my process. Be sure to use heavy leather gloves, face shield, hearing protection and particle mask. Leave the guards on the right angle electric grinders or you risk serious injury.
1. With heat gun and putty knife remove as much undercoating and loose paint as possible paying particular attention to the undercoating. Undercoating will melt & smear with wire wheels making it take longer to get an area clean.
2. Use a 4 1/2" electric angle grinder with twisted carbon wire wheels to remove as much paint & leftover undercoating. Do not try to clean perfect.
3. Use 4" electric angle grinder with stainless wire wheels. Go over all areas that were done with the bigger grinder wheels to remove anything left over by the 4/2" in open areas and then start start stripping nooks and crannies the 4 1/2" wouldn't fit it.
4. Use 3" wire wheels on an electric drill. Clean & strip deeper into corners nooks & crannies.
5. Use 2" wire wheels on electric drill.
6. Use 1 1/2" wire wheels on electric drill.
7. Use 1 1/2" wire wheels on air grinder to get in areas an electric drill is too big for.
8. Use 1/2" wire brush on air grinder to get into the smallest nooks & crannies.
9. Wipe the areas that were cleaned with the wire wheels using lacquer thinner on rags.
10. Go back over areas with small wire wheels in air grinder to get little places where paint is left in spot welds etc. Then wipe clean with thinner.
11. Use red scotch Brite pads over all sections where paint was removed till metal is clean.
12. Wipe all areas with wax & grease remover.
13. Primer!


NOT A TA
reliable source of info
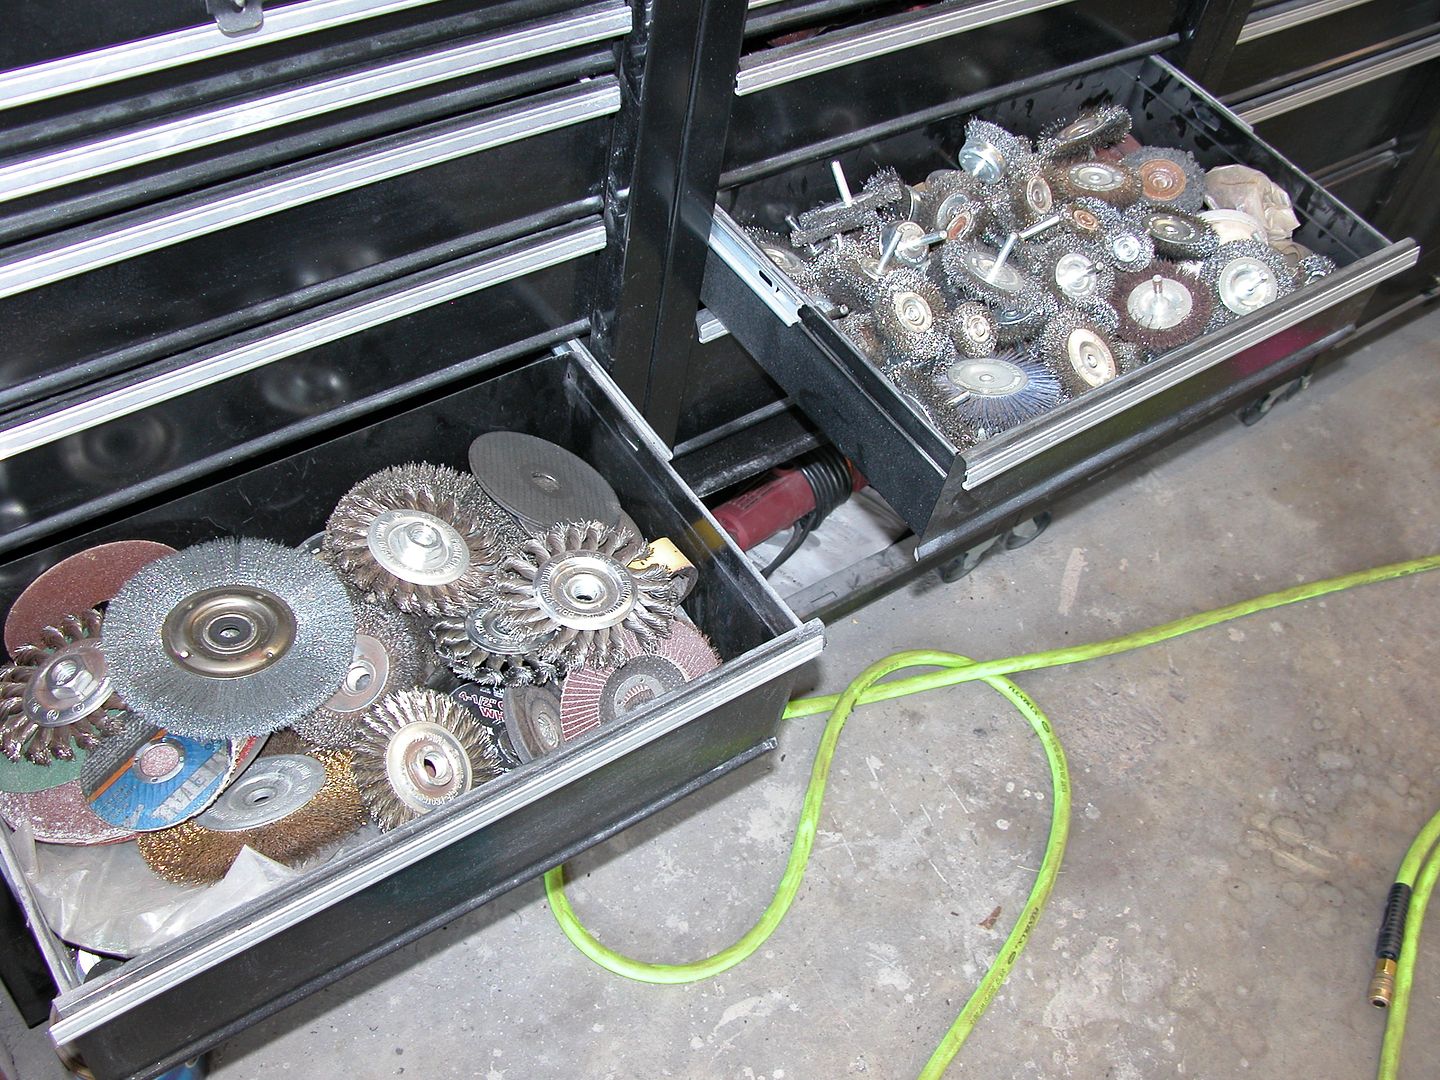
I've got a routine down and set up multiple grinders, drills, and air tools with the wire wheels, scotch brite etc. so I don't spend a lot of time switching things around. Just replace wheels as they wear out with another of the same size/type. Consumables run about $50.00 to strip the average unibody underside And I average 1 new electric right angle grinder from HF every 3 cars. I try other brands of grinders ocasionally but they all seem to wear out about the same. They just get really hot running for an hour straight between breaks.
It does take a long time to do a nice job however it's a better way to strip the underside of certain cars depending on circumstances. During the drier winter months I can strip the whole underside at one time and prime the whole thing in one shot which is quicker. From now till Nov. it's too humid here and I have to break it up into sections because of surface rust starts on the sections that use lower quality steel.
It does take a long time to do a nice job however it's a better way to strip the underside of certain cars depending on circumstances. During the drier winter months I can strip the whole underside at one time and prime the whole thing in one shot which is quicker. From now till Nov. it's too humid here and I have to break it up into sections because of surface rust starts on the sections that use lower quality steel.
NOT A TA
reliable source of info
Indycars said:
Wow, thanks a bunch for the detailed steps !!!
Is it true you just can't get all the paint stripper chemical out of the nooks and
crannies, therefore the paint has a problem?
On the underside chemical strippers will get in between the overlapped sheet metal where the rear frame rails and other supports/brackets are spot welded to the floor pan. The dried up stripper can come back to haunt you later during primer-paint or later down the road. If I use chemical strippers I prefer to only use it on the outside of body panels and stay away from edges that might trap the stripper. Media blasting works well for the underside but you really need to strip everything out of the whole car.
Started stripping out the interior today. With race seats like the Kirkeys the pieces of the seat are assembled inside the cage and bolted to it. So it's a project just getting the seats out.


Ive almost never seen that done without a gusset welder over the inclosed angle before! ,
Ive always used gussets on both sides of any welded joint


NOT A TA
reliable source of info
grumpyvette said:Ive almost never seen that done without a gusset welder over the inclosed angle before! ,
Ive always used gussets on both sides of any welded joint
The small Isosceles right triangle gussets posted above were standard practice years ago. My old Pro Street/drag car 67 Nova SS had them in the corners of the cage, but it was built in the 80's. If you do a Google search for pics of modern roll cages for NASCAR, FIA, WRC, etc. you'll find plenty of pics of cages built like the one in my Firebird with the tubing braces that create a larger isosceles right triangle than the small gussets. The latest version seems to be the curved fully enclosed WRC style triangle shown in the bottom.
I had the cage in my car constructed by JW Racing & Fabrication. We went over all the rule books for the various organizations I want to run the car in and went over the specs for cage requirements for the classes I might one day run in. We determined that the classes for unlimited speed open road racing and the Bonneville races required cages that were waaay beyond what is required for the road race track events and drag race things I would do. So the cage was built to be legal for 200 MPH at the Silver State Classic Challenge open road race and the Southern California Timing Association. The SCTA writes the rules the Land Speed Racing community goes by with minor differences for particular tracks.
I discussed the cage design, materials and methods of construction with a tech inspector from the SSCC and Joe Timney owner of the East Coast Timing Association ( Land Speed Racing organization) and Maryland Chassis works where he builds cages, cars etc. The cage put in my car exceeded the requirements of all the organizations at the time. Main tubes are TIG welded .120 wall 1 3/4" 1020 DOM and it took 200 lbs of tube to build the cage.
My cage was built about 5 years ago so some things may need to be updated as technology advances by the time I actually build enough power into the car to get into the fast classes. Until then the cage is far better than whats required for the classes I've run in the past. I'm building the safety and aerodynamics into the car before making it faster.
One other thing that goes against traditional thinking is that all of the organizations now prefer DOM over chromoly for cages like the one in my car. When I first started into the cage project I was sure I wanted chromoly.


Maybe you could tell us what kind of system you have for keeping all those
brackets, nuts, bolts and the thousands other pieces organized so you can
get them back in the right places.
I've looked thru your photobucket and it's obvious that you are well organized.
I'm also curious how big that garage is, sure seems like you have more than
most in the way of tools and still get a couple of cars in the garage.
8
87vette81big
Guest
The Biggest Danger of trying to run to 200mph + in a production based vehicle is becoming airborn & pirliteting end over end and landing on the roof.
Any substandard cage and the driver will die instant.
Any substandard cage and the driver will die instant.
8
87vette81big
Guest
We had a local driver flip his race car recent.
He was trapped in it for 45 minutes.
Roll cage collapsed.
He was screaming in Agony pain non stop.
Trapped. Entire car had to be cut apart piece by piece to free him.
Total Chaos at the Racetrack.
He was trapped in it for 45 minutes.
Roll cage collapsed.
He was screaming in Agony pain non stop.
Trapped. Entire car had to be cut apart piece by piece to free him.
Total Chaos at the Racetrack.
87vette81big said:We had a local driver flip his race car recent.
He was trapped in it for 45 minutes.
Roll cage collapsed.
He was screaming in Agony pain non stop.
Trapped. Entire car had to be cut apart piece by piece to free him.
Total Chaos at the Racetrack.
while I was obviously not there, and know zero about what happened, Id have to say that was a darn crappy roll cage ,if it folded up on impact, being that the whole concept of a roll cage is to maintain a protective outer perimeter , structurally sound protective perimeter around the occupant, at least to the point hes not trapped inside or hit with outside surfaces, some cross bracing or outer perimeter structural hoops had to have come loose, welds broke etc.
8
87vette81big
Guest
No. They have $$$.
$$$ Put into the Race Car.
Sometimes Rules in Rulebook not good enough Grumpy.
I have seen a lot of Bad Race accidents.
Worst when a Racecar got airborn at went over a 40 foot tall fence.
Upside down. Landed on a 5 year old boy.
Killed instant.
It was the other 410 engine.
I have the remaining 410 prototype race engine.
8
87vette81big
Guest
NASCAR Spec Cage best.
Winston Cup style.
Winston Cup style.
NOT A TA
reliable source of info
Indycars said:
Maybe you could tell us what kind of system you have for keeping all those
brackets, nuts, bolts and the thousands other pieces organized so you can
get them back in the right places.
I've looked thru your photobucket and it's obvious that you are well organized.
I'm also curious how big that garage is, sure seems like you have more than
most in the way of tools and still get a couple of cars in the garage.
As far as the parts go for cars I take apart, I try to keep assemblies together as much as possible to minimize the parts hunt during reassembly. Like a spindle has the rotor, caliper, etc. left intact till modification or reassembly. Any fasteners that can't be put where they normally go are put into zip lock bags with their use written on the bag with permanent marker. Unfortunately most of the cars I build for others I don't get to take apart. By the time I get hired the cars been apart for 10+ years, changed locations at least twice, parts are scattered in various attics, closets, grandpa's garage, storage lockers, etc. and IF I'm lucky enough to get any fasteners that match anything for the car I'm building they're mixed up in miscellaneous can's or boxes.
My 2 car garage is a working garage so I need to be able to switch quickly from job to job. I don't keep much in it other than toolboxes and tools needed at the time because I paint regularly and need to blow out everything and wash the floor before shooting paint. I have a couple shop areas where a lot of the bigger tools like drill presses, saws, and blasting cabinet are kept. I have a clean room with a large work table for interior and other clean projects and another for dirtier jobs fabricating etc.
NOT A TA said:. Any fasteners that can't be put where they normally go are
put into zip lock bags with their use written on the bag with permanent marker.
Unfortunately most of the cars I build for others I don't get to take apart.
Yes I also use the zip locks, they are essential in keeping organized and see thru
don't hurt either. When rebuilding the 200-4R automatic, the manuals have ID
numbers for everything, which makes it easy find the exact part needed next
during assembly if you write the number on the zip lock. But I can see where its
even harder for you and the multitude of fasteners used on a car body/chassis.
Photos of everything from several angles has also helped me considerably.
I don't see how you get all the larger floor space items like the bead blaster and
multiple tool boxes etc in a two car garage. I'm already putting things in the attic
and hot water closet. Is your garage larger than the standard 20' x 20' garage?
Thanks for the response!
NOT A TA
reliable source of info
Indycars said:I don't see how you get all the larger floor space items like the bead blaster and
multiple tool boxes etc in a two car garage. I'm already putting things in the attic
and hot water closet. Is your garage larger than the standard 20' x 20' garage?
Thanks for the response!
[/size][/color]
I turned part of my house into shop areas. Full shop build here http://grassrootsmotorsports.com/forum/ ... 721/page1/

