"The 14 Car" Performance therapy project

High build primers give that smooth as glass look .
Old school ways take much more efforts .
 
I'd blocked out the front fenders for final primer and set them aside when I took the front end sheet metal off to work on the engine/trans and G-brace mock up. I didn't want to mask off everything since the cowl and cage are already painted and the fenders were coming off anyway. Finally got around to shooting the last coat of primer on them today. Will start blocking out the final primer on the major body parts for sealer and paint soon.

Meanwhile I've got all the smaller pieces ready for sealer. With all the extra pieces like the multiple sets of fender vents and rear spoilers I've got about 50 small parts that need to be body color.

As if I didn't have enough paint work with body color parts I've also been prepping and painting other parts like the hood hinges, under tray supports, inner fender extensions, etc.


Like an Assembly line process Birdman.
It will get done.
When Garage space is not a Premium its a PIA. I know.
Use every Room in the House.
Outside too.
Just pretend your at the pits in the Racetrack.
Motel Rooms & Parking Lots working in the Dark.
What I do.
 
When you get a chance show me your Favorite Primer, Basecoat, & Clearcoat Paint Guns Birdman.
Any tricks also.
 
Here's whats left of my collection of old school siphon feed guns. The good ones were stolen (along with most of my good tools and boxes) when my truck/enclosed trailer were stolen while moving to FL. None of these have been used in a couple years. I should just sell or give to a young guy. I even still have a back up gun brand new in box.


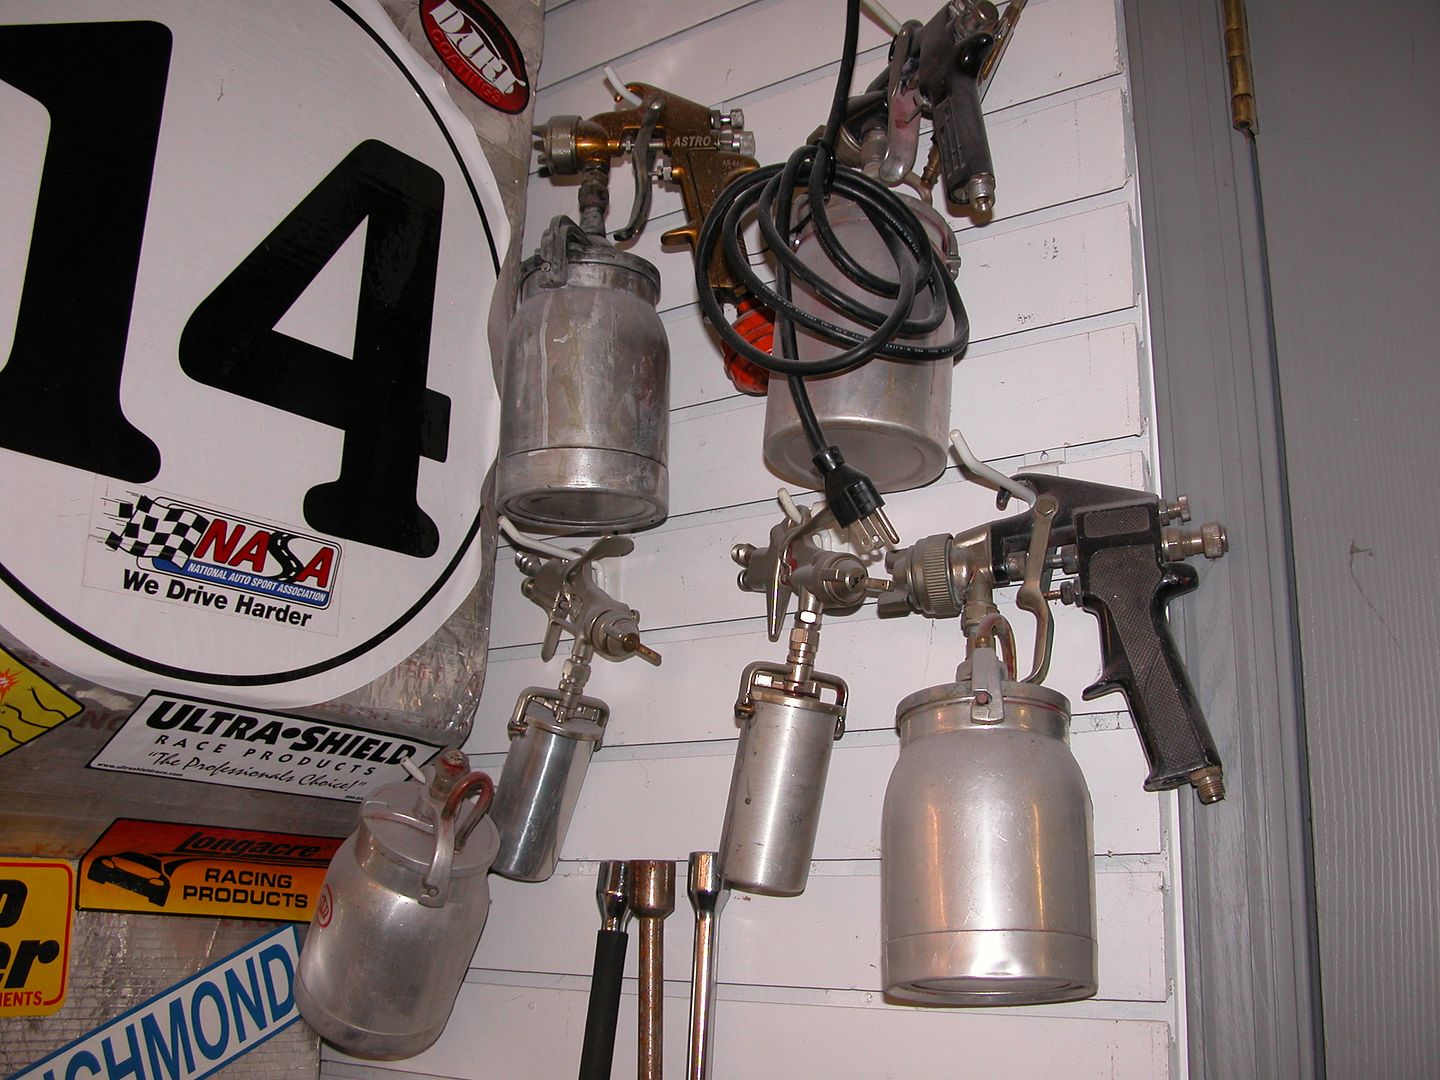
Here's the currently most used group of HVLP guns in pic below.

Left top, my go to high build primer gun a $12.00 Harbor Freight 1.5 tip with a 20 oz. cup. The smaller cup size makes it easier to get under things, isn't as tippy as a big cup, and is lighter. You can lay primer just as smooth as you can with a high dollar gun.

Next to the primer gun is a Harbor Freight 1.4 tip with 20 oz. cup. Mostly a back up gun for paints but sometimes I use it because of the smaller cup, lighter weight than a full size aluminum cup gun and sometimes I use it for thinner primers like the epoxy primers.

Vaper full size aluminum cup with 1.4 tip gets used for panels and parts single stage enamels and urethanes. Never used it for whole car or other big jobs and consider it a back up gun for big jobs.

Right top, Vaper 1.7 tip with full size aluminum cup rarely used, just for laying thick paints or undercoats etc.

Lower left, The 2 small jamb guns are both 1.0 tip guns Vaper on the right and some other house brand on the left. I use them for small parts and small spaces only for paint, not primer.


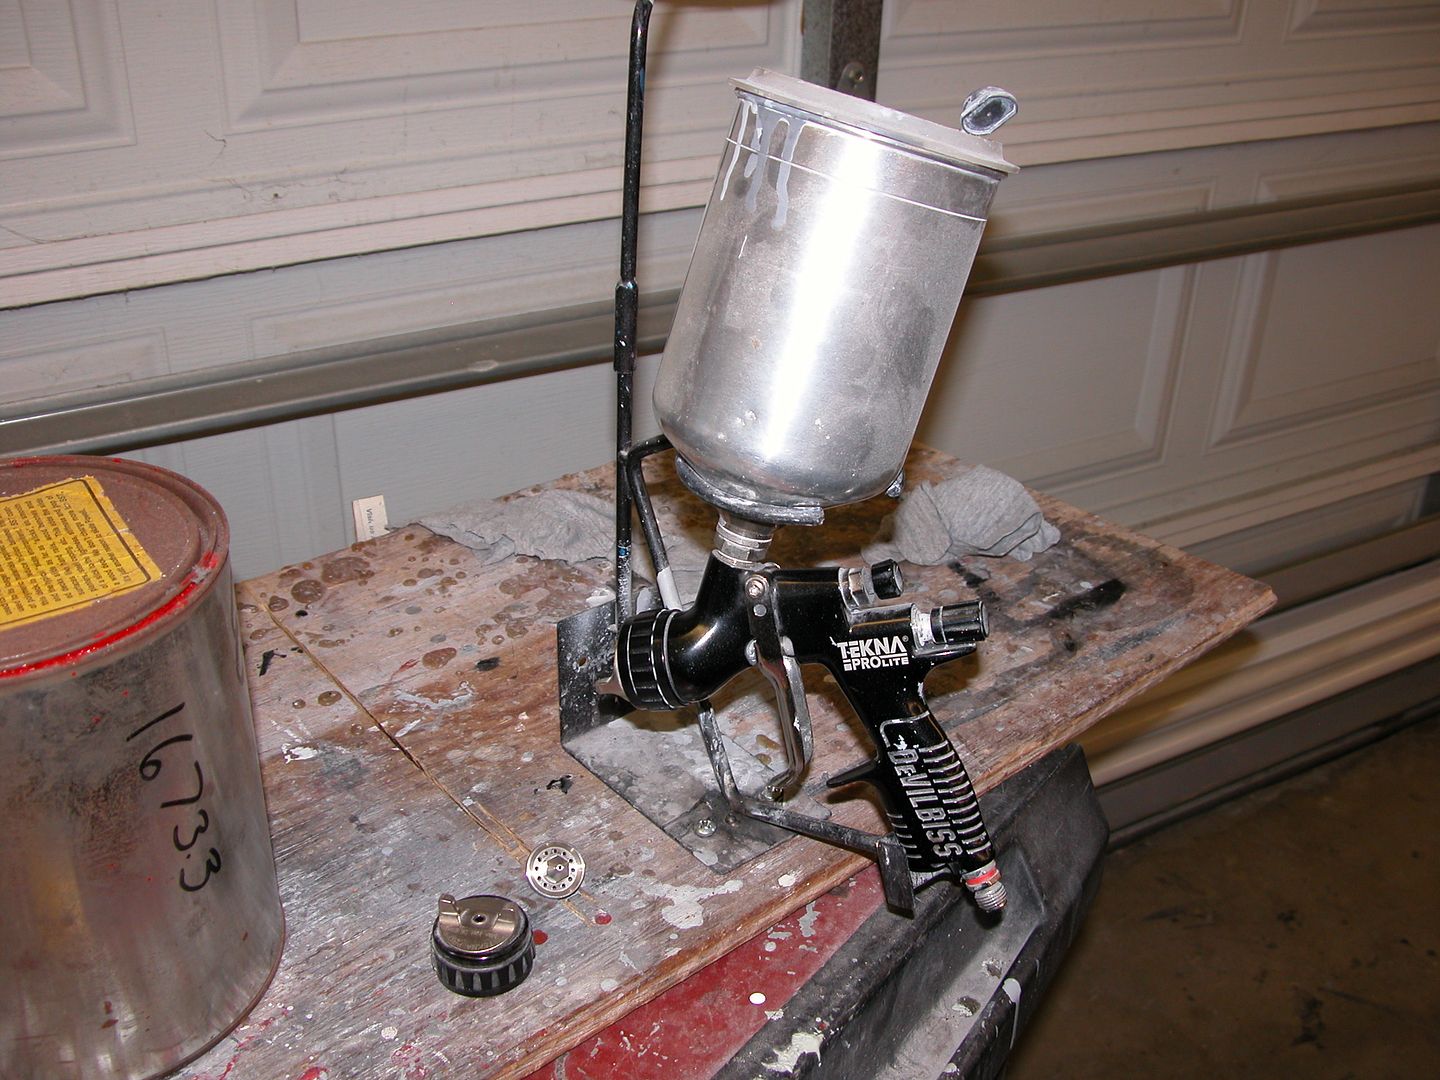
Devilbis Techna pro lite in pic below http://www.autorefinishdevilbiss.com/products/tekna/tekna-prolite-premium-spray-gun.aspx gets used for overall final primer/sealers and/or paint occasionally. Comes with multiple tips.


Not Pictured, SATAjet 3000 gun that gets used for base/clear large jobs. It's at the body shop tonight but I'll get a pic of it and put it up. It's the go to gun for all top coats on higher end work and big jobs. The adjustments and ease of use are nicer than less expensive guns (smoother operation) The fan adjustment and pressure adjustments are more concise and accurate. Atomization is better and when shooting clear at higher pressures allows you to lay a nice smooth finish that doesn't require buffing. It's a pleasure to use.

You'd be surprised how nice a finish you can lay down with a cheap Harbor Freight gun. I'm amazed at what you can do with a gun you only pay 10-12 bucks for on sale. They don't have the smooth trigger action and "feel" of a higher quality gun and the adjustments aren't as nice but with a bit of practice you can certainly put down a nice finish that doesn't require sanding/buffing. Those hinges in my post above were shot with a HF gun and were dry to the touch when pic was taken. I put parts like that out in sun for a couple days to really harden up the enamel. The roll cage base coat and matte clear were shot with the HF gun with 1.4 tip also.

Best tip I have is to have a back up for everything. I have a backup compressor, lines, filters, regulators, guns, 220 outlet, inline filters, water separators, face mask. And I make sure I have extra of all consumables, thinners, strainers, cups, rags etc. This way there's no worry if something should go wrong that you'll loose the window of opportunity before paint hardens in a cup or base dries before clear is ready if something goes wrong with equipment.
 
Last edited:
Its Like Hot Sex Birdman....

LAYING IN BED NAKED WAITING FOR HER TO COME OUT OF THAT DAMN BATHROOM.

SHOWTIME IS COMING.....
THE PAINT.
AND THE GLOSS !
 
Was going to shoot red paint inside of front fenders today BUT it rained and I had too many other things in the garage that couldn't go out in rain so no paint tonight. Like she fell asleep in the bathroom and never came out!
 
Yeah she took too long.....
The Little Trooper took a Nap too.

Your 1970 Espirt Will Be Steller Beautiful Birdman.

Gotta get some rest.
Want to Fire up that Olds 425 in my '63 GP by Tomarrow night.
 
No rain today so got some paint on the inside of the fenders. Shot them inside and then once the paint had flashed over brought them outside to the south Florida natural solar baking area to harden up the paint. Will bake them again tomorrow. Used the Vaper 1.4 tip gun.


Whew! Just finished going through this thread. Lots of good stuff in here. The car looks amazing. You have done some really interesting things here.
 
Thanks! It's been in my self imposed paint jail recently while blocking the final primer and getting it into sealer. Thats why no recent progress posts.
 
It's been a few months since I updated this thread and a lot has happened so I've got some catching up to do. The short version is listed below with some quick explanations in the paragraphs that follow.

1. Car still in my own self inflicted paint jail.
2. Started a new company called Lab-14 making pieces to repair and/or strengthen structural parts of sub frames and other parts.
3. The 14 Car is now sponsored by PRO-TOURING F-BODY.COM and is getting all new suspension.

First, paint jail. I've been working on getting the 50 or so smaller pieces as well as the doors, fenders, trunk etc. into final sealer. Only have the body and hood left to block & seal. There's been no big rush to get everything cut in and assembled for paint because I needed to be able to use the sub frame and related parts for mocking up parts for the new company.

Lab-14 (short for Laboratory Fourteen) is my new endeavor. The initial products are low tech, simple things that are used to repair and/or strengthen, the 2nd gen platform. Products for first gens and other platforms will be developed as the company moves forward. Some of the products are items that showed up previously in this thread while others haven't been talked about here yet. I'll write a separate post about the new company and products and go into more detail about the individual parts.

PTFB is now sponsoring the car and so all the old suspension components from various manufacturers are being replaced with PTFB GEN II products. The car will remain a traditional coil/leaf spring car (my decision) and will certainly be a challenge to get set up and tuned with the additional down force created by all the aero modifications I've been making. Since I work building cars for others also, I sold everything that came off of my car to a customer with a 70 TA who wanted them all installed. In addition to the springs, sways, control arms, shocks etc. that came off of my car I also replaced the steering with new pieces from PTFB including an 800 12:1 box, tie rods and adjusters, Idler arm, ball joints including tall uppers, as well as the PTFB solid body mounts and GEN II frame connectors.

Well, everyone likes pics, so here's a couple of mine and one of the TA that now sports some of my old parts and a bunch of new PTFB goodies.

Digging my way out of paint jail a few pieces at a time.


Installing Lab-14 front sway bar mounts. Will talk about them in an upcoming post.


70 TA with a new attitude influenced by a lower altitude. You may notice the white ball looking thing on the hood. It's a Samsung 360 degree 3D virtual reality camera. An amazing piece of equipment that's supposed to be released in the USA in the next few days. I've had one at my disposal the past couple months and it's amazing. If you try one you'll be hooked. It's going to affect video as much or more than Go Pro's did. http://www.samsung.com/us/explore/gear-vr/?cid=ppc-

 
I've been noticing the viewer advertised on the Olympics channel. Will have to
watch closer and see what it's all about.
 
Do you have AC going in your shop? I was wondering how you paint in high humidity and the high heat conditions?
 
No AC, I chose this part of FL to move to because of the micro climate. Rarely gets over 91-2 at my house and hasn't gotten over 93 the past 10+ years. Today's a typical late summer day here with a high of 90 and 62% humidity with the normal light breeze coming in off the ocean. The Atlantic ocean current gulf stream passes close to land here as it flows through the Florida straights. So while south of here at say Miami the beach water is affected more by the current from the Gulf of Mexico joining, during the summer the Atlantic current brings cooler water closer to shore from about Pompano to Palm Beach. During the summer (on land) it is usually hotter both South and North of here while in the winter it can be noticeably warmer here than it is just North of Palm Beach at say Port ST Lucie where it's typically 10 degrees colder in winter. I live near the coast, the farther inland you go the more the weather changes to the stereotypical Florida hot/sticky/buggy expectations. Very few bugs where I am, much much less than up north during the summers there. Haven't even seen a mosquito in probably 6 months here. Of course the local climate here is also why it's one of the most expensive areas of FL to buy property. http://oceancurrents.rsmas.miami.edu/atlantic/gulf-stream.html

The day you posted about the Key West trip I checked the weather there and here. It was 3 degrees cooler here that day. Today the temps are the same but humidity is 5% less here.

Most of the painting I do is with single stage or BC/CC urethane using traditional reducers for high temps this time of year and med. temp in winter. There's very few shops still trying to use water based paints as it just slows production too much because of the humidity compared with other sections of the country. I do still use some acrylic enamels and shot some this week on Lab-14 parts as well as some motor mounts and factory WS6 frame braces for my bird. No problems with humidity or heat and I put the pieces out in the sun to bake. Black parts usually go up to 120-150 F which bakes the paint nicely. Lacquer requires a bit more care with humidity and is best shot during the less humid times of year. I did have a problem once using SEM Trim Black in high humidity and experienced blushing.

I have my air system set up to drop the water out of the compressed air. Although the compressors are in the non AC shop area the air then goes into another 60 Gallon tank in the AC area where it cools and drops the moisture. Then exiting that tank it goes through a Snap On water separator. I usually use one of the disposable round filters right at the gun as additional insurance. I drain the compressor, storage tank, and water separator regularly to avoid any water build up in the system.

Motor mounts pic.

 
those pictures and the cars progress are both darn impressive!
 
This is my shameless self promotion post about Laboratory Fourteen "Lab-14", a company I started earlier this year. There's no budget for advertising yet so I can't sponsor any of the forums this thread is posted on so if a mod feels this post isn't appropriate or it conflicts with forum rules just delete it and I won't be offended. I'll get back to the regular project posts after this one. I know you " Grumpy's regulars" have seen posts about the new products because I use this forum as a testing ground. But I figured I'd include this post I put on other forums where this project is posted and if nothing else you guys get a couple pics to check out.

As mentioned previously I started a new company named Laboratory Fourteen "Lab-14" based primarily on parts to repair and reinforce the 2nd gen F body sub frame and also including some restoration reproduction pieces. I 'd been making "one of" pieces for repairs and builds on other peoples cars and mentioned the pieces I'd made for my car in this project thread (which is on several forums) asking if anyone else wanted them. After selling through PM's and emails for a while making small batches of products I figured I should just form a legal business and expand the product line. I've owned several successful businesses I built from scratch and operated for as long as 25 years before moving South, so I've got some experience. The concept of Lab-14 is simple products based on repairing and reinforcing factory chassis to provide a solid footing for all the modern suspension and tire technology we have available today. To make this concept work I realized it's gotta be cheaper, easier, and quicker to just buy my products than to try and copy them yourselves.

Thanks to all of you who went through PM's and emailing back and forth to purchase products before I finally got the onlne store set up. Here's a link to the store for anyone interested in checking out the products. https://www.lab-14.com/ Most products are for the sub frames and some are G-brace accessories but there's also some restoration sheet metal pieces that have not been reproduced till now.

By offering a number of different things that can all be purchased from one place a person can get everything to beef up a sub frame designed to work together from Lab-14 with just one shipping charge. Saves time driving around buying materials and hardware then trying to find items not available locally online. It's easier because the material choices, pattern making, and metal fabrication work is done, plus all the correct hardware has been figured out and included. You can just order everything in one shot from the online store at WWW.lab-14.com rather than trying to make your own stuff buying metal from here or there then fabricating etc.. and figuring out what hardware is needed then purchasing from multiple places. It's cheaper because you're not spending money driving around trying to source materials and hardware, paying shipping from multiple vendors, and buying materials and hardware you don't need because you can only buy in quantities greater than what is actually needed. After all, most people want to just build the car not spend all their time fabricating, sourcing, etc. It takes long enough to complete projects already.

Since we all like pics, here's a couple pics of products taken during small batch production to get the company going.


Back
Top