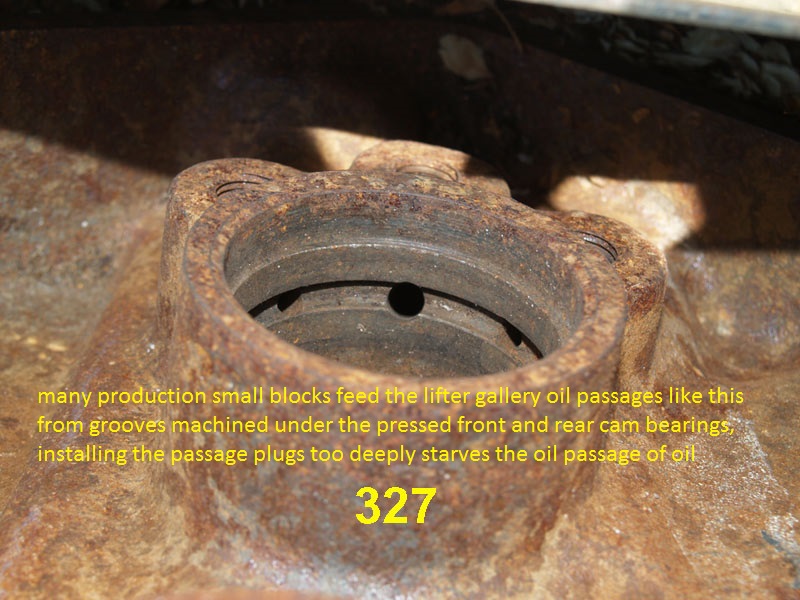
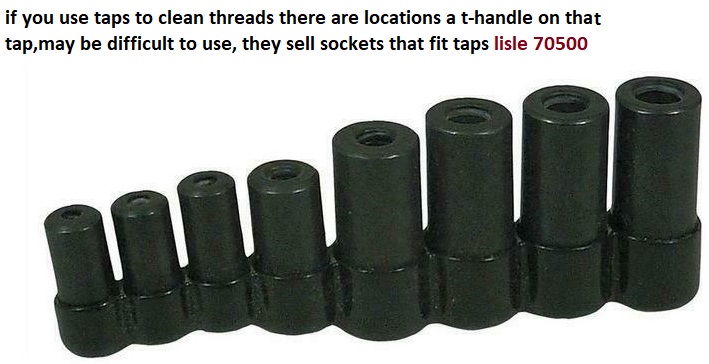
you really should read these links for a lot more USEFUL info, on block pre prep
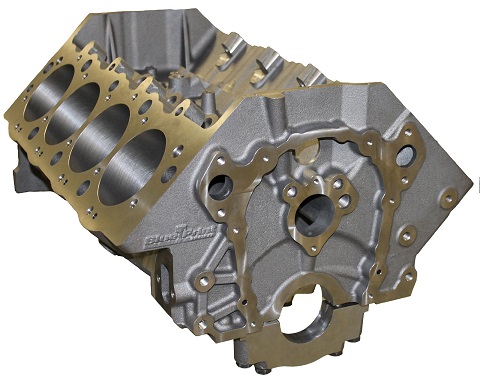
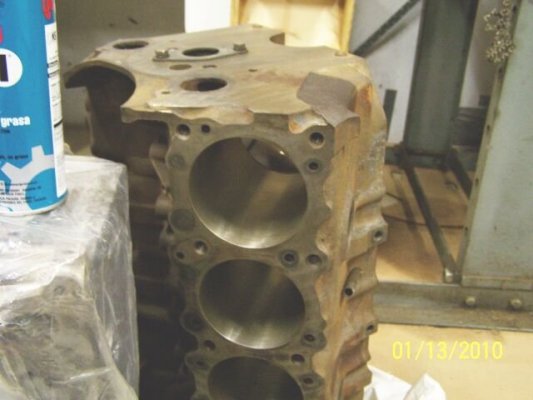
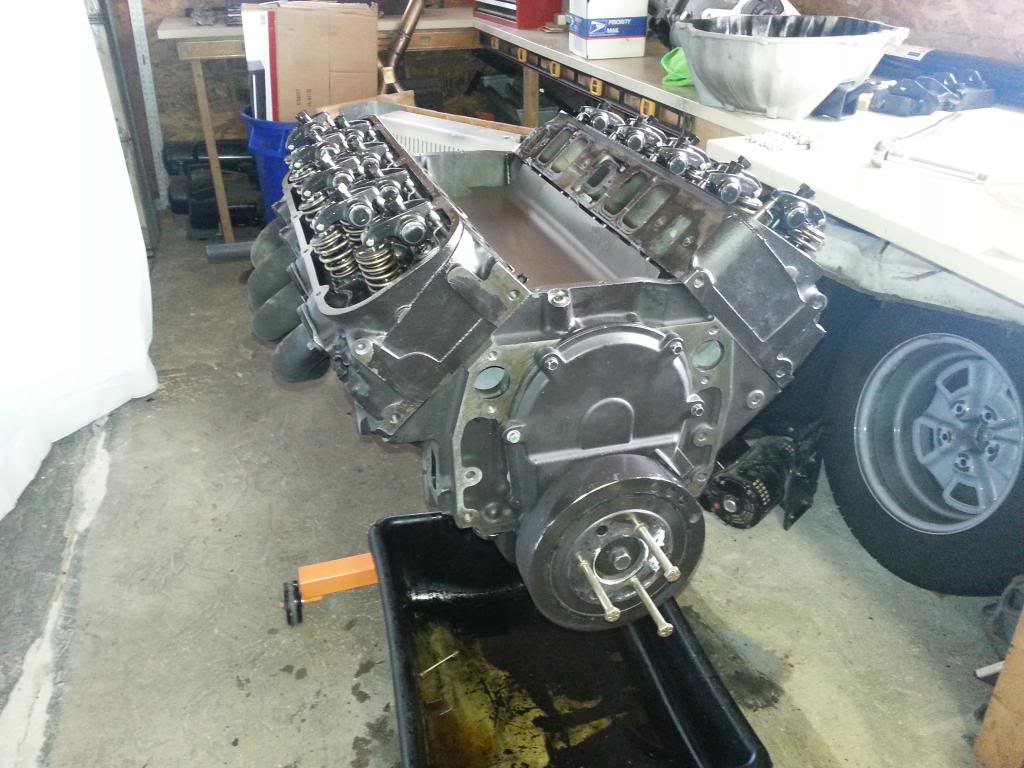
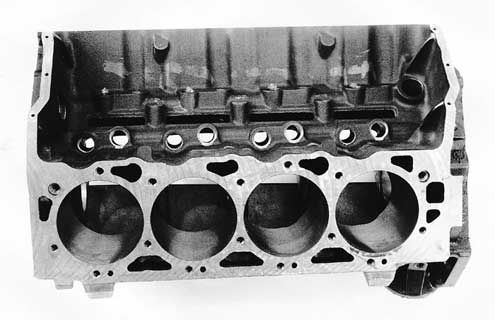
use the best block you can afford, the better aftermarket blocks are faR STRONGER THAN THE oem BLOCKS IN ALMOST ALL CASES
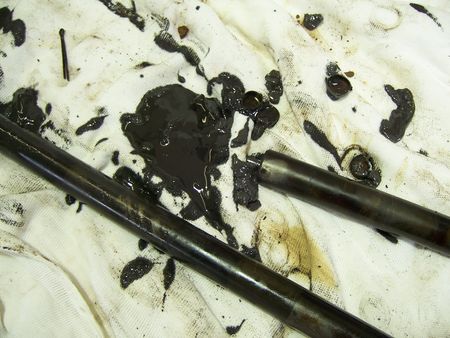
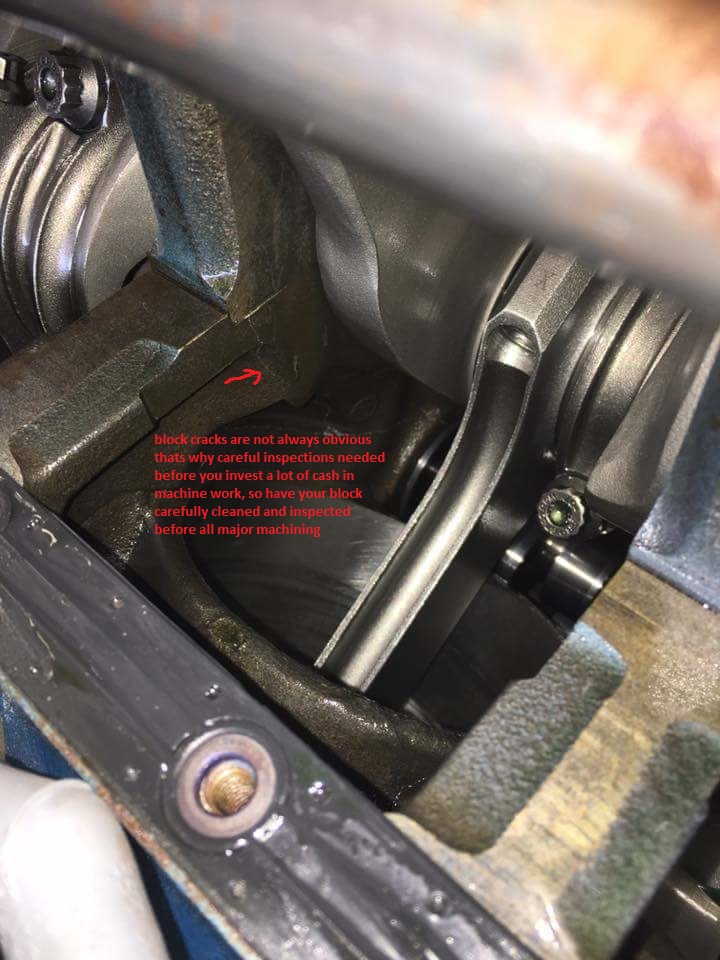
one of the least discussed & acknowledged, and yet more common reasons engines fail ,
is related to micro metallic crud left in the engine while its being assembled,
especially engine's built on newly machined blocks or blocks not extensively cleaned ,
that get used after an engine previously failed, loose casting flash,
crud from worn lifter and bearings, can be hidden in oil feed passages or,
in less obvious areas that must be carefully cleaned before reassembly can be done!
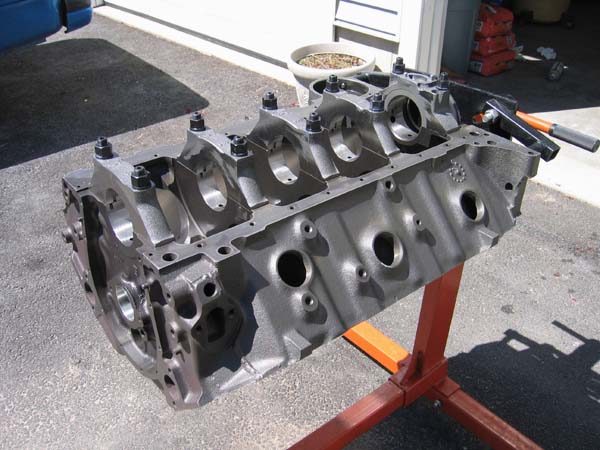
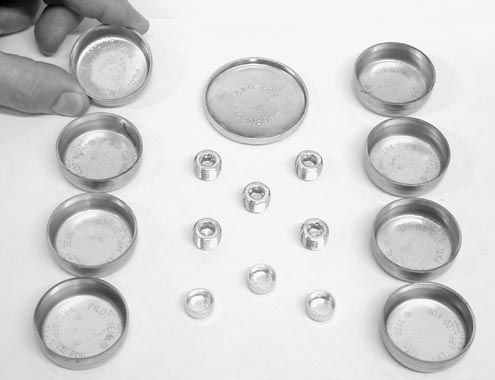
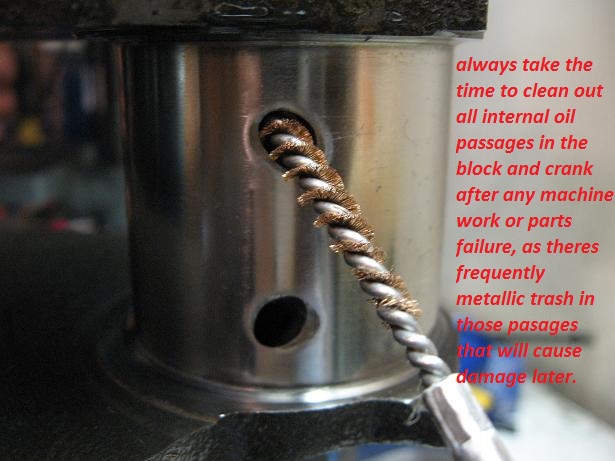
ALL OIL PASSAGE PLUGS MUST BE REMOVED, and all oil passages carefully cleaned before and engine build!
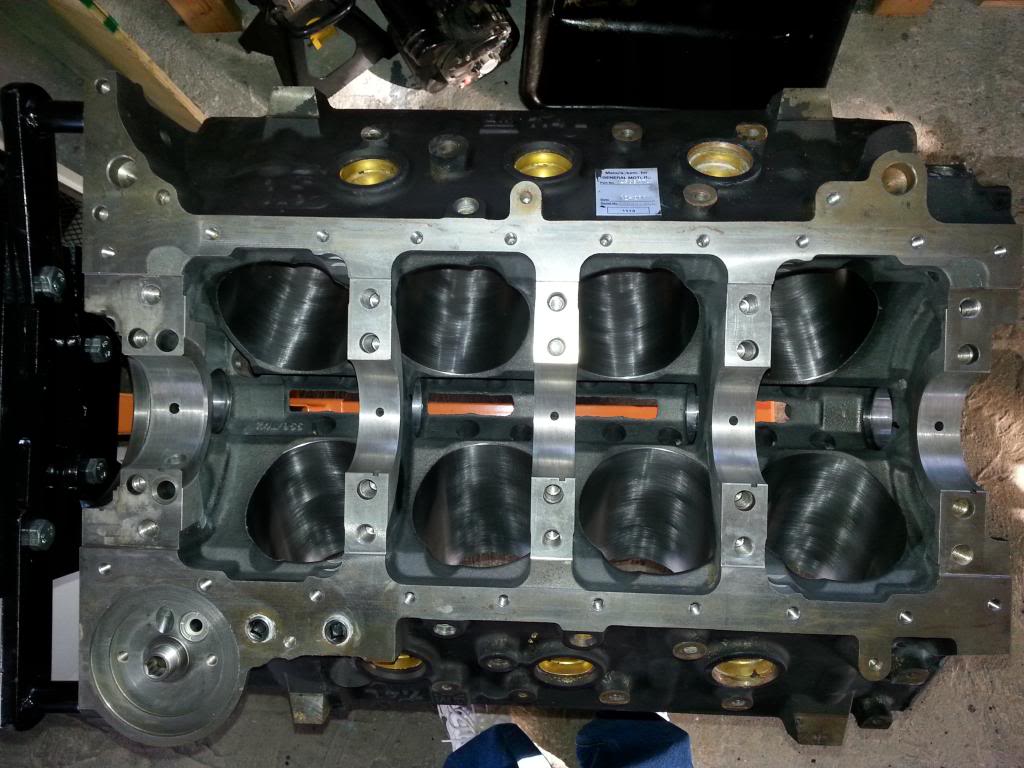
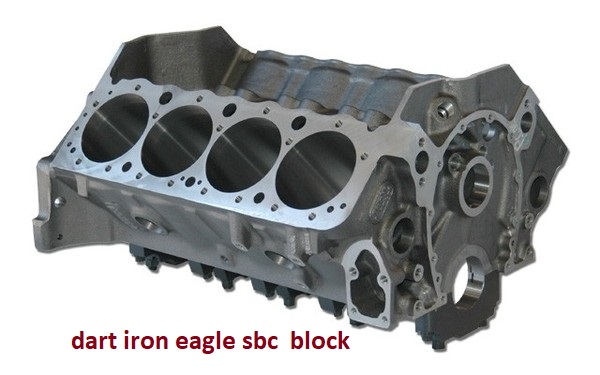
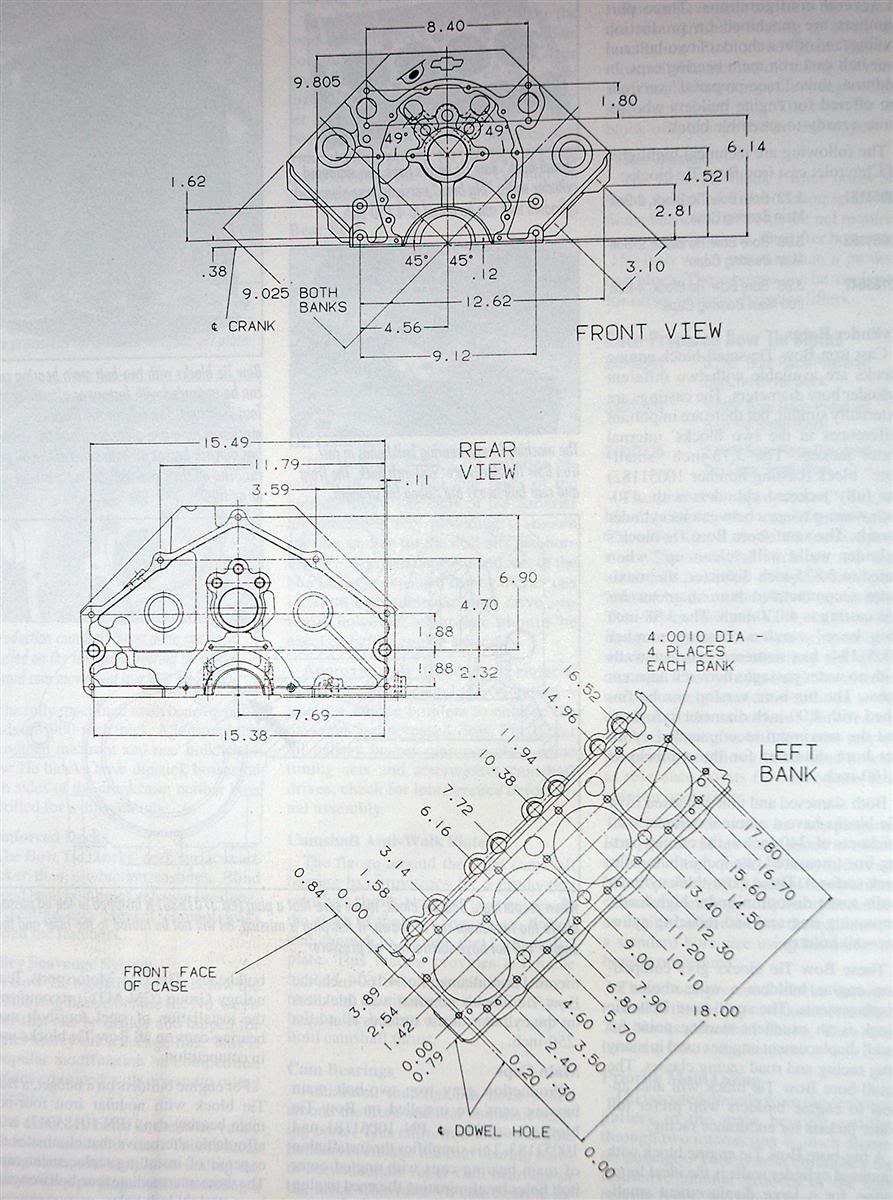
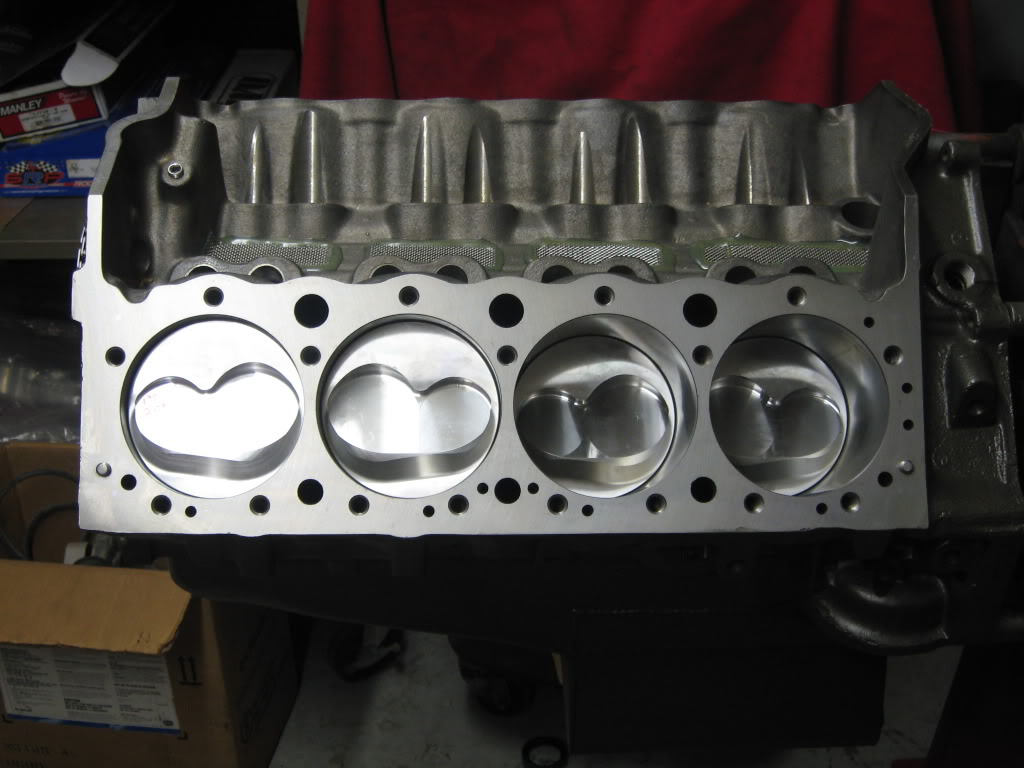
if your thinking of building a 500hp plus SBC based on the stock factory casting (NOT THE BOWTIE BLOCKS) a 350 based engines best limited to about 500 hp. the 400 blocks even weaker as theres less metal, in the 4.125" bore casting or greater bore, blocks , so BUY a DART block, the factory 400 block is far weaker and not designed to handle the stress, 400 sbc blocks were designed as low rpm truck engines
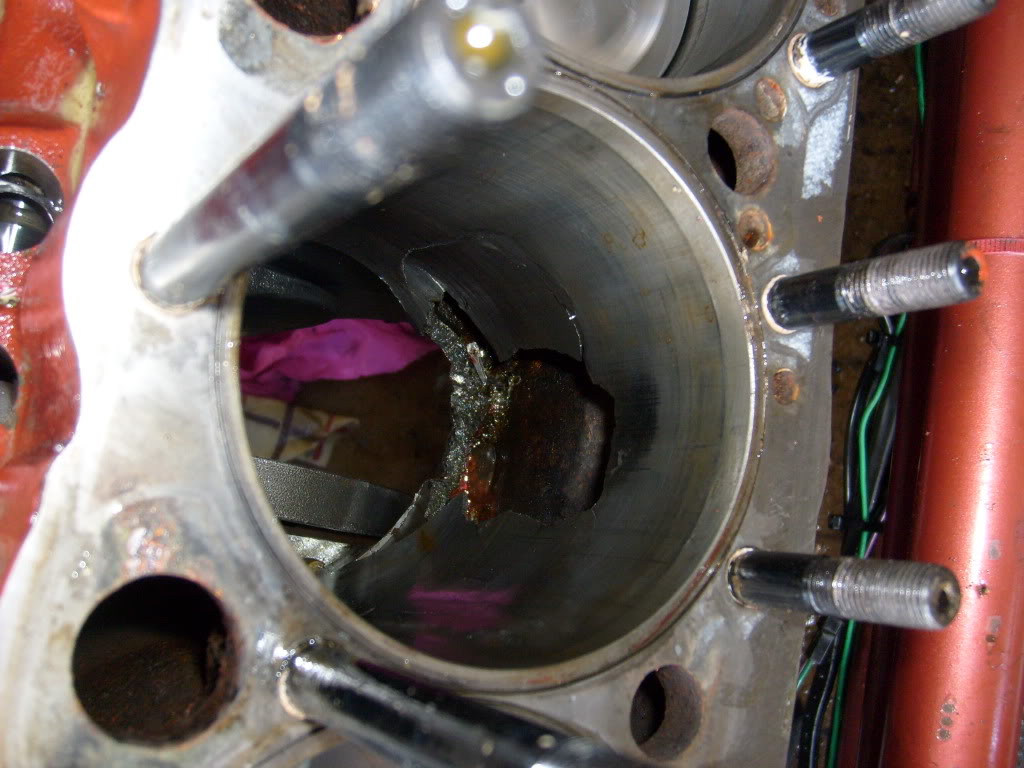
over-boring the stock 400 SBC puts the cylinder wall very close to the head bolt hole. some factory blocks end up cracked at the cylinder wall near the head bolt hole, or the threads in the thin factory casting end up pulling out of the holes. Either way water leaks and distorted cylinders are the result.
Have your machinist sonic check the block before you bore it.
calculate the remaining bore wall thickness, and if its not thick enough for safe use don,t bother
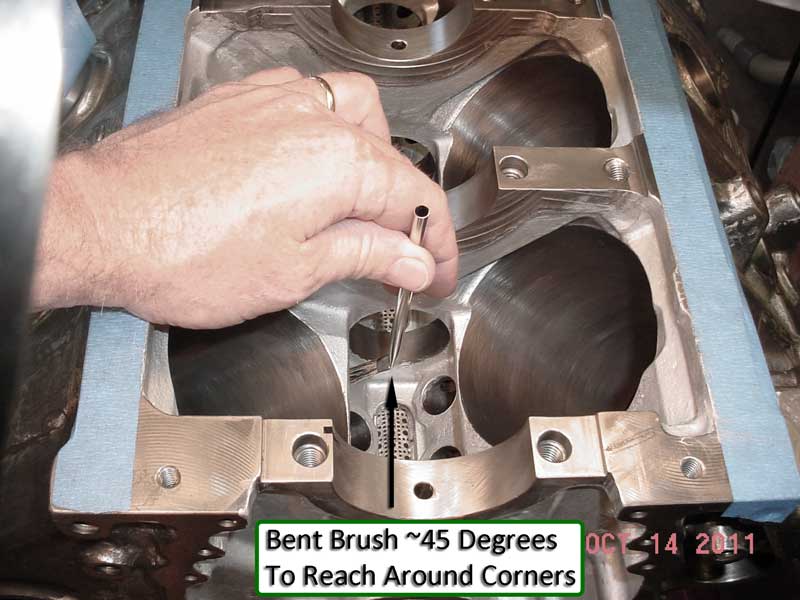
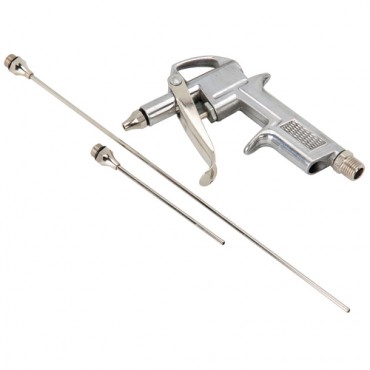
 http://garage.grumpysperformance.com/index.php?threads/flex-hone.9538/#post-96145
https://www.dragzine.com/news/engine-machining-101-getting-started-with-your-engine-build/
http://hotrodenginetech.com/how-to-build-racing-engines-cylinder-block-guide/
 www.youtube.com
Id suggest you start any engine build with a trip to a trusted local machine shop
http://garage.grumpysperformance.com/index.php?threads/finding-a-machine-shop.321/#post-59253
and ask them, at a minimum to steam clean too de-grease the block, and then pull the oil passage plugs and freeze plugs and carefully clean and inspect the block.
and have a long detailed discussion with your machinist about what needs to be done, the cost and time frame and get a firm due date and price list on a receipt that both of you sign and agree too.
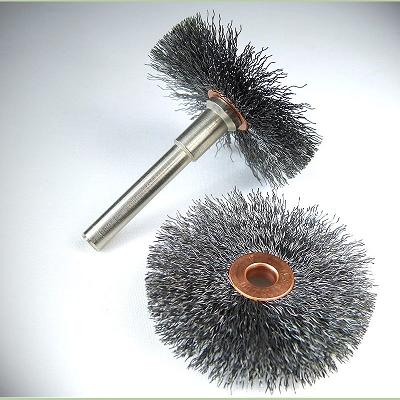
1. Tap or stainless steel brush all holes
2. inspect and clean Lifter bores
3. Drill cooling holes (if required)
4. De-burr deck, main saddles, bottom of bores, top of bores
inspect bores for taper and concentric bores and cracks
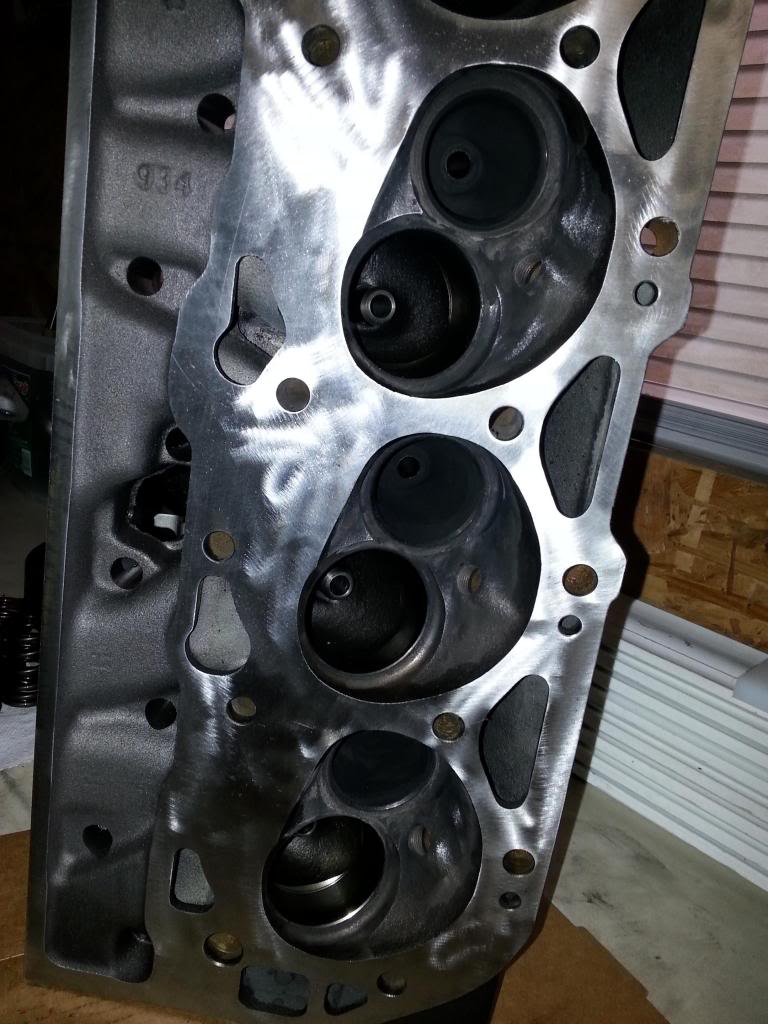
5. Unshroud deck for valve clearance, (deck block with mill, if required)
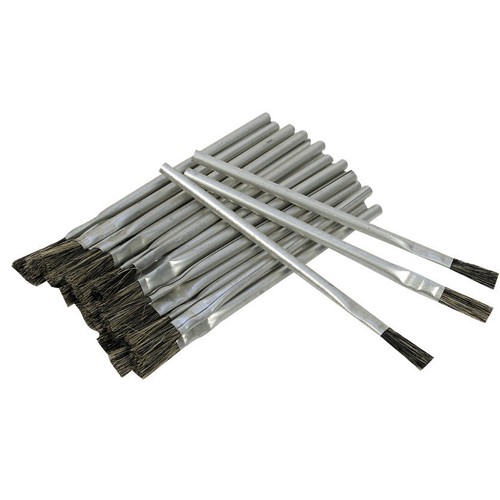
6. Clean all oil holes with stainless brush on drill, use a drill if required to clean casting flaws,
7. File main cap surfaces, re-thread tap bolt holes
8. Hone cam tunnel
9. Dress,and clean freeze plug holes
10. De-burr oil passages
11. re-clean the block and blow out oil passages
12.install cam bearings and oil passage plugs
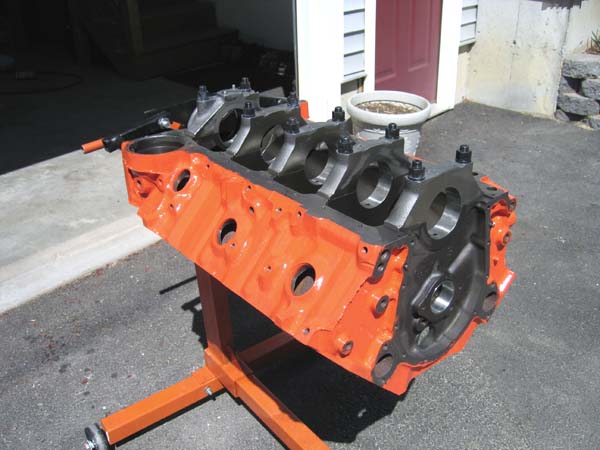
13. paint block
14.
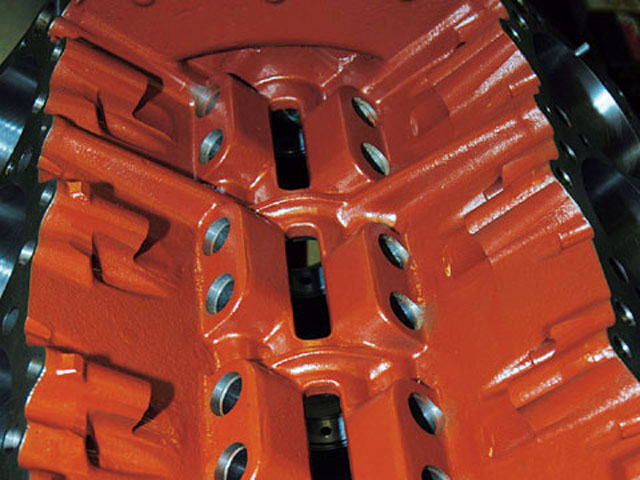
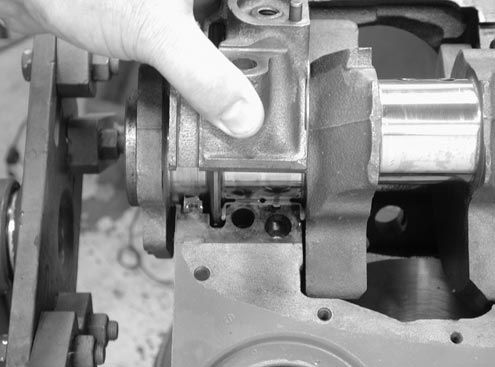
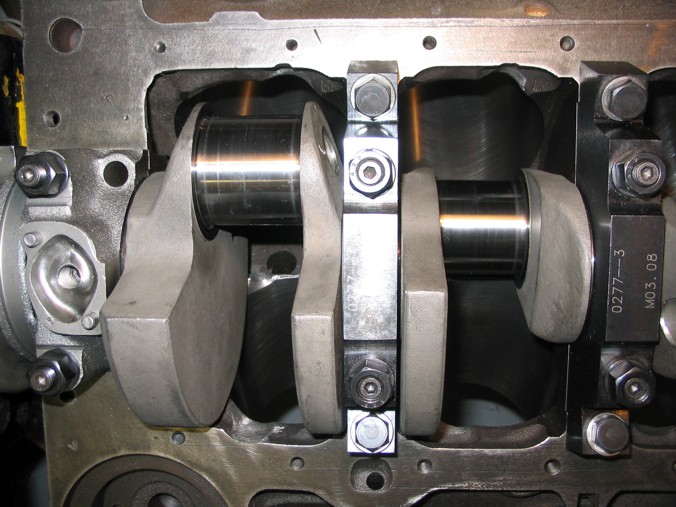
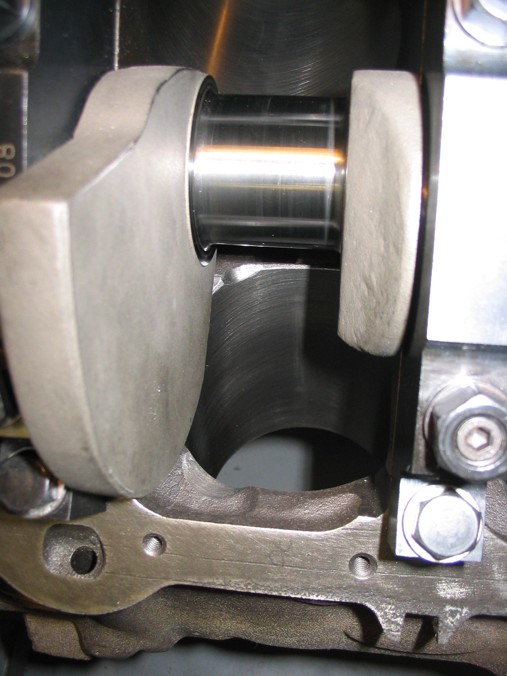
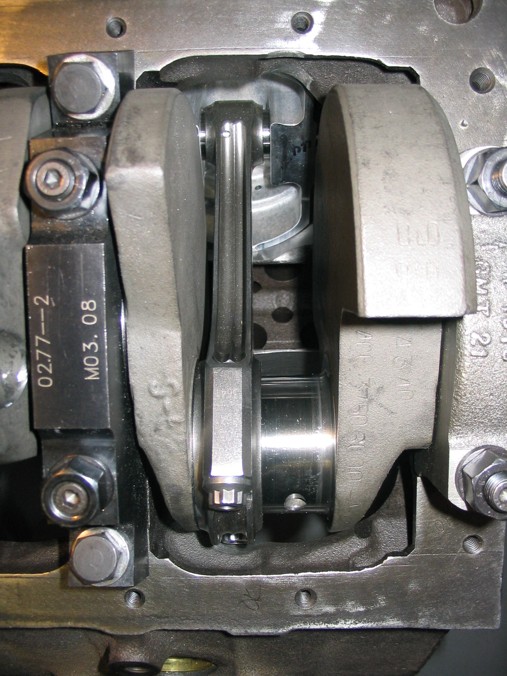
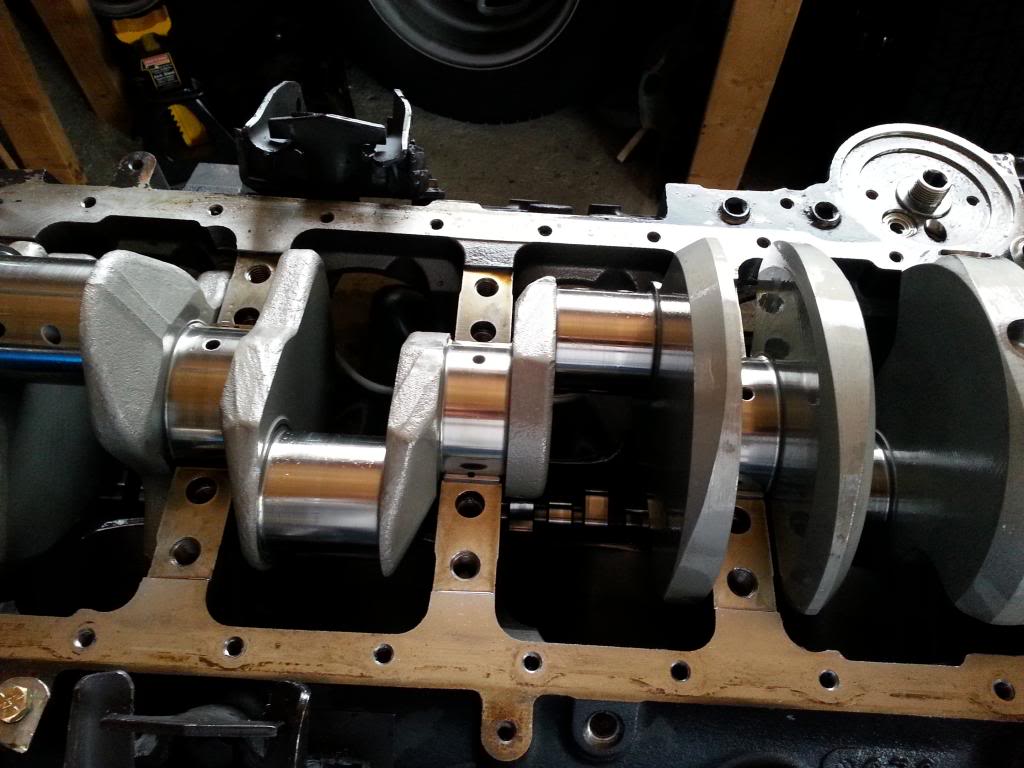
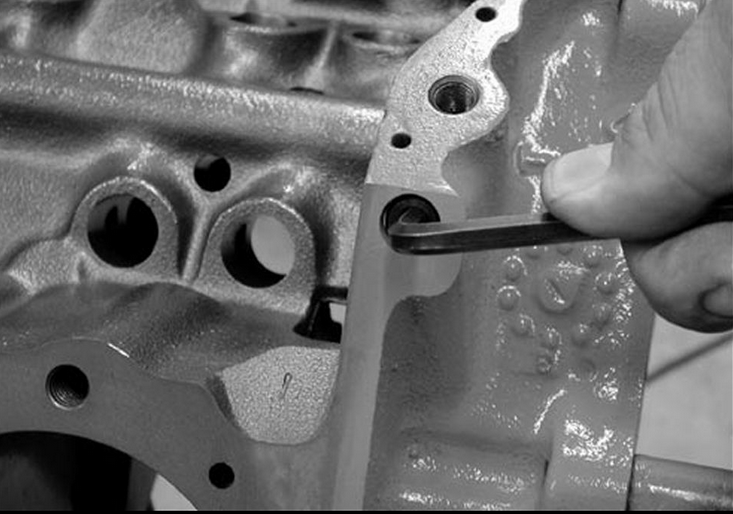
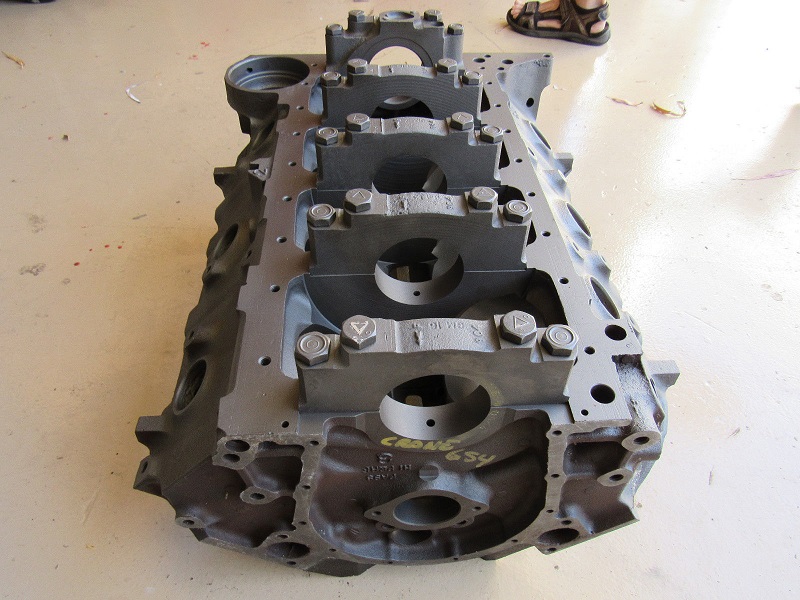
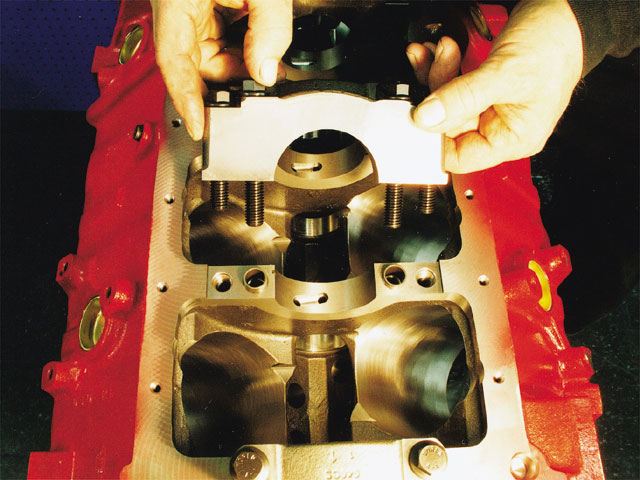
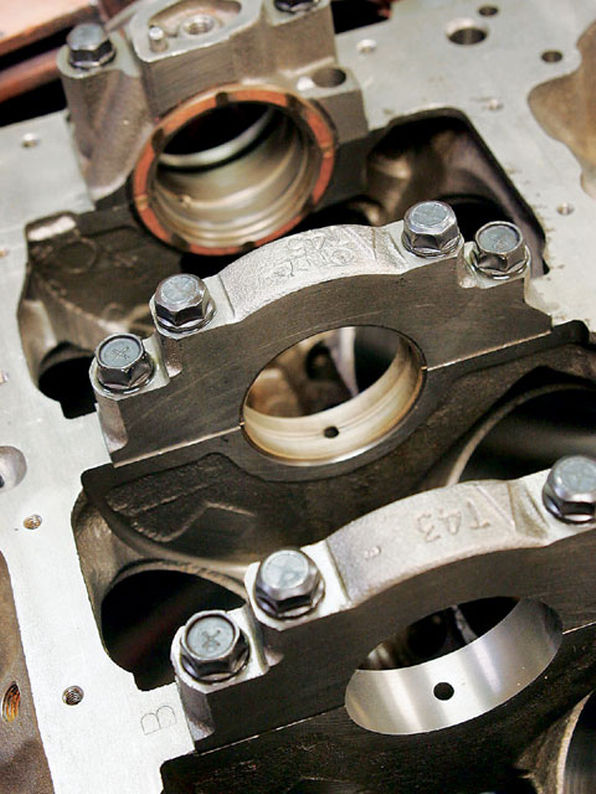
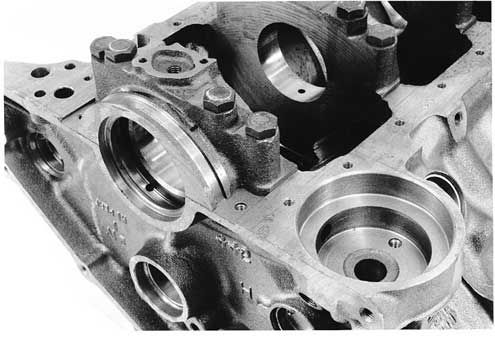
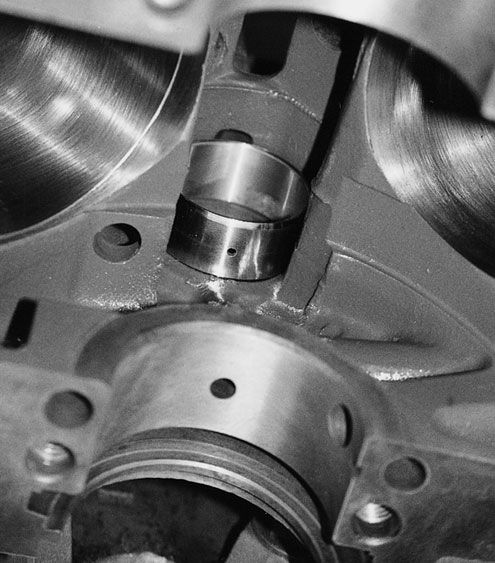
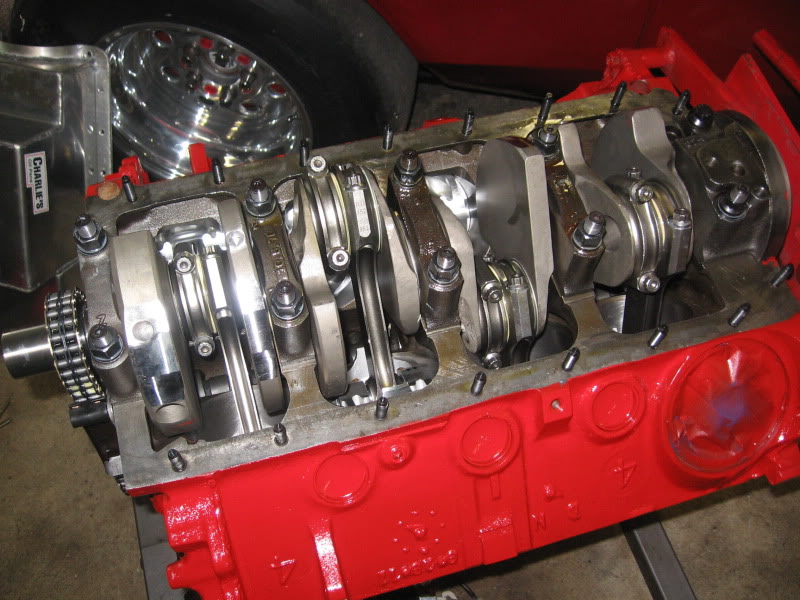
keep in mind both the main caps base and the area in the block must be machine precisely parallel , and there is a slight interference fit into a slight recess in the block on most engines to help prevent the caps moving once tightened into place by the main cap bolts or main cap studs. on some performance engines its fairly common for a hollow sleeve,s inserted 1/2 its short length, into the block and 1/2 its length into a shallow recess into the main caps, too fit into matching recesses around the main cap studs , this locates and prevents lateral movement of the main caps
http://garage.grumpysperformance.com/index.php?threads/sealants-and-threads.805/#post-45066
http://garage.grumpysperformance.co...orrect-bolt-length-and-type.13891/#post-71016


READ THIS
http://garage.grumpysperformance.com/index.php?threads/engine-block-cylinder-wall-thickness.976/
http://www.chevydiy.com/ultimate-guide-building-chevy-big-blocks-cylinder-blocks-instruction/
For a 4.125 bore or larger SBC based engine , buy a DART BLOCK, by the time all the required machine works done the difference in cost will be less than $600 and the dart blocks easily 2-3 times stronger and less likely to crack an aftermarket block is so far ahead in strength and durability it's not even worth talking about using a stock 400 casting as a basic component in a 500hp plus build.
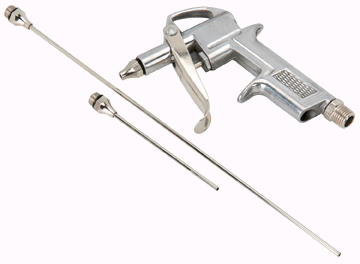
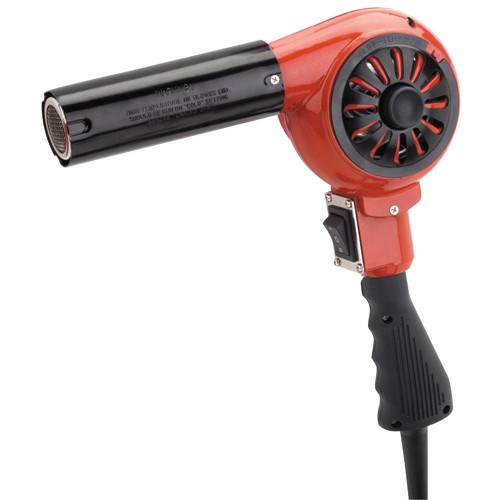
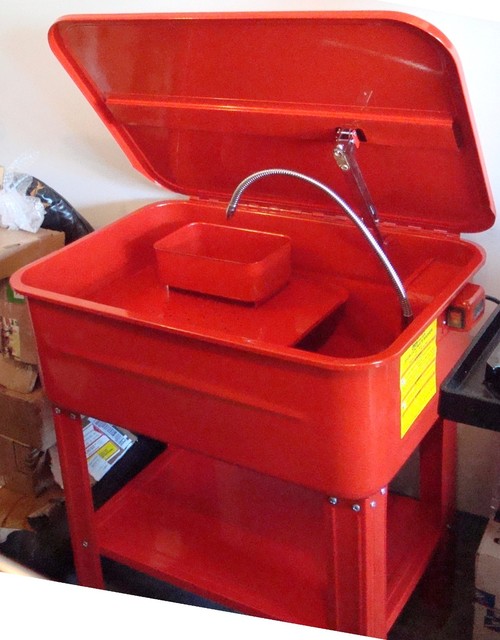
if you have not yet started assembly and can pressure clean all the machined surfaces and paint all the cast surfaces abrasive pads can be used to remove minor surface crud but remember these ALL leave abrasive dust that MUST be cleaned and removed well before assembly begins, before paint is applied use a pressure cleaner and soapy water ,solvents etc.
to clean the surfaces and a heat gun to completely dry the surfaces before pain is applied
public supermarkets sell
FORMULA 23 grease solvent,
DAWN dish wash liquid,
and white vinegar, a cup of each in a 1/2 full 5 gallon bucket
and an ounce of dawn ,
makes a decent block wash formula to remove grit grease and machine shop dirt
yeah! we all know guys that have built 600hp SBC engines, that they dyno proved and run occasionally at the track, engines that have lasted for years,, but its not constantly run under that stress level like on a circle track engine or the main caps would be moving and the block would have failed long ago, STRESS IS CUMULATIVE, its just a mater of time before something fails, the factory blocks are rated at 350-400hp and are thin wall castings, yes I know, you probably already have a block, but its just some hard learned wisdom, you don,t want to pay for all the machine work twice
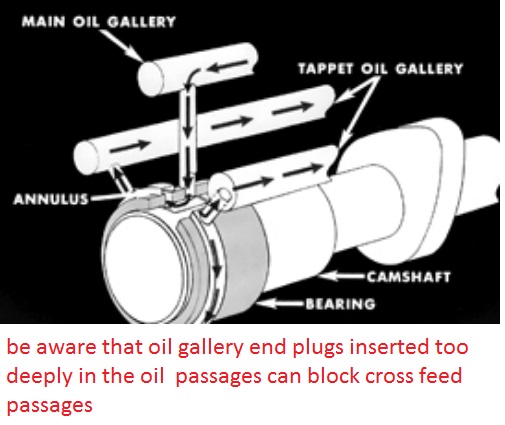
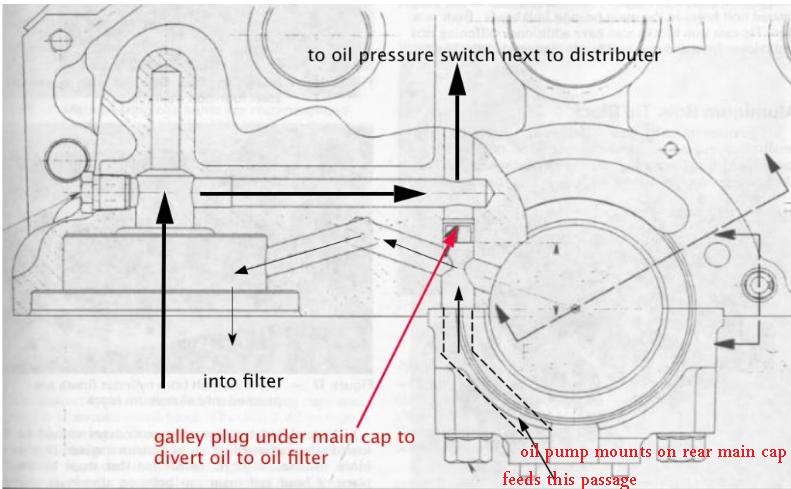
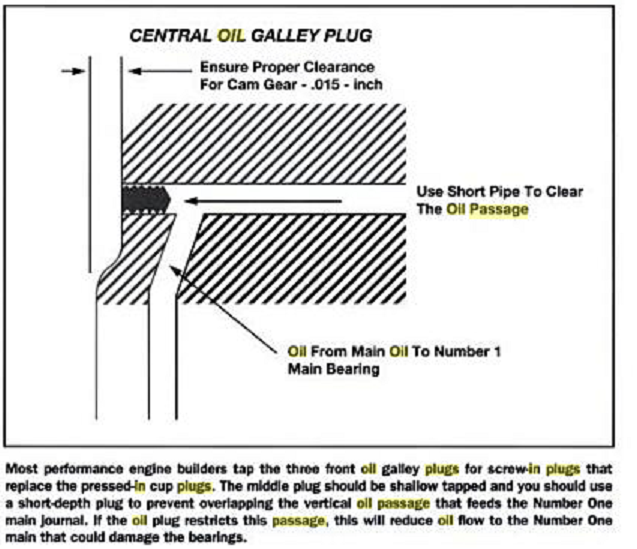
any time you use a block on a new engine build you'll be well advised to remove all the oil passage plugs an rod out the oil passages with a rifle bore brush and a high pressure pressure cleaner and replace the gallery plugs, and cam bearings, if your using a distributor with o-ring lower oil seal bands the entry to the distributor pilot hole down in the block MUST be smoothly beveled and de-burred on the upper edges of BOTH levels of the lower oil passage. failure to do so will result in cut/damaged, or O rings that get caught and pulled out of the lower sealing grooves,and if your intending to groove the lower band vertically to spray oil on the distributor gears the groove must be deep enough to compensate for the o-ring expanding slightly OR you can modify the lower distributor housing.
if you use the correct type of paint on a totally degreased block the paint traps and holds micro debris
I usually, have the block high pressure spray and chemically cleaned before I carefully inspect it for cracks, if I see anything suspicious I have the block magnetically checked
AFTER CAREFUL CLEANING, machines surfaces should be sprayed with a protective spray, and cast surfaces painted, Ive never had issues just starting an engine I built and put in storage for a few months,where Ive used it in the block as a rust preventative, it mixes with oil and seems to blend well
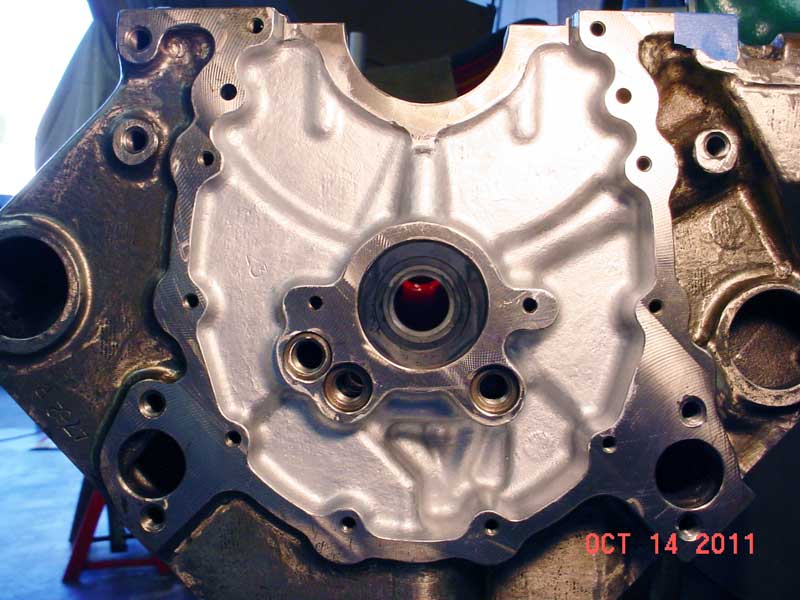
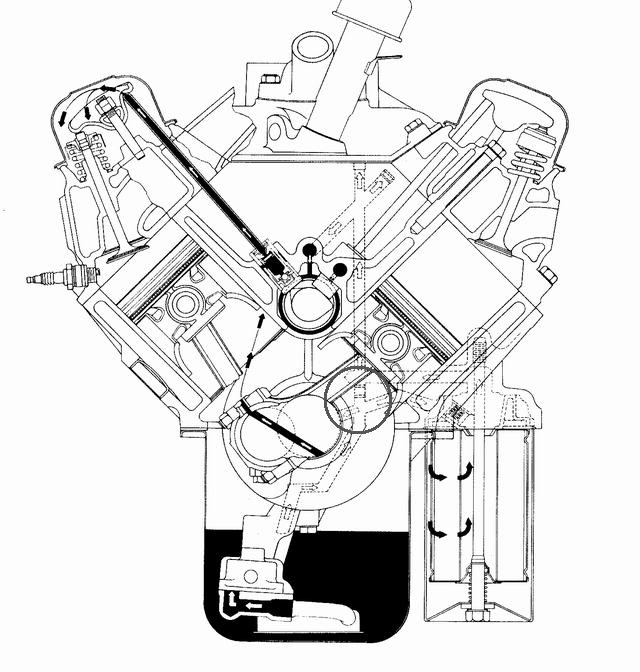
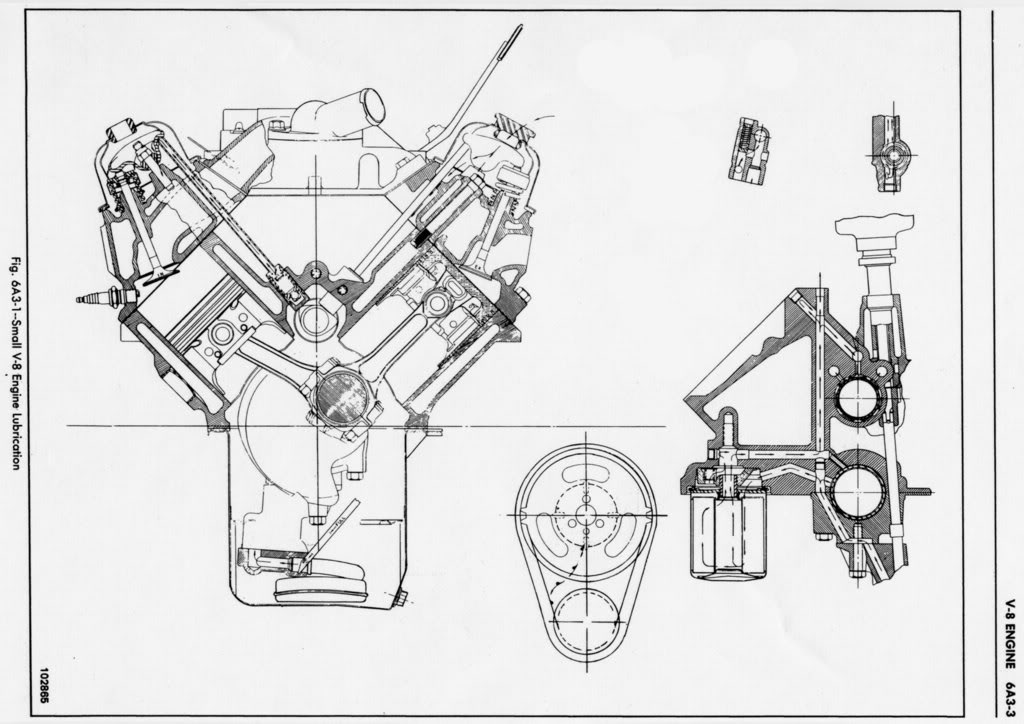
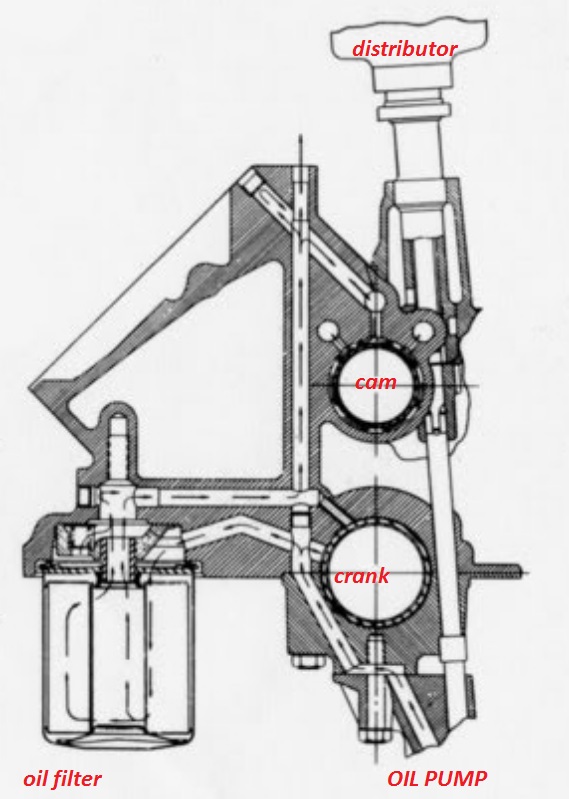
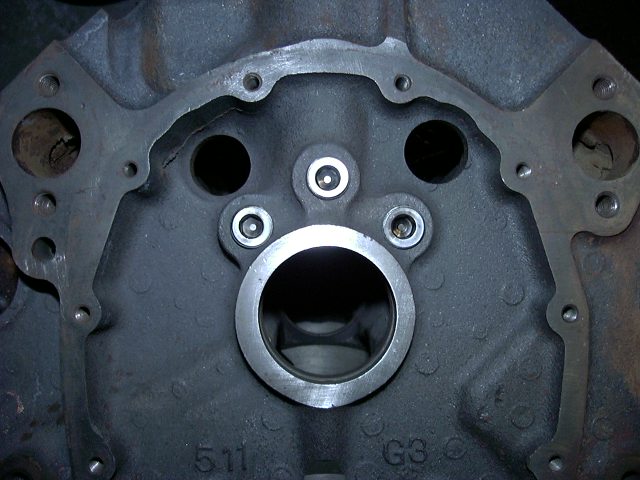
BTW, , on BIG BLOCKS the oil pumps and oil filter adapters are different due to the block oil filter recess and rear seals being different
mark iv blocks
mark v blocks
(keep in mind that ALL '91 and later Gen.V and Gen.VI big blocks come with 4-bolt main caps. The two-bolt big blocks are no longer in production
MANY BUT NOT ALL aftermarket head designs have been modified to work on both the early MARK IV 1965-90 and later MARK V & VI blocks 1991-later.)
BTW, , on BIG BLOCKS the oil pumps and oil filter adapters are different due to the block oil filter recess and rear seals being different
GEN 4 or MARK IV
GEN V and VI
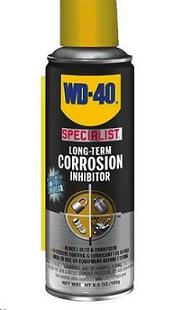 the new wd40 rust preventative spray works far better than the older version
stock cast iron main caps will tend to fail long before the ARP main studs, and of course the block bore walls should be honed with a torque plate, torqued to spec in place, and the ARP main STUDS are significantly stronger than the O.E.M main cap bolts,
If your concerned you might consider billet splayed main caps and a block line hone
http://garage.grumpysperformance.co...gine-block-main-cap-movement.6162/#post-19172
http://garage.grumpysperformance.com/index.php?threads/installing-splayed-caps.7267/#post-68837
http://garage.grumpysperformance.com/index.php?threads/splayed-main-caps.1014/#post-1861
http://garage.grumpysperformance.co...block-cylinder-wall-thickness.976/#post-33362
http://garage.grumpysperformance.co...ing-piston-to-bore-ring-seal.3897/#post-11709
http://garage.grumpysperformance.com/index.php?threads/block-prep.125/#post-30125
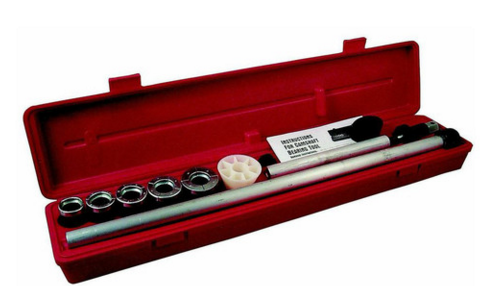
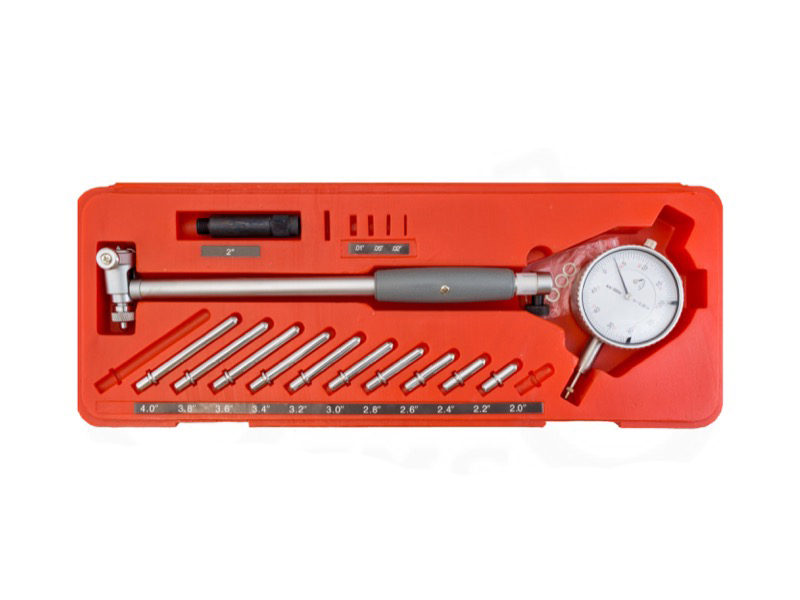
IT always helps if you have a few precision tools and the knowledge to look at and understand exactly what your looking at, and having the tools to accurately measure anything that requires you to measure it, to be sure you have the machine shop actually performing the work as requested
example
a dial indicator,
https://www.amazon.com/Anytime-Tool...ocphy=9012039&hvtargid=pla-593404776954&psc=1

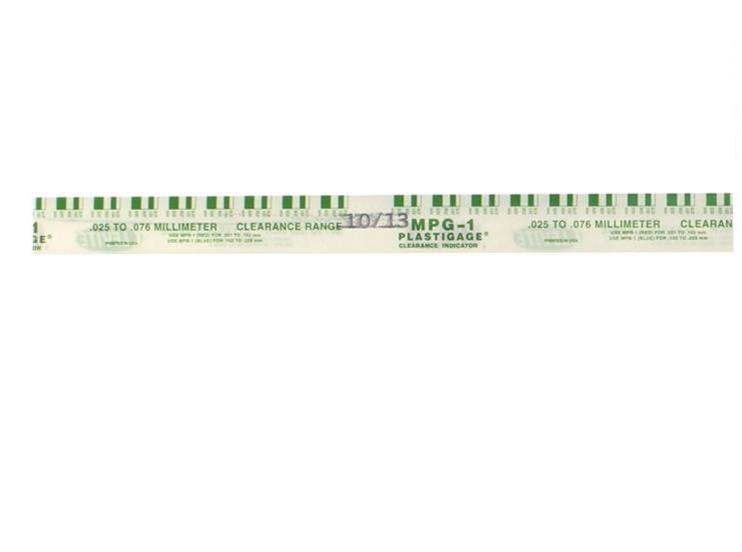
a pack of plasta gauge
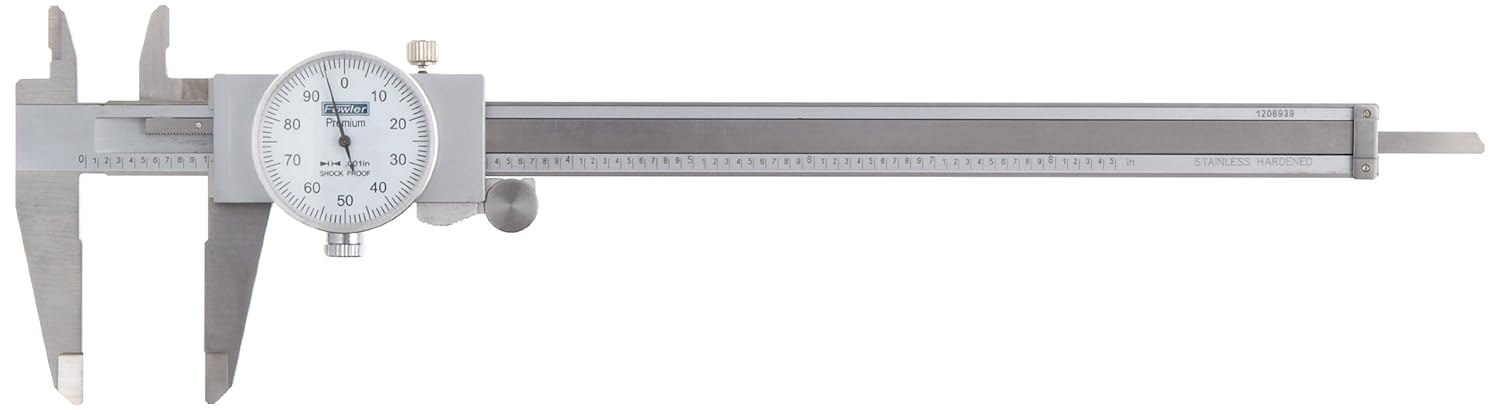
12" dial caliper,
bore gauge,
set of mics,
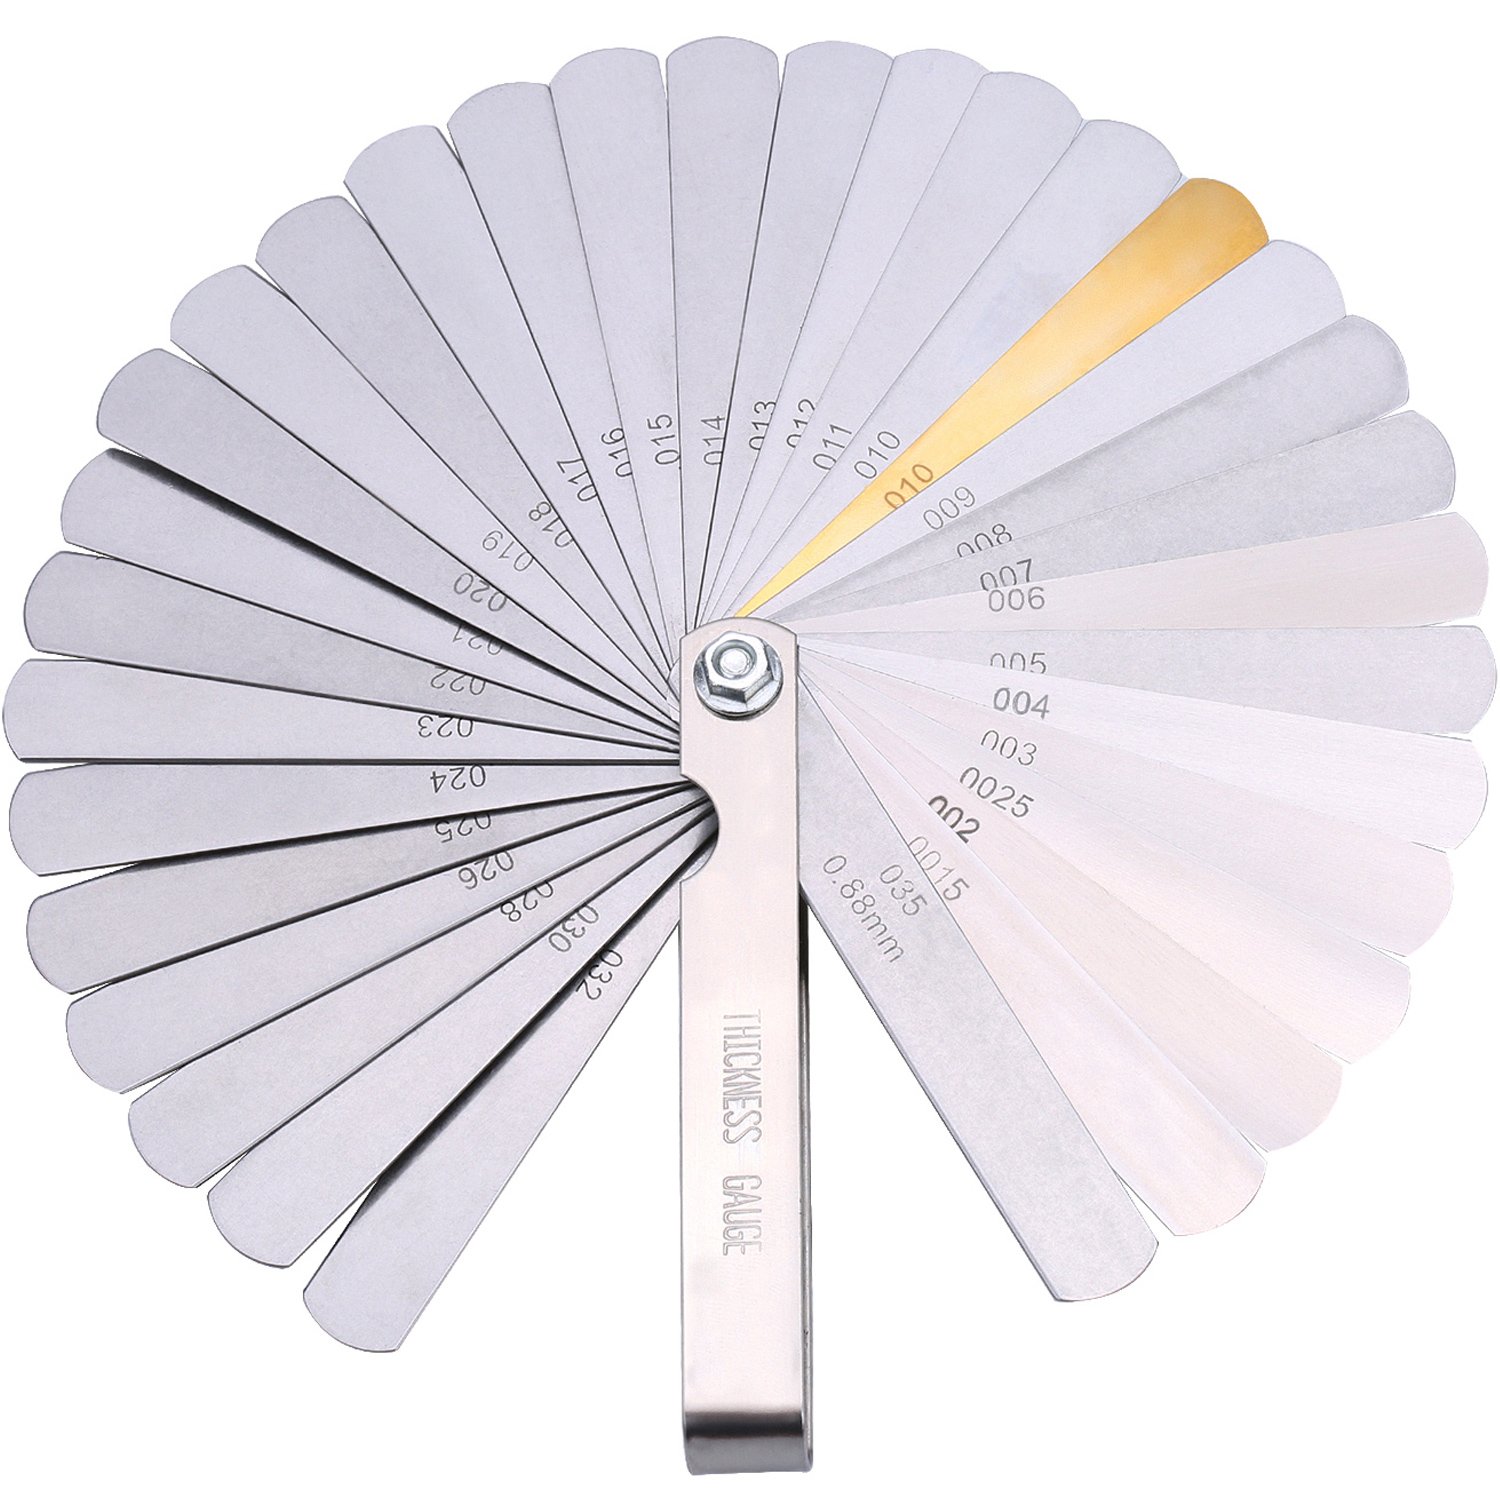
a set of feeler gauges
View attachment 17692
and a torque wrench
can go a long way in finding out if the parts are correctly machined
related threads
http://garage.grumpysperformance.com/index.php?threads/precision-measuring-tools.1390/#post-68861
http://garage.grumpysperformance.co...ing-parts-and-a-logical-plan.7722/#post-68651
http://garage.grumpysperformance.com/index.php?threads/finding-a-machine-shop.321/#post-59253
http://garage.grumpysperformance.com/index.php?threads/block-prep.125/
https://chevroletperformanceparts.com/catalog/chevrolet-performance-engines
https://video.search.yahoo.com/yhs/...=3ac4910781845346b00f6c350a2e352e&action=view
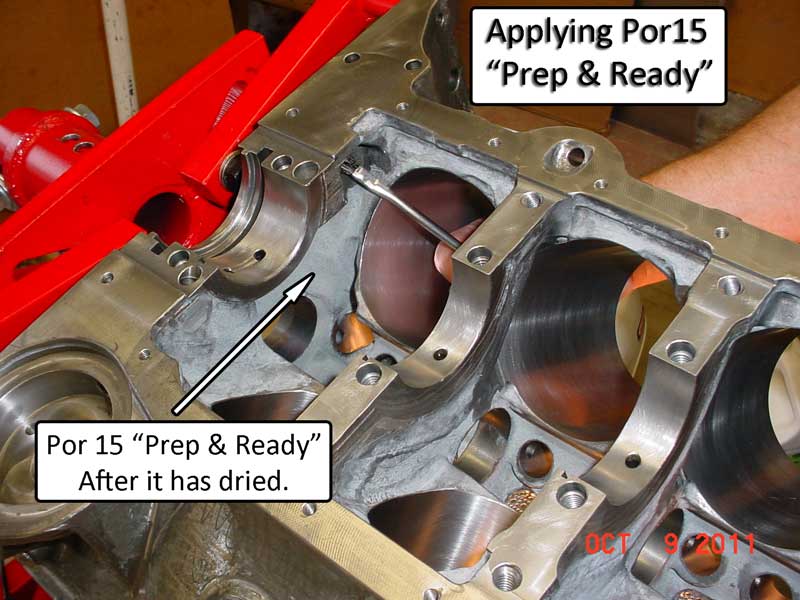
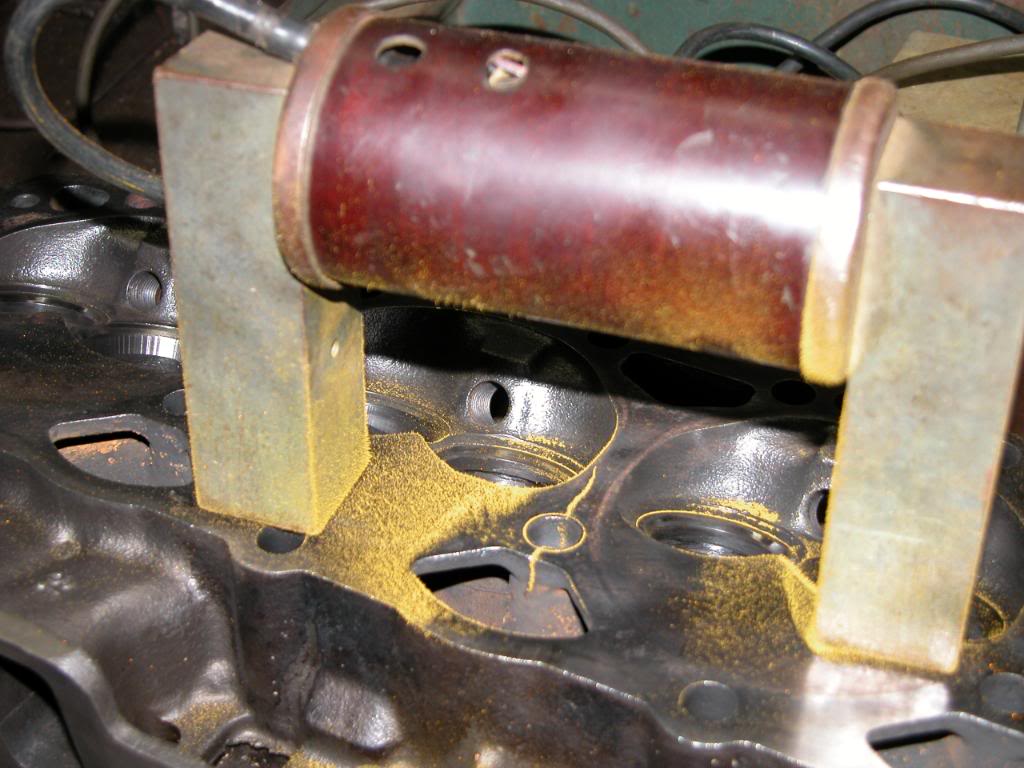
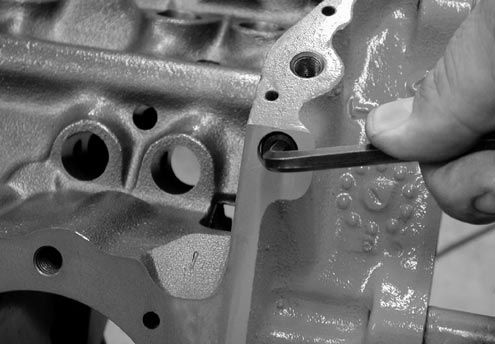
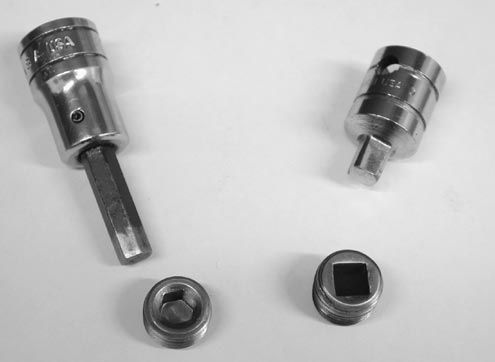
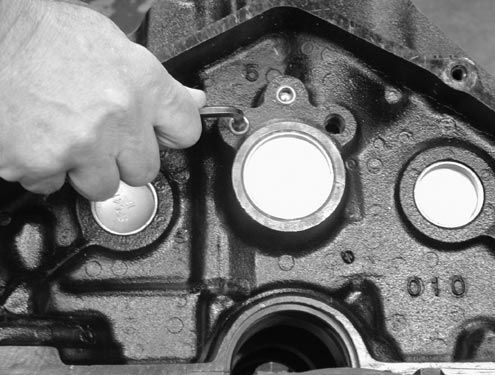
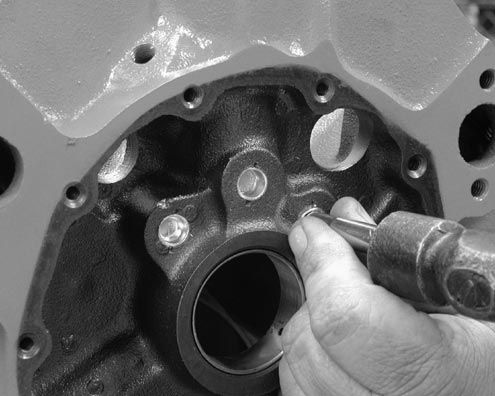
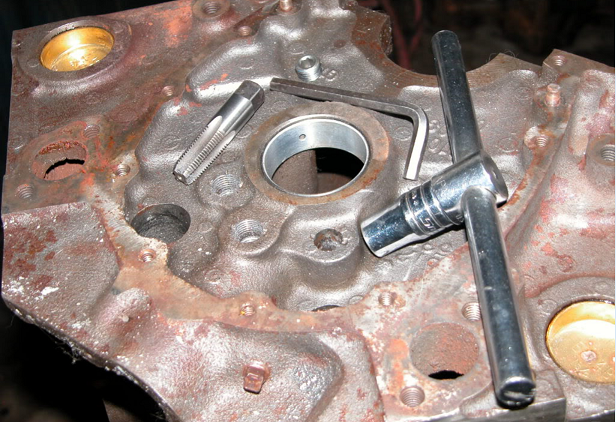
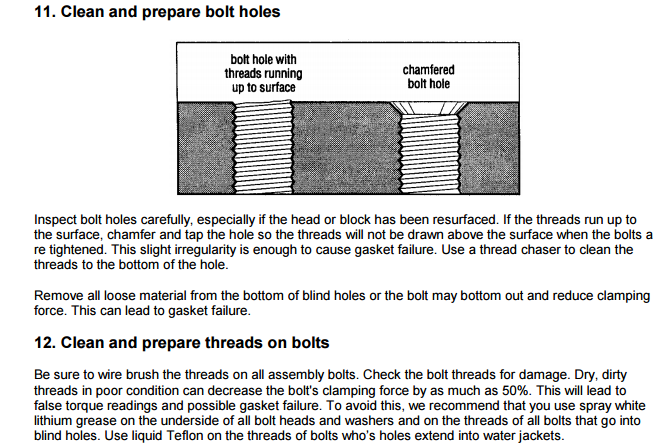
(1)clean all threaded holes with THREAD CHASER taps, NOT CUTTING TAPS
(2)send block out to be cleaned or I spray clean with high pressure water and high pressure air and solvents
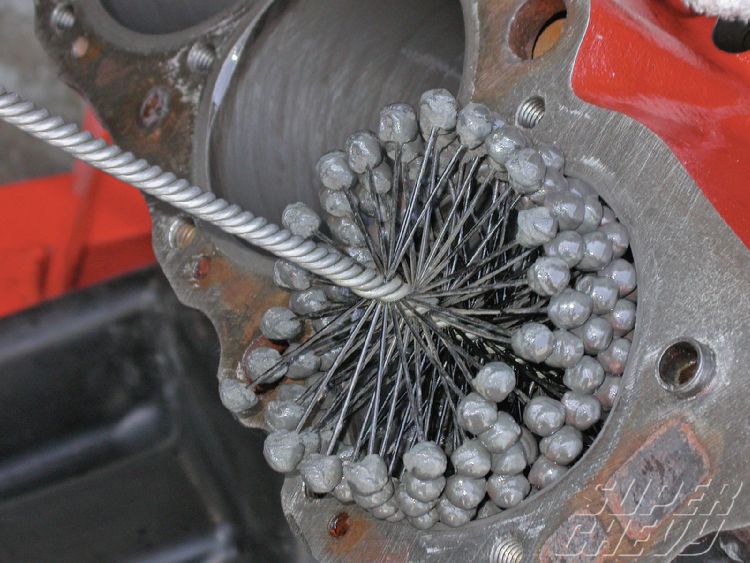
(3) open and smooth out all the oil drain back ports in the block lifter gallery casting then install shrapnel screens & magnets with epoxy
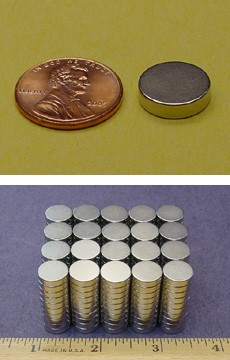
many magnets lose their magnetic pull if heated too 200F
these SPECIAL CERAMIC MAGNETS below won,t
they are available from several vendors
proper magnets trap metallic debris
SmCo Samarium Cobalt Disc Magnets
http://www.magnet4less.com/
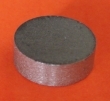
Ive used these for years
http://garage.grumpysperformance.com/index.php?threads/magnets.120/#post-76609
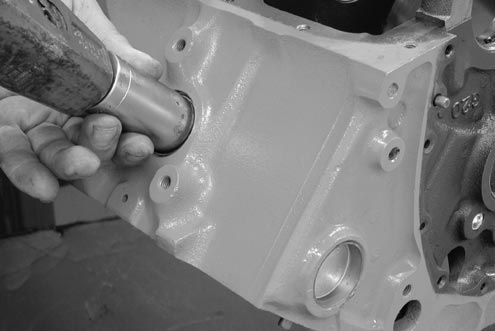
(4) paint block VERY CAREFULLY, after masking off machined surfaces and using rubber corks on lifter bores
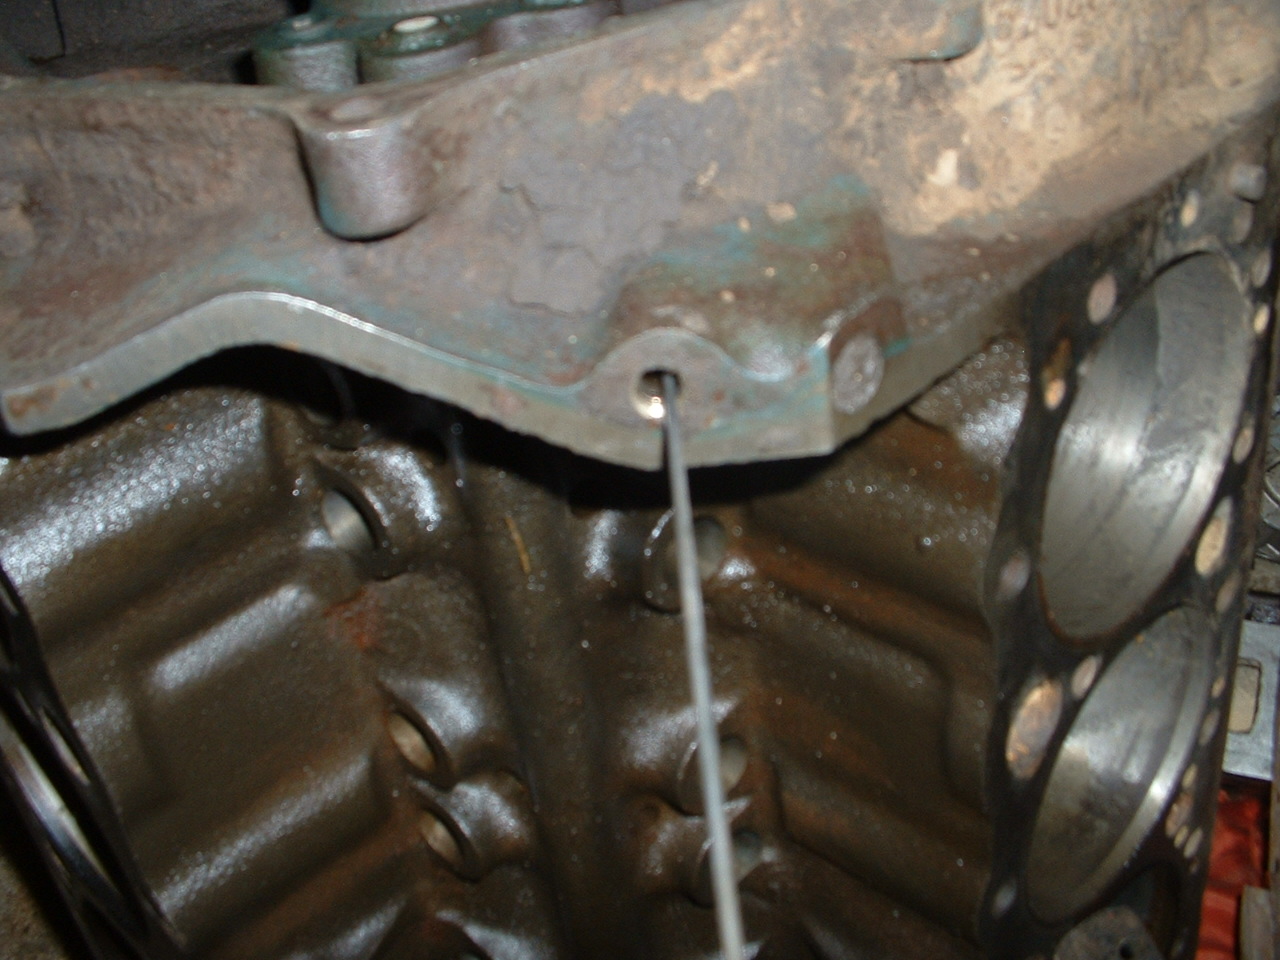
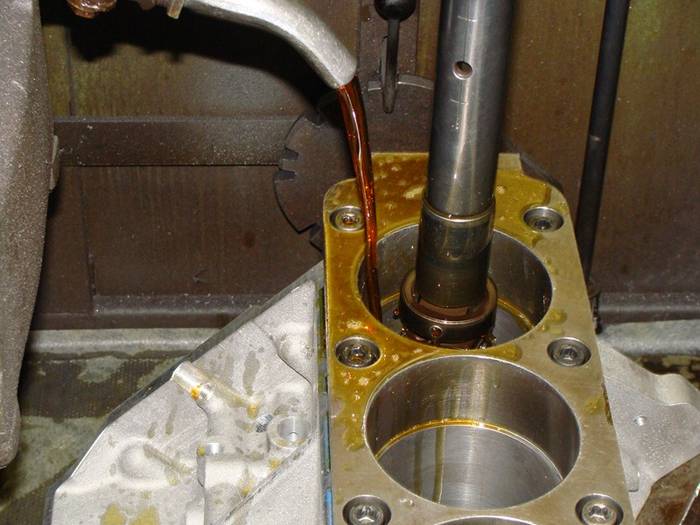
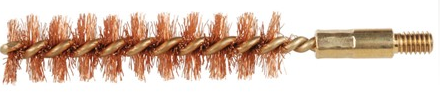
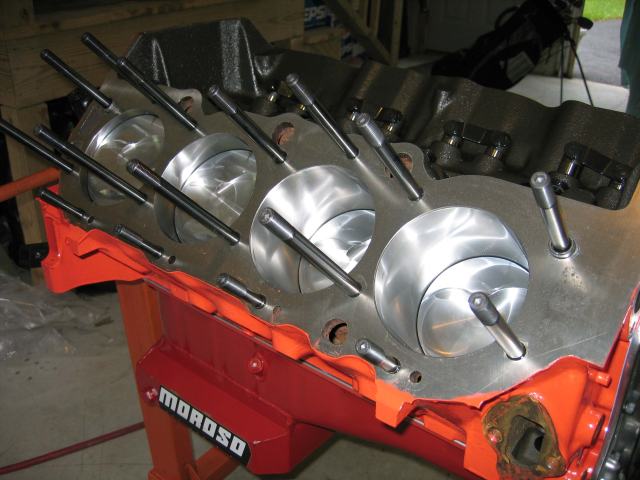
(5) rod out all the oil passages, brush them clean, with a rifle bore brush and solvent then install cam bearings
http://garage.grumpysperformance.com/index.php?threads/cam-bearing-install-tools-install-info.1479/
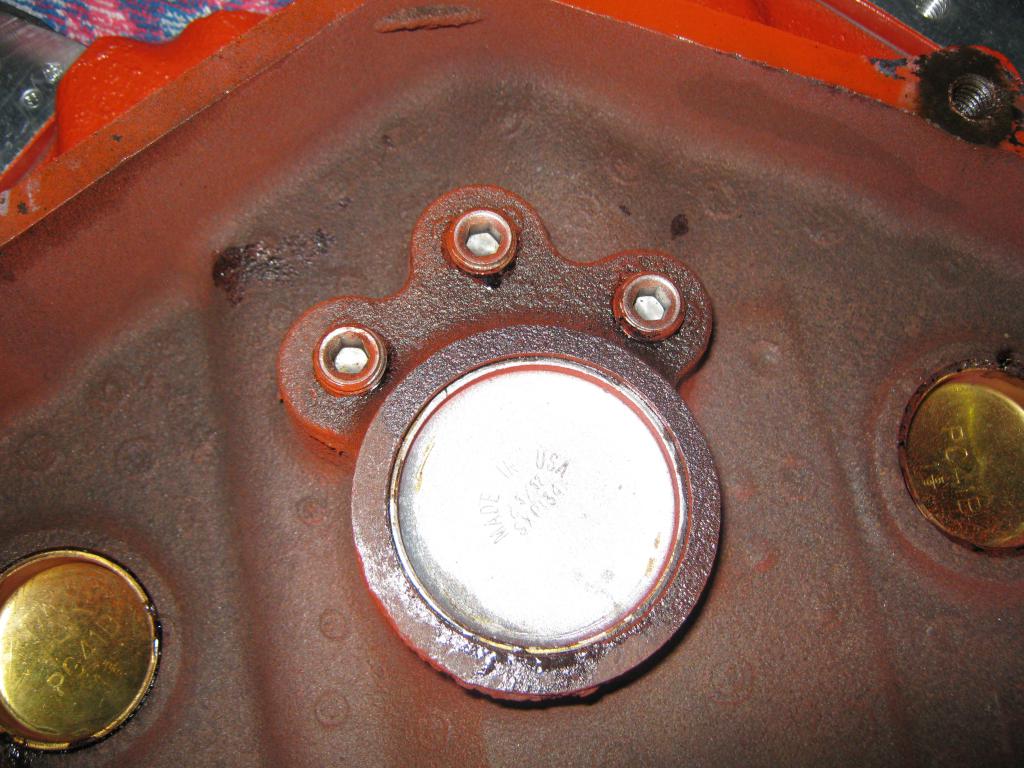
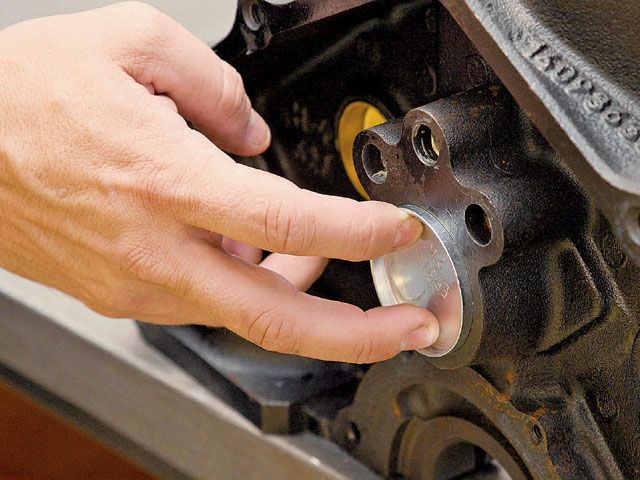
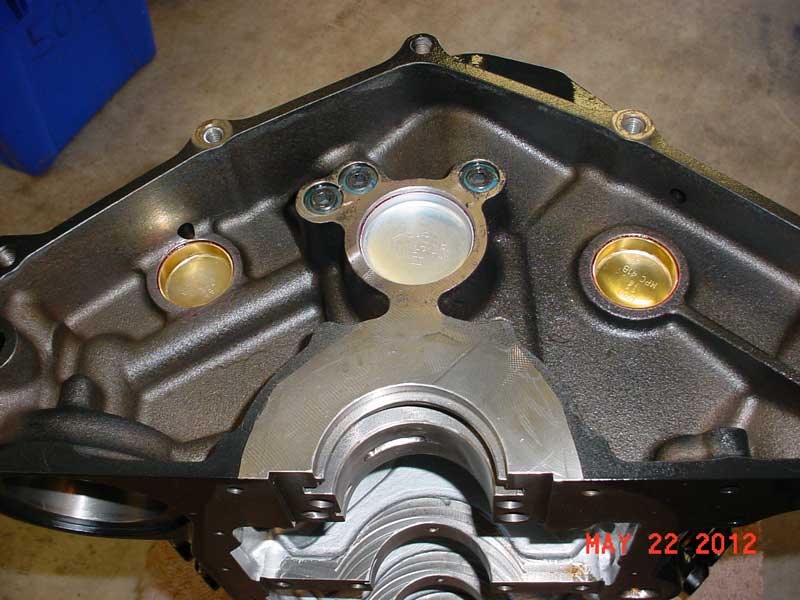
(6)install freeze plugs
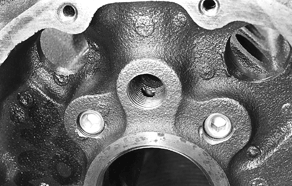
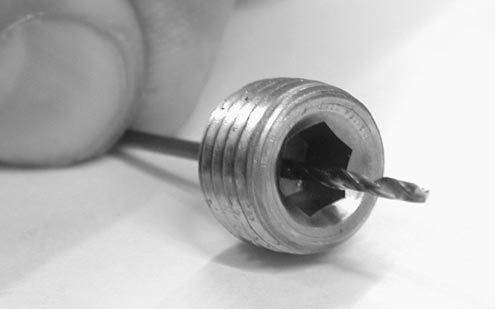
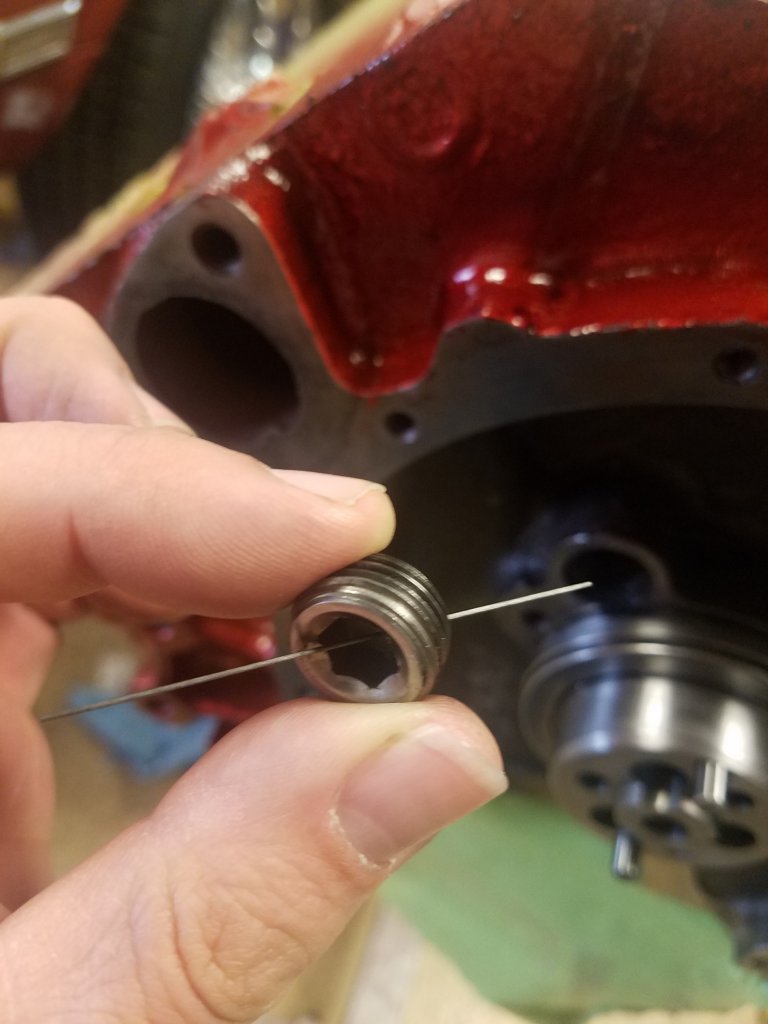
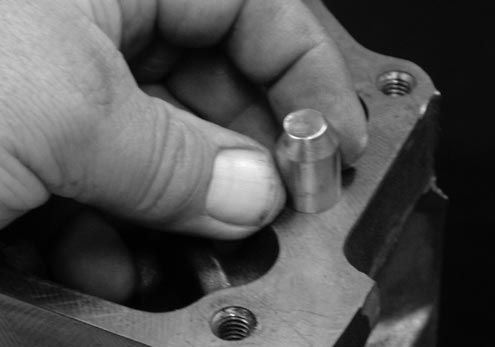
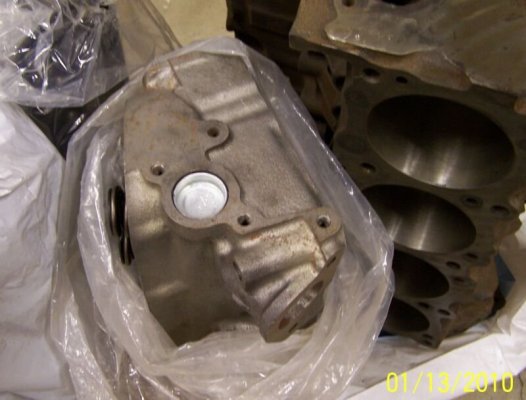
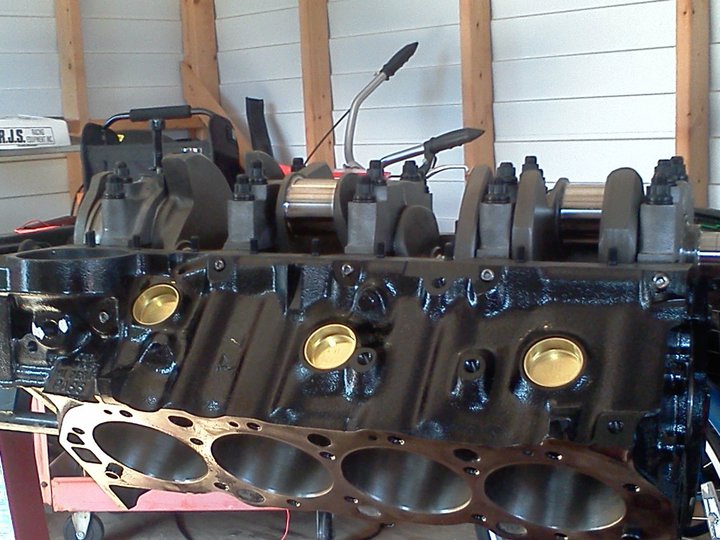
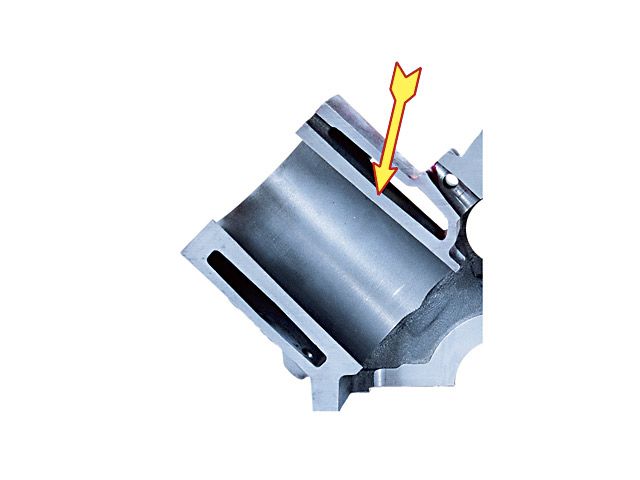
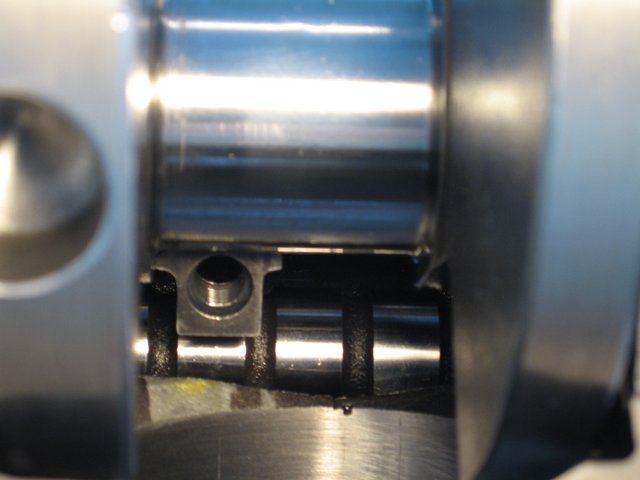
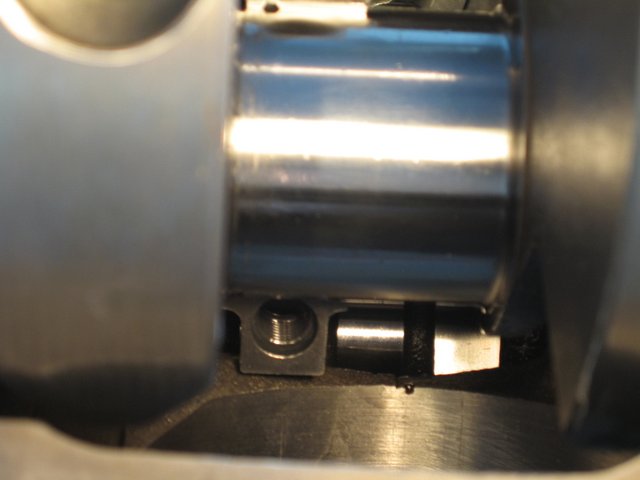
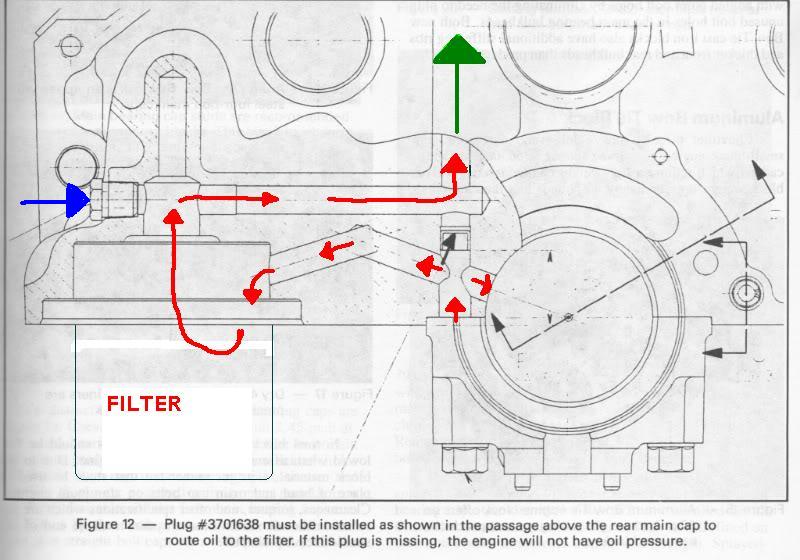
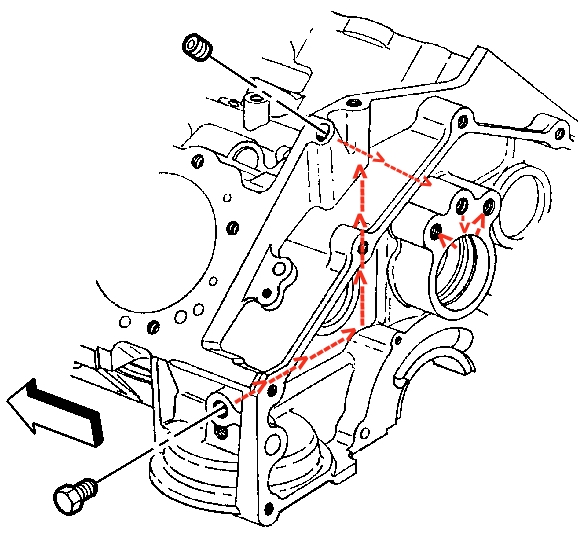
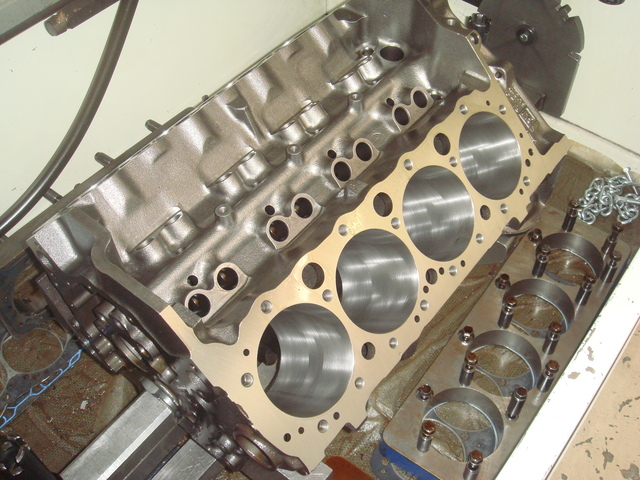
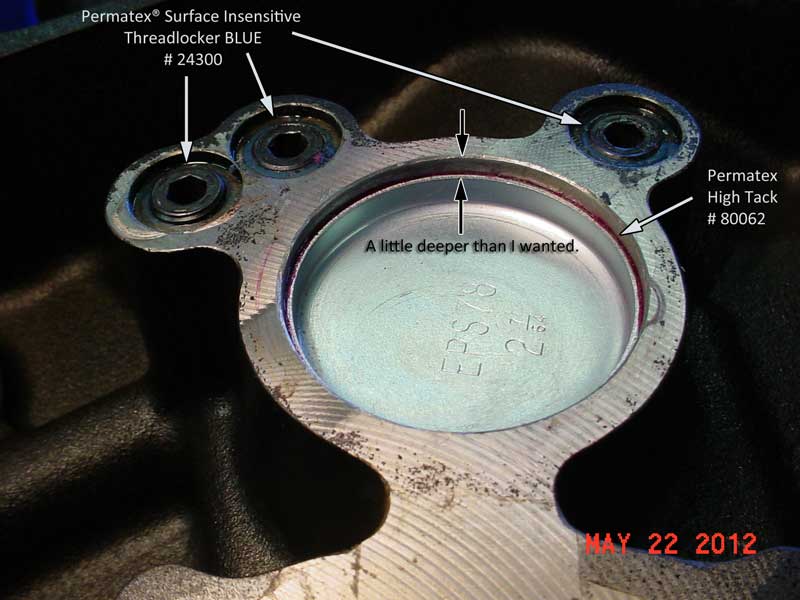
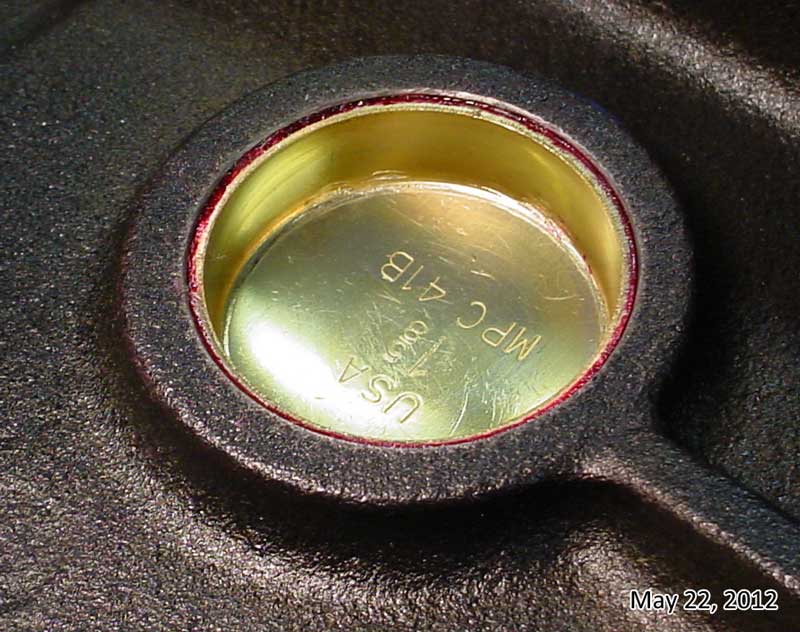
threading the oil passage plugs increases durability and I generally suggest drilling an oil pray jet hole thats .031-.035 in the pass side oil pass plug, THE ONE AS YET UN THREADED IN THE PICTURE ABOVE
http://www.chevydiy.com/the-complete-cylinder-block-guide-for-chevy-small-block-engines/#
http://www.precisionenginetech.com/proj ... d-part-1/#
posting.php?mode=edit&f=51&p=1706
http://www.hotrod.com/how-to/engine/hrd ... omparison/
http://www.eastwood.com/paints/hi-temp- ... aints.html
http://circletrack.automotive.com/10913 ... index.html
http://www.circletrack.com/enginetech/c ... index.html
http://www.popularhotrodding.com/tech/1 ... ine_block/
http://www.circletrack.com/ultimateraci ... index.html
http://www.mcmaster.com/#standard-taps/=ke36u2
http://www.mcmaster.com/#thread-forming-taps/=ke38k5
http://www.circletrack.com/tipstricks/1 ... index.html
http://www.dragzine.com/tech-stories/en ... ine-block/
viewtopic.php?f=51&t=2919&p=7625#p7625
http://www.hotrod.com/techarticles/buil ... index.html
https://secure.pawengineparts.com/shopp ... catid=1477
http://www.idavette.net/hib/bbfh1.htm
http://www.clockwheelblog.com/2009/09/e ... ourselfer/
http://www.circletrack.com/enginetech/c ... index.html
http://www.se-r.net/engine/block_prep.html
http://www.rpmmachine.com/dart-blocks.shtml
http://www.sa-motorsports.com/blkdiy.aspx
https://garage.grumpysperformance.c...t1-lt4-1992-96-corvette-engine-related.14574/
viewtopic.php?f=50&t=1249&p=2674#p2674
viewtopic.php?f=50&t=804
http://www.circletrack.com/enginetech/c ... index.html
http://www.project33.com/Categoryarticl ... ory=Engine
http://www.project33.com/Categoryarticl ... ory=Engine
http://www.project33.com/Categoryarticl ... ory=Engine
http://www.project33.com/Categoryarticl ... ory=Engine
http://www.project33.com/Categoryarticl ... ory=Engine
http://www.project33.com/Categoryarticl ... ory=Engine
http://www.circletrack.com/techarticles ... index.html
http://www.circletrack.com/enginetech/c ... index.html
Ive occasionally been asked what you can do too reduce the slack in the timing chain if your blocks been line honed,
to straiten the main bearings and that resulted in a slightly closer crank to cam center-line distance,
that results in a slightly increased slack in the stock timing chain sets.
a negligible amount of metal is generally removed from the main bearing saddles in the block, they usually try very hard to minimize that, metal removal so standard parts still fit, during a line hone , but they do sell slightly tighter timing chain sets to correct excess slack if that's required.
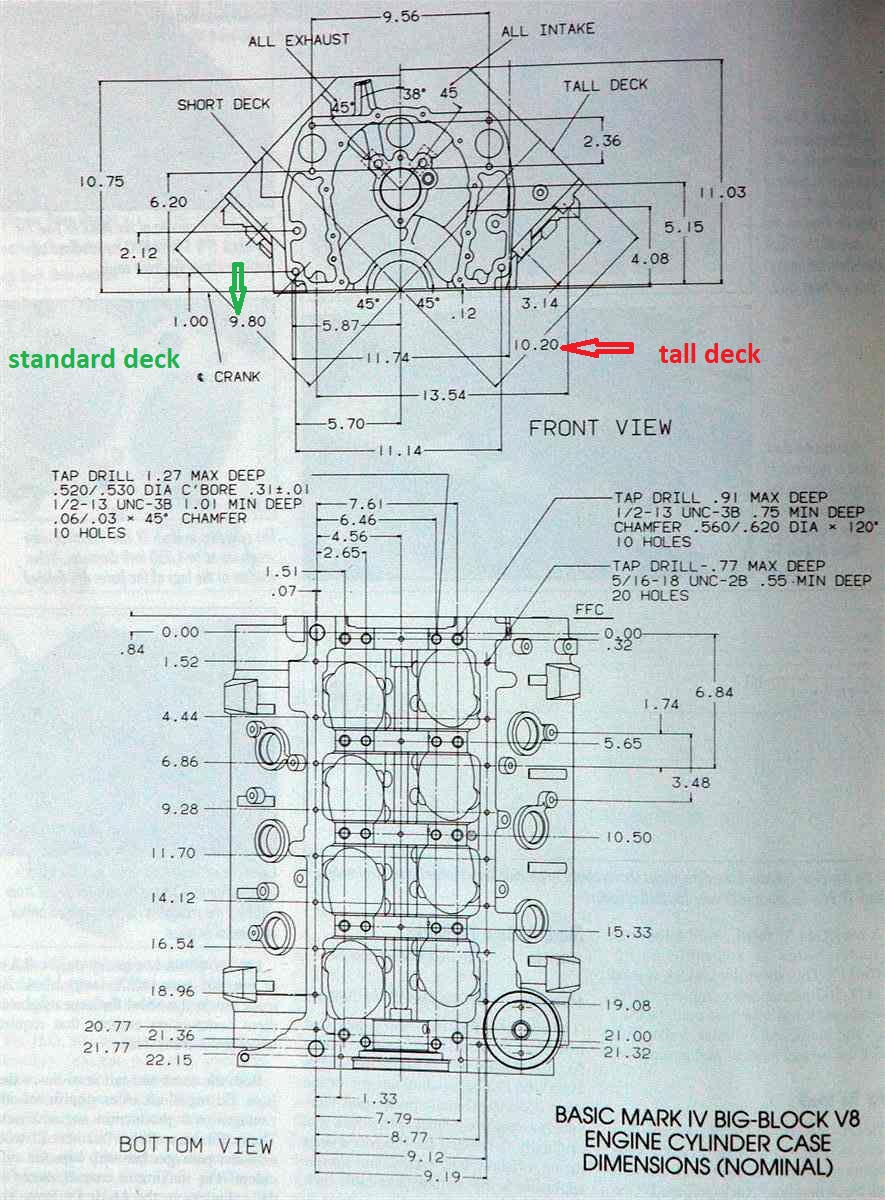
UN-machined SBC blocks have a nominal 9.0" deck height,
its very common to have the deck on a previously undecked block actually measure 9.022"-9.025"
UN-machined BBC blocks have a nominal 9.8" deck height,
its very common to have the deck on a previously undecked block actually measure 9.822-9.825
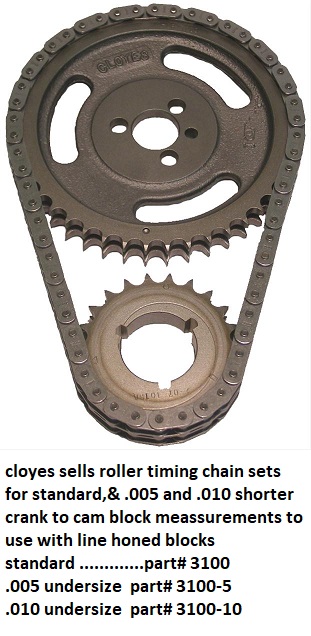
https://www.summitracing.com/parts/clo-9-3100-5
Timing Chain and Gear Set, Original True Roller, Double Roller, -0.005 in., Iron/Steel Sprockets, Chevy, Small Block, Set
for line honed blocks where the crank is .005 closer to the cam
https://www.summitracing.com/parts/clo-9-3100-10
for line honed blocks where the crank is .010 closer to the cam
Timing Chain and Gear Set, Original True Roller, Double Roller, -0.010 in., Iron/Steel Sprockets, Chevy, Small Block, Set
if you just assume that the machine shop must have cleaned the parts they worked on carefully...

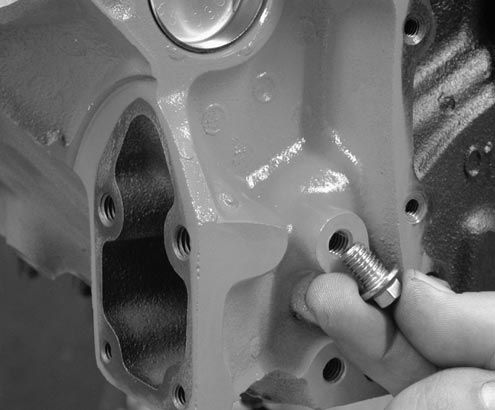
any time you'll want to re-use bolts its generally a good idea,
to clean the bolt threads with a rotary wire brush and a drill,
and run a cleaning tap through the blocks threaded bolt holes
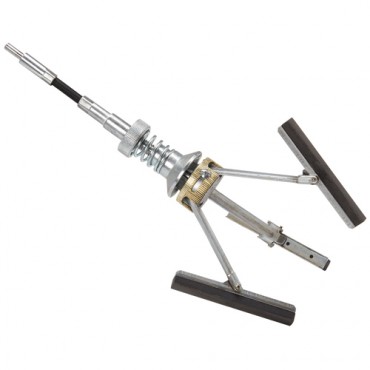
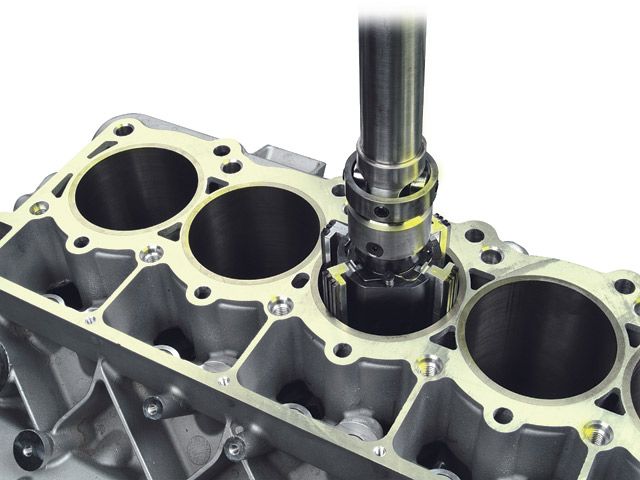
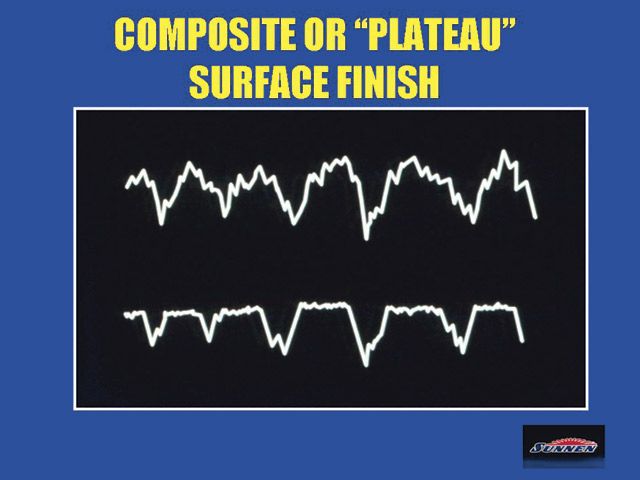
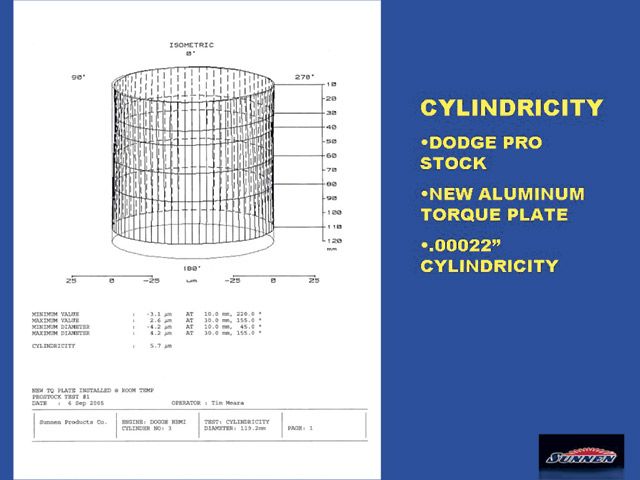
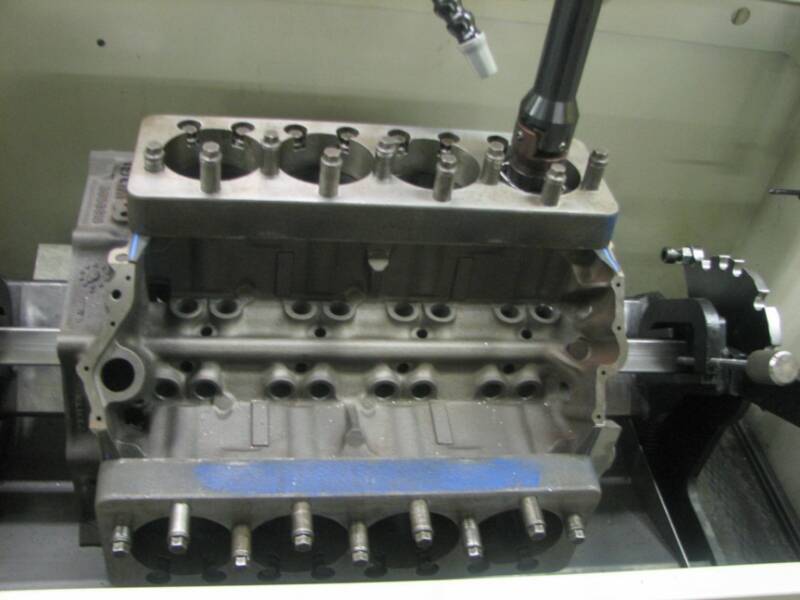
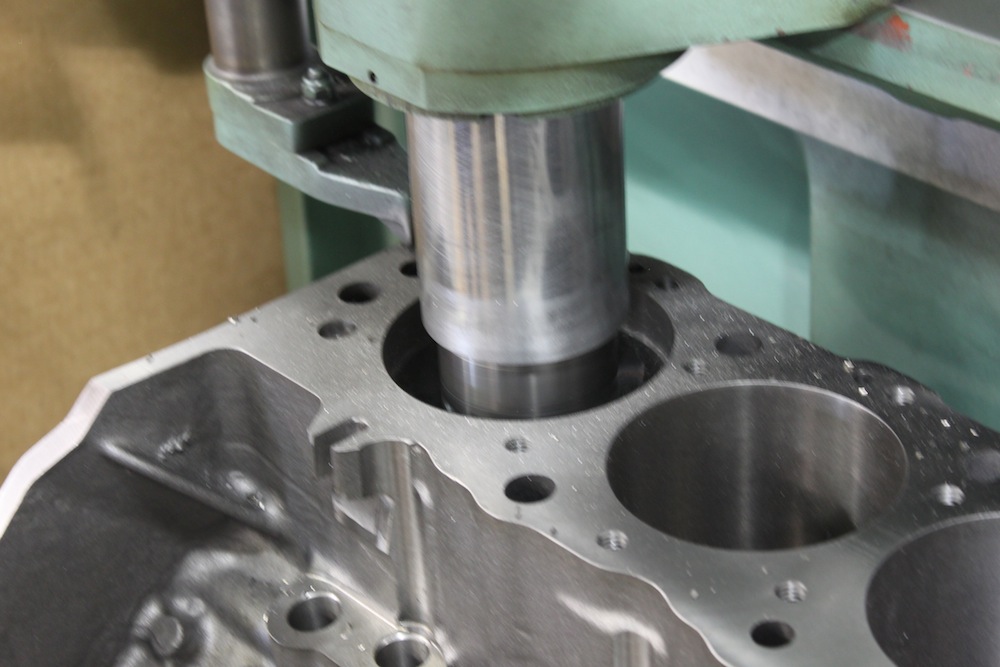
HONE WITH HONE PLATES to duplicate the stress the head bolts place on the cylinder walls to get a true round bore wall surface
the few minimum things Id ask for is
when you clean an engine block you'll need to pull all the oil passage plugs and use a rifle bore brush on the oil passages and a pressure washer spray followed immediately with lots of solvents and WD 40 to prevent rust
clean out the oil passages, its mandatory
verify the decks level, smooth, strait
verify the blocks sound (no cracks, in the lifter gallery or anywhere else,)and cylinder walls are a minimum of .200 thick
check, debur , slightly bevel the threaded holes entrance slightly
install new cam bearings
all brass freeze plugs,
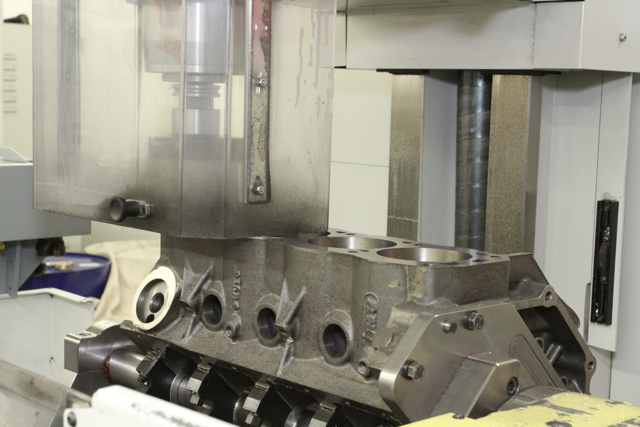
A GOOD CYLINDER HONE with a DECK PLATE
tap the oil passage plugs for screw in vs press in oil passage plugs
drill the left front lifter gallery oil passage plug with a .030 hole so oil sprays on the timing gears
use ARP main cap studs
bevel the oil pump passage entrance on the rear main cap
verify the lifter bore locations/diam.
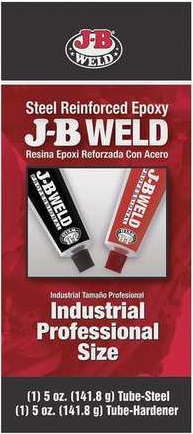
then paint the block and add shrapnel screens with J&B weld after you get the block back
viewtopic.php?f=54&t=10388

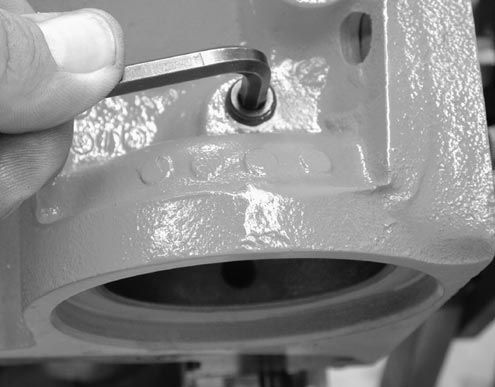
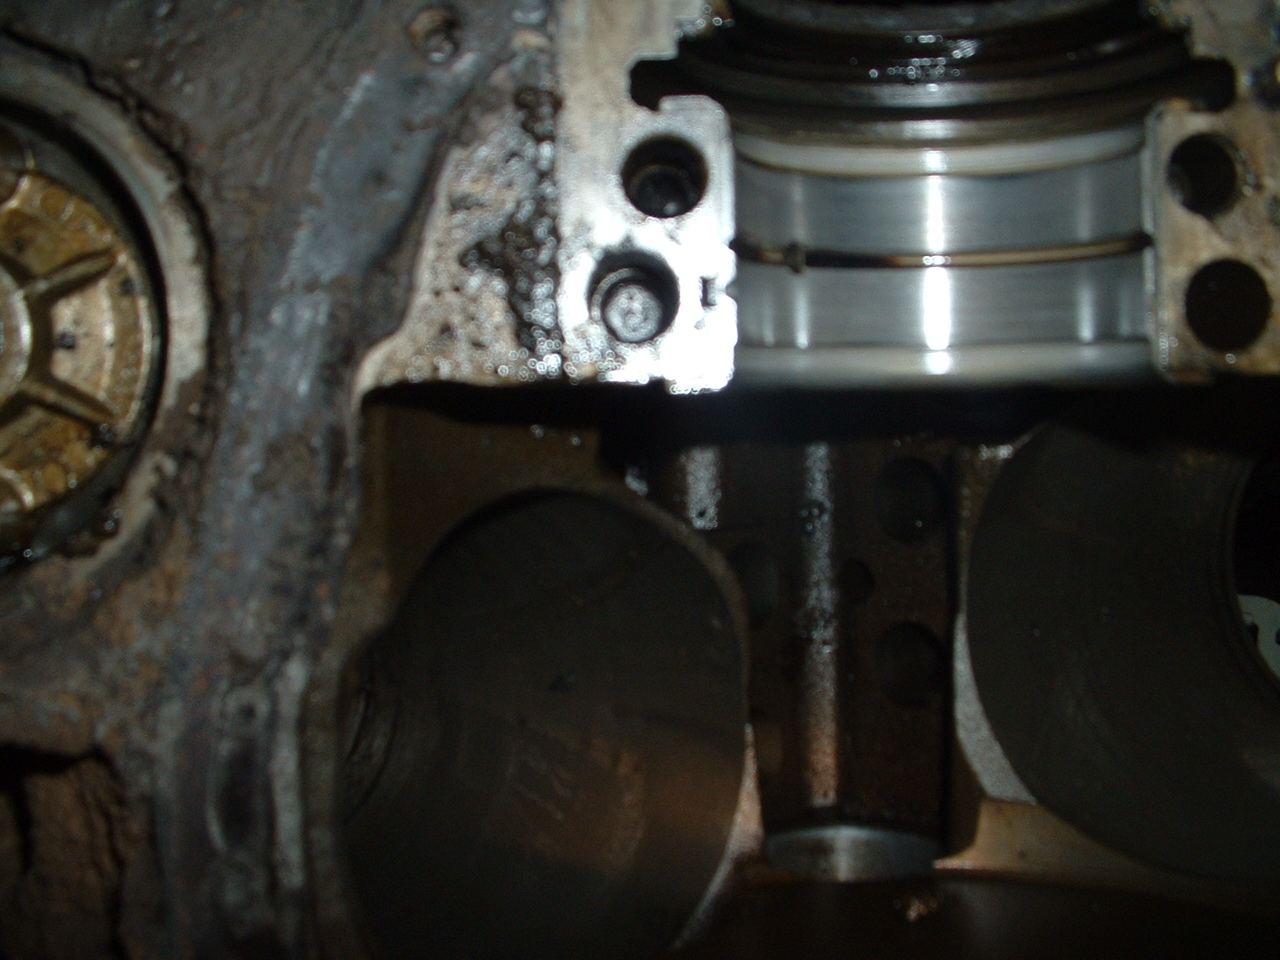
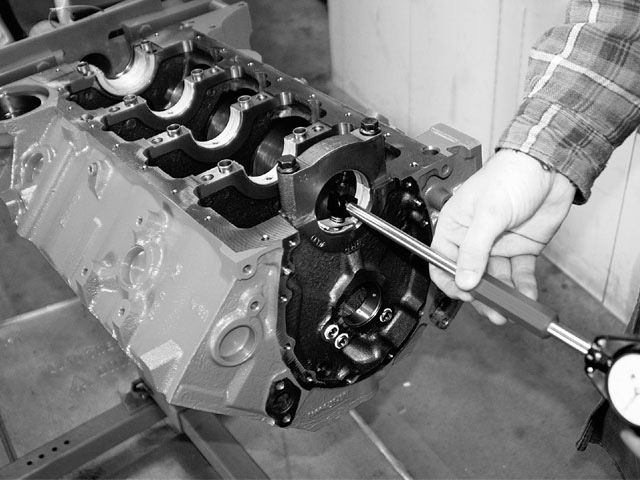
any time you go to install new cam bearings in an engine you first take detailed notes and a few pictures of the OLD cam bearing in the block under good lighting to note the location of the oil feed holes and and grooves, then as they are removed you number them each as its removed and measure them as on many engine they are NOT INTERCHANGEABLE between all main cap locations
the stock OEM components are rated by chevy, to with stand 350-400hp and 5700rpm-6000rpm,obviously we all know guys that have pushed their components to exceed those limits, but stress is cumulative, and the harder you push or the more frequently you push past those limits the more likely you are to experience component failures
look at the rated hp
http://www.sallee-chevrolet.com/ChevyBa ... 05123.html
the DART SHP Chevy Small Blocks are significantly stronger castings in the stressed areas and are rated UP TOO 600hp, the little m blocks are even stronger
http://www.dartheads.com/products/shp-c ... locks.html
http://www.dartheads.com/products/engin ... locks.html
it would make very little sense to build an engine thats intended to produce over about 500-550 hp on a STOCK PRODUCTION Chevy block simply because the main caps will walk or the lifter bores will crack or the cylinder walls will begin to flex ETC. at some point, and that point will be noticeably lower in the power curve than an aftermarket block , thats been properly machined, Ive got splayed 4 bolt main caps and use all ARP hardware in my block and Im still reluctant to push it much past those limits, because I see the results far to often in my shop, when guys insist on spinning the nearly stock engines to 7k plus or dropping a 150-200hp worth of nitrous,or use of stock bolts on an engine without the proper mixture and ignition controls and all forged components.
correct surface prep and degreasing on the metal is critical to long term paint retention, a good pressure cleaner, solvent spray and a stiff brush and a heat gun will prove beneficial during the process.
internal surfaces like the lifter gallery, and lower crank case surrounding the rotating assembly, where paint is used to both trap and hold micro debris and speed oil flow back to the sump, is best done with paint designed to handle a constant bath of hot oil and rapid temp changes.
I paint the inside surfaces of my blocks with
http://www.glyptal.com/1209_black_enamel.htm
or
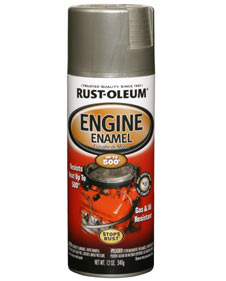
rustoleum engine paint
http://www.rustoleum.com/CBGProduct.asp?pid=372
to lock in place any micro dust left after the last total cleaning before assembly, to speed the oil flow back to the oil pan and help prevent corrosion
BTW I bought 16 rubber corks to push into the lifter bores to prevent paint entering the lifter bores during the painting, I placed 16 mini-screw eyes in the corks and strung them on a bead chain to keep from loosing them while in storage or in use!


http://www.hometrainingtools.com/rubber ... E-STOP01C/

you are aware that HOME DEPOT sells rubber corks?
in a fairly wide selection of sizes?
http://www.homedepot.com/webapp/catalog ... Search+All
AS AN EXAMPLE
I bought 16 of these
http://www.homedepot.com/p/15-16-in-x-1 ... ZLQ8sqtYzY
Zoom
15/16 in. x 11/16 in. Black Rubber Stopper
Model # 16058
Internet # 202209570
Store SKU # 755424
Write a review
Write the first review
$1.20 /EA-Each
a pack of theses screw eyes, so I could screw one into the top center of each rubber cork, and string the 16 corks
http://www.homedepot.com/p/4-Zinc-Plate ... ZLNE8qtYzY
so I had lifter bore protecting plugs, that I connected on a 36" bead chain, so they don,t get misplaced or lost, in my tool box, for use when painting engine blocks
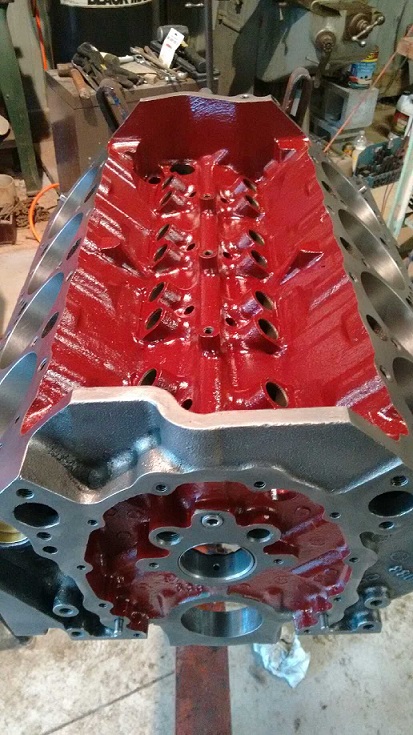
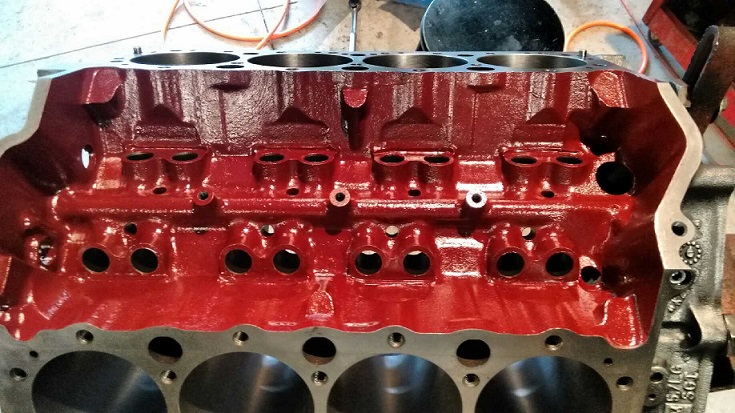
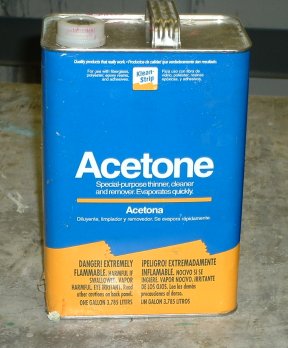
Ive used BOTH RUSTOLEUM and Glyptal but lately just several coats of BRIGHT CHEVY ORANGE RUSTOLEUM ON OVER THE glyptal EPOXY BASE COAT,COVERED BY BRITE YELLOW OR ORANGE RUSTOLEUM APPLIED ON THE TOTALLY CLEANED AND DECREASED AND DRIED BLOCK, (BTW A TOTAL DEGREASE OF THE BLOCK WITH ACETONE,and LINT FREE CLOTH, AND A heat gun or hair drier to totally dry the block just before cleaning helps the paint get a firm grip on the block surface) and don't forget you should remember the option to J&B EPOXY a MAGNET in the lifter gallery BEFORE painting the surfaces if you want to permanently a fix it on the block. (which do a great job at picking up micro metallic dust)
http://www.wondermagnet.com/dev/magnet1.html

I buy and use the 1 quart size cans of bright yellow or orange engine paint at the local hardware store keep in mind that YOU MUST ALLOW THE PAINT TO TOTALLY DRY BEFORE ASSEMBLING THE ENGINE, AND THAT NORMALLY TAKES A FULL DAY IN THE HOT FLA HEAT (85 degrees (F)is a fairly average temp here

#7747 Sunburst Yellow
http://www.rustoleum.com/product.asp?fr ... d=18&SBL=1
I use bright chevy orange or Pontiac blue on both the interior and exterior of the engine blocks I build because it makes finding oil leaks very easy once the engines in use in the corvettes where space is cramped and finding small leaks can sometimes be a problem
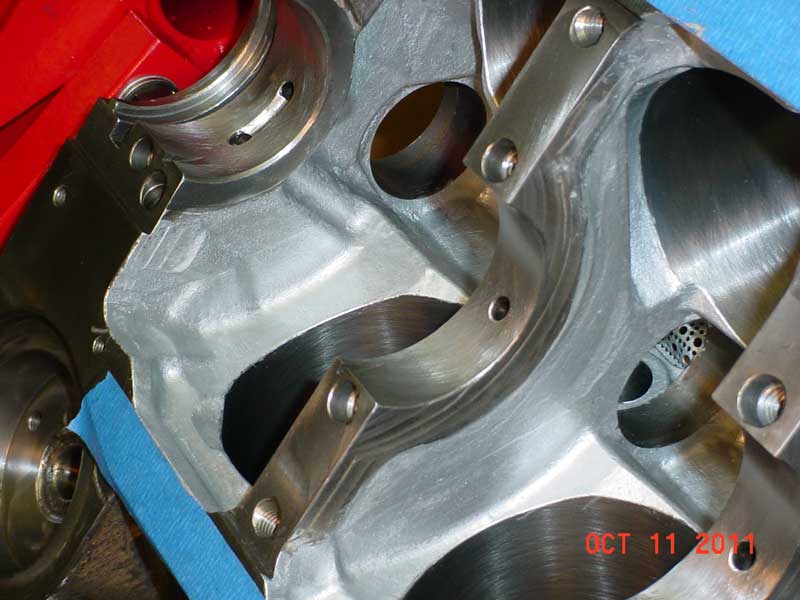
Actually the idea is to grind away all casting flash (the rough sandy looking surface) from the inside of the block, and then wash thoroughly, dry thoroughly, then apply the paint. This takes a long time and must be done carefully which is why most engine builders don't do it, but engine builders on racing teams do it.
It's not only to assist in oil drain back but also keeps the oil from clinging to the block and coking. In racing engines the benefits are slight but apparently noteworthy, check out any GTP type race car engine and you'll see this done as standard block prep.here read. it will help,
http://www.sa-motorsports.com/do-it-yourself.aspx
http://www.hardblok.com/
viewtopic.php?f=51&t=10464&p=43788#p43788
is popular, for filling blocks up to the lower edge of the freeze plugs
Ive used a slurry of steel bird shot and liquid EPOXY for my blocks
http://www.precisionreloading.com/mm5/m ... STEEL_SHOT
http://www.se-r.net/engine/block_prep.html]http://www.se-r.net/engine/block_prep.html
now in addition to that info , heres what I do
(1) get the block totally cleaned, DECREASED and CHECKED by a GOOD MACHINE SHOP BEFORE INVESTING MONEY IN IT!
(2) have new cam bearings and freeze plugs , oil plugs,installed only after all other machine work is done and after a extensive re-cleaning of all the oil passages just prior to starting assembly
(3) screens over the oil drain back holes are a good idea ONLY if your willing to change oil and filters very frequently
(4) several powerful magnets in the oil pan and one in the rear of each cylinder head to trap small metal parts is EXCELLENT INSURANCE
(5) polishing and smoothing the valve edges and combustion chambers helps prevent detonation
(6)never fill the water passages higher than the bottom of the freeze plug holes on a street engine
(7) 7 or more qt oil pans with BAFFLES AND A WINDAGE SCREEN like MILODON MAKES are a GREAT IDEA
shrapnel screens epoxied into the block to prevent valve train failure shrapnel from inducing bearing failure if crap gets sucked into the oil pump is a good idea IF you do frequent oil changes so the screens won,t get sledged up
THE SCREEN ABOVE IS CLOSE TO BEING IDEAL

THE SCREEN ABOVE IS TOO SMALL TO BE IDEAL
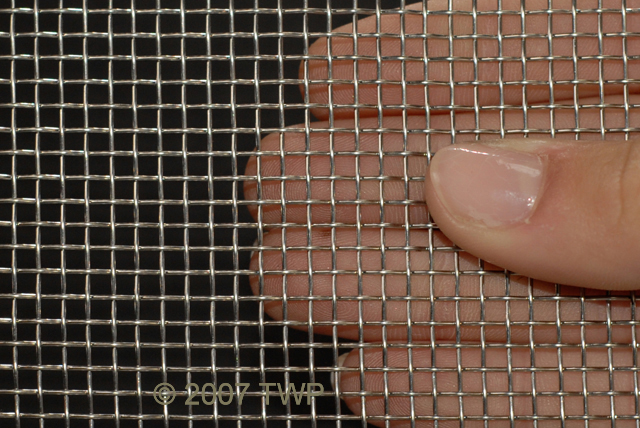
while I generally use stainless 6 or 8 mesh screens theres lots of options that will work just fine, just remember to keep the oil changed regularly or theres some potential for sludge to clog ANY size shrapnel screens
http://www.twpinc.com/twpinc/products/T ... 6T0350W36T
http://www.twpinc.com/twpinc/products/T ... 8S0280W36T
viewtopic.php?f=51&t=1014&p=26395&hilit=splayed#p26395
IVE typically used these magnets in an engine, one in the rear oil drain on each cylinder head, one near each lifter gallery drain and 4 in the oil pan sump
many magnets lose their magnetic pull if heated too 200F
these SPECIAL CERAMIC MAGNETS below won,t
they are available from several vendors
proper magnets trap metallic debris
SmCo Samarium Cobalt Disc Magnets
http://www.magnet4less.com/
Ive used these for years
IF youve got the time you could get a bit excessive and polish the block surfaces
use the best block you can afford, the better aftermarket blocks are faR STRONGER THAN THE oem BLOCKS IN ALMOST ALL CASES
one of the least discussed & acknowledged, and yet more common reasons engines fail ,
is related to micro metallic crud left in the engine while its being assembled,
especially engine's built on newly machined blocks or blocks not extensively cleaned ,
that get used after an engine previously failed, loose casting flash,
crud from worn lifter and bearings, can be hidden in oil feed passages or,
in less obvious areas that must be carefully cleaned before reassembly can be done!
ALL OIL PASSAGE PLUGS MUST BE REMOVED, and all oil passages carefully cleaned before and engine build!
I watched this video, and have to wonder..
I watched this video, and have to wonder.. did this guy washing his car that's obviously inside his garage or shop,\ or at least in front of his shop while the shop door was wide open. realize 100% of the crud he's peeling off that old mopar, is being randomly flung all over his shop or garage...
garage.grumpysperformance.com
over-boring the stock 400 SBC puts the cylinder wall very close to the head bolt hole. some factory blocks end up cracked at the cylinder wall near the head bolt hole, or the threads in the thin factory casting end up pulling out of the holes. Either way water leaks and distorted cylinders are the result.
Have your machinist sonic check the block before you bore it.
calculate the remaining bore wall thickness, and if its not thick enough for safe use don,t bother
Basic Engine Block Prep 101 - Hot Rod Engine Tech
It’s a time-honored tradition in the hot rod community - the day you take your block to the machinist for boring, decking, and line boring the mains. Sounds simple enough, but there is an amazing amount of precision measuring and machine work involved to do the job correctly. The good people at...
hotrodenginetech.com
https://www.dragzine.com/news/engine-machining-101-getting-started-with-your-engine-build/
http://hotrodenginetech.com/how-to-build-racing-engines-cylinder-block-guide/
SBC--BLOCK PREP & MACHINING
HOW TO VIDEO LINKS:How to Gap Piston Rings - https://youtu.be/YaVu8FiUhLQHow to Check PTV Clearance - https://youtu.be/blKm2ODrQZ4How to Measure Bearing Clea...
www.youtube.com
Id suggest you start any engine build with a trip to a trusted local machine shop
http://garage.grumpysperformance.com/index.php?threads/finding-a-machine-shop.321/#post-59253
and ask them, at a minimum to steam clean too de-grease the block, and then pull the oil passage plugs and freeze plugs and carefully clean and inspect the block.
and have a long detailed discussion with your machinist about what needs to be done, the cost and time frame and get a firm due date and price list on a receipt that both of you sign and agree too.
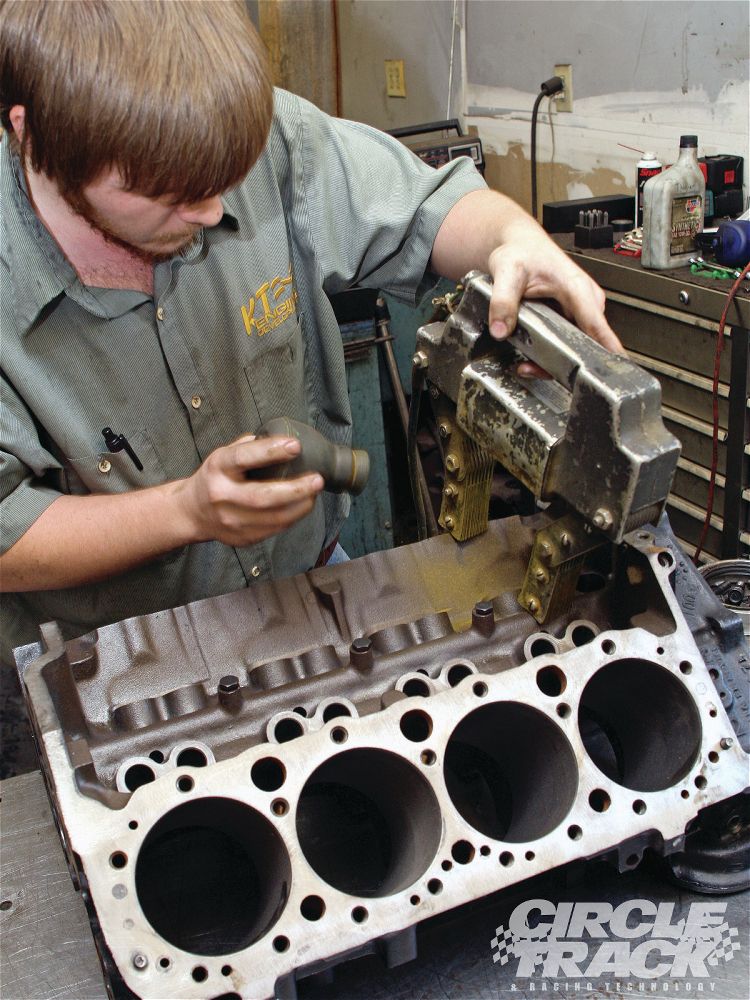
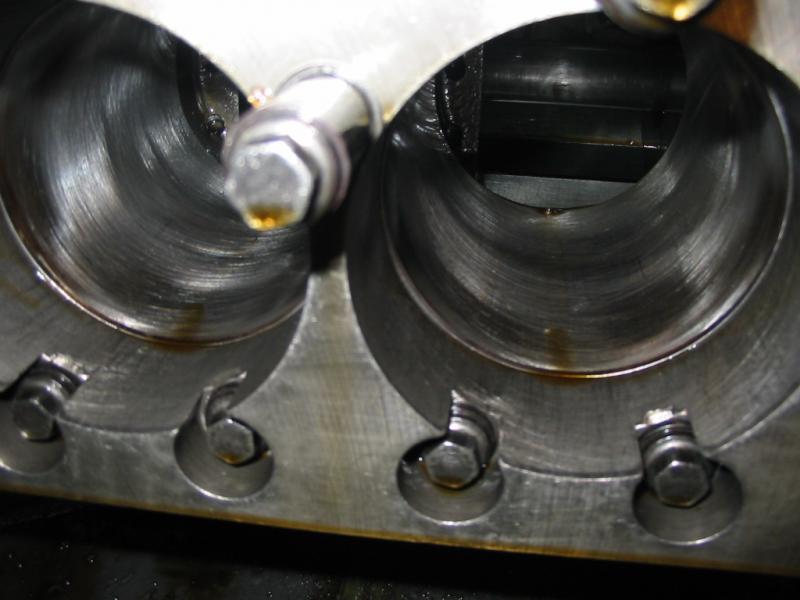
1. Tap or stainless steel brush all holes
2. inspect and clean Lifter bores
3. Drill cooling holes (if required)
4. De-burr deck, main saddles, bottom of bores, top of bores
inspect bores for taper and concentric bores and cracks
5. Unshroud deck for valve clearance, (deck block with mill, if required)
6. Clean all oil holes with stainless brush on drill, use a drill if required to clean casting flaws,
7. File main cap surfaces, re-thread tap bolt holes
8. Hone cam tunnel
9. Dress,and clean freeze plug holes
10. De-burr oil passages
11. re-clean the block and blow out oil passages
12.install cam bearings and oil passage plugs
13. paint block
14.
keep in mind both the main caps base and the area in the block must be machine precisely parallel , and there is a slight interference fit into a slight recess in the block on most engines to help prevent the caps moving once tightened into place by the main cap bolts or main cap studs. on some performance engines its fairly common for a hollow sleeve,s inserted 1/2 its short length, into the block and 1/2 its length into a shallow recess into the main caps, too fit into matching recesses around the main cap studs , this locates and prevents lateral movement of the main caps
http://garage.grumpysperformance.com/index.php?threads/sealants-and-threads.805/#post-45066
http://garage.grumpysperformance.co...orrect-bolt-length-and-type.13891/#post-71016
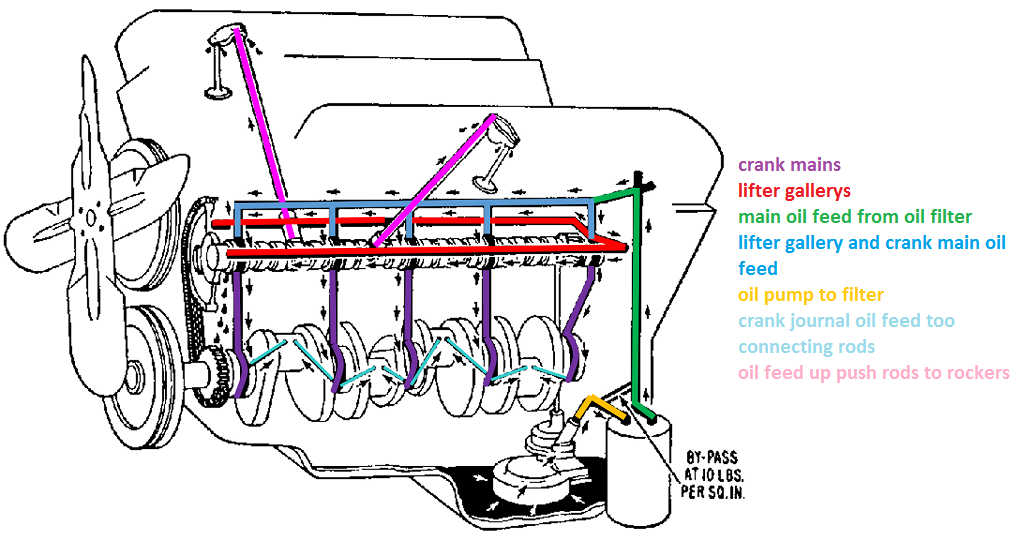
oil system mods that help
heres a short list REMEMBER the object or goal in building and maintaining the lubrication system is too maintain a 100% dependable pressurized cooling flow of lubricant to the bearings, rockers ,valves etc. your most important tool, is your ability to think about how things are supposed to...
garage.grumpysperformance.com
READ THIS
http://garage.grumpysperformance.com/index.php?threads/engine-block-cylinder-wall-thickness.976/
http://www.chevydiy.com/ultimate-guide-building-chevy-big-blocks-cylinder-blocks-instruction/
For a 4.125 bore or larger SBC based engine , buy a DART BLOCK, by the time all the required machine works done the difference in cost will be less than $600 and the dart blocks easily 2-3 times stronger and less likely to crack an aftermarket block is so far ahead in strength and durability it's not even worth talking about using a stock 400 casting as a basic component in a 500hp plus build.
if you have not yet started assembly and can pressure clean all the machined surfaces and paint all the cast surfaces abrasive pads can be used to remove minor surface crud but remember these ALL leave abrasive dust that MUST be cleaned and removed well before assembly begins, before paint is applied use a pressure cleaner and soapy water ,solvents etc.
to clean the surfaces and a heat gun to completely dry the surfaces before pain is applied
public supermarkets sell
FORMULA 23 grease solvent,
DAWN dish wash liquid,
and white vinegar, a cup of each in a 1/2 full 5 gallon bucket
and an ounce of dawn ,
makes a decent block wash formula to remove grit grease and machine shop dirt
yeah! we all know guys that have built 600hp SBC engines, that they dyno proved and run occasionally at the track, engines that have lasted for years,, but its not constantly run under that stress level like on a circle track engine or the main caps would be moving and the block would have failed long ago, STRESS IS CUMULATIVE, its just a mater of time before something fails, the factory blocks are rated at 350-400hp and are thin wall castings, yes I know, you probably already have a block, but its just some hard learned wisdom, you don,t want to pay for all the machine work twice
any time you use a block on a new engine build you'll be well advised to remove all the oil passage plugs an rod out the oil passages with a rifle bore brush and a high pressure pressure cleaner and replace the gallery plugs, and cam bearings, if your using a distributor with o-ring lower oil seal bands the entry to the distributor pilot hole down in the block MUST be smoothly beveled and de-burred on the upper edges of BOTH levels of the lower oil passage. failure to do so will result in cut/damaged, or O rings that get caught and pulled out of the lower sealing grooves,and if your intending to groove the lower band vertically to spray oil on the distributor gears the groove must be deep enough to compensate for the o-ring expanding slightly OR you can modify the lower distributor housing.
if you use the correct type of paint on a totally degreased block the paint traps and holds micro debris
I usually, have the block high pressure spray and chemically cleaned before I carefully inspect it for cracks, if I see anything suspicious I have the block magnetically checked
AFTER CAREFUL CLEANING, machines surfaces should be sprayed with a protective spray, and cast surfaces painted, Ive never had issues just starting an engine I built and put in storage for a few months,where Ive used it in the block as a rust preventative, it mixes with oil and seems to blend well
BTW, , on BIG BLOCKS the oil pumps and oil filter adapters are different due to the block oil filter recess and rear seals being different
mark iv blocks
mark v blocks
(keep in mind that ALL '91 and later Gen.V and Gen.VI big blocks come with 4-bolt main caps. The two-bolt big blocks are no longer in production
MANY BUT NOT ALL aftermarket head designs have been modified to work on both the early MARK IV 1965-90 and later MARK V & VI blocks 1991-later.)
BTW, , on BIG BLOCKS the oil pumps and oil filter adapters are different due to the block oil filter recess and rear seals being different
GEN 4 or MARK IV
GEN V and VI
stock cast iron main caps will tend to fail long before the ARP main studs, and of course the block bore walls should be honed with a torque plate, torqued to spec in place, and the ARP main STUDS are significantly stronger than the O.E.M main cap bolts,
If your concerned you might consider billet splayed main caps and a block line hone
http://garage.grumpysperformance.co...gine-block-main-cap-movement.6162/#post-19172
http://garage.grumpysperformance.com/index.php?threads/installing-splayed-caps.7267/#post-68837
http://garage.grumpysperformance.com/index.php?threads/splayed-main-caps.1014/#post-1861
http://garage.grumpysperformance.co...block-cylinder-wall-thickness.976/#post-33362
http://garage.grumpysperformance.co...ing-piston-to-bore-ring-seal.3897/#post-11709
http://garage.grumpysperformance.com/index.php?threads/block-prep.125/#post-30125
IT always helps if you have a few precision tools and the knowledge to look at and understand exactly what your looking at, and having the tools to accurately measure anything that requires you to measure it, to be sure you have the machine shop actually performing the work as requested
example
a dial indicator,
https://www.amazon.com/Anytime-Tool...ocphy=9012039&hvtargid=pla-593404776954&psc=1
a pack of plasta gauge
12" dial caliper,
bore gauge,
set of mics,
a set of feeler gauges
View attachment 17692
and a torque wrench
can go a long way in finding out if the parts are correctly machined
Precision measuring tools
I’m looking for the best quality precision tools on a limited budget (i.e. I don't want to pay $300 for one mic). I plan on building the occasional small- & big-block Chevy (more than one, less than 1000). Names that come up on the limited results I’ve found on the web include Starrett...
garage.grumpysperformance.com
Dial Bore Guage Selections To Purchase 8-22-2021 Grumpy ?
Looking to purchase a New Dial Bore Guage Universal set for 1.000" - 6.000" range Grumpy. 1-5 inches be Ok cover all my own engine building needs and for others I build for. I don't have the funds for a Sunnen Deep reach dial bore guage along with the Sunnen Adjustable Bench standard like Pros...
garage.grumpysperformance.com
which torque wrench
these look great, and theres little doubt they are a quality tool. keep in mind the purpose of a torque wrench, its designed to allow you to tighten bolts to a known and consistent and repeatable or duplicate-able level, that insures the bolt or fastened applies a consistent predictable clamping...
garage.grumpysperformance.com
http://garage.grumpysperformance.com/index.php?threads/precision-measuring-tools.1390/#post-68861
http://garage.grumpysperformance.co...ing-parts-and-a-logical-plan.7722/#post-68651
http://garage.grumpysperformance.com/index.php?threads/finding-a-machine-shop.321/#post-59253
http://garage.grumpysperformance.com/index.php?threads/block-prep.125/
https://chevroletperformanceparts.com/catalog/chevrolet-performance-engines
https://video.search.yahoo.com/yhs/...=3ac4910781845346b00f6c350a2e352e&action=view
(1)clean all threaded holes with THREAD CHASER taps, NOT CUTTING TAPS
(2)send block out to be cleaned or I spray clean with high pressure water and high pressure air and solvents
(3) open and smooth out all the oil drain back ports in the block lifter gallery casting then install shrapnel screens & magnets with epoxy
many magnets lose their magnetic pull if heated too 200F
these SPECIAL CERAMIC MAGNETS below won,t
they are available from several vendors
proper magnets trap metallic debris
SmCo Samarium Cobalt Disc Magnets
http://www.magnet4less.com/
Ive used these for years
http://garage.grumpysperformance.com/index.php?threads/magnets.120/#post-76609
(4) paint block VERY CAREFULLY, after masking off machined surfaces and using rubber corks on lifter bores
(5) rod out all the oil passages, brush them clean, with a rifle bore brush and solvent then install cam bearings
http://garage.grumpysperformance.com/index.php?threads/cam-bearing-install-tools-install-info.1479/
(6)install freeze plugs
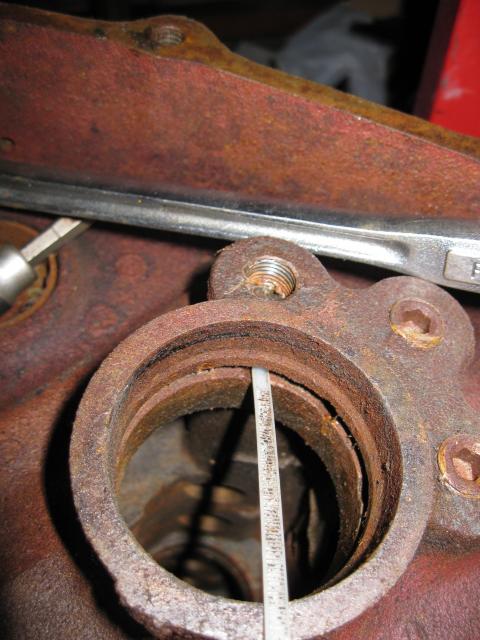
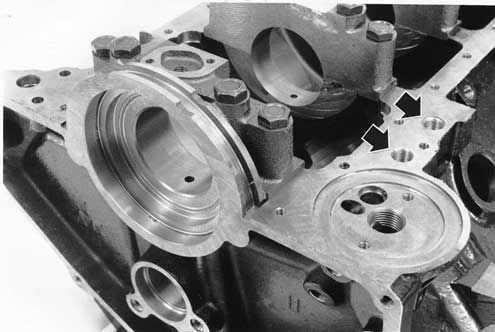
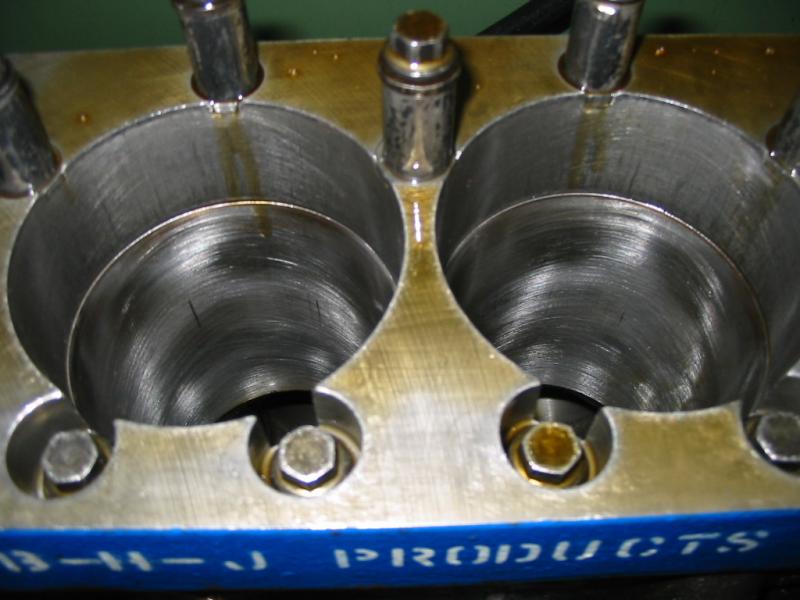
threading the oil passage plugs increases durability and I generally suggest drilling an oil pray jet hole thats .031-.035 in the pass side oil pass plug, THE ONE AS YET UN THREADED IN THE PICTURE ABOVE
http://www.chevydiy.com/the-complete-cylinder-block-guide-for-chevy-small-block-engines/#
http://www.precisionenginetech.com/proj ... d-part-1/#
posting.php?mode=edit&f=51&p=1706
http://www.hotrod.com/how-to/engine/hrd ... omparison/
http://www.eastwood.com/paints/hi-temp- ... aints.html
http://circletrack.automotive.com/10913 ... index.html
http://www.circletrack.com/enginetech/c ... index.html
http://www.popularhotrodding.com/tech/1 ... ine_block/
http://www.circletrack.com/ultimateraci ... index.html
http://www.mcmaster.com/#standard-taps/=ke36u2
http://www.mcmaster.com/#thread-forming-taps/=ke38k5
http://www.circletrack.com/tipstricks/1 ... index.html
http://www.dragzine.com/tech-stories/en ... ine-block/
viewtopic.php?f=51&t=2919&p=7625#p7625
http://www.hotrod.com/techarticles/buil ... index.html
https://secure.pawengineparts.com/shopp ... catid=1477
http://www.idavette.net/hib/bbfh1.htm
http://www.clockwheelblog.com/2009/09/e ... ourselfer/
http://www.circletrack.com/enginetech/c ... index.html
http://www.se-r.net/engine/block_prep.html
http://www.rpmmachine.com/dart-blocks.shtml
http://www.sa-motorsports.com/blkdiy.aspx
https://garage.grumpysperformance.c...t1-lt4-1992-96-corvette-engine-related.14574/
viewtopic.php?f=50&t=1249&p=2674#p2674
viewtopic.php?f=50&t=804
http://www.circletrack.com/enginetech/c ... index.html
http://www.project33.com/Categoryarticl ... ory=Engine
http://www.project33.com/Categoryarticl ... ory=Engine
http://www.project33.com/Categoryarticl ... ory=Engine
http://www.project33.com/Categoryarticl ... ory=Engine
http://www.project33.com/Categoryarticl ... ory=Engine
http://www.project33.com/Categoryarticl ... ory=Engine
http://www.circletrack.com/techarticles ... index.html
http://www.circletrack.com/enginetech/c ... index.html
Ive occasionally been asked what you can do too reduce the slack in the timing chain if your blocks been line honed,
to straiten the main bearings and that resulted in a slightly closer crank to cam center-line distance,
that results in a slightly increased slack in the stock timing chain sets.
a negligible amount of metal is generally removed from the main bearing saddles in the block, they usually try very hard to minimize that, metal removal so standard parts still fit, during a line hone , but they do sell slightly tighter timing chain sets to correct excess slack if that's required.
UN-machined SBC blocks have a nominal 9.0" deck height,
its very common to have the deck on a previously undecked block actually measure 9.022"-9.025"
UN-machined BBC blocks have a nominal 9.8" deck height,
its very common to have the deck on a previously undecked block actually measure 9.822-9.825
https://www.summitracing.com/parts/clo-9-3100-5
Timing Chain and Gear Set, Original True Roller, Double Roller, -0.005 in., Iron/Steel Sprockets, Chevy, Small Block, Set
for line honed blocks where the crank is .005 closer to the cam
https://www.summitracing.com/parts/clo-9-3100-10
for line honed blocks where the crank is .010 closer to the cam
Timing Chain and Gear Set, Original True Roller, Double Roller, -0.010 in., Iron/Steel Sprockets, Chevy, Small Block, Set
if you just assume that the machine shop must have cleaned the parts they worked on carefully...
any time you'll want to re-use bolts its generally a good idea,
to clean the bolt threads with a rotary wire brush and a drill,
and run a cleaning tap through the blocks threaded bolt holes
HONE WITH HONE PLATES to duplicate the stress the head bolts place on the cylinder walls to get a true round bore wall surface
the few minimum things Id ask for is
when you clean an engine block you'll need to pull all the oil passage plugs and use a rifle bore brush on the oil passages and a pressure washer spray followed immediately with lots of solvents and WD 40 to prevent rust
clean out the oil passages, its mandatory
verify the decks level, smooth, strait
verify the blocks sound (no cracks, in the lifter gallery or anywhere else,)and cylinder walls are a minimum of .200 thick
check, debur , slightly bevel the threaded holes entrance slightly
install new cam bearings
all brass freeze plugs,
A GOOD CYLINDER HONE with a DECK PLATE
tap the oil passage plugs for screw in vs press in oil passage plugs
drill the left front lifter gallery oil passage plug with a .030 hole so oil sprays on the timing gears
use ARP main cap studs
bevel the oil pump passage entrance on the rear main cap
verify the lifter bore locations/diam.
then paint the block and add shrapnel screens with J&B weld after you get the block back
viewtopic.php?f=54&t=10388
any time you go to install new cam bearings in an engine you first take detailed notes and a few pictures of the OLD cam bearing in the block under good lighting to note the location of the oil feed holes and and grooves, then as they are removed you number them each as its removed and measure them as on many engine they are NOT INTERCHANGEABLE between all main cap locations
the stock OEM components are rated by chevy, to with stand 350-400hp and 5700rpm-6000rpm,obviously we all know guys that have pushed their components to exceed those limits, but stress is cumulative, and the harder you push or the more frequently you push past those limits the more likely you are to experience component failures
look at the rated hp
http://www.sallee-chevrolet.com/ChevyBa ... 05123.html
the DART SHP Chevy Small Blocks are significantly stronger castings in the stressed areas and are rated UP TOO 600hp, the little m blocks are even stronger
http://www.dartheads.com/products/shp-c ... locks.html
http://www.dartheads.com/products/engin ... locks.html
it would make very little sense to build an engine thats intended to produce over about 500-550 hp on a STOCK PRODUCTION Chevy block simply because the main caps will walk or the lifter bores will crack or the cylinder walls will begin to flex ETC. at some point, and that point will be noticeably lower in the power curve than an aftermarket block , thats been properly machined, Ive got splayed 4 bolt main caps and use all ARP hardware in my block and Im still reluctant to push it much past those limits, because I see the results far to often in my shop, when guys insist on spinning the nearly stock engines to 7k plus or dropping a 150-200hp worth of nitrous,or use of stock bolts on an engine without the proper mixture and ignition controls and all forged components.
correct surface prep and degreasing on the metal is critical to long term paint retention, a good pressure cleaner, solvent spray and a stiff brush and a heat gun will prove beneficial during the process.
internal surfaces like the lifter gallery, and lower crank case surrounding the rotating assembly, where paint is used to both trap and hold micro debris and speed oil flow back to the sump, is best done with paint designed to handle a constant bath of hot oil and rapid temp changes.
I paint the inside surfaces of my blocks with
http://www.glyptal.com/1209_black_enamel.htm
or
rustoleum engine paint
http://www.rustoleum.com/CBGProduct.asp?pid=372
to lock in place any micro dust left after the last total cleaning before assembly, to speed the oil flow back to the oil pan and help prevent corrosion
BTW I bought 16 rubber corks to push into the lifter bores to prevent paint entering the lifter bores during the painting, I placed 16 mini-screw eyes in the corks and strung them on a bead chain to keep from loosing them while in storage or in use!
http://www.hometrainingtools.com/rubber ... E-STOP01C/
you are aware that HOME DEPOT sells rubber corks?
in a fairly wide selection of sizes?
http://www.homedepot.com/webapp/catalog ... Search+All
AS AN EXAMPLE
I bought 16 of these
http://www.homedepot.com/p/15-16-in-x-1 ... ZLQ8sqtYzY
Zoom
15/16 in. x 11/16 in. Black Rubber Stopper
Model # 16058
Internet # 202209570
Store SKU # 755424
Write a review
Write the first review
$1.20 /EA-Each
a pack of theses screw eyes, so I could screw one into the top center of each rubber cork, and string the 16 corks
http://www.homedepot.com/p/4-Zinc-Plate ... ZLNE8qtYzY
so I had lifter bore protecting plugs, that I connected on a 36" bead chain, so they don,t get misplaced or lost, in my tool box, for use when painting engine blocks
Ive used BOTH RUSTOLEUM and Glyptal but lately just several coats of BRIGHT CHEVY ORANGE RUSTOLEUM ON OVER THE glyptal EPOXY BASE COAT,COVERED BY BRITE YELLOW OR ORANGE RUSTOLEUM APPLIED ON THE TOTALLY CLEANED AND DECREASED AND DRIED BLOCK, (BTW A TOTAL DEGREASE OF THE BLOCK WITH ACETONE,and LINT FREE CLOTH, AND A heat gun or hair drier to totally dry the block just before cleaning helps the paint get a firm grip on the block surface) and don't forget you should remember the option to J&B EPOXY a MAGNET in the lifter gallery BEFORE painting the surfaces if you want to permanently a fix it on the block. (which do a great job at picking up micro metallic dust)
http://www.wondermagnet.com/dev/magnet1.html
I buy and use the 1 quart size cans of bright yellow or orange engine paint at the local hardware store keep in mind that YOU MUST ALLOW THE PAINT TO TOTALLY DRY BEFORE ASSEMBLING THE ENGINE, AND THAT NORMALLY TAKES A FULL DAY IN THE HOT FLA HEAT (85 degrees (F)is a fairly average temp here
#7747 Sunburst Yellow
http://www.rustoleum.com/product.asp?fr ... d=18&SBL=1
I use bright chevy orange or Pontiac blue on both the interior and exterior of the engine blocks I build because it makes finding oil leaks very easy once the engines in use in the corvettes where space is cramped and finding small leaks can sometimes be a problem
Actually the idea is to grind away all casting flash (the rough sandy looking surface) from the inside of the block, and then wash thoroughly, dry thoroughly, then apply the paint. This takes a long time and must be done carefully which is why most engine builders don't do it, but engine builders on racing teams do it.
It's not only to assist in oil drain back but also keeps the oil from clinging to the block and coking. In racing engines the benefits are slight but apparently noteworthy, check out any GTP type race car engine and you'll see this done as standard block prep.here read. it will help,
http://www.sa-motorsports.com/do-it-yourself.aspx
http://www.hardblok.com/
viewtopic.php?f=51&t=10464&p=43788#p43788
is popular, for filling blocks up to the lower edge of the freeze plugs
Ive used a slurry of steel bird shot and liquid EPOXY for my blocks
http://www.precisionreloading.com/mm5/m ... STEEL_SHOT
http://www.se-r.net/engine/block_prep.html]http://www.se-r.net/engine/block_prep.html
now in addition to that info , heres what I do
(1) get the block totally cleaned, DECREASED and CHECKED by a GOOD MACHINE SHOP BEFORE INVESTING MONEY IN IT!
(2) have new cam bearings and freeze plugs , oil plugs,installed only after all other machine work is done and after a extensive re-cleaning of all the oil passages just prior to starting assembly
(3) screens over the oil drain back holes are a good idea ONLY if your willing to change oil and filters very frequently
(4) several powerful magnets in the oil pan and one in the rear of each cylinder head to trap small metal parts is EXCELLENT INSURANCE
(5) polishing and smoothing the valve edges and combustion chambers helps prevent detonation
(6)never fill the water passages higher than the bottom of the freeze plug holes on a street engine
(7) 7 or more qt oil pans with BAFFLES AND A WINDAGE SCREEN like MILODON MAKES are a GREAT IDEA
shrapnel screens epoxied into the block to prevent valve train failure shrapnel from inducing bearing failure if crap gets sucked into the oil pump is a good idea IF you do frequent oil changes so the screens won,t get sledged up
THE SCREEN ABOVE IS CLOSE TO BEING IDEAL
THE SCREEN ABOVE IS TOO SMALL TO BE IDEAL
while I generally use stainless 6 or 8 mesh screens theres lots of options that will work just fine, just remember to keep the oil changed regularly or theres some potential for sludge to clog ANY size shrapnel screens
http://www.twpinc.com/twpinc/products/T ... 6T0350W36T
http://www.twpinc.com/twpinc/products/T ... 8S0280W36T
viewtopic.php?f=51&t=1014&p=26395&hilit=splayed#p26395
IVE typically used these magnets in an engine, one in the rear oil drain on each cylinder head, one near each lifter gallery drain and 4 in the oil pan sump
many magnets lose their magnetic pull if heated too 200F
these SPECIAL CERAMIC MAGNETS below won,t
they are available from several vendors
proper magnets trap metallic debris
SmCo Samarium Cobalt Disc Magnets
http://www.magnet4less.com/
Ive used these for years
IF youve got the time you could get a bit excessive and polish the block surfaces
Last edited by a moderator: