most shops have or would like to have an air compressor to run air wrenches, fill tires, run die grinders ETC.
the problem, is most reasonably priced air compressors can,t maintain the flow volume at reasonable pressure levels and your constantly waiting for the tank to re-pressurize,
so you can use the air tools for more than a few minutes at a time,
cheap compressors lack the tank size and flow to keep up,
and few guys have the room or want to spend several thousand dollars on a commercial compressor, which can easily cost twice too three times what two home shop,compressors cost,
compressors will have a rated air flow,
lets say, your looking at a compressor that
Delivers 11.5 SCFM at 40 psi and 10.2 SCFM at 90 psi
take that as a absolute MAX and figure theres transmission line losses, so you then look at your air tools and look at what they require!
and if its even close the compressor will need to have some time to catch up or the tool cant be used 100% of the time (FEW ARE)
but its nice not needing to wait for pressure to build back up so get a decent sized tank and compressor
http://www.harborfreight.com/air-die-gr ... 99698.html
Air consumption: 18 SCFM, 4.5 CFM
look at the two ratings and you see why I need dual compressors.
REMEMBER TO shop carefully ,you might find, that you can buy two compressors that will have a larger total holding tank capacity, more total horsepower and a higher total CFM rating than a single compressor costing two to three times as much can produce
youll tend to get what you pay for and a $600 home depot , or harbor freight compressor is not going to be the same quality , durability or flow volume as a commercial compressor that costs 4 times as much
Id also point out that a bit of careful thought going into the install will allow your compressor to last many years longer than it will if you just bolt it to the floor of your shop and plug it in.....
take the time to think about how and where you'll want to install the compressor,
it will need to be close to a 220 volt source,
ideally mounted on rubber vibration absorbing mounts,
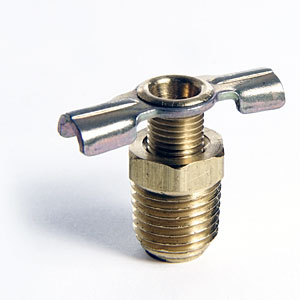
and if you want it to last you'll need to drain moisture from the storage tank before and after every use.
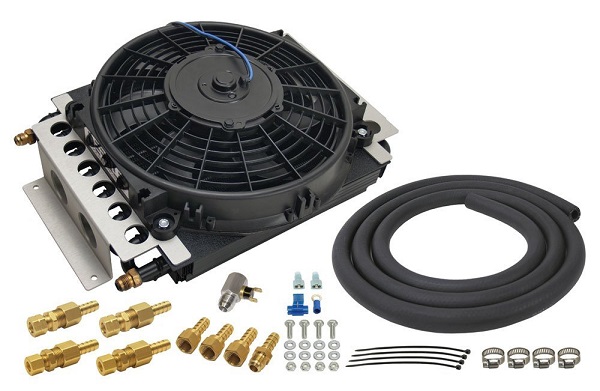
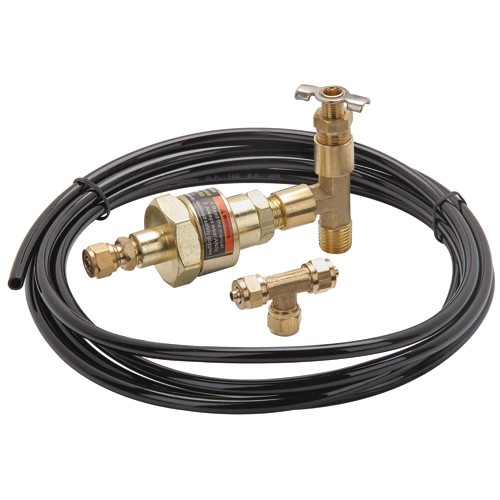
Ideally youll take the time and effort to run the compressors pressurized air flow out through a heat and moisture trap, before the hot moist air can reach the holding tank, too significantly reduce the moisture that reaches the storage tank,
because moisture and steel are not going to play well together long term.
youll also want to check the compressors oil level before every use.
http://garage.grumpysperformance.com/index.php?threads/franzinator-air-dryer.6246/
http://www.homedepot.com/h_d1/N-5yc1v/R ... logId=1005
http://www.championpneumatic.com/produc ... ies/?n=490
http://www.tptools.com/Champion-Refrigerated-Air-Dryers.html
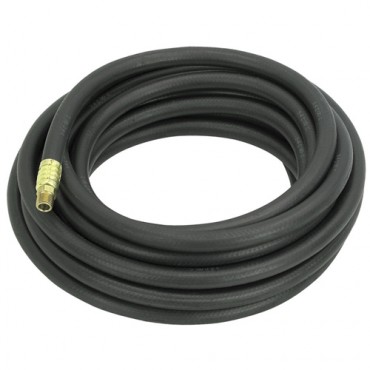
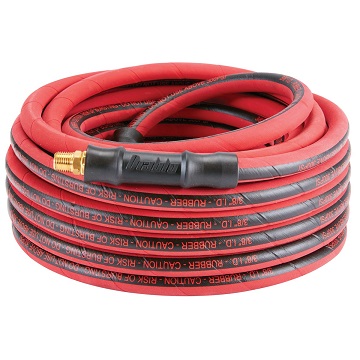
http://www.tptools.com/Flexzilla-4-...nd2-Ends,8008.html?b=d*8063!r*Brand*Flexzilla
what you need depends on what your doing! I found I needed TWO compressors working in tandem, as I do a good deal of cylinder head PORT work on heads and using air ratchets, and it tends to tick me off if I need to wait for pressure to build up, my brother-in-law has a 2hp/20 gallon compressor and for a single air ratchet he has that just fine.
remember to check the oil in your compressor and drain water from the tank before and after each use, and to carefully OIL air TOOLS before and after each use, !
http://blog.cnccookbook.com/2011/09/06/aftercooling-a-compressor-to-cut-down-on-moisture/
https://www.amazon.com/dp/B004XONT3E?tag=viglink26107-20
you really should take the time to read this linked info, posted in the links and sub links, obviously most of us are limited by budget concerns, but check and compare the pressure limits and flow capacity and tank size
http://reviews.ebay.com/Air-compressors ... 0002309894
viewtopic.php?f=27&t=3444
http://www.homedepot.com/p/Husky-80-gal ... ifications
http://www.championpneumatic.com/produc ... ies/?n=490
http://www.rapidairproducts.com/pdfs/airnet_flyer.pdf
http://www.rapidairproducts.com/pdfs/du ... ed2009.pdf
http://www.rapidairproducts.com
viewtopic.php?f=27&t=8910
viewtopic.php?f=50&t=1830&p=4764&hilit=moisture#p4764
viewtopic.php?f=59&t=6246&hilit=franzinator
http://www.northerntool.com/shop/tools/ ... _200396621
http://www.ecompressedair.com/air-compr ... ating.aspx
http://www.1969supersport.com/draw1.html
http://www.mastertoolrepair.com/air-com ... c-271.html
yeah, the use of TWO of the cheaper 60-80 gallon single stage compressors feeding a single common air pipe with taps around the shop is usually far cheaper than trying to find a decent single compressor that will keep up with most tool demand, keep in mind pressures above about 125 psi are not usually needed or necessary but having the volume of air flow two separate compressors can provide is usually a big plus. BTW I got my current compressors at HOME DEPOT for $450 each, rated at 7hp 80 gallon, 130 psi
IM not debating which compressor is superior, only pointing out the advantages of TWIN compressors, in significantly reduced wait times under multi use conditions
similar to this, but I don,t currently see the exact one listed
http://www.homedepot.com/webapp/wcs...langId=-1&catalogId=10053&productId=100349429
HF SELLS A PIPE KIT BUT LOOK CAREFULLY THE TUBES RATED AT 150PSI
http://www.northerntool.com/shop/tools/ ... _200367525
btw
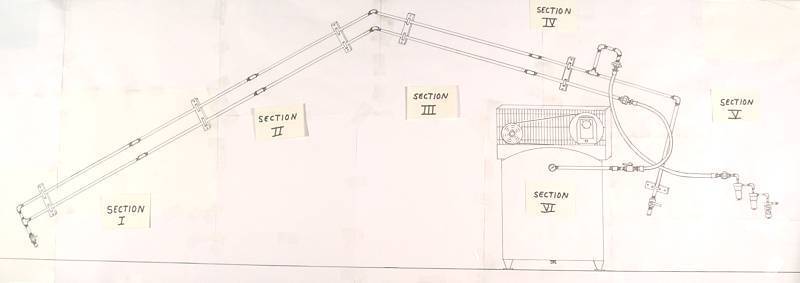
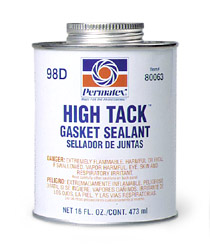
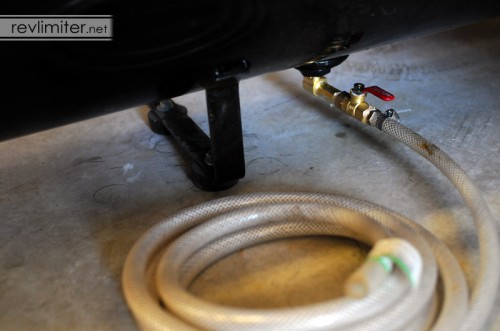
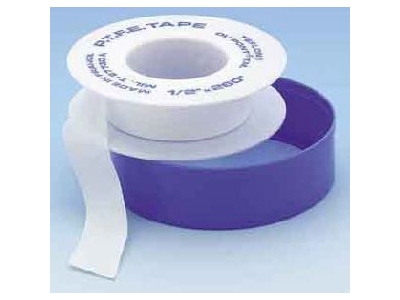
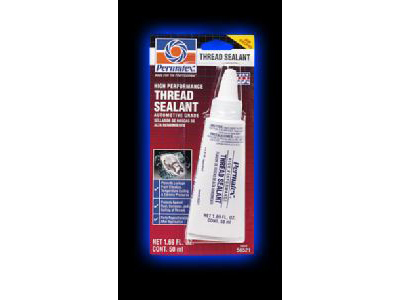
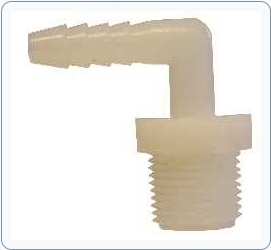
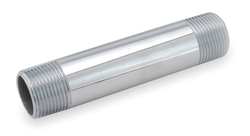
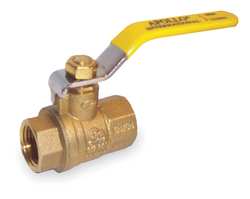
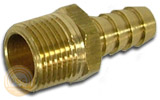
I used several hundred feet of 3/4" schedule 80 PVC pipe rated at 660 PSI to pipe the air around the shop and used brass fittings screwed and glued into the pick-up access points , both compressors feed a 3/4" pipe that then dips to a drain valve then shoots over the rafters to a (T) where its routed along the walls to every place I might EVER use air flow to clean or operate tools in the shop,and its worked flawlessly at about 1/8 the price of copper pipe and sweated joints I used in the previous shop., and its worked fine for 5 years now at the 130 psi max I use.
yes IM WELL AWARE your not suppose to use PVC but after looking into most PVC failures they were related to SCHEDULE 40 pipe, pipe in direct sun light or pipe that got mechanically damaged
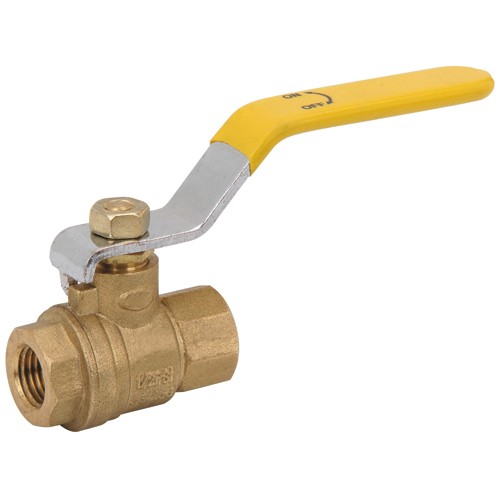
keep in mind moisture tends to run down hill so route your pipes so that the pipes drain to drain valve locations and all access points to draw air are higher than the drain points IE don,t run the pipe level with the floor,pick-up points should be higher than drains and there should be several drain valve points, one near the compressors and at least one more before any access to the air for tools my compressors are feeding the pipe at 5 feet from the floor,it slants to a drain at 4.9 ft from the floor,then shoots directly up the wall,over the rafters in a sweeping curve and drops to the opposite side of the shop at a drain at 5 ft from the floor, all access points are tees 6 ft from the floor
yes IM fully aware that PVC pipe is not generally suggested for pressurized air....and sweated copper or galvanized steel is suggested... yes 3/4" copper pipe with soldered fittings is the best choice, and iron pipe works fine if you have an air drier,I used several hundred feet of 3/4" schedule 80 PVC pipe rated at 660 PSI
Oh IM only too aware of the minimal risks, but Im also aware of the huge cost difference, like 800% higher for copper and steel pipe rusts,, the copper pipe I used in the last shop would have cost me hundreds of dollars in this shop,the better moisture tolerance and several hundred psi safety margin (pipes rated at 660 psi and it will never see 140 psi) and almost negligible risk of injury, the worst case is it fails too hold air pressure and my air tools don,t work
I probably would never have tried it if a buddy's shop had not used it without any problems for over 12 years now , and hes located less than 5 miles from here so he gets similar shop temps and pressures on the pipe,any compressors a huge improvement over having none it the shop, I could not believe how helpful having access to air ratchets and die grinders was when I got my first compressor and a few air tools.
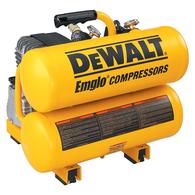
when I go over to the BROTHER IN LAWS garage his compressors a huge help over nothing at all, but its a P.I.T.A. to use if your doing serious repairs because its only something similar to this
http://www.harborfreight.com/cpi/ctaf/d ... umber=5637
a HUGE improvement over not having any compressor but you constantly wait for the pressure to build to use tools
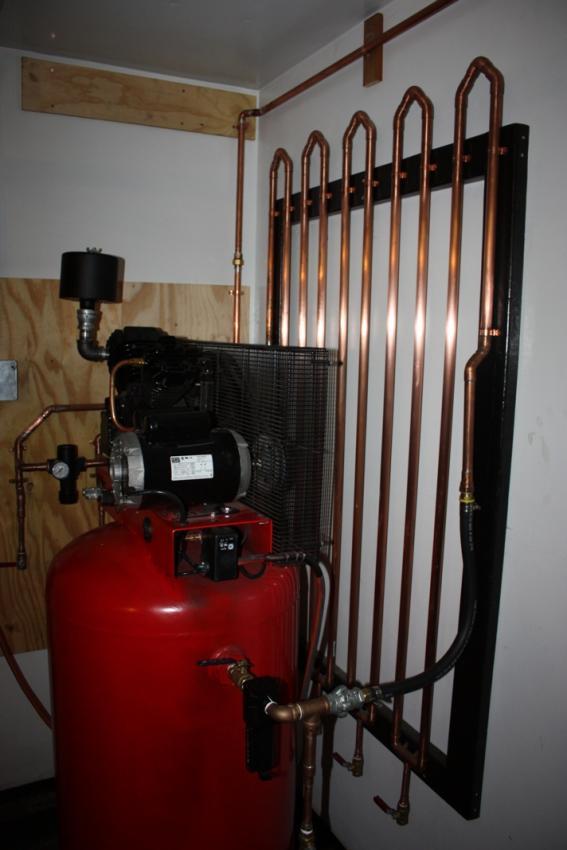
I got asked what compressor I use, well heres a picture, I use twin 7hp/60 gallon compressors feeding a single garage wide run of schedule 80 3/4" PVC piping with brass fittings rated at 660 PSI, yeah! IM well aware you should NEVER USE PVC for air, I used it for 10 PLUS years ,in my old shop, my buddies used it for over 12 years in his shop,and its what Ive installed in the new garage, schedule 80 3/4" PVC piping with brass fittings rated at 660 PSI, if and when I have problems it will be replaced, I fully agree, if you used larger diam,or schedule 40 your just asking for problems
http://www.homedepot.com/Tools-Hard...splay?langId=-1&storeId=10051&catalogId=10053
At $375 each ID by two of these
duplicating my current set-up, which allows me to port heads and run air tools etc. having the twin compressors reduced down time significantly so I don,t need to wait on the pressure to build back up, most guys don,t realize the volume of air thats required to run air tools continuously, almost anything works if your just using a single air ratchet, but porting heads or having several air tools in use makes the required flow necessary skyrocket
http://forum.grumpysperformance.com/viewtopic.php?f=27&t=24
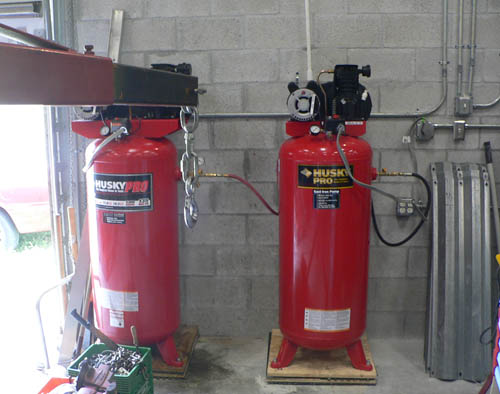
what happens is that both compressors are set up to max out and stop at 130 psi on separate pressure switches and both are set up to come on once the pressure hits 100 psi,that's the theory, in reality the control switches are not precise,
now if your only using a little air volume only one compressor generally kicks in, and yes its usually the same one kicking in first, BUT if your using a good deal of flow volume,the pressure drops fast enough for both compressors to kick in!, both compressors kick in as the second compressor generally kicks in seconds after the first if the pressure drops below about 100 psi,and both keep running until the pressure reaches about 127 psi, and yes one tends to kick out early,but the net effect is that both compressors do run and while one probably does 70% of the work, the pair do work to stabilize and keep the tanks fully pressurized, and yes you can easily adjust the pressure switch settings to reverse the order the compressors kick in, which I have done every few months, to basically keep the rate of stress or wear fairly consistent between the two compressors.
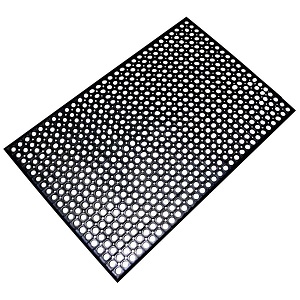
look closely youll see the compressors are mounted on two layers of 3/4" marine ply wood 2' x 2' and two layers of rubber waffle mat, this reduces noise in the shop, theres three 8" long expansion set 4" into the concrete slab, the bolts holding the compressors mounted firmly to the concrete have rubber washers further insulating vibration
BTW if you purchase a couple 3 ft x 5 ft rubber waffle mat it can be cut to produce required matching sections of rubber pads that can be screwed and glued to the compressor base support stack lower surface this prevents the pads from sliding on wet floors and reduces the damage potential damage to the vibration support over time,if the stack of wood were subjected to water on the shop floor
http://www.homedepot.com/s/rubber+floor+mats?NCNI-5
two compressors, feeding my air lines in the shop solved most of my pressurized air needs, allowing me to run tools without down time about 90%v of the time vs about 60% with a single compressor (I still need a decent air drier)
keep in mind if your just running a single air ratchet its a non-issue, but if your running several tools its far more important
down here in Florida you need to drain the tanks before and after every use, that's several times a day if you don,t want rusted air tools
most days the moisture in the airs fairly high
the problem, is most reasonably priced air compressors can,t maintain the flow volume at reasonable pressure levels and your constantly waiting for the tank to re-pressurize,
so you can use the air tools for more than a few minutes at a time,
cheap compressors lack the tank size and flow to keep up,
and few guys have the room or want to spend several thousand dollars on a commercial compressor, which can easily cost twice too three times what two home shop,compressors cost,
compressors will have a rated air flow,
lets say, your looking at a compressor that
Delivers 11.5 SCFM at 40 psi and 10.2 SCFM at 90 psi
take that as a absolute MAX and figure theres transmission line losses, so you then look at your air tools and look at what they require!
and if its even close the compressor will need to have some time to catch up or the tool cant be used 100% of the time (FEW ARE)
but its nice not needing to wait for pressure to build back up so get a decent sized tank and compressor
http://www.harborfreight.com/air-die-gr ... 99698.html
Air consumption: 18 SCFM, 4.5 CFM
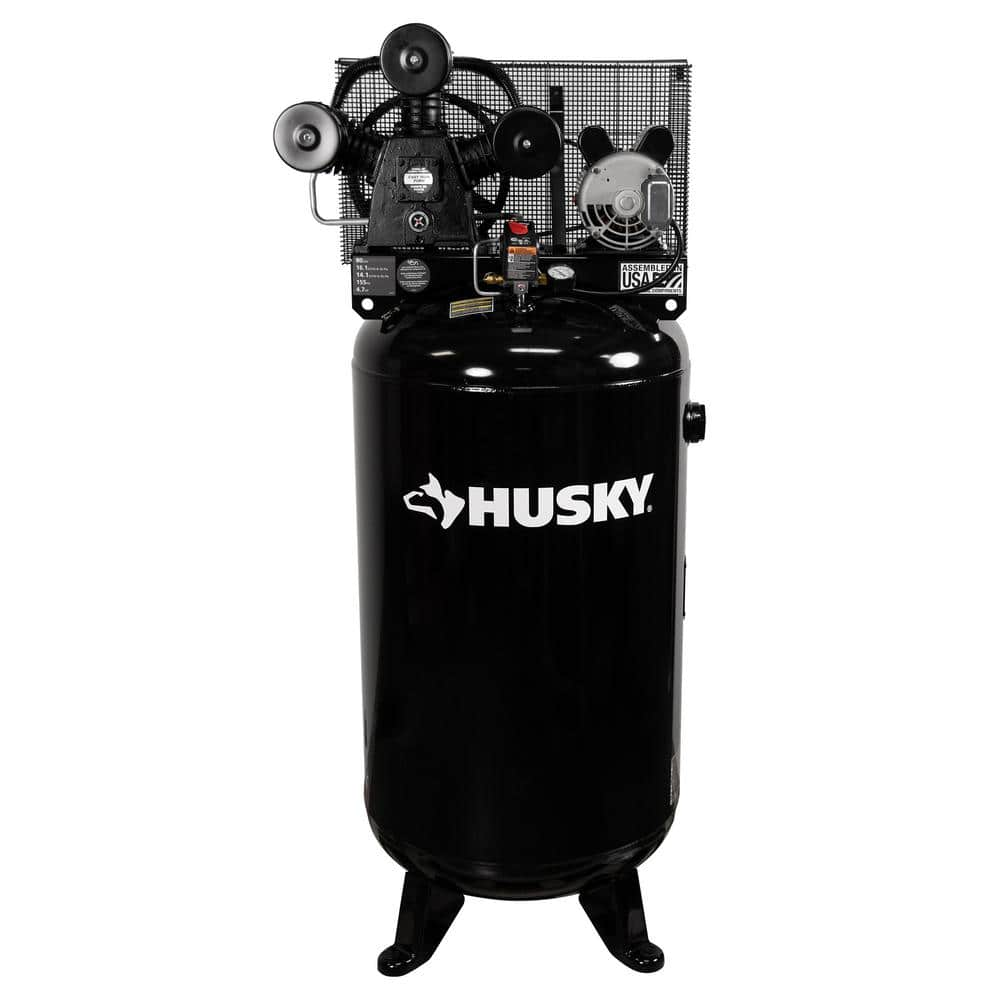
Husky 80 Gal. 3-Cylinder Single Stage Electric Air Compressor C801H - The Home Depot
Husky 80 Gal. single stage air compressor provides high air flow with has 14 SCFM at 90 PSI and 155 PSI max working pressure giving the user optimum tool performance. The compressor features an oil-lubricated
www.homedepot.com
look at the two ratings and you see why I need dual compressors.
REMEMBER TO shop carefully ,you might find, that you can buy two compressors that will have a larger total holding tank capacity, more total horsepower and a higher total CFM rating than a single compressor costing two to three times as much can produce
youll tend to get what you pay for and a $600 home depot , or harbor freight compressor is not going to be the same quality , durability or flow volume as a commercial compressor that costs 4 times as much
Id also point out that a bit of careful thought going into the install will allow your compressor to last many years longer than it will if you just bolt it to the floor of your shop and plug it in.....
take the time to think about how and where you'll want to install the compressor,
it will need to be close to a 220 volt source,
ideally mounted on rubber vibration absorbing mounts,
and if you want it to last you'll need to drain moisture from the storage tank before and after every use.
Ideally youll take the time and effort to run the compressors pressurized air flow out through a heat and moisture trap, before the hot moist air can reach the holding tank, too significantly reduce the moisture that reaches the storage tank,
because moisture and steel are not going to play well together long term.
youll also want to check the compressors oil level before every use.
http://garage.grumpysperformance.com/index.php?threads/franzinator-air-dryer.6246/
http://www.homedepot.com/h_d1/N-5yc1v/R ... logId=1005
http://www.championpneumatic.com/produc ... ies/?n=490
http://www.tptools.com/Champion-Refrigerated-Air-Dryers.html
http://www.tptools.com/Flexzilla-4-...nd2-Ends,8008.html?b=d*8063!r*Brand*Flexzilla
what you need depends on what your doing! I found I needed TWO compressors working in tandem, as I do a good deal of cylinder head PORT work on heads and using air ratchets, and it tends to tick me off if I need to wait for pressure to build up, my brother-in-law has a 2hp/20 gallon compressor and for a single air ratchet he has that just fine.
remember to check the oil in your compressor and drain water from the tank before and after each use, and to carefully OIL air TOOLS before and after each use, !
http://blog.cnccookbook.com/2011/09/06/aftercooling-a-compressor-to-cut-down-on-moisture/
https://www.amazon.com/dp/B004XONT3E?tag=viglink26107-20
you really should take the time to read this linked info, posted in the links and sub links, obviously most of us are limited by budget concerns, but check and compare the pressure limits and flow capacity and tank size
http://reviews.ebay.com/Air-compressors ... 0002309894
viewtopic.php?f=27&t=3444
http://www.homedepot.com/p/Husky-80-gal ... ifications
http://www.championpneumatic.com/produc ... ies/?n=490
http://www.rapidairproducts.com/pdfs/airnet_flyer.pdf
http://www.rapidairproducts.com/pdfs/du ... ed2009.pdf
http://www.rapidairproducts.com
viewtopic.php?f=27&t=8910
viewtopic.php?f=50&t=1830&p=4764&hilit=moisture#p4764
viewtopic.php?f=59&t=6246&hilit=franzinator
http://www.northerntool.com/shop/tools/ ... _200396621
http://www.ecompressedair.com/air-compr ... ating.aspx
http://www.1969supersport.com/draw1.html
http://www.mastertoolrepair.com/air-com ... c-271.html
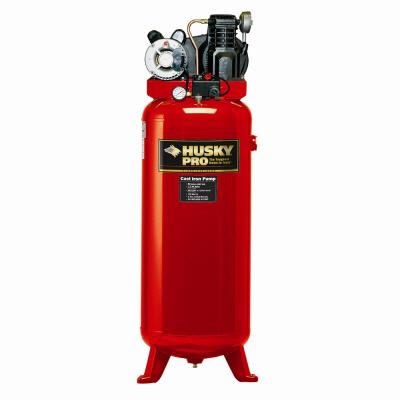
yeah, the use of TWO of the cheaper 60-80 gallon single stage compressors feeding a single common air pipe with taps around the shop is usually far cheaper than trying to find a decent single compressor that will keep up with most tool demand, keep in mind pressures above about 125 psi are not usually needed or necessary but having the volume of air flow two separate compressors can provide is usually a big plus. BTW I got my current compressors at HOME DEPOT for $450 each, rated at 7hp 80 gallon, 130 psi
IM not debating which compressor is superior, only pointing out the advantages of TWIN compressors, in significantly reduced wait times under multi use conditions
similar to this, but I don,t currently see the exact one listed
http://www.homedepot.com/webapp/wcs...langId=-1&catalogId=10053&productId=100349429
HF SELLS A PIPE KIT BUT LOOK CAREFULLY THE TUBES RATED AT 150PSI
http://www.northerntool.com/shop/tools/ ... _200367525
btw
I used several hundred feet of 3/4" schedule 80 PVC pipe rated at 660 PSI to pipe the air around the shop and used brass fittings screwed and glued into the pick-up access points , both compressors feed a 3/4" pipe that then dips to a drain valve then shoots over the rafters to a (T) where its routed along the walls to every place I might EVER use air flow to clean or operate tools in the shop,and its worked flawlessly at about 1/8 the price of copper pipe and sweated joints I used in the previous shop., and its worked fine for 5 years now at the 130 psi max I use.
yes IM WELL AWARE your not suppose to use PVC but after looking into most PVC failures they were related to SCHEDULE 40 pipe, pipe in direct sun light or pipe that got mechanically damaged
keep in mind moisture tends to run down hill so route your pipes so that the pipes drain to drain valve locations and all access points to draw air are higher than the drain points IE don,t run the pipe level with the floor,pick-up points should be higher than drains and there should be several drain valve points, one near the compressors and at least one more before any access to the air for tools my compressors are feeding the pipe at 5 feet from the floor,it slants to a drain at 4.9 ft from the floor,then shoots directly up the wall,over the rafters in a sweeping curve and drops to the opposite side of the shop at a drain at 5 ft from the floor, all access points are tees 6 ft from the floor
yes IM fully aware that PVC pipe is not generally suggested for pressurized air....and sweated copper or galvanized steel is suggested... yes 3/4" copper pipe with soldered fittings is the best choice, and iron pipe works fine if you have an air drier,I used several hundred feet of 3/4" schedule 80 PVC pipe rated at 660 PSI
Oh IM only too aware of the minimal risks, but Im also aware of the huge cost difference, like 800% higher for copper and steel pipe rusts,, the copper pipe I used in the last shop would have cost me hundreds of dollars in this shop,the better moisture tolerance and several hundred psi safety margin (pipes rated at 660 psi and it will never see 140 psi) and almost negligible risk of injury, the worst case is it fails too hold air pressure and my air tools don,t work
I probably would never have tried it if a buddy's shop had not used it without any problems for over 12 years now , and hes located less than 5 miles from here so he gets similar shop temps and pressures on the pipe,any compressors a huge improvement over having none it the shop, I could not believe how helpful having access to air ratchets and die grinders was when I got my first compressor and a few air tools.
when I go over to the BROTHER IN LAWS garage his compressors a huge help over nothing at all, but its a P.I.T.A. to use if your doing serious repairs because its only something similar to this
http://www.harborfreight.com/cpi/ctaf/d ... umber=5637
a HUGE improvement over not having any compressor but you constantly wait for the pressure to build to use tools
I got asked what compressor I use, well heres a picture, I use twin 7hp/60 gallon compressors feeding a single garage wide run of schedule 80 3/4" PVC piping with brass fittings rated at 660 PSI, yeah! IM well aware you should NEVER USE PVC for air, I used it for 10 PLUS years ,in my old shop, my buddies used it for over 12 years in his shop,and its what Ive installed in the new garage, schedule 80 3/4" PVC piping with brass fittings rated at 660 PSI, if and when I have problems it will be replaced, I fully agree, if you used larger diam,or schedule 40 your just asking for problems
http://www.homedepot.com/Tools-Hard...splay?langId=-1&storeId=10051&catalogId=10053
At $375 each ID by two of these
duplicating my current set-up, which allows me to port heads and run air tools etc. having the twin compressors reduced down time significantly so I don,t need to wait on the pressure to build back up, most guys don,t realize the volume of air thats required to run air tools continuously, almost anything works if your just using a single air ratchet, but porting heads or having several air tools in use makes the required flow necessary skyrocket
http://forum.grumpysperformance.com/viewtopic.php?f=27&t=24
what happens is that both compressors are set up to max out and stop at 130 psi on separate pressure switches and both are set up to come on once the pressure hits 100 psi,that's the theory, in reality the control switches are not precise,
now if your only using a little air volume only one compressor generally kicks in, and yes its usually the same one kicking in first, BUT if your using a good deal of flow volume,the pressure drops fast enough for both compressors to kick in!, both compressors kick in as the second compressor generally kicks in seconds after the first if the pressure drops below about 100 psi,and both keep running until the pressure reaches about 127 psi, and yes one tends to kick out early,but the net effect is that both compressors do run and while one probably does 70% of the work, the pair do work to stabilize and keep the tanks fully pressurized, and yes you can easily adjust the pressure switch settings to reverse the order the compressors kick in, which I have done every few months, to basically keep the rate of stress or wear fairly consistent between the two compressors.
look closely youll see the compressors are mounted on two layers of 3/4" marine ply wood 2' x 2' and two layers of rubber waffle mat, this reduces noise in the shop, theres three 8" long expansion set 4" into the concrete slab, the bolts holding the compressors mounted firmly to the concrete have rubber washers further insulating vibration
BTW if you purchase a couple 3 ft x 5 ft rubber waffle mat it can be cut to produce required matching sections of rubber pads that can be screwed and glued to the compressor base support stack lower surface this prevents the pads from sliding on wet floors and reduces the damage potential damage to the vibration support over time,if the stack of wood were subjected to water on the shop floor
http://www.homedepot.com/s/rubber+floor+mats?NCNI-5
two compressors, feeding my air lines in the shop solved most of my pressurized air needs, allowing me to run tools without down time about 90%v of the time vs about 60% with a single compressor (I still need a decent air drier)
keep in mind if your just running a single air ratchet its a non-issue, but if your running several tools its far more important
down here in Florida you need to drain the tanks before and after every use, that's several times a day if you don,t want rusted air tools
most days the moisture in the airs fairly high
Last edited by a moderator: