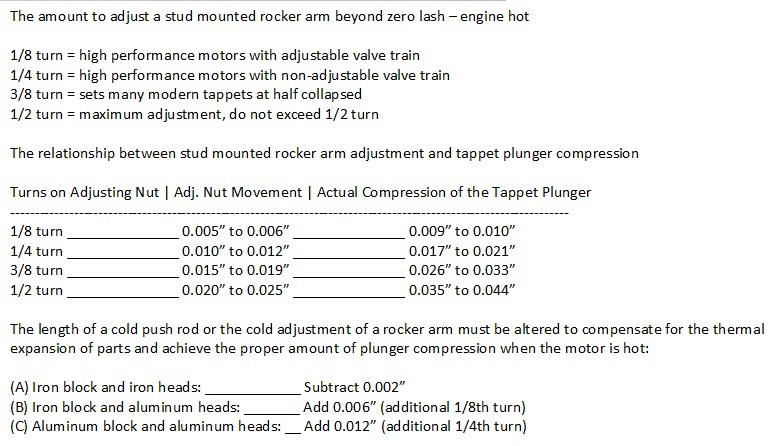
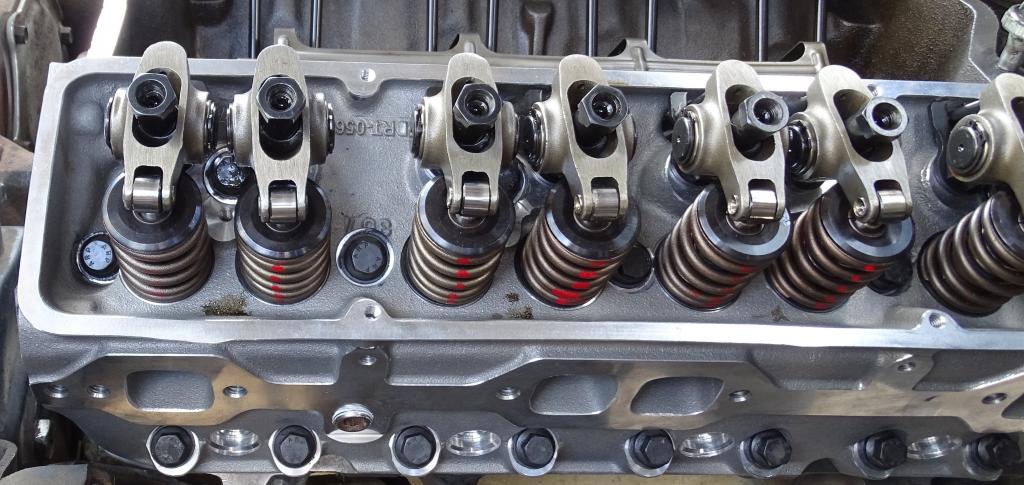
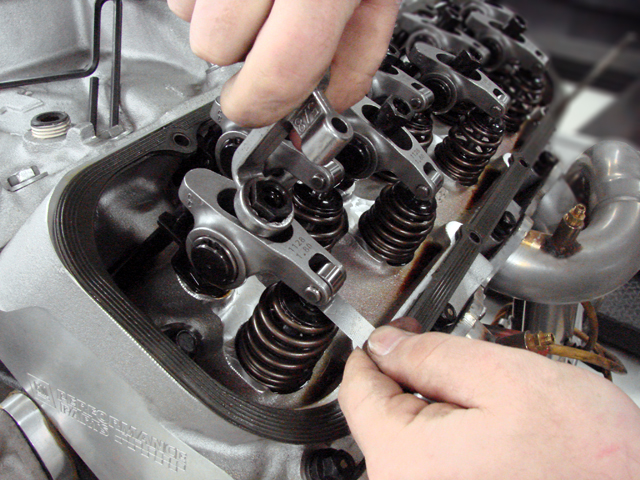
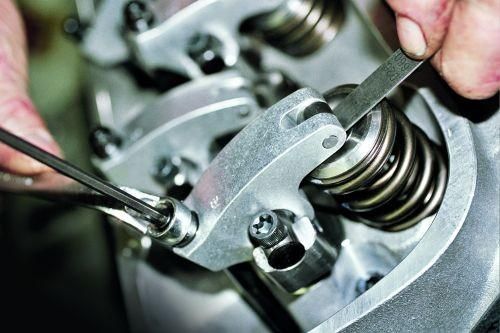
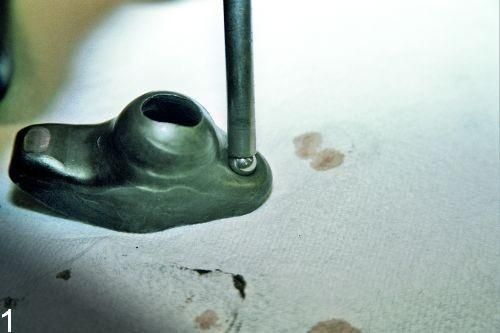
this is an area that causes many newer guys problems ,a slight clicking noise at idle in any hydraulic or solid lifter valve train is usually the result of clearances in the valve train, obviously you should have, some clearance, to allow oil flow thru the lifters to provide lubrication on moving parts, in the valve train and a consistent sewing machine like rhythmic clicking from a solid lifter valve train is expected and DESIRABLE. In my experience you can get really darn close adjusting valves on hydraulic lifter engines, while the engines stationary and cold on a non running engine IF YOU know what to look for and how the lash is SUPPOSED to feel but in my experience that takes having done so on dozens of engines before you develop the "FEEL" most guys doing this process the first few times tend to over tighten the rockers, thats why.
the fact is that due to manufacturing tolerances a dot-to-dot install will frequently be a few degrees off! now most guys might never notice, but it can and frequently does effect the engines power band so getting it correct helps and eliminates one potential source of problems (be damn sure you verify the cams degreed in correctly and the ignition firing orders correct and all the distributor wires go to the correct cylinder,s spark plugs and distributor cap locations)
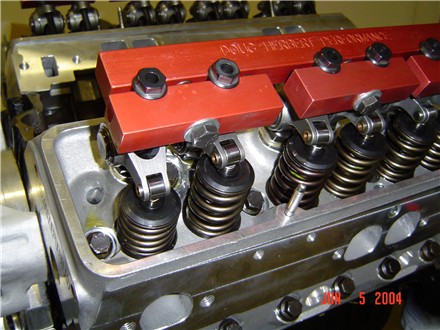
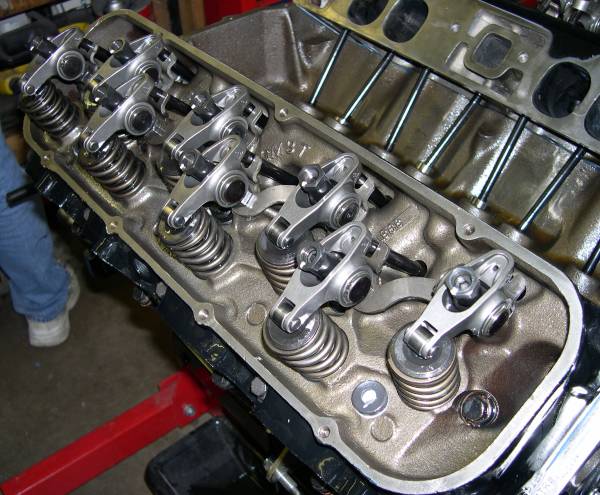
honestly this takes a good deal longer to post about and discuss that to correct and check, so what ever method you might select ,Adjusting the valves is a rather simple procedure, that youll need to go thru on almost any new engine instal and you can use the E-O, I-C method,or if your experienced the adjustments easily done at idle speed, your choice, either works just fine if you know what your doing. I strongly suggest the adjustment to the rocker arms pre- load on the lifters be made with the engine running at idle , where you back off the rocker adjustment nut slowly just to the point the rocker clicks, then slowly turn it in just to the point the clicking stops, then add a 1/4 turn pre-load, obviously this can get messy so a tall valve cover with the top cut out helps reduce oil loss and smoke and if you don,t have that a piece of card board about the length of the cylinder head and about 8"-12" tall placed above the lower valve cover lip , below the rockers can help
Ive always preferred to get the engine temps up to about operational temp levels and adjust the valve train on hydraulics for 1/4 turn in on the rocker nuts from the point they just stop clicking at idle as it tends to maintain the best compromise on both low and high rpm valve train stability.
if you insist on doing it cold the instructions are listed below, you generally turn the engine so each lifters on its matching cam lobes base circle and tighten the rocker slowly while spinning the push-rod between your fingers,any increase in resistance indicated both the lifter and rocker touch and your at zero lash, and then when you feel minimal resistance to rotation indicating theres no effective clearance between lifter and rocker,so you add 1/4 turn,lifter pre-load, that puts it close.
its back the rocker adjustment nut out until the rockers clattering /clicking, then slowly turn it in the nut too just the point, the noise stops than add 1/4-1/2 turn of preload, the engine will stutter for about 5-10 seconds,as the lifter preload adjusts then stabilize
btw it is usually far easier to hear each rocker change sound,the second time you go thru,the adjustment, as the other rockers will generally be far less noisy
If you insist on adjusting the lifter pre-load on a new engine cold and experience a cam lobe or lifter failure after a few hundred miles, its frequently the result of incorrect lubrication or valve train clearances or geometry issues causing that most of the time, if so chances are EXCELLENT you've wiped a cam lobe, because in my experience maybe 1 out of 40 guys has the experience to do this correctly by feel alone. the valve adjustment done at idle is FAR less likely to get your into problems
yes theres a hundred guys who are about to post Im wrong and many of those same guys are the same guys that have unexplained cam failures or bitch, about soft or defective cams, the truth is that hydraulic lifters require a certain amount of clearance to function and allow the valve train to live and it takes some skill to get that clearance set correctly. IF you insist on doing the valve adjustment on a non-running engine,mark the harmonic balancer every 90 degrees starting at the timing mark,on the damper aligned with the timing tab at TDC. put the engine on #1 TDC on the compression stroke and adjust both rockers with both valves closed, then rotate the engine 90 degrees clockwise as viewed from the front and set both valves on #8. Proceed in this fashion through the firing order until you have them all set (18436572). guesswork will get you into trouble
your free to do things any way you want too, but I see far more guys with valve train issues among the guys that adjust valves cold in a non-running engine, or fail to check clearances during the assembly process, or who assume they get the adjustment correct than those who adjust the valves at idle, and guys who take the time to verify clearances and valve train geometry, and check push rod
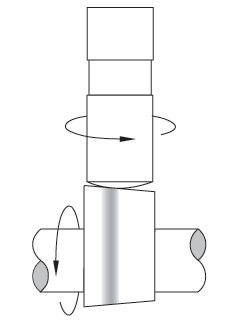
length . MOST flat tappet cams are designed for FAIRLY low spring pressures and have cam lobes that are cut at an angle to allow the lifter to spin, failure to provide the required clearance retards the lifters ability to spin in the lifter bore , causing rapid wear, and cam core, don,t get the necessary lubrication, results in a ruined cam and lifters
[/b][/color]
if your trying to reduce oil spray from getting on the exhaust manifolds while adjusting the valves/rockers, as the engine idles, you have options , you can cut a 10" tall and 22" wide section of cardboard , or thin flexible aluminum, sheet metal, to stick in between the lower outside block valve cover gasket rail and rockers, too deflect oil while, inspecting or adjusting the rockers or you can modify and old valve cover
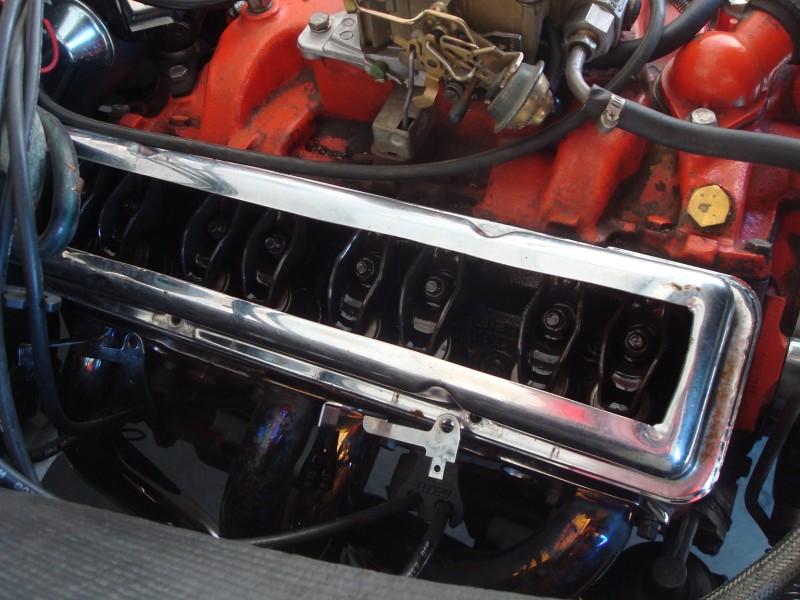
the the tall cast valve covers I fabricated/modified for valve adjustment is taller and has a smaller open area,
but yes the basic concept of having a valve cover modified to adjust valves at idle works very effectively,
watch video
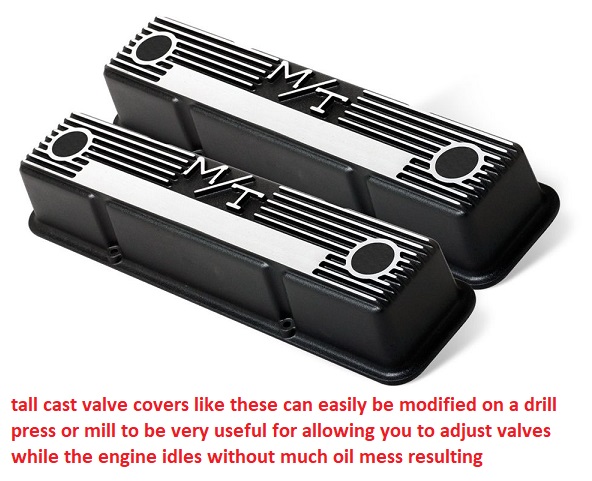
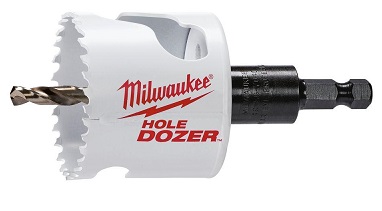
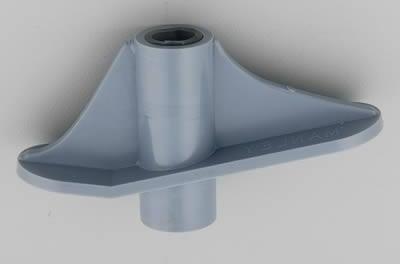
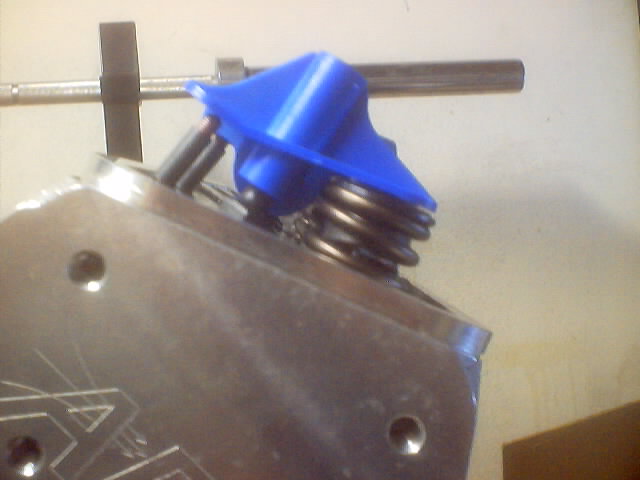
I bought a used set like these to modify and drilled 8 -2 1/8" diameter round holes centered on the rocker studs (yes the holes overlap)
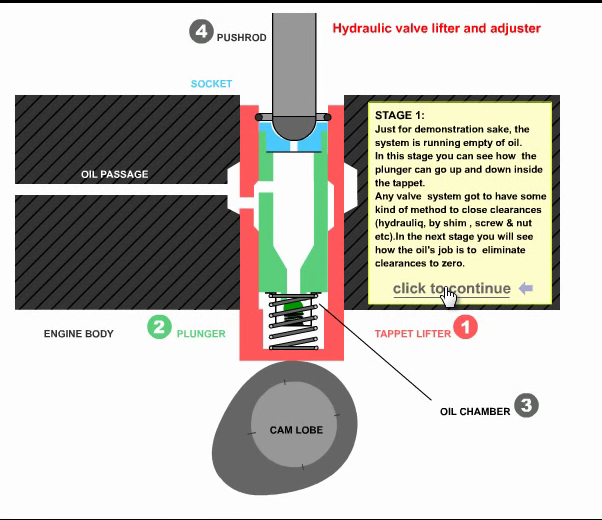
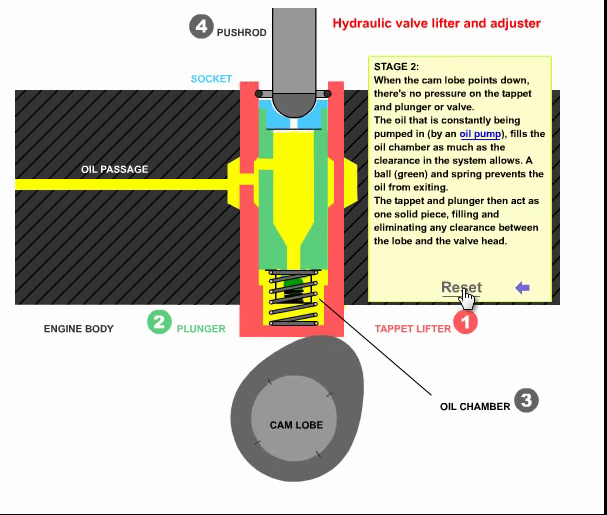
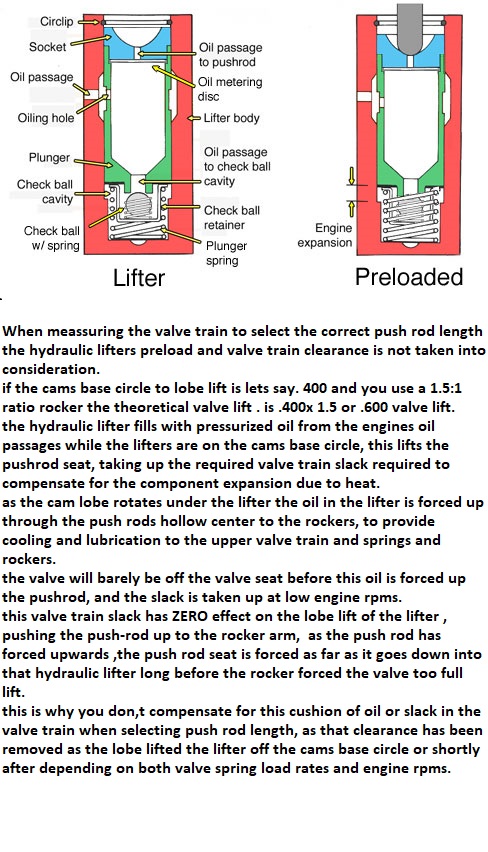
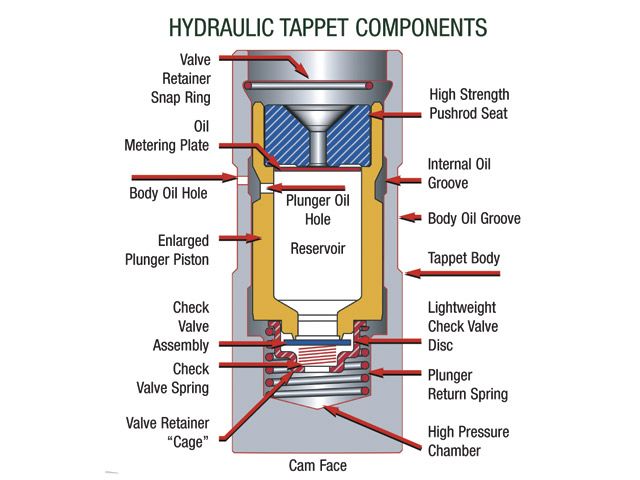
watch this video, it depicts the lifters movement as the cam lobe rotates under its base forcing it up as the lobes ramp, rotates under the lifter base,removing the clearance slack,
as it compresses the valve spring and forces the trapped oil, up the push rod and lifts the valve
If you are concerned with measuring the clearance in the hydraulic lifter seat when selecting and measuring the correct valve train geometry,
so you can order the correct length push rods...
I don,t think you have the correct idea as to how hydraulic lifters work,
yes it is possible for an engine with hydraulic lifters to be pushed too operate at a high enough rpm that the time required for the lifter seat to fully depress and all the oil too be forced up to the push rod/rockers , to be so short that the lifter pumps up and the valves will have less seat time, ( sometimes one of several factors, like the lifter leaving the cam lobes surface as the inertial loads exceed the valve springs ability to maintain lifter too lobe contact, referred too or contributing to what is commonly referred too as valve float) but that has ZERO to do with selecting push rod length or proper valve train geometry, (remember at 6000 rpm the valve is lifted off its seat 50 times PER SECOND)
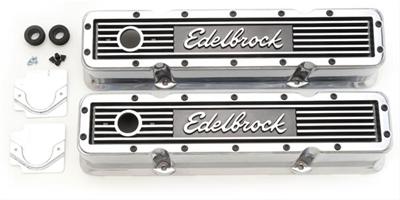
look thru yard sales and try hard too find a TALL valve cover, preferably a tall cast aluminum valve cover ,something like these below
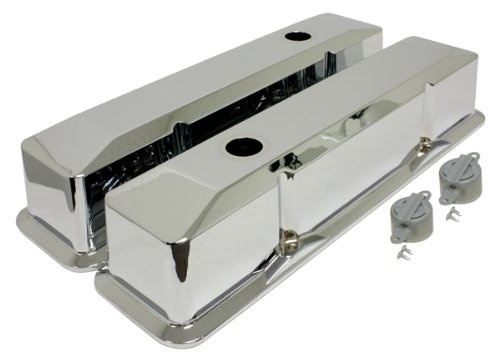
unlike this short steel version posted above and mill the center top center surface in a similar manor to this and you have a very useful tool to use to adjust valves without getting much oil on the headers
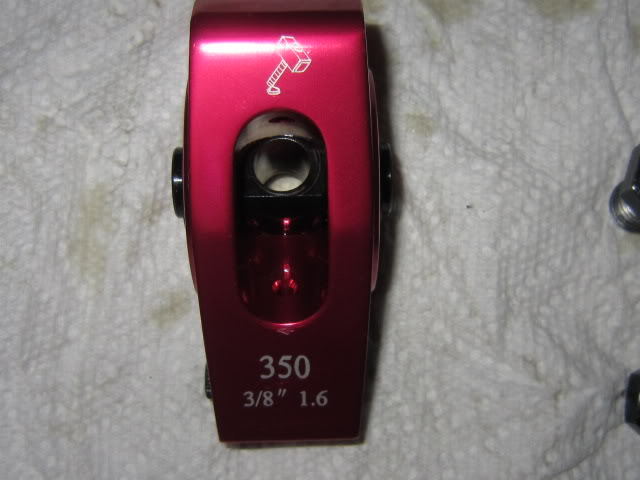
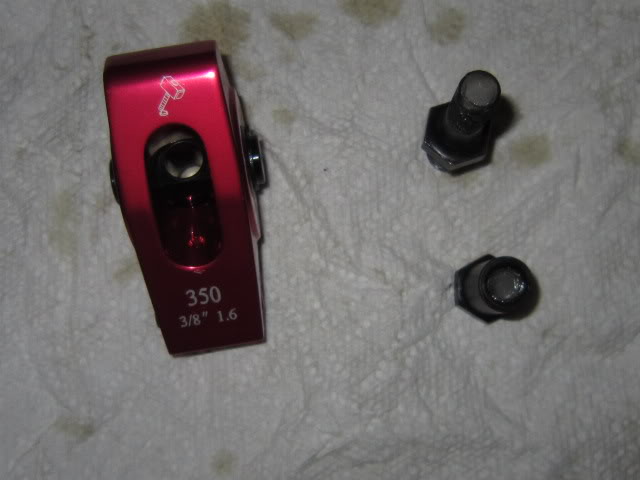
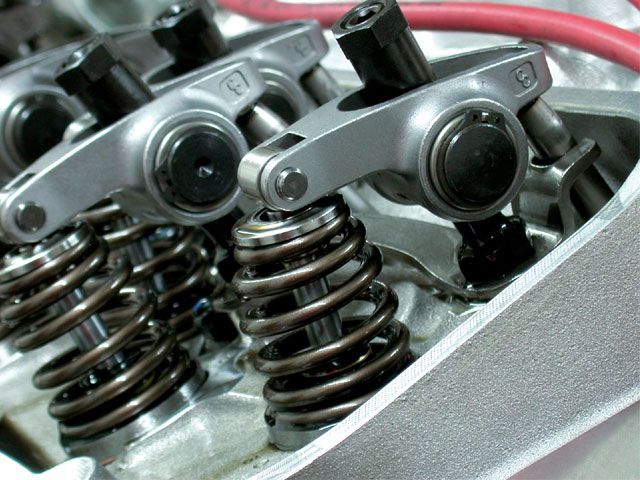
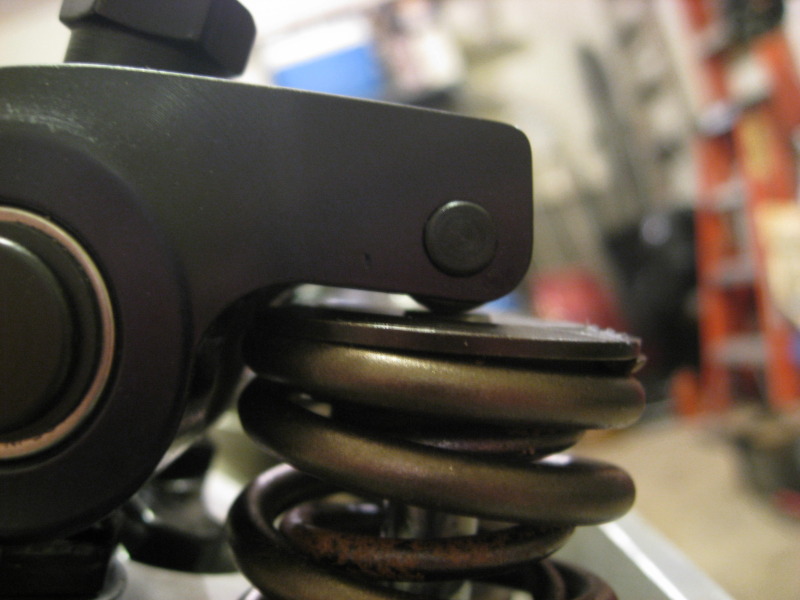
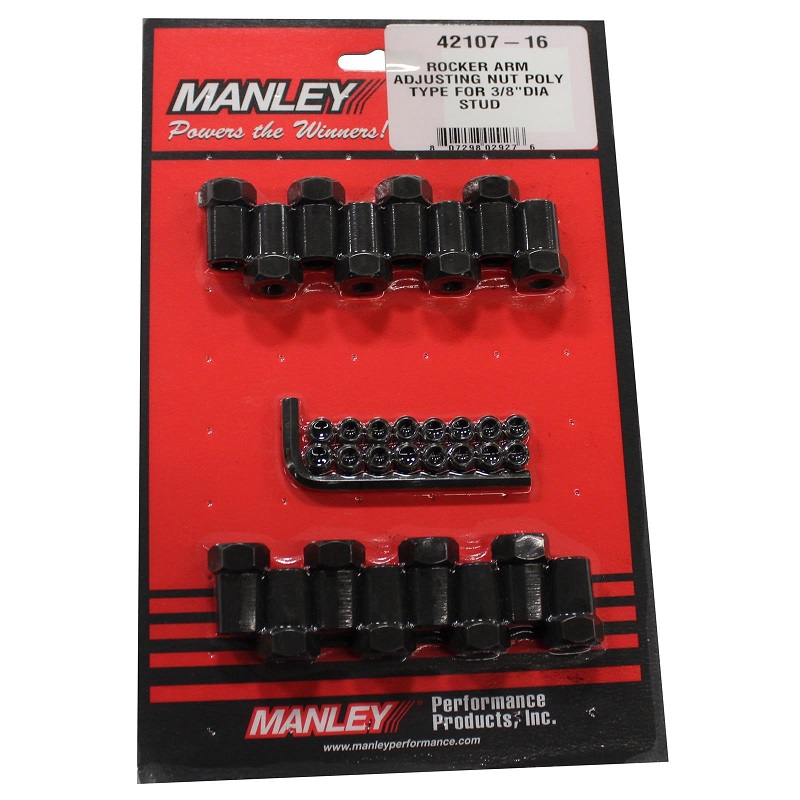
standard OEM rocker nuts like these can get loose and not retain the proper clearances, as vibration allows them to slowly back off
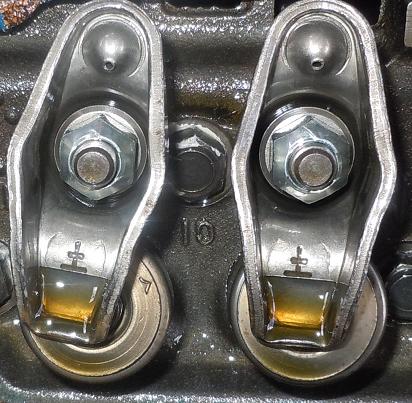
rocker stud jam nuts with a locking center jam stud are less likely to loosen
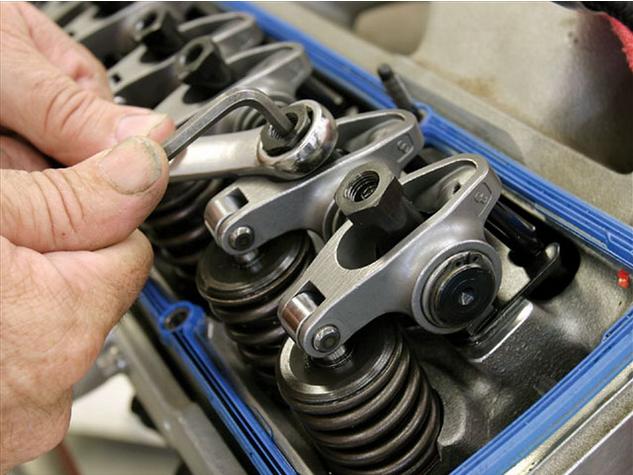
I always get asked if you can pre-load the lifters before you run the engine, and the answer is yes, it can be done but your very unlikely to get it exactly correct, youll be close, if you have experience, doing it, and theres easily about .060 adjustment slack in the lifter seal, so if your happy being close, yes its done all the time!
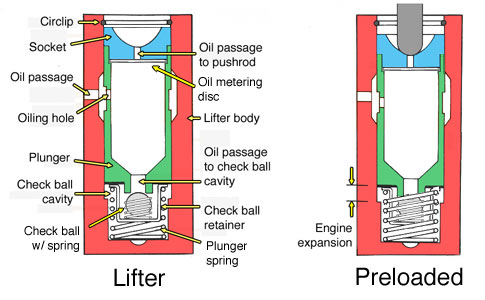
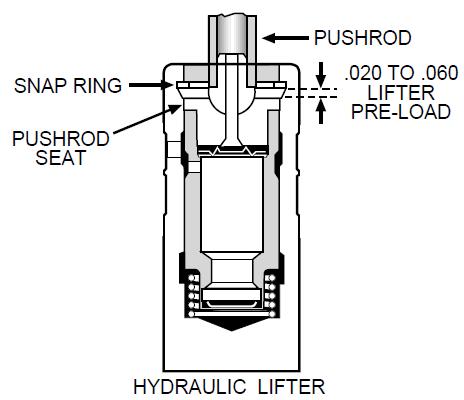
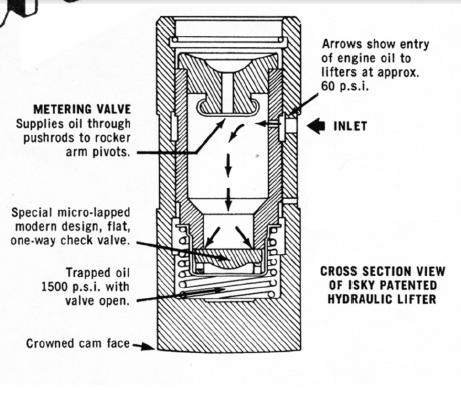
hydraulic lifters BY DESIGN, leak oil both up the push rod to supply oil flow to the rockers and past the push rod seat to allow for pressure and clearance equalization, it really won,t matter much if you set the lifter adjustment on a hydraulic lifter while the engine idles, as oil will be flowing into the lifter while the lifter is on the cams base circles and up thru the push rods as the lobe rotation compresses the valve spring, forcing oil and any trapped air up out of the lifter.
yes you can set lifter pre-load with experience while the engines cold, but in my experience the chances of doing it correctly if your rather new to the process is low.
if you set the lifters on a non-running engine you may find that you need to go back and do it again once the engines been run awhile, this is almost mandatory in my experience.
that knock sensor myth, youll occasionally hear about that says roller rockers can,t be used because the computers knock sensor won,t allow roller rockers, on the Lt1 and LT4 engines, got started because many people can,t correctly adjust valves, especially if your using roller rockers
they leave too much slack in the valve train (usually due to adjusting the valve train while its cold and not adjusting the hydraulic lifter pre-load correctly) and as a result the slight ticking that results is detected as detonation.
once correctly adjusted theres no need to swap knock sensors
READ THRU THE LINKS
http://www.centuryperformance.com/valve-adjustment-procedure.html
viewtopic.php?f=52&t=1376
viewtopic.php?f=52&t=181
http://garage.grumpysperformance.co...-in-vs-threaded-rocker-studs.2746/#post-43539
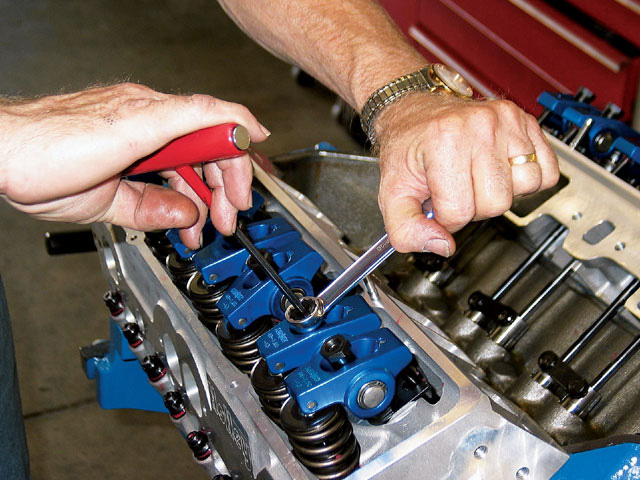
solid lifters can be adjusted in a similar manor, you just don,t add any pre-load once you feel resistance to the push-rod rotation and you adjust each valve with the recommended cam lash clearance gauge, listed on your cam card temporarily inserted between the rocker and tip of the valve stem, if your really looking for max performance a correctly set up and adjusted solid lifter valve train almost always has at least a 600rpm-1500rpm advantage, as it will allow higher rpms before valve float, or loss of valve control
http://www.ratwell.com/technical/HydraulicLifters.html
To cold adjust pre-load on hydraulic lifter camshafts with
adjustable rocker arms, turn the engine in the normal direction
of rotation until the exhaust lifter starts to move up, then
adjust the intake valve to zero lash with no preload, then 1/4
to 1/2 turn more max. Turn the engine over again until the intake
opens completely and then is almost all the way back down.
Now, set the exhaust valve to zero lash, then 1/4 to 1/2 turn max
more. Continue the above procedure for each cylinder until
all valves are adjusted to the same amount of preload. This
procedure will give you the correct lifter preload for any
hydraulic lifter cam with adjustable rocker arms.
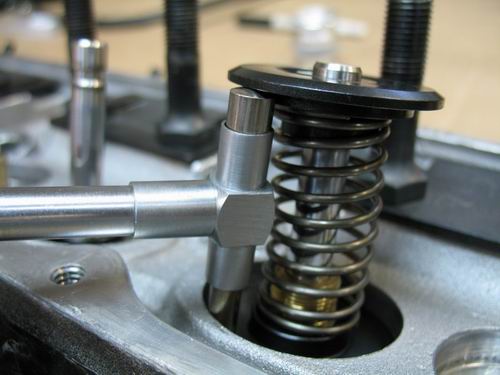
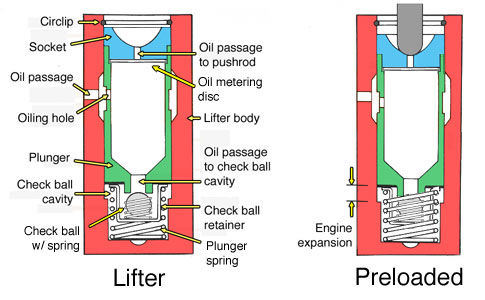
http://www.youtube.com/watch?v=89o5rLpb ... _embedded#!
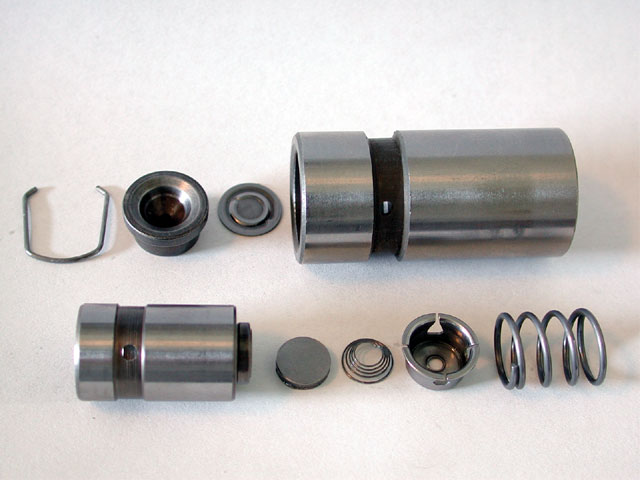
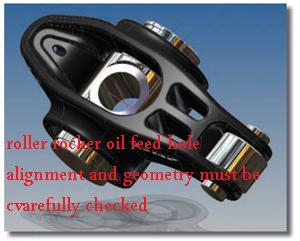
but on a hydraulic lifter, that clearance is rapidly filled with pressurized oil under a lifter/push-rod seat, that moves to take up slack as the cam lobe , rotates under the lifters base and compresses the lifter seat, which forces oil up the push-rod to the rocker, and lifts the lifter,rocker,and valve , so you'll need to verified all valve train clearances and geometry during the pre-assembly stage of your engine build up, and made sure theres no clearance issues,a bit to much tightening on the rocker nut will prevent the valve from seating, youll have very low compression or zero compression, a bit to little results in a noisy loose valve train READ THRU THE LINKED INFO
http://www.centuryperformance.com/adjus ... g-149.html
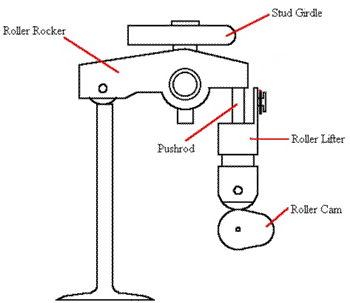
http://www.centuryperformance.com/valve ... edure.html
http://garage.grumpysperformance.com/index.php?threads/rhodes-lifters.1552/#post-6067
its the attention to details and checking clearance etc. and time and care taken,
that makes the difference between a barely or average functional ,
and a rather exceptional engine build, yes the urge to get it running is strong,
but getting it done correctly is the goal

keep in mind some roller lifters (even hydraulic roller lifters)and roller rocker combos will by design have a good deal more slack , to provide good lubrication and oil cooling or clearance to the roller bearings than a similar combo using different components and the way you set up or preload the valve train will effect your resulting noise levels, a soft rhythmic clicking even with hydraulic lifters, is common with many designs of roller rockers , this soft rhythmic clicking,is NORMAL, and you'll learn to appreciate the soft rhythmic sounds a bit similar,to and sounding like a sewing machine or a bit softer than properly adjusted solid lifters, and you will defiantly hear a difference in the sound if your adjusting them at idle as the preload reaches zero lash if you slowly tighten up the rocker adjustment nuts ,allowing the valve train time to bleed off the oil under the lifter seats , that are taking up the valve train clearance as you approach zero lash , but naturally an experienced ear helps
1/4-about ideal -1/2 max turn in past the point where they just stop clicking at idle,is MORE than enough to set the proper preload (hydraulics), obviously solid lifters don,t require (PRELOAD)they require clearance or (LASH) that's usually specified on the cam manufacturers cam card.
if you don,t have the specs start with .020 on the intake valves and .022 on the exhaust thats close for most solid roller lifter cams
.[/b][/color]
I have no idea why people are so afraid to adjust valve lash on solid lifter cams, its just not that difficult to do,
adjusting a solid lifter cams a bit like SEX, your nervous the first few times, but after gaining some experience you learn what to do, how to do it correctly and learn to enjoy it
if its a street, solid lifter cam design, it will tend to go significantly longer between adjustments ,than a more aggressive race only cam lobe design with less emphasis on long term durability, than on max horsepower. but the answer depends on the cam lobe design used and valve train components,and the mileage,your putting on the engine and at what average rpm levels, higher stress levels tend to make adjustments more frequent but adjusting valves every few weeks, on the more radical designs to having several months between adjustments on the milder cam designs is about average in my opinion, Ive run mostly solid lifter flat tappet design cams for years in most Mopar and G.M. (Chevy,Pontiac, Caddy) engines
in most cases it takes longer to remove and replace the valve covers that it does for the actual valve adjustment on a solid lifter cam, if you've got the correct tools and a bit of experience, personally I prefer to do it with a tappet gauge at idle but both methods work
in 99.99% of the cases I see guys having problems like a rough idle or loss of compression from badly adjusted valves its the direct result of guys who have no idea how to adjust valves and refuse to do it correctly , and as far as IM concerned youll NEVER EVER get it exactly correct doing it cold on a non-running engine,most guys get the rockers too tight, I don,t know why theres such an aversion to doing it at idle I don,t know why because its simple to do with a properly modified tall valve cover cut to significantly reduce oil leakage during the process and on flat tappet hydraulic cams its just backing the rocker out off the rocker stud threads till it clicks loudly then slowly and carefully tightening it untill the clicking just stops and then adding a 1/4" turn of preload and locking the adjustment

this is a short valve cover modified to do valve adjustments without about 80% of the mess that you get without using a valve cover thats so modified to reduce oil spray, a tall cast aluminum cover works even better if modified in a similar manor, IF you can find TALL CAST ALUMINUM VALVE COVERS like those pictured below , and have the center milled out to provide easy access to the valve train while leaving about an inch overhang around the perimeter youll have the best tool
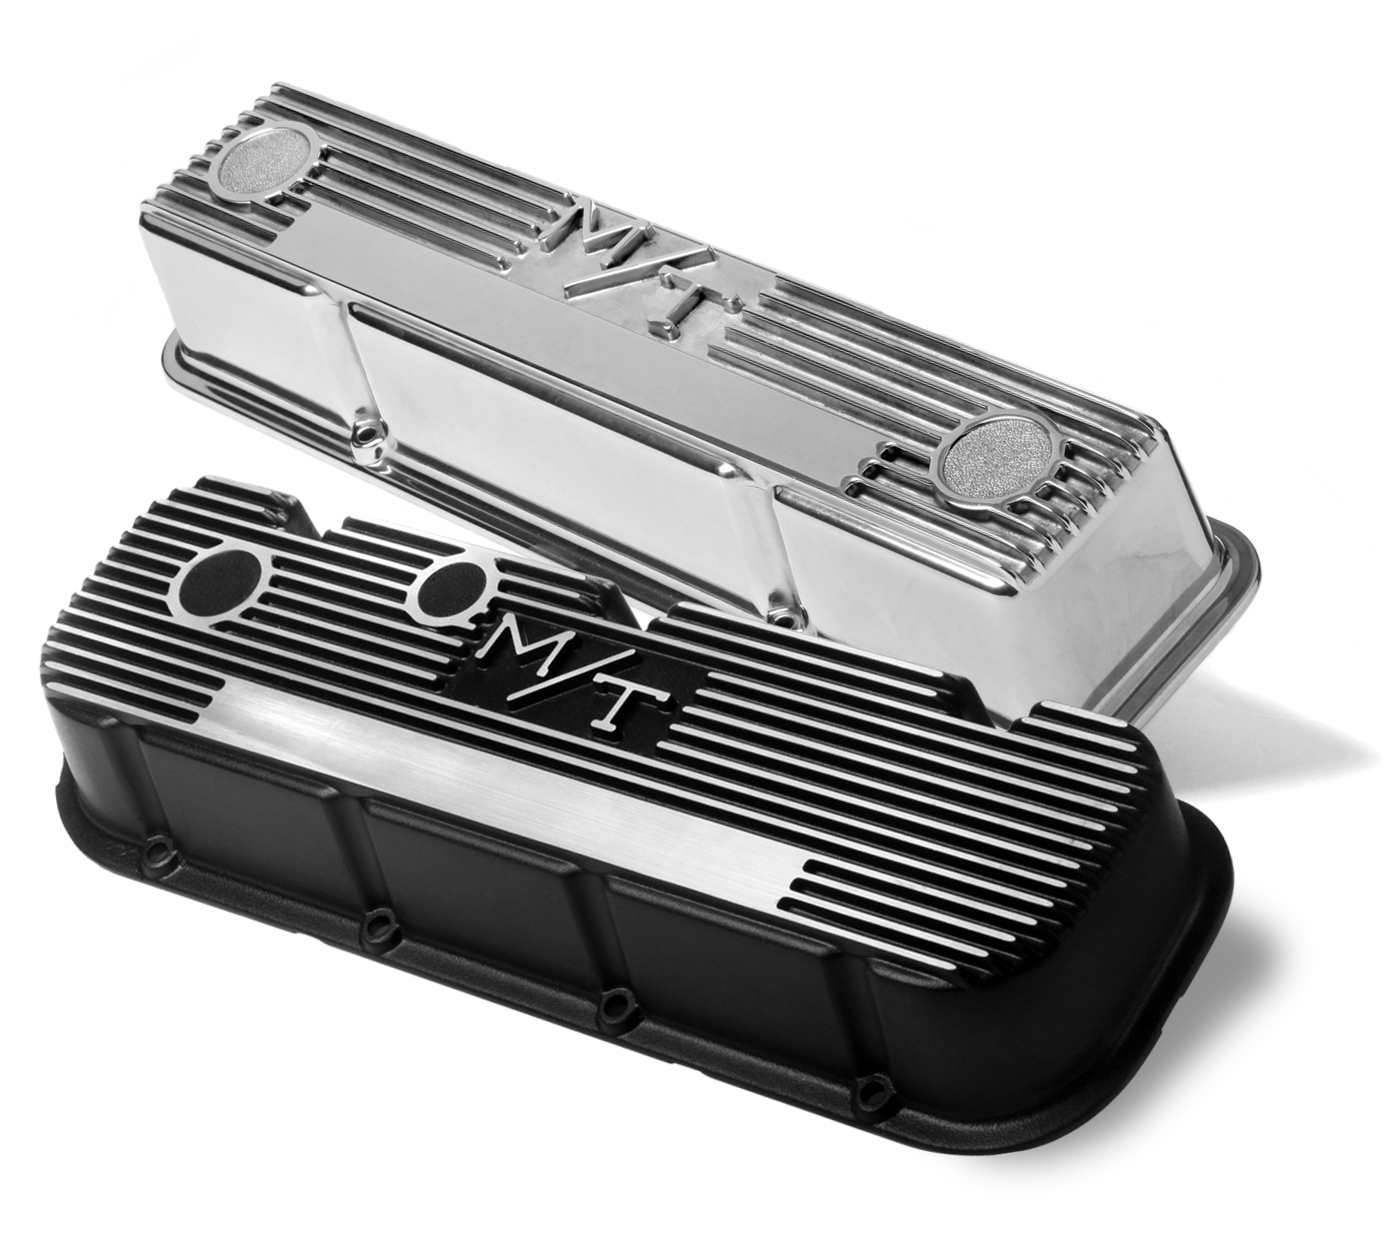
you can do the adjustment at idle or if your dampers marked every 90 degrees you can do it static, but Ive never seen it done static on a cold engine and getting it 100% correct!
http://www.centuryperformance.com/adjus ... g-149.html
ok how do i adjust them now?
(Ive always found the final adjusting of HYDRAULIC LIFTERS, OR SOLID LIFTERS is best done at idle, with the engine up to operating temps., as it allows for all the variables like heat expansion and lifter seat movement as the oil pressure lifts the push rod seat)but with solid lifters that takes a great deal of experience, so the static cold adjustment methods are generally preferred,by most guys.....LINKED INFO POSTED BELOW
ID ALSO POINT OUT THAT,The most commonly accepted method of adjusting the rockers with solid lifters and ensuring the lifter is centered on the cam lobe base circle is the EOIC (engine off) method. For each individual cylinder you adjust the intake rocker when the exhaust valve just starts to open. You adjust the exhaust rocker when the intake valve is fully open and just starts to close.
OR
https://www.centuryperformance.com/valve-adjustment-procedure.html
Valve Adjustment: ENGINE OFF!
with #1 cylinder Intake Valve at full valve lift .... Adjust #6 Intake Valve
with #8 cylinder Intake Valve at full valve lift .... Adjust #5 Intake Valve
with #4 cylinder Intake Valve at full valve lift .... Adjust #7 Intake Valve
with #3 cylinder Intake Valve at full valve lift .... Adjust #2 Intake Valve
with #6 cylinder Intake Valve at full valve lift .... Adjust #1 Intake Valve
with #5 cylinder Intake Valve at full valve lift .... Adjust #8 Intake Valve
with #7 cylinder Intake Valve at full valve lift .... Adjust #4 Intake Valve
with #2 cylinder Intake Valve at full valve lift .... Adjust #3 Intake Valve
Exhaust Valve Adjustment: ENGINE OFF!
If you have noticed, this is the same procedure as the intake valves listed above, just that you are now adjusting the exhaust valves the same way.
with #1 cylinder Exhaust Valve at full valve lift .... Adjust #6 Exhaust Valve
with #8 cylinder Exhaust Valve at full valve lift .... Adjust #5 Exhaust Valve
with #4 cylinder Exhaust Valve at full valve lift .... Adjust #7 Exhaust Valve
with #3 cylinder Exhaust Valve at full valve lift .... Adjust #2 Exhaust Valve
with #6 cylinder Exhaust Valve at full valve lift .... Adjust #1 Exhaust Valve
with #5 cylinder Exhaust Valve at full valve lift .... Adjust #8 Exhaust Valve
with #7 cylinder Exhaust Valve at full valve lift .... Adjust #4 Exhaust Valve
with #2 cylinder Exhaust Valve at full valve lift .... Adjust #3 Exhaust Valve
any time you adjust new lifters without oil pressure and heat expansion taken into account like in a running engine you'll have problems, yes you can get very close but IVE always found a final adjustment made while the engine idles to give the most consistent results.
yes its potentially messy unless you have an old tall valve cover with the top surface slotted for rocker access to limit oil splash on the headers but if done correctly you get consistent results[/color]
YOU REALLY SHOULD TAKE THE TIME AND EFFORT TO READ THRU THE SUB LINKS BELOW, AS THERES A TRUE WEALTH OF USEFUL INFO FROM SEVERAL PERSPECTIVES
http://www.youtube.com/watch?v=89o5rLpb ... re=related
http://www.thedirtforum.com/chevyvalves.htm
http://www.centuryperformance.com/adjus ... g-149.html
http://www.centuryperformance.com/valve ... edure.html
viewtopic.php?f=54&t=4793&p=13273&hilit=lifter+spin#p13273
viewtopic.php?f=52&t=697&p=968&hilit=geometry+checker#p968
viewtopic.php?f=78&t=631&p=845#p845
http://www.hemmings.com/mus/stories/201 ... tips1.html
http://www.cpgnation.com/forum/comp-cam ... -2076.html
http://www.2quicknovas.com/happyvalves.html
https://www.holley.com/data/Products/Te ... NST150.pdf
http://www.cranecams.com/pdf-tech-tips/mech-lift.pdf
http://www.centuryperformance.com/valveadjustment.asp
http://www.boostandfuel.com/support/setting_valves.htm
http://www.carcraft.com/techarticles/87998/index2.html
http://www.youtube.com/watch?v=89o5rLpb ... re=related
http://www.angelfire.com/fl4/pontiacdude428/valveadj.html
http://www.vetteweb.com/tech/vemp_0703_ ... index.html
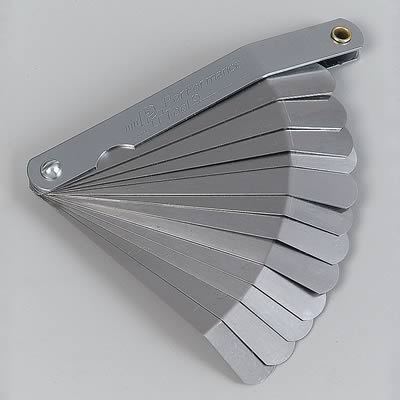
btw if your totally new at this the tappet feeler gauge measures the lash clearance between the valve and rocker on solid lifter cams
Ive generally found the most consistent and best results , if you warm the engine up to operational temps,
back off the rocker adjustment nut slowly just to the point the rocker clicks at idle, very slowly tighten,
just to the point the clicking stops and then add 1/2 or 3/4 of a turn and lock the jam nut.
in many engines youll find that when you first restart that engine its going to have a valve train click,
or two for the first 60- 1min-.45 seconds, but that stops as soon as the oil pressure stabilized so its of zero concern.
btw I also really like the appearance of the M/T valve covers, and
I generally find a valve train stabilization girdle a P.I.T.A. to use,
but well worth the extra effort.
obviously its critical you check all clearance issues
garage.grumpysperformance.com
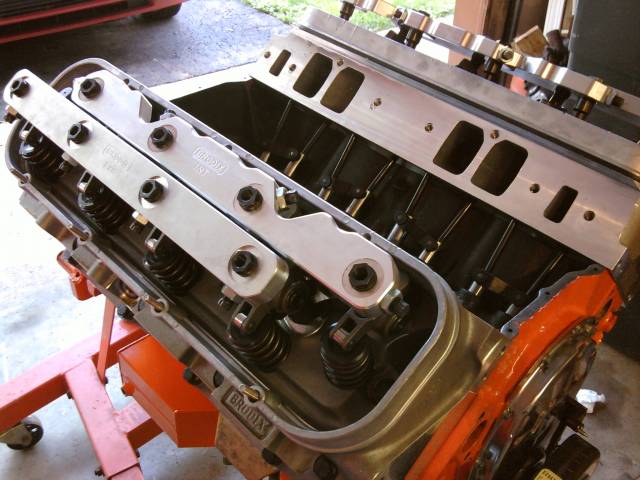
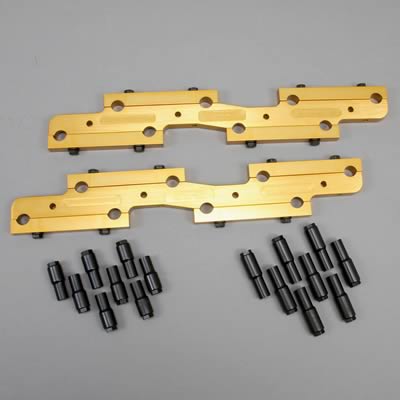
NOT ALL BBC ROCKER GIRDLES INTERCHANGE ON ALL BBC HEADS,
or
work with all rocker designs or all jam nut designs or fit under all valve covers
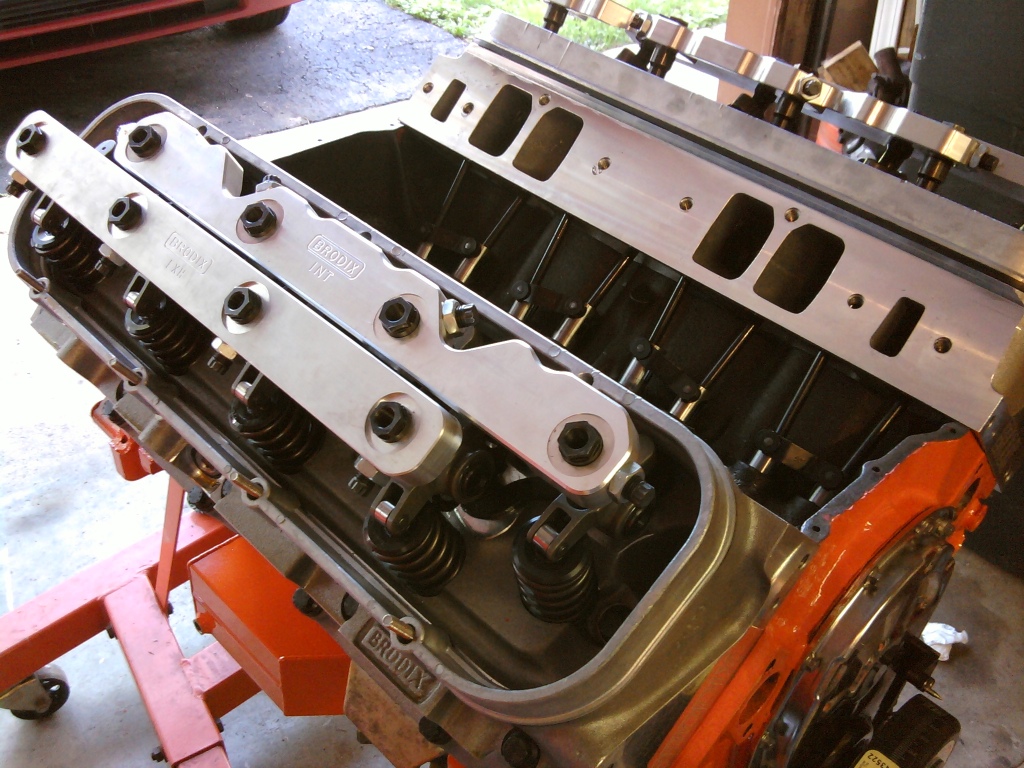
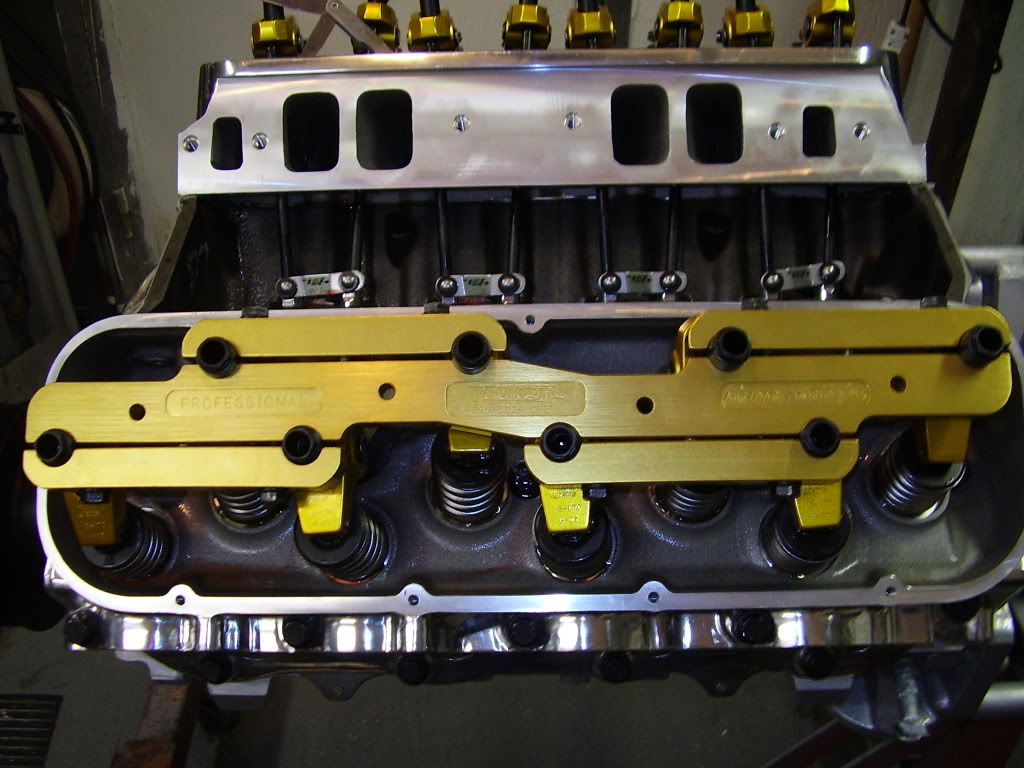
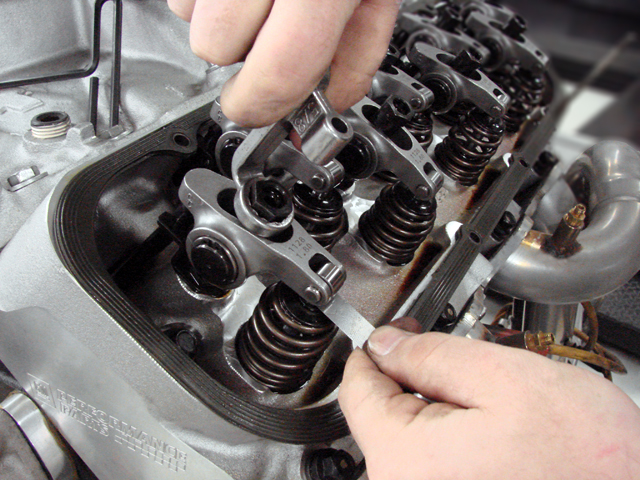
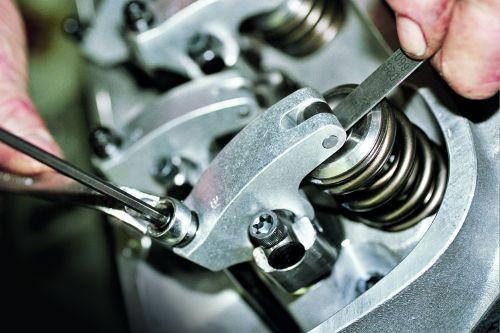
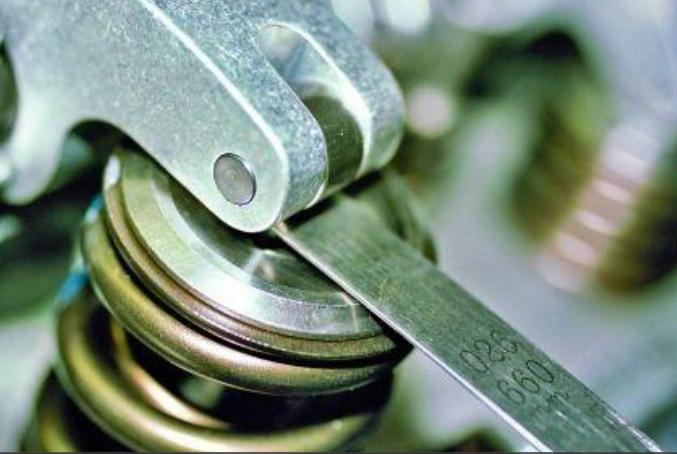
I just don,t think adjusting the valves without the oil pressure and the block up to operating temp. is the best way to adjust valves , but yes you can do it just fine with several methods described above
how do you adjust valves at idle without the mess of oil getting all over the engine and headers
HIT A FEW YARD SALES, SWAP MEETS UNTIL YOU FIND A DIRT CHEAP SET OF TALL CAST VALVE COVERS LIKE THESE, the CONDITION THEY ARE IN ,WITHIN REASONABLE LIMITS OF COURSE IS NOT THAT IMPORTANT
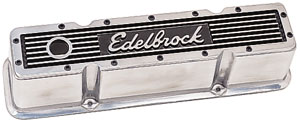
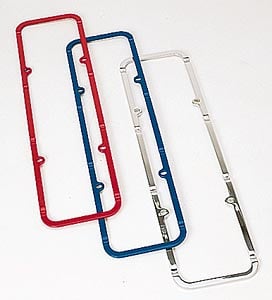
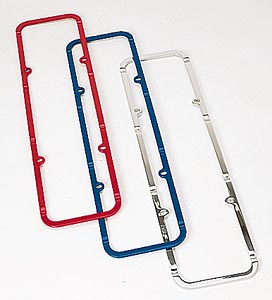
you simply cut the ribbed center section out of the valve cover, and glue the synthetic valve cover gaskets on them in the normal location,
when you go to adjust the valves you first remove the standard valve covers and install your VALVE ADJUSTMENT COVERS, they retain about 80%-90% of the oil that would normally be lost over the edge of the cylinder head while adjusting a running engine, they also catch much of the splashed oil, just leave a 1/4"-3/8" of the rolled top for strength around the perimeter of the top surface. I bought my set for $10, they were old and slightly discolored but I could not care less! I took them home and used a drill and saber saw to remove the center ribbed area, theres several brands that are very similar in appearance, all will work! and Ive used them for over 25 years, if I remember correctly they are mickey Thompson brand
now if the lifters are hydraulic of course you just back the adjustment nuts off the rocker studs with a wrench, slowly until the rocker JUST starts clicking , then slowly tighten the nut just up to the point that the clicking stops then add 1/4 to 3/8 turn to preload the lifter and move to the next rocker and repeat, the only difference with solid lifters is you use a feeler gauge inserted between the valve tip and rocker after they click slightly,to measure the lash distance recommended on the cam spec. card (normally .016-.028 thousands) and you tighten them just to the point at idle that the clicking stops... then you remove the feeler gauge and move to the next rocker
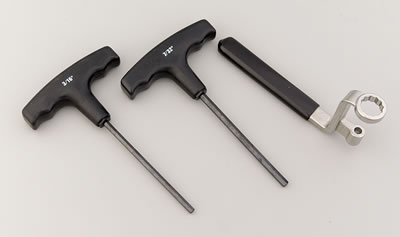
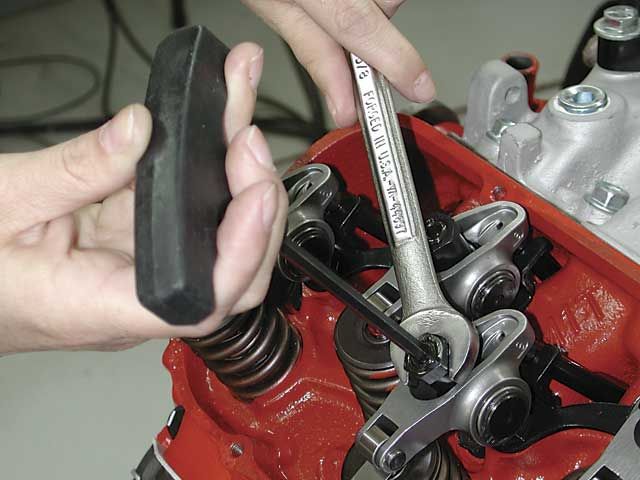
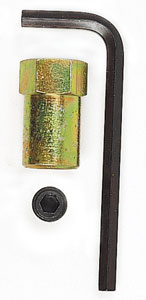
if your using jam nuts don't forget to lock the Allen key
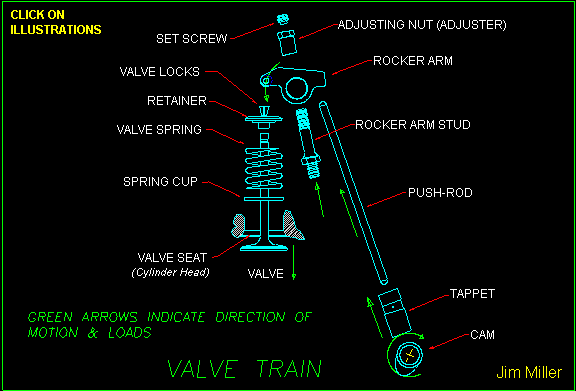
IF you don,t think lifter adjustment matters to engine operation, I don,t think you have a firm grasp on whats going on,during the mechanics of the lifters operation, the lifter seat is FULLY compressed to its seat as the cam lobe ramp spinning under the lifter base lifts the lifter off the cams base circle,and the lifters push-rod seat is compressed against the valve spring, oil trapped between the lifter, is forced up the push-rod until the lifters push-rod seat reaches its fully depressed location in the lifter body, this takes time and depending on the rpm levels it may not reach its full depressed seat location in the lifter body before peak valve lift, keep in mind that at 6000rpm the lifter is cycling from seated to fully open 50 times a second.
the lifter seat is forced back to its full upper location by a combo of engine oil hydraulic pressure and a small spring, this also takes time, hydraulic lifters will at some point in the upper rpm band fail to fully cycle, but generally continue to cycle once the rpms drop again.
the factory suggests 3/4 turn as it allows more compensation for wear in the valve train, and anything from 1/4-3/4 works but you get more valve spring cooling with 1/4
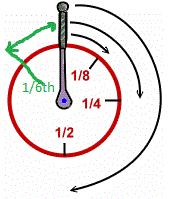
or if your really lazy (you can use this method on hydraulic lifters)install the tall cut valve covers and just turn the engine about 45 degrees or 1/8th turn,(start anywhere )and take the slack out of any loose rockers, repeat for 720 degrees,(twice around) then go back and give each rocker nut one turn OUT(LOOSER) and start the engine,(yeah it will be messy and noisy) and then go back and turn each rocker IN (TIGHTER) until it just quits clicking plus 1/4 -1/3rd of a turn past that point BTW many Chevy rocker studs use a thread pitch of about .040 thousands per turn so once your very familiar with your solid lifter engines needs and the cam lash clearance you need and once you verify the pitch rate of the threads you can adjust solids surprisingly close to correctly by running them in till they quit clicking, then OUT about 1/3-1/2 a turn to get the correct lash rather than IN like on a hydraulic lifter to add pre-load,naturally you'll need to verify with a feeler gauge.Id suggest two quick checks first, replace your oil filter, as they can be defective and block oil flow, and while its off, inspect the spin on oil filter adapter plate, to verify its not busted
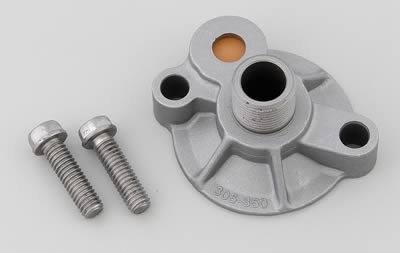
and then verify your oil levels at the correct level on the dipstick,
then loosen ALL the rocker arms until they are loose enough to click at idle,
DON,T OVER LOOK THIS!
did you do what I suggested and loosen every rocker until it clicks, the reason is that its entirely possible to cold adjust rockers so the lifter seat can,t move far enough up to fill the lifter with oil,when its on the base of the cam lobe when the rockers not placing spring loads on the lifter seat so that no or darn little oil gets under the push rod seat consequentially, no-or very little oil moves up the push rods

NATURALLY you need to know the threads per inch on the rocker studs and a quick check with your calculator will give you the necessary info on the clearance a full turn of the adjustment nut advances or loosens the rocker, and be aware that this is not exact but a fast way to get close at the track
you can set the lifter pre-load cold and get very close, to the ideal lash/pre-load, but IVE always found that adjusting the valve train once the engines up to operating temps at idle gives the best results
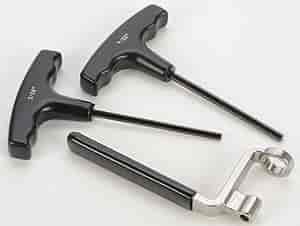
having the correct tool if your using jam nuts with locking Allen keys helps
experience, judgment and practice helps, especially with locking rocker nuts and rocker girdles
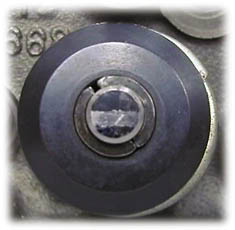
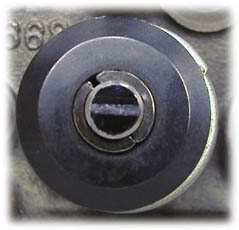
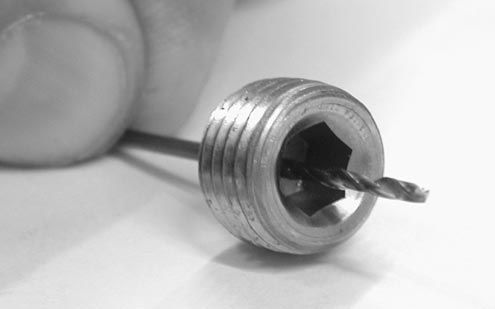
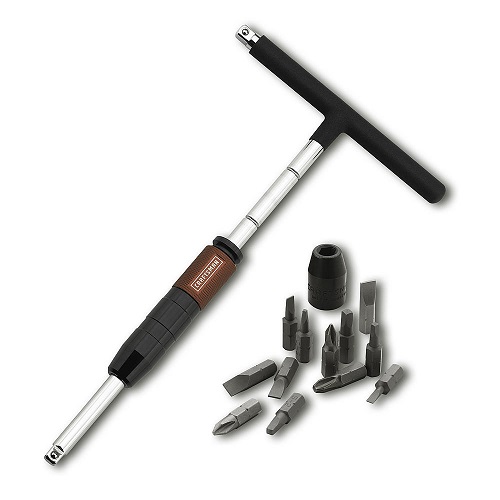
you generally back out the locking Allen key in the center and adjust the rockers just like you normally would do, ,once the nuts adjusted correctly with a 1/4 turn past the point where the rocker stops clicking on hydraulic lifters or at the correct lash with solids using a tappet gauge you use the t-handle Allen key to lock the nut in place, but you ll eventually find they occasionally tend to loosen over time so the proper cure is to run the center Allen key in, until its solid, against the top of the stud the nuts locked on, then loose the nut about 1/10-1/8 turn, re-seat the locking center stud and then turn the loose the nut in again about 1/10-1/8 turn, back to its original location, this will preload the center lock nut, stud, and lock nut threads,a couple thousands assuring a firm seat and the nuts won,t back off.
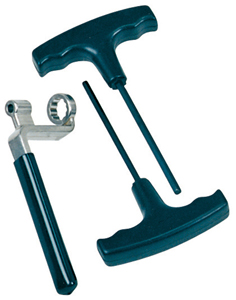
https://www.craftsman.com/products/craftsman-mach-series-14-piece-3-8-t-handle-driver-and-bit-set

 www.youtube.com
READ THRU THESE THREADS
http://www.rhoadslifters.com/Pages/Installation.html
http://www.cranecams.com/pdf-tech-tips/mech-lift.pdf
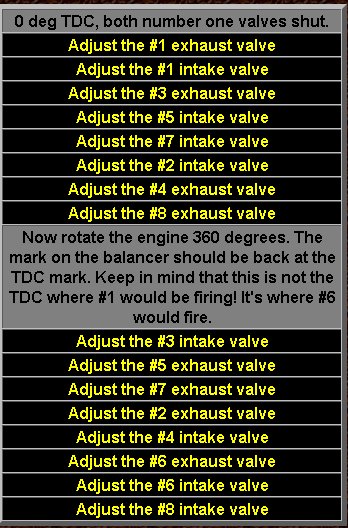
the method below, is simple and quick,it gets you very close, but in my experience its MANDATORY to readjust at idle to get it correct
the fact is that due to manufacturing tolerances a dot-to-dot install will frequently be a few degrees off! now most guys might never notice, but it can and frequently does effect the engines power band so getting it correct helps and eliminates one potential source of problems (be damn sure you verify the cams degreed in correctly and the ignition firing orders correct and all the distributor wires go to the correct cylinder,s spark plugs and distributor cap locations)
honestly this takes a good deal longer to post about and discuss that to correct and check, so what ever method you might select ,Adjusting the valves is a rather simple procedure, that youll need to go thru on almost any new engine instal and you can use the E-O, I-C method,or if your experienced the adjustments easily done at idle speed, your choice, either works just fine if you know what your doing. I strongly suggest the adjustment to the rocker arms pre- load on the lifters be made with the engine running at idle , where you back off the rocker adjustment nut slowly just to the point the rocker clicks, then slowly turn it in just to the point the clicking stops, then add a 1/4 turn pre-load, obviously this can get messy so a tall valve cover with the top cut out helps reduce oil loss and smoke and if you don,t have that a piece of card board about the length of the cylinder head and about 8"-12" tall placed above the lower valve cover lip , below the rockers can help
Ive always preferred to get the engine temps up to about operational temp levels and adjust the valve train on hydraulics for 1/4 turn in on the rocker nuts from the point they just stop clicking at idle as it tends to maintain the best compromise on both low and high rpm valve train stability.
if you insist on doing it cold the instructions are listed below, you generally turn the engine so each lifters on its matching cam lobes base circle and tighten the rocker slowly while spinning the push-rod between your fingers,any increase in resistance indicated both the lifter and rocker touch and your at zero lash, and then when you feel minimal resistance to rotation indicating theres no effective clearance between lifter and rocker,so you add 1/4 turn,lifter pre-load, that puts it close.
its back the rocker adjustment nut out until the rockers clattering /clicking, then slowly turn it in the nut too just the point, the noise stops than add 1/4-1/2 turn of preload, the engine will stutter for about 5-10 seconds,as the lifter preload adjusts then stabilize
btw it is usually far easier to hear each rocker change sound,the second time you go thru,the adjustment, as the other rockers will generally be far less noisy
If you insist on adjusting the lifter pre-load on a new engine cold and experience a cam lobe or lifter failure after a few hundred miles, its frequently the result of incorrect lubrication or valve train clearances or geometry issues causing that most of the time, if so chances are EXCELLENT you've wiped a cam lobe, because in my experience maybe 1 out of 40 guys has the experience to do this correctly by feel alone. the valve adjustment done at idle is FAR less likely to get your into problems
yes theres a hundred guys who are about to post Im wrong and many of those same guys are the same guys that have unexplained cam failures or bitch, about soft or defective cams, the truth is that hydraulic lifters require a certain amount of clearance to function and allow the valve train to live and it takes some skill to get that clearance set correctly. IF you insist on doing the valve adjustment on a non-running engine,mark the harmonic balancer every 90 degrees starting at the timing mark,on the damper aligned with the timing tab at TDC. put the engine on #1 TDC on the compression stroke and adjust both rockers with both valves closed, then rotate the engine 90 degrees clockwise as viewed from the front and set both valves on #8. Proceed in this fashion through the firing order until you have them all set (18436572). guesswork will get you into trouble
your free to do things any way you want too, but I see far more guys with valve train issues among the guys that adjust valves cold in a non-running engine, or fail to check clearances during the assembly process, or who assume they get the adjustment correct than those who adjust the valves at idle, and guys who take the time to verify clearances and valve train geometry, and check push rod
length . MOST flat tappet cams are designed for FAIRLY low spring pressures and have cam lobes that are cut at an angle to allow the lifter to spin, failure to provide the required clearance retards the lifters ability to spin in the lifter bore , causing rapid wear, and cam core, don,t get the necessary lubrication, results in a ruined cam and lifters

[/b][/color]
if your trying to reduce oil spray from getting on the exhaust manifolds while adjusting the valves/rockers, as the engine idles, you have options , you can cut a 10" tall and 22" wide section of cardboard , or thin flexible aluminum, sheet metal, to stick in between the lower outside block valve cover gasket rail and rockers, too deflect oil while, inspecting or adjusting the rockers or you can modify and old valve cover

the the tall cast valve covers I fabricated/modified for valve adjustment is taller and has a smaller open area,
but yes the basic concept of having a valve cover modified to adjust valves at idle works very effectively,
watch video


watch this video, it depicts the lifters movement as the cam lobe rotates under its base forcing it up as the lobes ramp, rotates under the lifter base,removing the clearance slack,
as it compresses the valve spring and forces the trapped oil, up the push rod and lifts the valve
If you are concerned with measuring the clearance in the hydraulic lifter seat when selecting and measuring the correct valve train geometry,
so you can order the correct length push rods...
I don,t think you have the correct idea as to how hydraulic lifters work,
yes it is possible for an engine with hydraulic lifters to be pushed too operate at a high enough rpm that the time required for the lifter seat to fully depress and all the oil too be forced up to the push rod/rockers , to be so short that the lifter pumps up and the valves will have less seat time, ( sometimes one of several factors, like the lifter leaving the cam lobes surface as the inertial loads exceed the valve springs ability to maintain lifter too lobe contact, referred too or contributing to what is commonly referred too as valve float) but that has ZERO to do with selecting push rod length or proper valve train geometry, (remember at 6000 rpm the valve is lifted off its seat 50 times PER SECOND)

look thru yard sales and try hard too find a TALL valve cover, preferably a tall cast aluminum valve cover ,something like these below
unlike this short steel version posted above and mill the center top center surface in a similar manor to this and you have a very useful tool to use to adjust valves without getting much oil on the headers

standard OEM rocker nuts like these can get loose and not retain the proper clearances, as vibration allows them to slowly back off

rocker stud jam nuts with a locking center jam stud are less likely to loosen


I always get asked if you can pre-load the lifters before you run the engine, and the answer is yes, it can be done but your very unlikely to get it exactly correct, youll be close, if you have experience, doing it, and theres easily about .060 adjustment slack in the lifter seal, so if your happy being close, yes its done all the time!
hydraulic lifters BY DESIGN, leak oil both up the push rod to supply oil flow to the rockers and past the push rod seat to allow for pressure and clearance equalization, it really won,t matter much if you set the lifter adjustment on a hydraulic lifter while the engine idles, as oil will be flowing into the lifter while the lifter is on the cams base circles and up thru the push rods as the lobe rotation compresses the valve spring, forcing oil and any trapped air up out of the lifter.
yes you can set lifter pre-load with experience while the engines cold, but in my experience the chances of doing it correctly if your rather new to the process is low.
if you set the lifters on a non-running engine you may find that you need to go back and do it again once the engines been run awhile, this is almost mandatory in my experience.
that knock sensor myth, youll occasionally hear about that says roller rockers can,t be used because the computers knock sensor won,t allow roller rockers, on the Lt1 and LT4 engines, got started because many people can,t correctly adjust valves, especially if your using roller rockers
they leave too much slack in the valve train (usually due to adjusting the valve train while its cold and not adjusting the hydraulic lifter pre-load correctly) and as a result the slight ticking that results is detected as detonation.
once correctly adjusted theres no need to swap knock sensors
READ THRU THE LINKS
http://www.centuryperformance.com/valve-adjustment-procedure.html
viewtopic.php?f=52&t=1376
viewtopic.php?f=52&t=181
http://garage.grumpysperformance.co...-in-vs-threaded-rocker-studs.2746/#post-43539

solid lifters can be adjusted in a similar manor, you just don,t add any pre-load once you feel resistance to the push-rod rotation and you adjust each valve with the recommended cam lash clearance gauge, listed on your cam card temporarily inserted between the rocker and tip of the valve stem, if your really looking for max performance a correctly set up and adjusted solid lifter valve train almost always has at least a 600rpm-1500rpm advantage, as it will allow higher rpms before valve float, or loss of valve control


http://www.ratwell.com/technical/HydraulicLifters.html
To cold adjust pre-load on hydraulic lifter camshafts with
adjustable rocker arms, turn the engine in the normal direction
of rotation until the exhaust lifter starts to move up, then
adjust the intake valve to zero lash with no preload, then 1/4
to 1/2 turn more max. Turn the engine over again until the intake
opens completely and then is almost all the way back down.
Now, set the exhaust valve to zero lash, then 1/4 to 1/2 turn max
more. Continue the above procedure for each cylinder until
all valves are adjusted to the same amount of preload. This
procedure will give you the correct lifter preload for any
hydraulic lifter cam with adjustable rocker arms.


http://www.youtube.com/watch?v=89o5rLpb ... _embedded#!
but on a hydraulic lifter, that clearance is rapidly filled with pressurized oil under a lifter/push-rod seat, that moves to take up slack as the cam lobe , rotates under the lifters base and compresses the lifter seat, which forces oil up the push-rod to the rocker, and lifts the lifter,rocker,and valve , so you'll need to verified all valve train clearances and geometry during the pre-assembly stage of your engine build up, and made sure theres no clearance issues,a bit to much tightening on the rocker nut will prevent the valve from seating, youll have very low compression or zero compression, a bit to little results in a noisy loose valve train READ THRU THE LINKED INFO
http://www.centuryperformance.com/adjus ... g-149.html

http://www.centuryperformance.com/valve ... edure.html
http://garage.grumpysperformance.com/index.php?threads/rhodes-lifters.1552/#post-6067
its the attention to details and checking clearance etc. and time and care taken,
that makes the difference between a barely or average functional ,
and a rather exceptional engine build, yes the urge to get it running is strong,
but getting it done correctly is the goal

keep in mind some roller lifters (even hydraulic roller lifters)and roller rocker combos will by design have a good deal more slack , to provide good lubrication and oil cooling or clearance to the roller bearings than a similar combo using different components and the way you set up or preload the valve train will effect your resulting noise levels, a soft rhythmic clicking even with hydraulic lifters, is common with many designs of roller rockers , this soft rhythmic clicking,is NORMAL, and you'll learn to appreciate the soft rhythmic sounds a bit similar,to and sounding like a sewing machine or a bit softer than properly adjusted solid lifters, and you will defiantly hear a difference in the sound if your adjusting them at idle as the preload reaches zero lash if you slowly tighten up the rocker adjustment nuts ,allowing the valve train time to bleed off the oil under the lifter seats , that are taking up the valve train clearance as you approach zero lash , but naturally an experienced ear helps
1/4-about ideal -1/2 max turn in past the point where they just stop clicking at idle,is MORE than enough to set the proper preload (hydraulics), obviously solid lifters don,t require (PRELOAD)they require clearance or (LASH) that's usually specified on the cam manufacturers cam card.
if you don,t have the specs start with .020 on the intake valves and .022 on the exhaust thats close for most solid roller lifter cams
.[/b][/color]
I have no idea why people are so afraid to adjust valve lash on solid lifter cams, its just not that difficult to do,
adjusting a solid lifter cams a bit like SEX, your nervous the first few times, but after gaining some experience you learn what to do, how to do it correctly and learn to enjoy it
if its a street, solid lifter cam design, it will tend to go significantly longer between adjustments ,than a more aggressive race only cam lobe design with less emphasis on long term durability, than on max horsepower. but the answer depends on the cam lobe design used and valve train components,and the mileage,your putting on the engine and at what average rpm levels, higher stress levels tend to make adjustments more frequent but adjusting valves every few weeks, on the more radical designs to having several months between adjustments on the milder cam designs is about average in my opinion, Ive run mostly solid lifter flat tappet design cams for years in most Mopar and G.M. (Chevy,Pontiac, Caddy) engines
in most cases it takes longer to remove and replace the valve covers that it does for the actual valve adjustment on a solid lifter cam, if you've got the correct tools and a bit of experience, personally I prefer to do it with a tappet gauge at idle but both methods work
in 99.99% of the cases I see guys having problems like a rough idle or loss of compression from badly adjusted valves its the direct result of guys who have no idea how to adjust valves and refuse to do it correctly , and as far as IM concerned youll NEVER EVER get it exactly correct doing it cold on a non-running engine,most guys get the rockers too tight, I don,t know why theres such an aversion to doing it at idle I don,t know why because its simple to do with a properly modified tall valve cover cut to significantly reduce oil leakage during the process and on flat tappet hydraulic cams its just backing the rocker out off the rocker stud threads till it clicks loudly then slowly and carefully tightening it untill the clicking just stops and then adding a 1/4" turn of preload and locking the adjustment

this is a short valve cover modified to do valve adjustments without about 80% of the mess that you get without using a valve cover thats so modified to reduce oil spray, a tall cast aluminum cover works even better if modified in a similar manor, IF you can find TALL CAST ALUMINUM VALVE COVERS like those pictured below , and have the center milled out to provide easy access to the valve train while leaving about an inch overhang around the perimeter youll have the best tool


you can do the adjustment at idle or if your dampers marked every 90 degrees you can do it static, but Ive never seen it done static on a cold engine and getting it 100% correct!
http://www.centuryperformance.com/adjus ... g-149.html
ok how do i adjust them now?
(Ive always found the final adjusting of HYDRAULIC LIFTERS, OR SOLID LIFTERS is best done at idle, with the engine up to operating temps., as it allows for all the variables like heat expansion and lifter seat movement as the oil pressure lifts the push rod seat)but with solid lifters that takes a great deal of experience, so the static cold adjustment methods are generally preferred,by most guys.....LINKED INFO POSTED BELOW
ID ALSO POINT OUT THAT,The most commonly accepted method of adjusting the rockers with solid lifters and ensuring the lifter is centered on the cam lobe base circle is the EOIC (engine off) method. For each individual cylinder you adjust the intake rocker when the exhaust valve just starts to open. You adjust the exhaust rocker when the intake valve is fully open and just starts to close.
OR
https://www.centuryperformance.com/valve-adjustment-procedure.html
Valve Adjustment: ENGINE OFF!
with #1 cylinder Intake Valve at full valve lift .... Adjust #6 Intake Valve
with #8 cylinder Intake Valve at full valve lift .... Adjust #5 Intake Valve
with #4 cylinder Intake Valve at full valve lift .... Adjust #7 Intake Valve
with #3 cylinder Intake Valve at full valve lift .... Adjust #2 Intake Valve
with #6 cylinder Intake Valve at full valve lift .... Adjust #1 Intake Valve
with #5 cylinder Intake Valve at full valve lift .... Adjust #8 Intake Valve
with #7 cylinder Intake Valve at full valve lift .... Adjust #4 Intake Valve
with #2 cylinder Intake Valve at full valve lift .... Adjust #3 Intake Valve
Exhaust Valve Adjustment: ENGINE OFF!
If you have noticed, this is the same procedure as the intake valves listed above, just that you are now adjusting the exhaust valves the same way.
with #1 cylinder Exhaust Valve at full valve lift .... Adjust #6 Exhaust Valve
with #8 cylinder Exhaust Valve at full valve lift .... Adjust #5 Exhaust Valve
with #4 cylinder Exhaust Valve at full valve lift .... Adjust #7 Exhaust Valve
with #3 cylinder Exhaust Valve at full valve lift .... Adjust #2 Exhaust Valve
with #6 cylinder Exhaust Valve at full valve lift .... Adjust #1 Exhaust Valve
with #5 cylinder Exhaust Valve at full valve lift .... Adjust #8 Exhaust Valve
with #7 cylinder Exhaust Valve at full valve lift .... Adjust #4 Exhaust Valve
with #2 cylinder Exhaust Valve at full valve lift .... Adjust #3 Exhaust Valve
any time you adjust new lifters without oil pressure and heat expansion taken into account like in a running engine you'll have problems, yes you can get very close but IVE always found a final adjustment made while the engine idles to give the most consistent results.
yes its potentially messy unless you have an old tall valve cover with the top surface slotted for rocker access to limit oil splash on the headers but if done correctly you get consistent results[/color]
YOU REALLY SHOULD TAKE THE TIME AND EFFORT TO READ THRU THE SUB LINKS BELOW, AS THERES A TRUE WEALTH OF USEFUL INFO FROM SEVERAL PERSPECTIVES
http://www.youtube.com/watch?v=89o5rLpb ... re=related
http://www.thedirtforum.com/chevyvalves.htm
http://www.centuryperformance.com/adjus ... g-149.html
http://www.centuryperformance.com/valve ... edure.html
viewtopic.php?f=54&t=4793&p=13273&hilit=lifter+spin#p13273
viewtopic.php?f=52&t=697&p=968&hilit=geometry+checker#p968
viewtopic.php?f=78&t=631&p=845#p845
http://www.hemmings.com/mus/stories/201 ... tips1.html
http://www.cpgnation.com/forum/comp-cam ... -2076.html
http://www.2quicknovas.com/happyvalves.html
https://www.holley.com/data/Products/Te ... NST150.pdf
http://www.cranecams.com/pdf-tech-tips/mech-lift.pdf
http://www.centuryperformance.com/valveadjustment.asp
http://www.boostandfuel.com/support/setting_valves.htm
http://www.carcraft.com/techarticles/87998/index2.html
http://www.youtube.com/watch?v=89o5rLpb ... re=related
http://www.angelfire.com/fl4/pontiacdude428/valveadj.html
http://www.vetteweb.com/tech/vemp_0703_ ... index.html
btw if your totally new at this the tappet feeler gauge measures the lash clearance between the valve and rocker on solid lifter cams
Ive generally found the most consistent and best results , if you warm the engine up to operational temps,
back off the rocker adjustment nut slowly just to the point the rocker clicks at idle, very slowly tighten,
just to the point the clicking stops and then add 1/2 or 3/4 of a turn and lock the jam nut.
in many engines youll find that when you first restart that engine its going to have a valve train click,
or two for the first 60- 1min-.45 seconds, but that stops as soon as the oil pressure stabilized so its of zero concern.
btw I also really like the appearance of the M/T valve covers, and
I generally find a valve train stabilization girdle a P.I.T.A. to use,
but well worth the extra effort.
obviously its critical you check all clearance issues
shaft rockers vs rocker stud girdles
always call the cylinder head manufacturer for their input on rocker stud girdles,BEFORE PURCHASING THEM< because rocker stud spacing, and stud angles can vary, between head designs and models READ THRU THIS THREAD ALSO its not horsepower, its the stress on the valve train, that makes a...garage.grumpysperformance.com


NOT ALL BBC ROCKER GIRDLES INTERCHANGE ON ALL BBC HEADS,
or
work with all rocker designs or all jam nut designs or fit under all valve covers


I just don,t think adjusting the valves without the oil pressure and the block up to operating temp. is the best way to adjust valves , but yes you can do it just fine with several methods described above
how do you adjust valves at idle without the mess of oil getting all over the engine and headers

HIT A FEW YARD SALES, SWAP MEETS UNTIL YOU FIND A DIRT CHEAP SET OF TALL CAST VALVE COVERS LIKE THESE, the CONDITION THEY ARE IN ,WITHIN REASONABLE LIMITS OF COURSE IS NOT THAT IMPORTANT

you simply cut the ribbed center section out of the valve cover, and glue the synthetic valve cover gaskets on them in the normal location,
when you go to adjust the valves you first remove the standard valve covers and install your VALVE ADJUSTMENT COVERS, they retain about 80%-90% of the oil that would normally be lost over the edge of the cylinder head while adjusting a running engine, they also catch much of the splashed oil, just leave a 1/4"-3/8" of the rolled top for strength around the perimeter of the top surface. I bought my set for $10, they were old and slightly discolored but I could not care less! I took them home and used a drill and saber saw to remove the center ribbed area, theres several brands that are very similar in appearance, all will work! and Ive used them for over 25 years, if I remember correctly they are mickey Thompson brand
now if the lifters are hydraulic of course you just back the adjustment nuts off the rocker studs with a wrench, slowly until the rocker JUST starts clicking , then slowly tighten the nut just up to the point that the clicking stops then add 1/4 to 3/8 turn to preload the lifter and move to the next rocker and repeat, the only difference with solid lifters is you use a feeler gauge inserted between the valve tip and rocker after they click slightly,to measure the lash distance recommended on the cam spec. card (normally .016-.028 thousands) and you tighten them just to the point at idle that the clicking stops... then you remove the feeler gauge and move to the next rocker
if your using jam nuts don't forget to lock the Allen key


IF you don,t think lifter adjustment matters to engine operation, I don,t think you have a firm grasp on whats going on,during the mechanics of the lifters operation, the lifter seat is FULLY compressed to its seat as the cam lobe ramp spinning under the lifter base lifts the lifter off the cams base circle,and the lifters push-rod seat is compressed against the valve spring, oil trapped between the lifter, is forced up the push-rod until the lifters push-rod seat reaches its fully depressed location in the lifter body, this takes time and depending on the rpm levels it may not reach its full depressed seat location in the lifter body before peak valve lift, keep in mind that at 6000rpm the lifter is cycling from seated to fully open 50 times a second.
the lifter seat is forced back to its full upper location by a combo of engine oil hydraulic pressure and a small spring, this also takes time, hydraulic lifters will at some point in the upper rpm band fail to fully cycle, but generally continue to cycle once the rpms drop again.
the factory suggests 3/4 turn as it allows more compensation for wear in the valve train, and anything from 1/4-3/4 works but you get more valve spring cooling with 1/4
or if your really lazy (you can use this method on hydraulic lifters)install the tall cut valve covers and just turn the engine about 45 degrees or 1/8th turn,(start anywhere )and take the slack out of any loose rockers, repeat for 720 degrees,(twice around) then go back and give each rocker nut one turn OUT(LOOSER) and start the engine,(yeah it will be messy and noisy) and then go back and turn each rocker IN (TIGHTER) until it just quits clicking plus 1/4 -1/3rd of a turn past that point BTW many Chevy rocker studs use a thread pitch of about .040 thousands per turn so once your very familiar with your solid lifter engines needs and the cam lash clearance you need and once you verify the pitch rate of the threads you can adjust solids surprisingly close to correctly by running them in till they quit clicking, then OUT about 1/3-1/2 a turn to get the correct lash rather than IN like on a hydraulic lifter to add pre-load,naturally you'll need to verify with a feeler gauge.Id suggest two quick checks first, replace your oil filter, as they can be defective and block oil flow, and while its off, inspect the spin on oil filter adapter plate, to verify its not busted

and then verify your oil levels at the correct level on the dipstick,
then loosen ALL the rocker arms until they are loose enough to click at idle,
DON,T OVER LOOK THIS!
did you do what I suggested and loosen every rocker until it clicks, the reason is that its entirely possible to cold adjust rockers so the lifter seat can,t move far enough up to fill the lifter with oil,when its on the base of the cam lobe when the rockers not placing spring loads on the lifter seat so that no or darn little oil gets under the push rod seat consequentially, no-or very little oil moves up the push rods

NATURALLY you need to know the threads per inch on the rocker studs and a quick check with your calculator will give you the necessary info on the clearance a full turn of the adjustment nut advances or loosens the rocker, and be aware that this is not exact but a fast way to get close at the track
you can set the lifter pre-load cold and get very close, to the ideal lash/pre-load, but IVE always found that adjusting the valve train once the engines up to operating temps at idle gives the best results
having the correct tool if your using jam nuts with locking Allen keys helps
experience, judgment and practice helps, especially with locking rocker nuts and rocker girdles
you generally back out the locking Allen key in the center and adjust the rockers just like you normally would do, ,once the nuts adjusted correctly with a 1/4 turn past the point where the rocker stops clicking on hydraulic lifters or at the correct lash with solids using a tappet gauge you use the t-handle Allen key to lock the nut in place, but you ll eventually find they occasionally tend to loosen over time so the proper cure is to run the center Allen key in, until its solid, against the top of the stud the nuts locked on, then loose the nut about 1/10-1/8 turn, re-seat the locking center stud and then turn the loose the nut in again about 1/10-1/8 turn, back to its original location, this will preload the center lock nut, stud, and lock nut threads,a couple thousands assuring a firm seat and the nuts won,t back off.

https://www.craftsman.com/products/craftsman-mach-series-14-piece-3-8-t-handle-driver-and-bit-set

QUICK Hack! Fast Valve Adjustment with Dave at Chucks Speed in Phoenix AZ
See the whole procedure - https://youtu.be/u3s-GuBvKDcDave Lowther at Chuck's Speed Center in Phoenix AZ shows us his "Hack" for a quick SBC Valve Adjustment...

READ THRU THESE THREADS
http://www.rhoadslifters.com/Pages/Installation.html
http://www.cranecams.com/pdf-tech-tips/mech-lift.pdf
the method below, is simple and quick,it gets you very close, but in my experience its MANDATORY to readjust at idle to get it correct

Last edited by a moderator:

