My Cam Research for the Experts Eye

yes one of the most common mistakes people make is to not take the time and effort to make a cardboard pattern and test fit it before starting to cut the metal parts

I've found that cardboard is cheap! And much easier to tweak to get things just right.
 
Little bit on the shifter, if you look at my other th400 thread you can tell I work back and forth on stuff :)

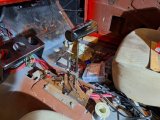
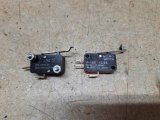
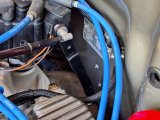
I replaced the neutral safety micro-switch with a roller type switch. Not a big deal, just replacing the switch that had worked well for about 30 years. Amazon came through on the new switch, I got 6 switches for about a buck each and they are Omron switches. I guess I've got several lifetimes' worth of switches.

1000004695.jpg

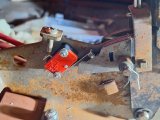
New switch installed. It's a three-contact, C, NO, NC so if I wanted to do something fancy with the NC contact I can (like an in-gear indicator).
1000004717.heic.jpg

But there's a long to-do list just to get the transmission cranked up so I'll save the fancy stuff for another day.
 
Center Console ......

Well it's not really a console yet, just the stuff needed to drive the car.

I went by my local steel supply - they have drops, which are the remaining cut pieces, priced at a fraction of the price of the original steel sheet/shape. I stocked up on 16ga sheet steel and a lot of drops, about 4 ft lengths of tube, angle, flat bar, solid round bar, etc. In this crap economy, any savings is needed, and it gives me a lot of available steel in the shop, comes in really handy.

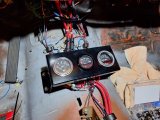
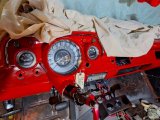
I've got water temp and oil pressure gauges in the dash, but I need to have transmission temp, volts, and fuel level as well. I've also got that 6-led indicator panel finished, so the dash itself is pretty much done. Just some switches and the decorative trim panel and glovebox.
1000004759.heic.jpg

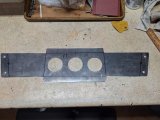
For now, until the interior work starts, I just need something sturdy to put the gauges into. I started with my favorite template material - cardboard. Fiddled with what I wanted in the car, and came up with this 16 ga sheet steel shape.
1000004751.jpg

My handy-dandy homemade bender in my hand-dandy homemade 20 ton press worked really nicely.
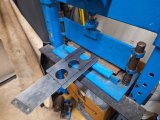
1000004752.heic.jpg

I'll go back and add some corner stiffeners but wanted to get this made and fit to the car.
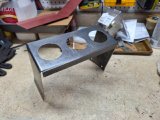
1000004756.heic.jpg

Over the past couple of days I routed all the needed wiring for the gauges, neutral safety, and line-lock to the (future) center console area.
The new gauge panel fit fine, I used my favorite - rivet nuts - to secure it in place.
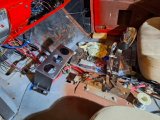
1000004757.heic.jpg

1000004758.heic.jpg

Aside from a general cleanup of this work area, this is pretty much how it's going to look until I start on the interior.
First things first - I need to be able to drive the car to get both the engine and transmission broken in and of course to see if there's any issues that come up. Running a car on stands is one thing, running it on the road is quite another.

Edit - got the gauge panel painted, I really like using caliper paint. Nice gloss but not over the top.
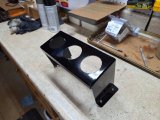
1000004792.heic.jpg

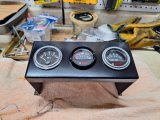
Edit - started putting the gauges into the panel. I got a black ring gauge by mistake for the trans temp but I'll use it, this is a setup for now until there's an actual console.
317202417332.jpg
 
Last edited:
My thanks for letting this initial cam question evolve into engine and car build.
Greatly appreciate your input and advice on this SLOW road :like:
 
My engine build turned into 150 pages about the car. You certainly have NOT broken any rules!!!
 
Last edited:
Center Console ......

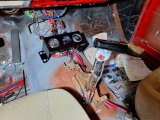
Console area gauges are done and all wired up.
Volts, transmission temp, fuel level
1000004859.heic.jpg

Line lock is also in place and wired.
1000004860.heic.jpg

This is how it's going to look for a while until interior work commences.
 
Throttle Linkage .....

Well, I thought that I'd have a simple re-install of the throttle bracket, but it was not to be.

I didn't want or need a cable system, the simple lever arm setup works well.
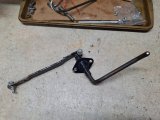
The ball end on the left attaches to a link rod to the carburetor. This assembly bolts through the firewall and the left end is under the gas pedal.
Simple and effective.
1000004895.jpg

However, if you look at my long-winded TH400 rebuild you'll find a lot of work done on configuring engine mounts and ensuring the drivetrain was positioned properly in the car. I had also found that the previous setup had placed too much weight on the transmission mount.

The result of this re-positioning raised the engine slightly in the engine compartment. No issues with header interference, but I found that the slight increase in height caused the throttle linkage rod to hit the carb linkage bracket. This was with gas pedal at rest.
The throttle rod was very close before - about 3/16 clearance - so the height increase meant I needed to lengthen the gas pedal linkage bracket.

Not a huge deal, but time-consuming. Those that have built cars know what I'm talking about, just small tasks that need resolution.
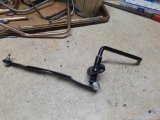
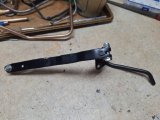
I didn't want to make an entirely new bracket so I cut the existing bracket and welded in a 1 inch extension.
1000004998.heic(1).jpg


Original bracket.
1000004997.heic.jpg

It clears everything throughout the entire arc, from idle to WOT.
1000005024.heic.jpg

A bit hard to see, but the throttle rod easily clears the carb linkage bracket.
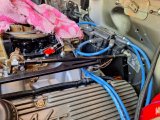
I've not yet tidied up the spark plug wires and HEI wiring from the hoisting chains I had attached to the heads.
1000005023.heic.jpg

Another To-Do crossed off the list!
 
Back
Top