renegade intake? for cross fires

Ok i got some goodies today in the mail.

Input drum bonded conversion kit, including new style spring cage for the overrun piston.

And the sonnax reinforcement kit for the input drum, it also specifies the new style spring cage and the bonded steel pistons.

Also i have a new reverse input drum and the transgo boost valves along with the transgo pump ring kit.

Pretty much i'm waiting on my new steels and frictions i'm replacing.
 
Even thou you've spent alot of money, still way short of paying for someone
else to do it. AND you you've learned a great deal.
 
Oh yeah, this has been an itch i have been wanting to scratch for some time.

And money spent here learning from my mistakes should save me money when i tackle the 4l60e in my s10!

I also have a gauge pod for the car, and a matching set of transmission gauges, one a temp gauge, the other a pressure gauge.

If nothing else they should be educational.
 
Working with my bud Ed in Joliet.
Be home later tonite Gibbles.
 
yes in the longer term knowledge gained in correcting problems that almost invariably result in a good deal of experience
that will almost always prove very useful later
 
I have some other parts in there as well, pretty much i bought the list provided by Bryan.
Leaving out duplicates, and selecting parts by availability or features i liked the best.

While on ebay i found a listing for the bonded steel piston conversion kit for an older 700r4, good thing as it's called for in the sonnax kit.

I also found the long gm servo pin lacked the seals, looking at how things work it seems like that would be important...

Anyways i have the sonnax servo pin now, and if not needed i bought it from summit, easy returns ect :)
 
Ok so looking at the reinforcement kit...

I guess i'm just reusing the 84 drum, i cant see any damage...

I can build a support for the drum pretty easy, but as for actually pressing it on, it's tight, very tight...

I might have to outsource that...
 
lots of clear detailed pictures with posted written commentary,
accurately detailing exactly whats being done, and details ,
on how and why each parts being selected,used and installed ,
would be very helpful to other members reading through this thread!
keep in mind easily 90% of the people reading the thread,
have never opened or worked on the automatic transmission internals,
nor any experience or idea what was or is required to do so!
 
Been Away taking care of stuff at my house and my small farm Gibbles.
The Input Drum Reinforcement kit , the High Tensile strength wedding band Steel Ring must be installed with a 20 ton.or better Hydraulic shop press.
Do not hammer it on.
Apply Green Loctite Bearing retainer compound to the Reinforcement ring ID.
Start it square nit cockeyed.
 
Here are some pictures for entertainment...
the worst looking clutches from the 3-4 pack
upload_2016-5-23_12-25-11.png
 

Attachments

  • upload_2016-5-23_12-23-43.png
    upload_2016-5-23_12-23-43.png
    790.4 KB · Views: 1
That's what happens when you push the car to 4 or 5k rpm to be sure the clutches are slipping while going 85mph!
 
I have some conflicting information...

Low roller clutch, should it free wheel clockwise or counter clockwise?

From my GM manual,

upload_2016-6-1_11-38-51.png


From an internet search (ATSG manual)

upload_2016-6-1_11-38-13.png
 
The GM Manual is correct.
It should assemble only one way.
Because of the way the Dog Ramps are layed out.
Reference is front face view .
 
I have a bunch of images to post, however I got everything together, installed gauges ect, and while I was installing the gauges I installed a new shift cable while I was routing the stuff for the gauges....

I spent my 3 day weekend doing this, got the car on 4 wheels just in time to hit the sack for work on Tuesday...

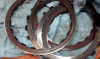
Pump clearance was in the upper limits of .008 clearance...

The rapid release valve did not work out for me, tight fit at the end and the valve was to soft to drive in, ended up going back to the transgo valve.

input drum reinforcement kit is installed

I bought a new air gun that gave me a leak free air check seal, everything checked out, all pistons leak free in the input drum, reverse, and low reverse.

I did not do a detailed tear down of the valve body, however I did flush it out and verified all valves move freely.

Took it for a drive with out my console and noticed I had a hard time finding drive...

Shifts quite nice and quick 1-2-3, took it back home and topped off the fluid and adjusted the shifter.
Put the console back together and went to take it for another drive...

Pressures are good in every gear, I see the boost valves are doing their thing...
one issue....

Shifter selected in OD = nothing, no forward movement.

Shifter in D = movement

Shifter in other selections is fine.

I had some issues with the valve body gasket I bought, some holes had to be cut...

reading on the issue it sounds like a sprag might be the issue, however what I'm reading I should also have no movement in D

I will also note that the reverse roller clutch free spins turning clockwise, but turns the clutches if I spin counter clockwise, I do recall I could only install the roller one way.

I'm positive the front sprag is facing the right way, however it's a generic part that came with the rebuild kit...

And I'm bummed, I need to drive the car!!! (it's my happy place :) )
 
I also have a wide rear roller support on order, and I have new BorgWarner sprags for both front and rear.
 
There is a Hydraulic issue.
Like a Shift valve stuck not working.
Thinking .
Working on my replacement 350 TBI Engine present now.
 
I'm thinking I should have disassembled the valve body, but I was shooting for a Tuesday or Wednesday drive to work.

I also did extra work inside of the case, all flashing I could fine cleaned, the low reverse piston casting flash has been removed to a shine, same with the back of the case.


Going to be in the mid 90s this week, perfect for the top off corvette drive/commute!

also I'm getting really freaking good at hanging my exhaust system... I make little improvements each time...

once the exhaust system is out the transmission is a quite easy to remove.

The trick with the center support is to shift the transmission to the driver side, and the C beam falls right out!
 
Back
Top