I started the block fill tonight. I got one side done.
I used this product..

They said to mix 3 pints of water to 10 lbs of filler. The pail was full so I dumped half the powder into a seperate pail for the other side.
I recommend wearing latex gloves when using this. They said you only have 15 minutes before it starts to set up.. and they ARE correct!
I only had paint sticks to mix it up and it was taking too long so I just stuck my (gloved) hands in and mixed it faster.
I prepped the block prior to mixing. Very Important step because of how fast it sets up.

That pic was after the pour.. but I wanted to show how to protect the block. Yes , I used a clear 1/4" tube and inserted it into the petcock and up through the head.

I started with the back hole on the deck surface and poured in about 2 cups and prodded with a long screwdriver . It flows really well!
I then went to the middle hole and repeated the pour. and then to the front hole and added the same 2 cups.
I used a short piece of 2x4 to tap on the side of the block to try and level it.
I did not install the freeze plugs because I was only pouring enough to reach the bottom of the SIDE plugs.... NOT the front of the block freeze plugs.

Now I recommend installing the rear plugs after I discovered the mix was not settling fast enough by the time I poured the the front holes.
The stuff was flowing out the rear of the block freeze plug and boy what a mess I had! I got it cleaned up and wiped down but I am still going to need to use a small
brush to remove the residue on the block. Lesson learned!
.

I ended up with a 3" fill around the cylinders by only filling to the side freeze plugs.


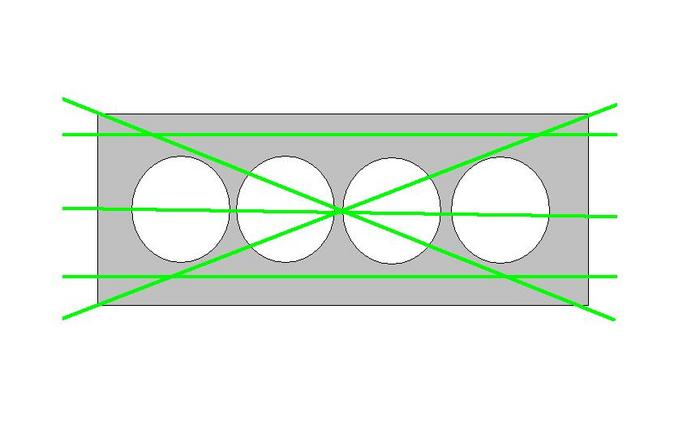
Her are a few pics of a camera shot down the deck water jacket holes I poured through to show the fill around the cylinders. first pic is between 1 and 3 cylinder.

this pic below is between 3 and 5 cylinder.

The next pic blow is between 5 and 7 cylinder.

I tried to scrape as much as I could off the cylinders because I thought that the grout would act as an insulator. I'm a little concerned about how the gap between 3 and 5 got sealed some what between
the cylinders also. There is a gap near the top for coolant to flow, but I could not clear the grout any lower.
Overall I thought that for the first time doing something like this... I was pleased with the experience. Hopefully tomorrow will go the same... less the overflow in the back. hehe
That's it for tonight.. Have to get some rest.
")