You are using an out of date browser. It may not display this or other websites correctly.
You should upgrade or use an alternative browser.
You should upgrade or use an alternative browser.
1977 Camaro Z28 Resto Mod Build
- Thread starter Erik
- Start date
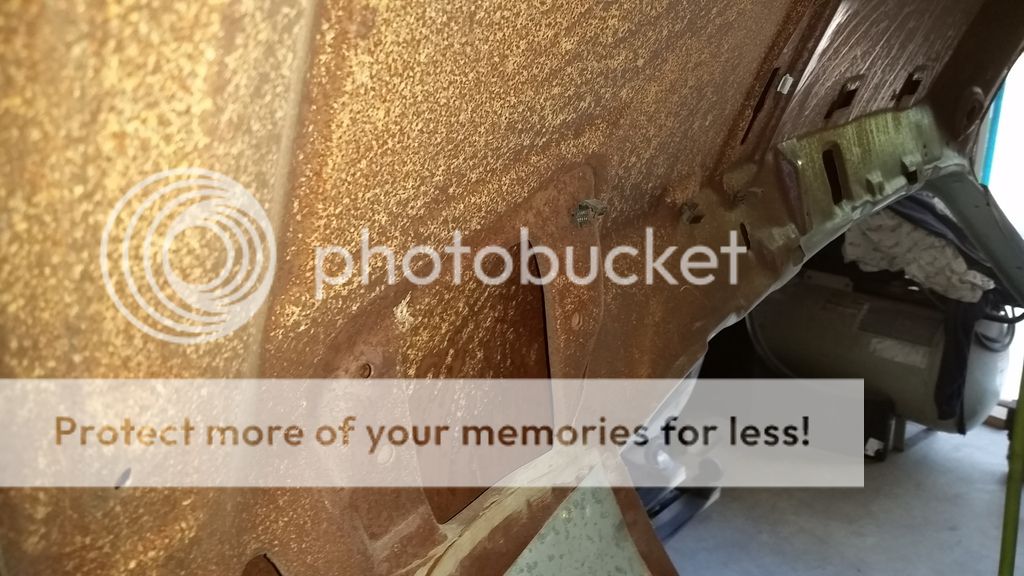
I just finished cleaning off the inside of the roof. It had a bunch of rust up in there. Not sure how it got there. Did they park this thing next to a sprinkler with the windows open?
After a lot of sanding, wire wheeling and phosphoric acid treatment, I put two coats of PPG DPLV epoxy on it. It looks much better now")
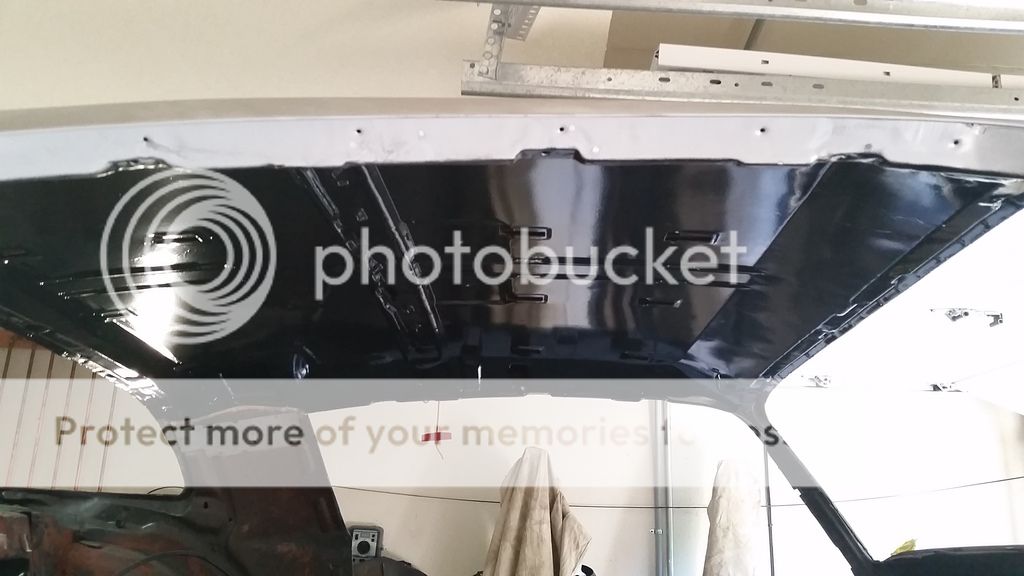
After a lot of sanding, wire wheeling and phosphoric acid treatment, I put two coats of PPG DPLV epoxy on it. It looks much better now
Thanks a lot Grumpyan amazing improvement that shows what a bit of time and effort well, by someone who gives a crap about restoring a car vs junking it, can do,
time and effort well spent , and research and experience can accomplish a great deal.
Oh that rotisserie saved my back here! I made sure to do this before I dropped it off the rotisserie. I just angled the car to close to 90 degrees and stood inside it. Thanks Rick!Looks great, but that must of been fun sanding and scraping over your head!
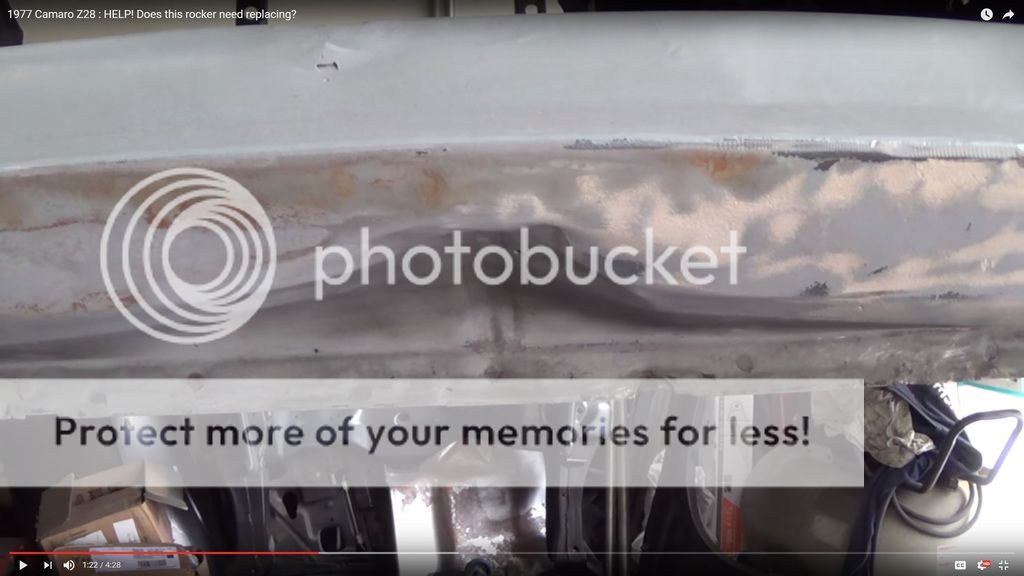
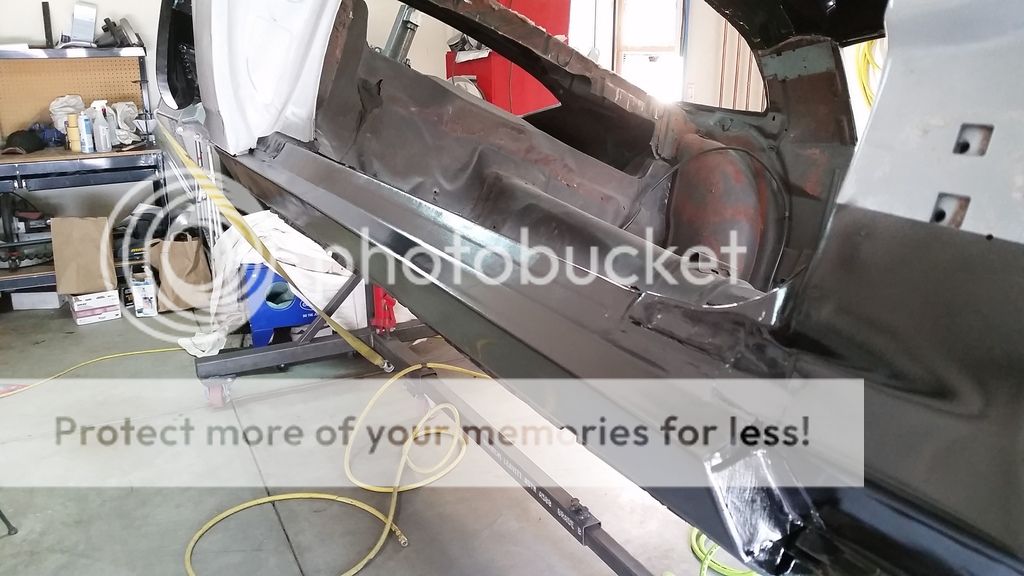
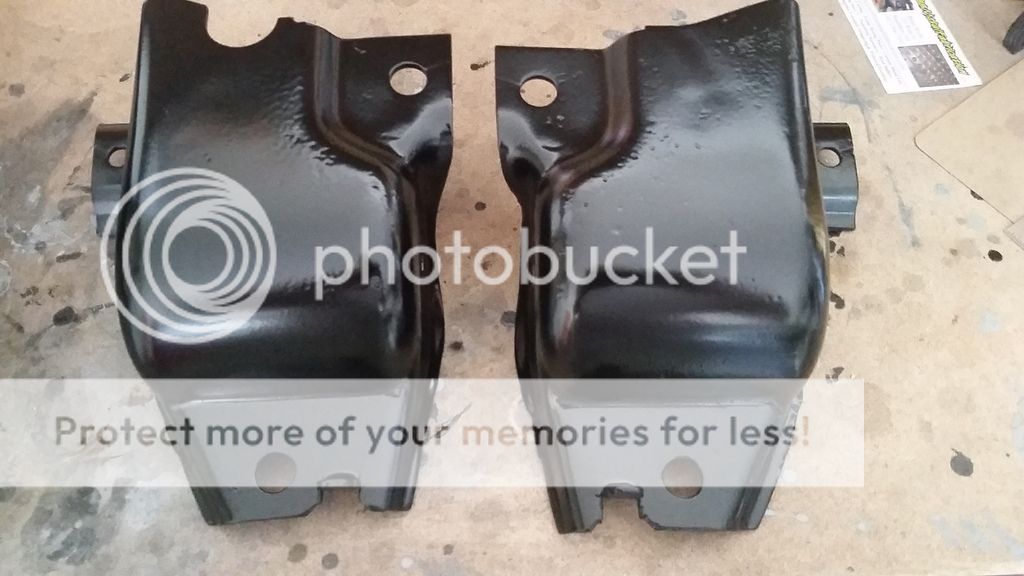
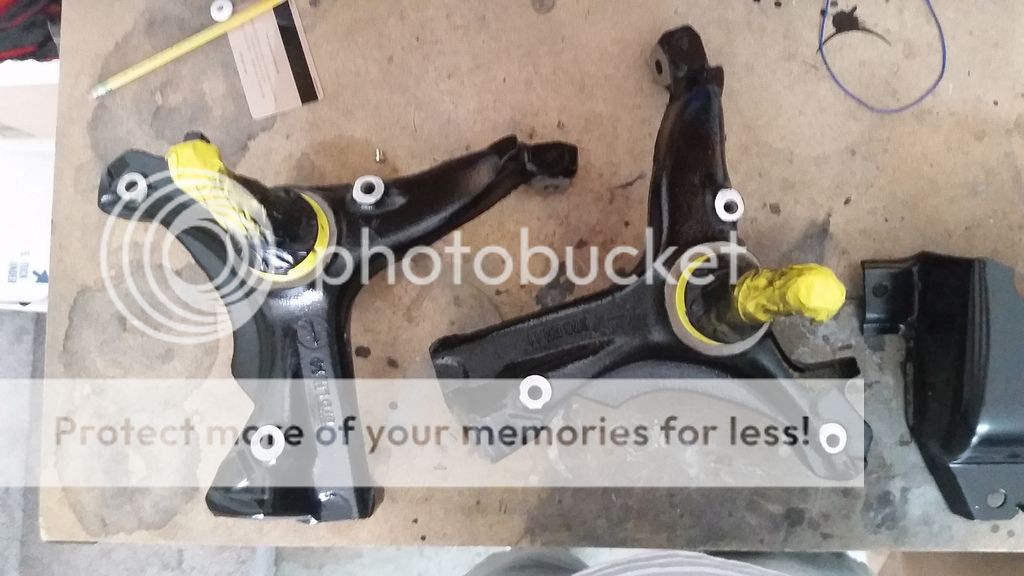
Ok, we are just about done with the car on the rotisserie. It is coming down next week (I hope). I just finished repairing the passenger rocker panel. I also painted the front spindles and the rear leaf spring shackle mounts. Those are used as the front attachment point for the RideTech 4 link. That is going in soon, so I needed to get those prepped. All the suspension parts had 2 coats of DPLV epoxy and 2 coats of Delfleet Essential satin black single stage urethane.
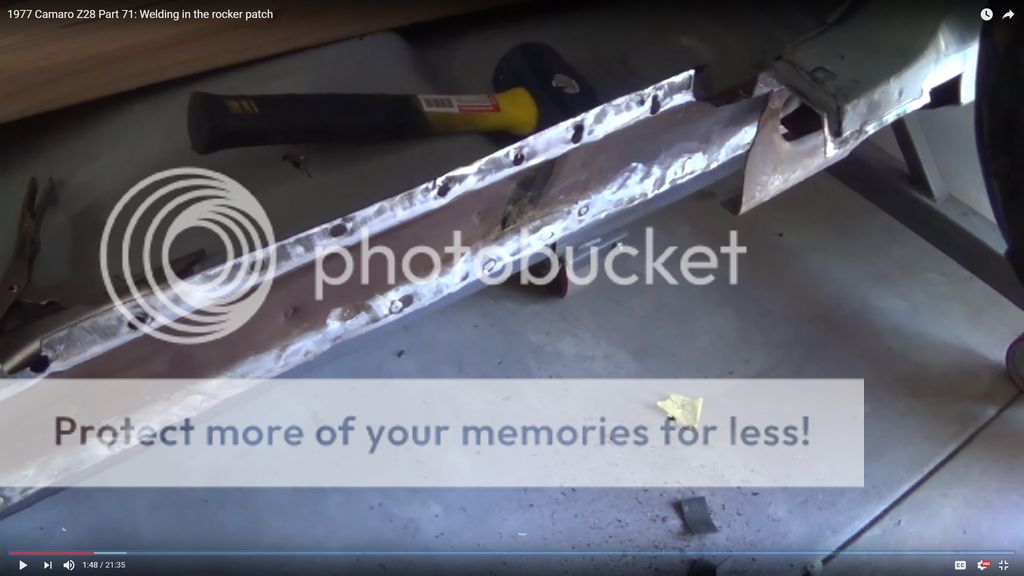
As you can see, the rocker had a huge dent in it, and the front was all chowdered up. I realized after I was putting the new rocker in that the car had been hit in the door jamb area as the bottom of the rocker/jamb joint was too far inward by about 1/2". I used a porta power to push the metal back into place before welding in the new rocker patch.
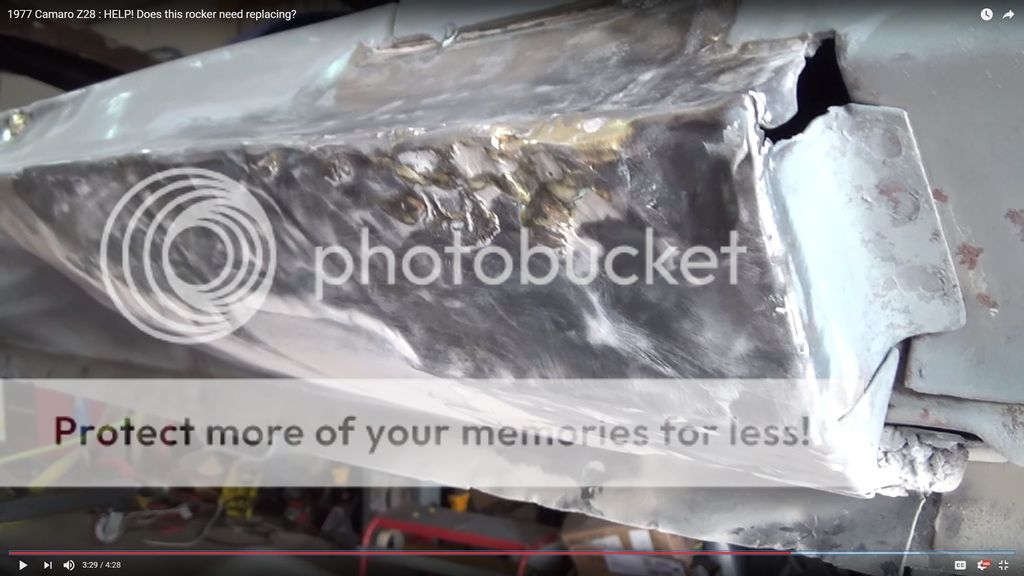
I cut out that whole section.
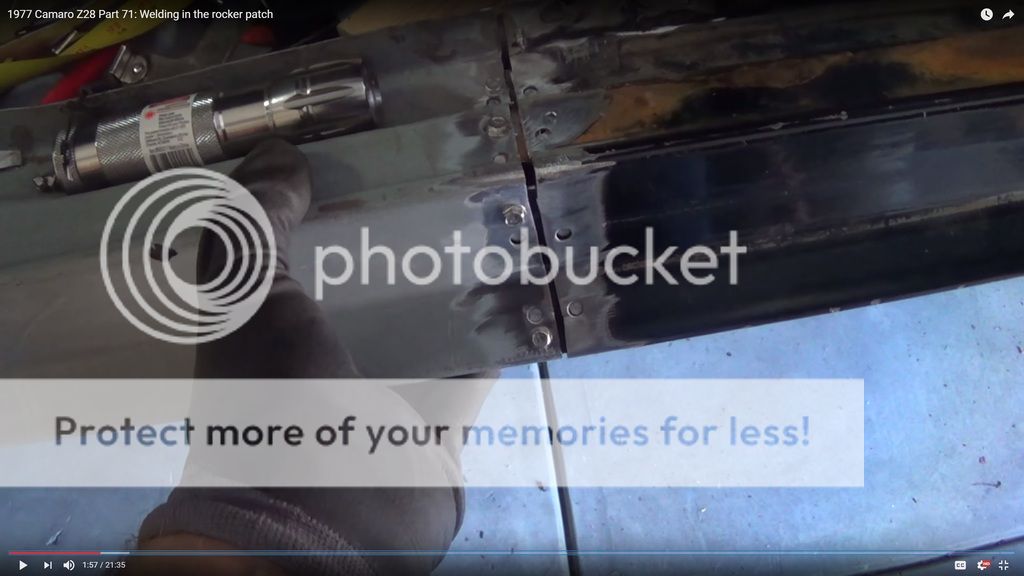
And patched in a new piece. I made a backing plate at the butt joint from a couple of pieces of rocker. That way, I could screw the joint and hold it in place while I welded everything.
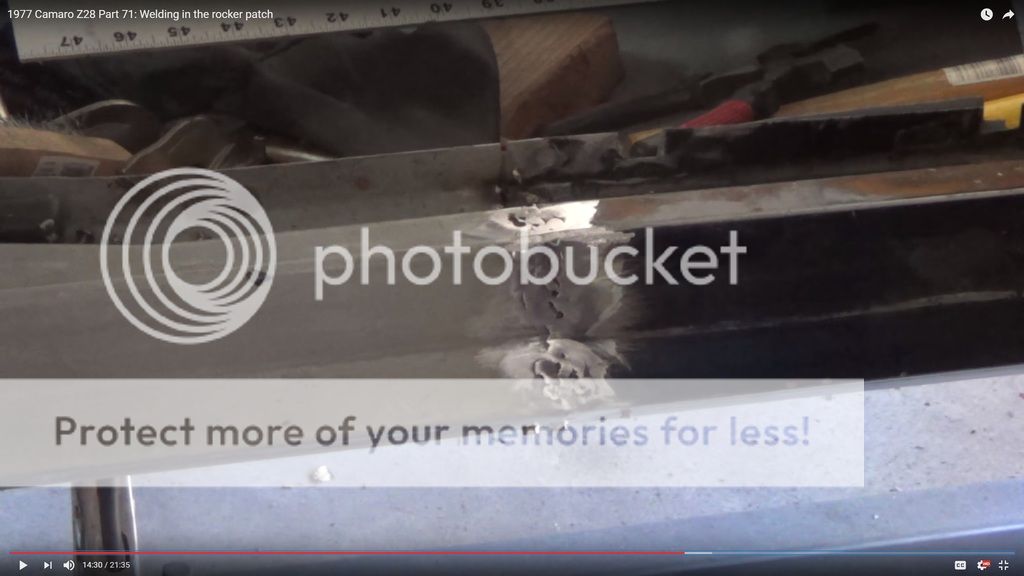
I then welded in the front and back.
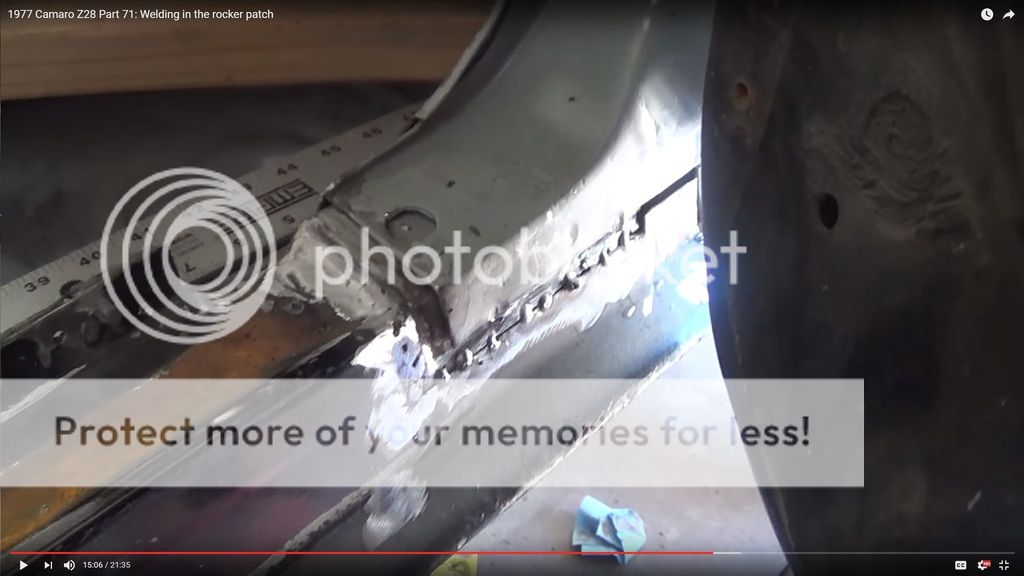
Finally, I sealed everything with short-strand fiberglass and primed it.
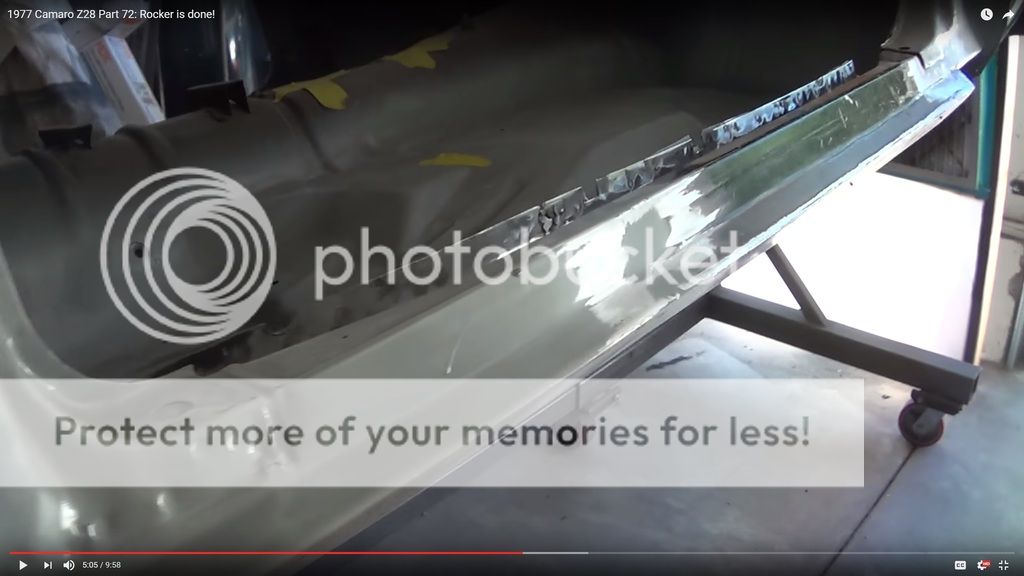
As you can see, the rocker had a huge dent in it, and the front was all chowdered up. I realized after I was putting the new rocker in that the car had been hit in the door jamb area as the bottom of the rocker/jamb joint was too far inward by about 1/2". I used a porta power to push the metal back into place before welding in the new rocker patch.
I cut out that whole section.
And patched in a new piece. I made a backing plate at the butt joint from a couple of pieces of rocker. That way, I could screw the joint and hold it in place while I welded everything.
I then welded in the front and back.
Finally, I sealed everything with short-strand fiberglass and primed it.
NOT A TA
reliable source of info
Looking good!
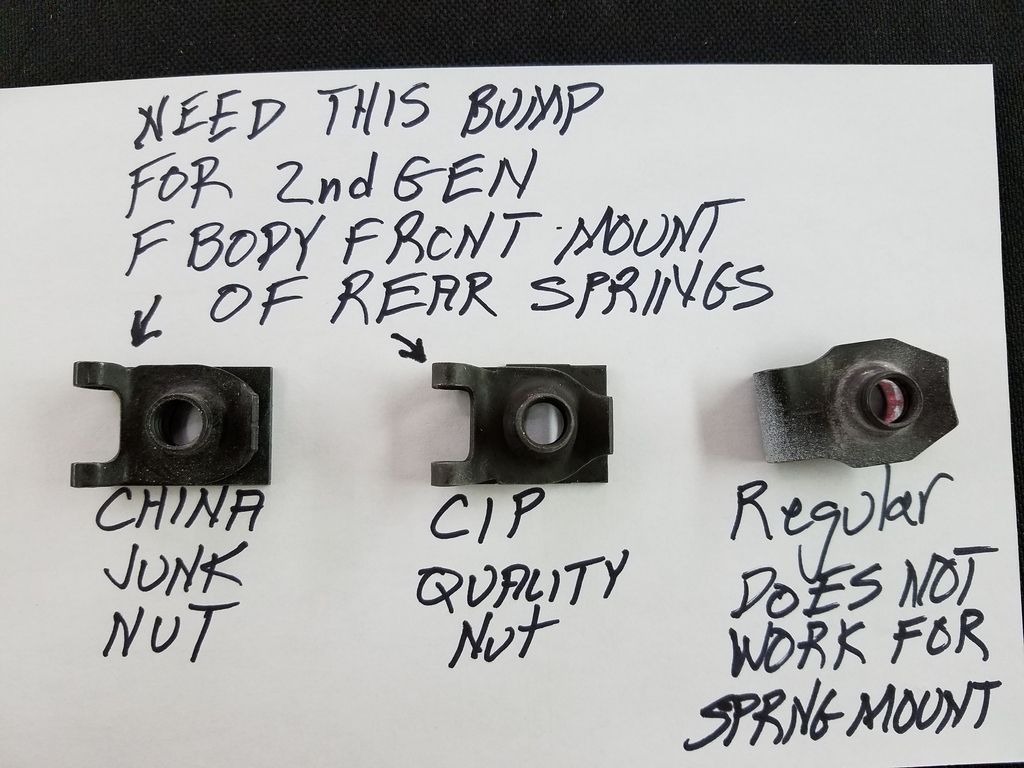
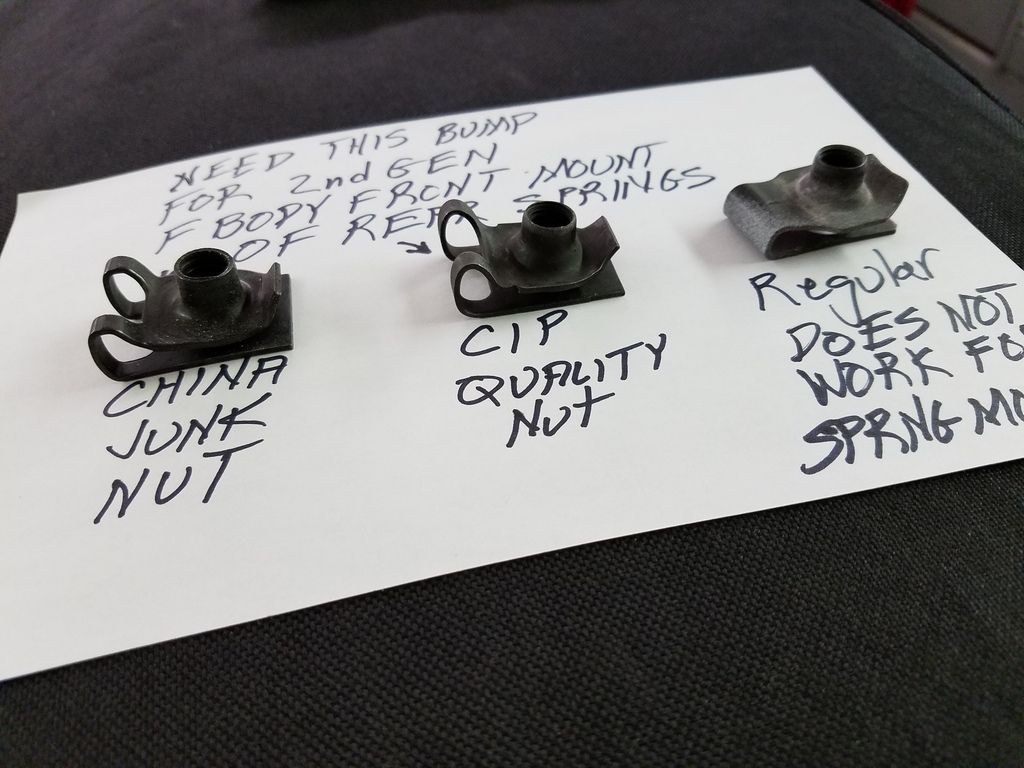
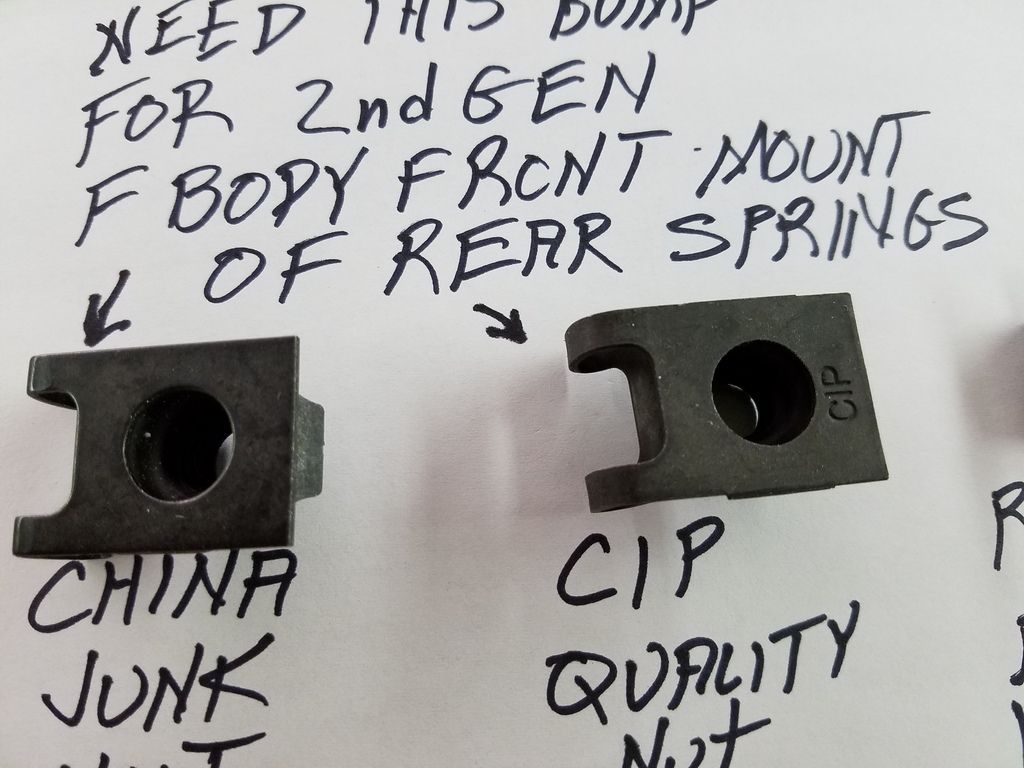
If you're going to install the rear spring front spring pockets with bolts and extruded U nuts like the factory used,
I'll suggest you get the CIP brand nuts.
I've tried to find the best ones because I install those spring pockets in cars pretty often,
and there have been a lot of problems over the years with the,
Chinese ones sold by Summit, Jegs,
and restoration parts suppliers under various brand names like OER.
They can't take as much torque tightening the bolt and are,
more likely to get cross threaded and or strip
than the CIP ones.


Last edited by a moderator:
Aw darn, I just ordered those the other day from OER (Summit). They look and feel pretty good. I guess I will find out when I install them. I will need LOTS more of those U nuts though, so I will keep that in mind in the future. That is great info, I just missed it by a few days. Do you happen to know the torque spec for those bolts?
THANK YOU!
thats good info,
we always can use first hand experienced tips on quality components,
from the guys that use the parts constantly
I high-lighted the info to make it stand out a bit.
most of us don,t do enough of that type of stuff to easily see the quality difference,
we fight it and screw it up and MAY never realize the small fastener part quality varies a lot ,
just like larger parts like BEARINGS, LIFTERS,INTAKE MANIFOLDS,VALVE SPRINGS ETC.
That's just gorgeous work, Erik. Makes me feel like doing another build.
Hm. I've found that Summit products vary in quality some good some (really) bad. Nowadays I tend to look out for the reviews. The buyer feedback stars. It works well. But it's good to give feedback as well!!
Props!
Hm. I've found that Summit products vary in quality some good some (really) bad. Nowadays I tend to look out for the reviews. The buyer feedback stars. It works well. But it's good to give feedback as well!!
Props!
NOT A TA
reliable source of info
Aw darn, I just ordered those the other day from OER (Summit). They look and feel pretty good. I guess I will find out when I install them. I will need LOTS more of those U nuts though, so I will keep that in mind in the future. That is great info, I just missed it by a few days. Do you happen to know the torque spec for those bolts?
25 Lb Ft for the spring pocket bolts. DO NOT exceed if you use the OER branded nuts, they WILL strip. I've removed so many stripped ones I just expect it as part of the job now. I'm doing a 70 Trans Am right now a customer shipped down to me. Replacing everything below the floor pan/sub frame. All suspension, steering, springs, sways, shocks etc. and fully expect to have to grind the heads off at least 2 of the front spring pocket bolt heads due to stripped China nuts since this car was rebuilt back in the early 90's and probably got the crappy U nuts installed. Should be removing rear suspension Wed. so I'll find out then.
In my most dead calm very serious NOT A TA tone. >>>> "I would throw the OER nuts in the garbage and order the good ones. The benefits far outweigh the monetary loss in the long run. I've got several packages of the OER brand in stock and refuse to use them for the spring pocket application, even on a stock restoration application."
In your case the aftermarket rear suspension combined with today's sticky rubber can put a lot more stress on that spring pocket and mounting hardware than the GM engineers designed it for and with the 4 link I believe some of the forces are in a slightly different direction than it was originally designed for. I'd consider an extra 15-20 bucks to get quality nuts cheap insurance. Oh, and although you're not doing a factory correct restoration, consider that the factory installed CIP nuts.
For the standard type U nuts that hold body panels etc. the Au-Ve-Co brand works well. They are available in a couple different sizes of standard threads for your application as well as metric threads for later applications.
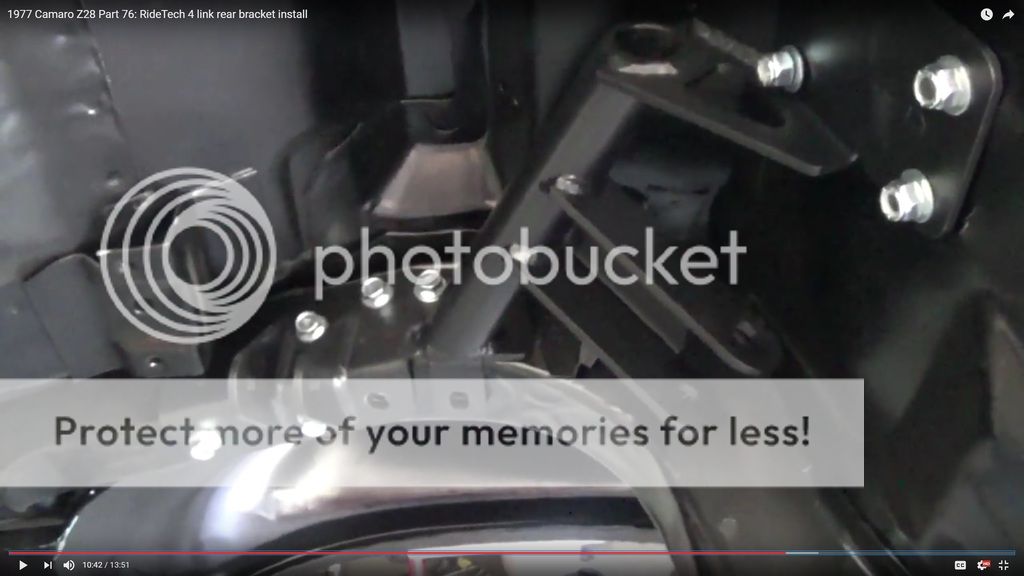
Yesterday, I installed the RideTech upper brackets. A few hiccups in the instructions and parts list. They did not indicate washers on these bolts, but there are the right amount of washers suggesting they should be there, so I added them. Also, they did not supply enough bolts since they assumed you have the 4 bolts where the rear sway bar went. I do not, so I need to get those from somewhere. Most of the bolts are self-threading type and you need to drill holes for them.
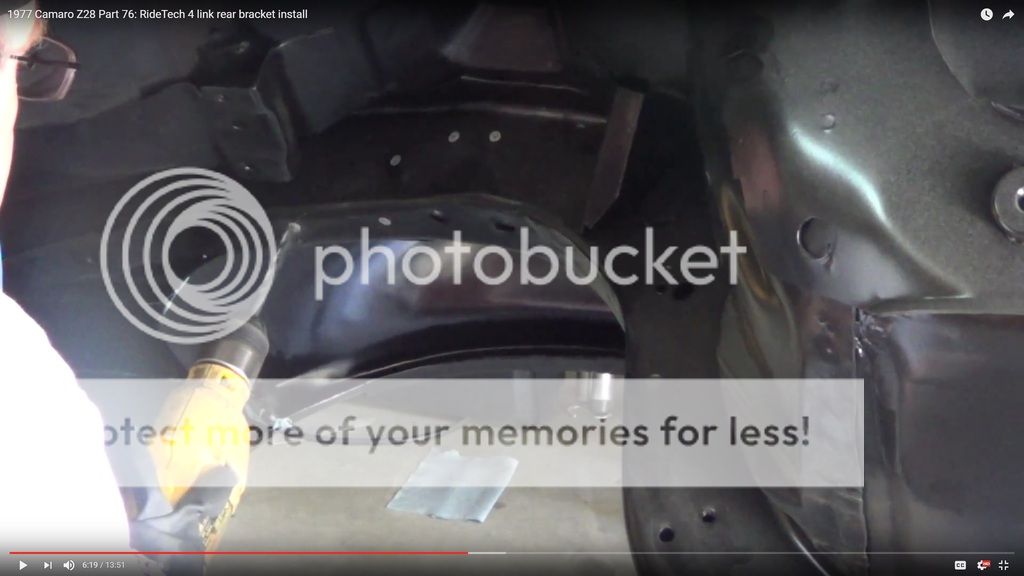
This one I am drilling here stripped out when I tightened it down. I am going to probably put the next size bigger bolt in there (1/2" I think). I may also end up welding in the brackets down the road, we'll see.
Here is the driver's side bracket all bolted in (save those two missing bolts).
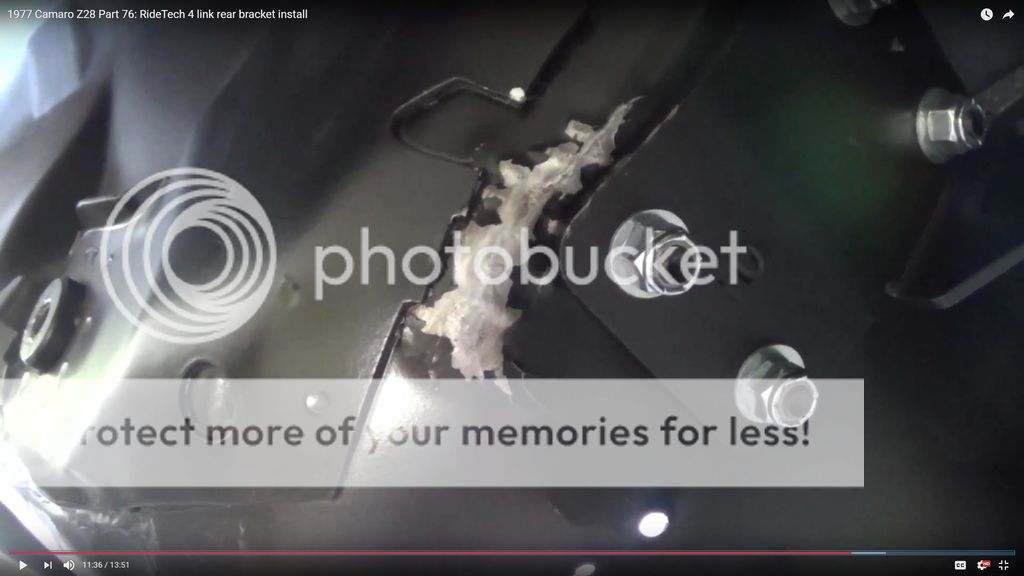
On the passenger side, I ended up having to beat the crap out of the metal to get the bracket to sit tight. So, I have a paint repair to do there.
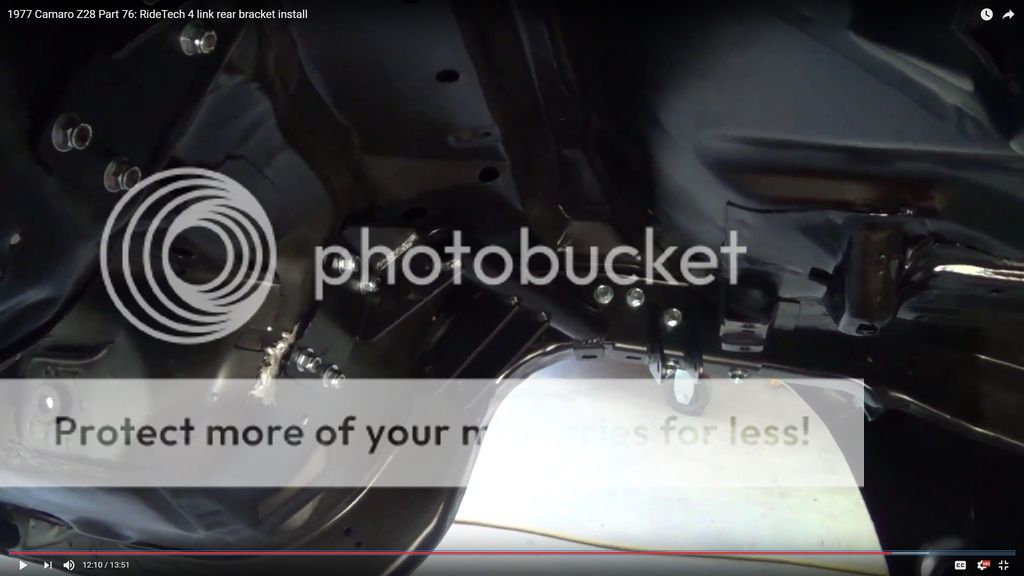
And here is everything in place.
This one I am drilling here stripped out when I tightened it down. I am going to probably put the next size bigger bolt in there (1/2" I think). I may also end up welding in the brackets down the road, we'll see.
Here is the driver's side bracket all bolted in (save those two missing bolts).
On the passenger side, I ended up having to beat the crap out of the metal to get the bracket to sit tight. So, I have a paint repair to do there.
And here is everything in place.