My Chevelle build and spot to Rant

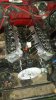
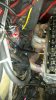
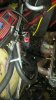
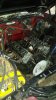
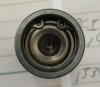
I will definitely have a look I bought lucas break in oil for the cam break in. You guys agree the oil runs the 25 min of break in then gets dumped. Then gonna buy some decent oil with zinc additive zddp, new filter, and go about 3 tank fulls of gas then add amsoil race oil and back to normal intervals. Sound right? Overkill or not enough?
 
Well yesterday I gave Lance Nist a call again to order a fuel pump for the new fuel system I am building. We had another great discussion and he recommended a finer filter before the pump. Along with the ideal of using annealed stainless for the fuel lines. He stated using a 8-10 micron pre pump filter would lengthen the pump life by keeping the larger particle that tend to get in the pump and wear it away out. I can go with this. So put it on my order also. He also stated this would save me money as I could get away with only one filter this way. I like that idea but plan to put a second filter right before the fuel rails down the road just for reassurance. Fuel filters are cheaper than injectors. But it will be nice having all new to start from with the fuel system. I will post some pictures of the parts when I receive them from Lance.

I am very impressed with Lances business practices. I enjoy the conversations and the knowledge he shares with me. He has not forced any of his products on me as I am not using his regulator, the Aeromotive fits my needs better than his even though his is cheaper. I love that you can tell he loves what he does and is passionate about it also. I get that it’s not about spending the most money but getting there the best way possible from him. I don’t know to many businesses that would give this much support for a product I purchased (stole for the price) from EBay. It’s good to see this type of business ethics still alive. Heck he even had answered my questions on a forum before I gave him a call.

I am looking at fuel cells right now and think I have found the one I plan to use, RCI 2191A. It is a 19 gallon cell with the dimensions of 30”x12”x12”. The only thing I don’t like is the fact the outlet tube comes out the top but this seems safer than having the fittings in the rear. I might try to baffle or trap door the pickup after I receive the cell.
 
I started this forum because I spent decades dealing with people and machine shops that either would not provide the services they were paid for or ones that did sub standard work and as a result it was a long expensive learning curve that I think should, and could be avoided,if someone would step up and provide some guidance and expertise. so I started the site to allow anyone willing to read thru threads and links, too save a great deal of cash and wasted time ,so they could avoid problems by asking questions and getting strait answers, thus learning and avoiding the problems, and not waste time making the mistakes my friends and I made and learned from.
Its rare to find a parts dealer, or machine shop or mechanic, that you can trust, one that seems to treat you the way you expect to be treated and one that tells you your options regardless of his personal profit potential, so you might want to ask Lance Nist to join and post on this forum

magicianba.jpg


https://www.youtube.com/watch?v=qOtoujYOWw0

https://www.youtube.com/watch?v=cQB03yOa6so
 
I like the T-shirt Grumpy.

There are a couple of Pontiac longtime gurus since 1976 floating around on the Pontiac musclecar & race forums I recognize.
They go by self made nicknames.
Post Sparatic every now & then.
Ken Crocie from the Original HO RACING & ROMEO NUNZI From Nunzi Auto were my favorites to talk to before the Net.
Both are retired now and shops closed.
But they around still.
Both can take an all iron Pontiac 400-455 & do thier handiwork & set Super Stock records into deep 10's & 9's. Normally aspirated.
 
7 out of 16 inner springs out stuck on the rear spring by the brake booster. Its my b-day and spent doing what I love dealing with stubborn parts lol
 

I confer !!! ..... It's a double edge ..... :p


Attachments

  • double edge sword.jpg
    double edge sword.jpg
    16.2 KB · Views: 44
I got 7 more inner springs pulled last night before it got too dark (did not want to break out the drop light). Big thanks to Grumpy his proceedure has working good. 2 more left to go then get it degreed in and then buttoned up. I have some pics to share, taken with my phone sorry the quality is not optimal as it was getting dark and my hands were oily. But I came up with a good process of getting them done one cylinder at a time you can see my airpressure device made from a cylider pressure guage in the pics. But I would remove the plug charge the cylinder up with air. Then take a 5/8" socket hold it flush to the valve spring retainer and blast it with my new harbor frieght dead blow hammer. You can feel the difference when it comes loose. Some actually had one retainer come out when being beaten. After the inner spring removed put it back together and set the pushrod and rocker back in place. I did notice I need to make some adjustments to my push rod guides as the rockers are not perfectly centered over the valves. I noticed no play or wear to the rockers. I gave each of them a good visual inspection all bearing seem smooth also. I think it is always a good idea to inspect any components you come in contact with during a job. Slowly but surely but I at least know it will all be done right.
 

Attachments

  • 20140914_174639_resized.jpg
    20140914_174639_resized.jpg
    278.4 KB · Views: 42
  • 20140914_174654_resized.jpg
    20140914_174654_resized.jpg
    255.3 KB · Views: 44
  • 20140914_174659_resized.jpg
    20140914_174659_resized.jpg
    204.2 KB · Views: 44
  • 20140914_174708_resized.jpg
    20140914_174708_resized.jpg
    256.7 KB · Views: 42
looking good glad youre finally seeing the light at the end of the tunnel... i like the setup with the compression gauge fitting, very simple and effective. :mrgreen:
 
Hoping tonight to get the rest knocked out and get the cam broke in. Son and girl have been sick so my sunday finish date got pushed forward. The little mans fever broke yesterday so thinking I will be able to escape. :D Stay tuned later for pictures of new fuel system parts
 
Ok start with pictures of the new regulator and spring. Aeromotive 13301 3-60 psi 3-20 spring comes installed and in the box is the 20-60 psi spring.

I also purchased this to use for a gauge while it is set up for carburation with the low pressure spring installed.

The gauge will be mounted to the front of the regulator I have a brass reducer that came with my transtemp gauge that will work perfect. I will get a better quality one when I set this up for efi pressures.
 

Attachments

  • 20140924_091134_resized.jpg
    20140924_091134_resized.jpg
    75.2 KB · Views: 32
  • 20140924_091146_resized.jpg
    20140924_091146_resized.jpg
    127.4 KB · Views: 31
The fuel pump ended up being a 65 GPH unit looks to be made by Big End Performance so it has 110 GPH free flow numbers nice pump.

Mounting hardware that came with pump

Wiring and fuse came with pump

Double female AN fittings for both sides the pump also came with pump

GM style weather seal male and female connector with pins
 

Attachments

  • 20140924_091301_resized.jpg
    20140924_091301_resized.jpg
    66.5 KB · Views: 31
  • 20140924_091309_resized.jpg
    20140924_091309_resized.jpg
    57.7 KB · Views: 31
  • 20140924_091316_resized.jpg
    20140924_091316_resized.jpg
    102.2 KB · Views: 31
  • 20140924_091324_resized.jpg
    20140924_091324_resized.jpg
    48.4 KB · Views: 30
  • 20140924_091356_resized.jpg
    20140924_091356_resized.jpg
    69.1 KB · Views: 30
Fuel filter is a wix 24003 with 3/4" female npt in and out this will be my pre pump filter.

A new timing chain cover cause my other one popped the seal holder half off when I removed it my fault for being a bull about it, will try to get some pics tonight

A fuel pump block off plate

And a set of new valve cover gaskets I ripped one of the existing just some felpro rubber
 

Attachments

  • 20140924_091233_resized.jpg
    20140924_091233_resized.jpg
    83.3 KB · Views: 27
  • 20140924_091429_resized.jpg
    20140924_091429_resized.jpg
    64.1 KB · Views: 27
  • 20140924_091439_resized.jpg
    20140924_091439_resized.jpg
    33 KB · Views: 27
  • 20140924_091448_resized.jpg
    20140924_091448_resized.jpg
    31.9 KB · Views: 27
A few things first order of business Grumpy you think we could do a Big Block swap on this or squeeze a 455 in it Brian then get Phil on board to turbo charge it. :twisted:

Next here is the pic of the lifter I pulled from my block I did not realize the cam that was in it "Mystery Cam" was a solid mechaical. I will have to remember to look for some numbers on the cam next time I'm at the Chevelle.

And here is the promised pic of my old timing chain cover now tool, nut, and bolt holder
 

Attachments

  • 2014-03-14 19.09.14_resized.jpg
    2014-03-14 19.09.14_resized.jpg
    36.7 KB · Views: 21
  • 20140925_103645_resized.jpg
    20140925_103645_resized.jpg
    57.7 KB · Views: 21
  • 20140924_190433_resized.jpg
    20140924_190433_resized.jpg
    66.5 KB · Views: 21
I have one stubborn retainer left. The one that is closest to the brake booster it does not wanna budge. Bought some rope and tried that still being a royal pain any ideas?
 
Strictly Attitude said:
I have one stubborn retainer left. The one that is closest to the brake booster it does not wanna budge. Bought some rope and tried that still being a royal pain any ideas?
Unbolt the power brake booster John.
From under the dash with a long 24 " extension & 3/8" swivel with your deepwell socket on the end.
 
Lay the booster and master cylinder on the inner fender.
Don't remove the master cylinder cap.
 
Thanks was contemplating that earlier seemed a better option then removing the head. Never thought of just gently moving it over good call.
 
Mystery cam is no longer a mystery the numbers off it are 3863151 bet grumpy might know this cam with out even looking it up.

I also got the last spring out and the riming set installed last night. So should be able to get it totally back together soon and fired up.

Mystery Cam specs I will post little later ;)
 
Did a fast Google search John.
Chevy L79 1965-67 327/350 Hp Solid flat tappet.
Single Pattern Cam.
222 & 222 @.050".
.447 &.447 Valve liftds with 1.5 rockers.
LSA ground on 114 .
But also ICA ground set at 110 degrees.
Advanced 4 degrees.
Packs cylinder pressure in tight for bottom end grunt & midrange punch.
My Source ZASTYZ28.COM .

Pontiac 400-455 like Single Pattern cams I have found real world testing.
Why I Love ISKY CAMS TOO LIKE YOU.
 
Back
Top