Gibbles
Clicker of buttons
Don't remember, what rockers did you buy? Makes you wonder if one will come
apart early..
Depends what rockers your asking about
The ones I plan on using for camshaft break-in and then tossing are "ProComp" and those ones destroyed two studs already!
Also note that I have already had them installed and ran them for a few thousand miles, while I don't trust them long term, I think they would be perfect for the camshaft break-in.
Also they are roller tip only.
And the full rollers I just bought @ 1.65 are "Scorpion race series".
I was realllly close to buying the compcams gold but the wife started cracking down on me for money spent... and they had a sale at summit..

Got pics of the process. Lots of people have used those.......just saying politely or
trying to anyway!.
I have some pictures on the camera, however I have been way to lazy.
Expensive, but worth every penny I'm sure!.
I sure hope so, I'm looking forward to seeing how it handles with the new steering!
It's not quite that simple. If you could read the dial indicator, push down on the valve
until contacts the piston for the 30° before and after TDC, now that might work. You
might have the right idea, but you didn't explain with enough detail that we could tell
for sure. We can't assume that you are going to do something so very important, so
error on the conservative side and call your hand on it ...... sorry.
That was pretty much my thought.
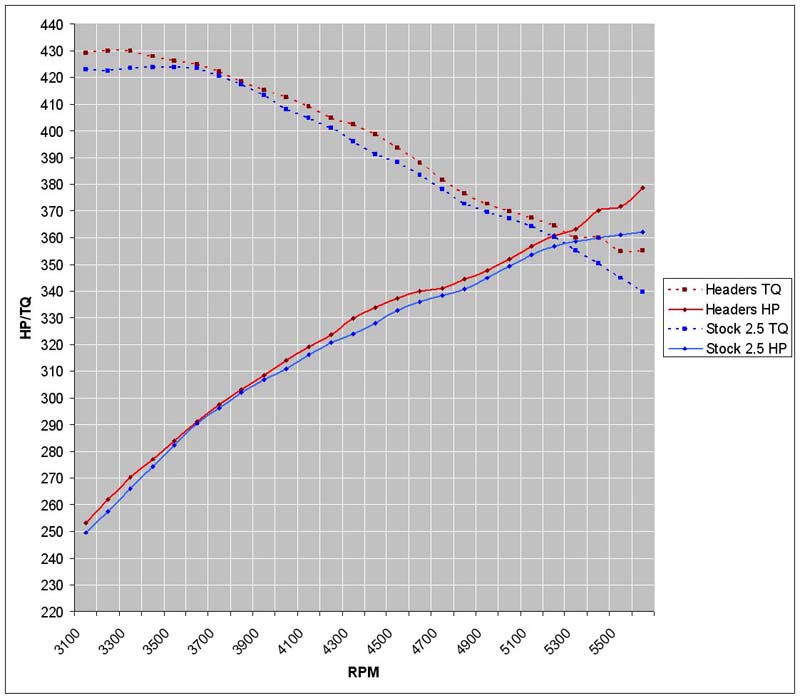
The graph Grumpy posted is very helpful.
My first thought was to move the crank a few degrees and check it, few more degrees and check it again, and continue like that for a good hour or so...
Now I'm thinking the same thing, but focusing on the 30 degree mark before and after TDC to start.
I was also trying to figure how the heck to get my magnetic dial indicator base to stick to something, but that metal strip in the image is brilliant.
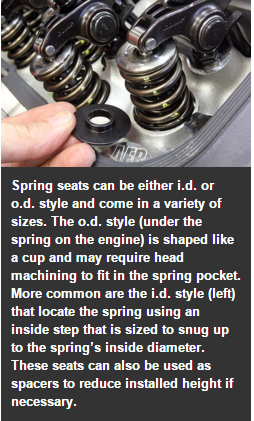
Next thing I need to get are pictures of the OEM springs on the new heads, they are a bit smaller dia. than the new springs...
I'm thinking I might be ok to run the engine like that for 20-30min but I'll refer to the experience here...
Last edited: