Planning a new 383 build that is now going to be a 400

That 400 cubic engine is going no where Bob.
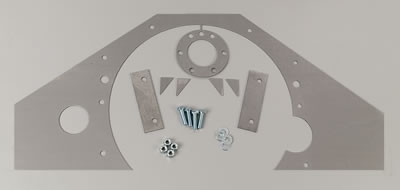
The Front & Rear Motor plates are stronger than the entire Nova.
 
I am not sure what its all going to look like, but strength is what I am shooting for and ease of engine and tranny install. I will probably have to put the front mount in with the engine in the car, but I think I can get the rear tranny mount in after the midmounts are bolted up, the tailshaft mount is going to be a one of the universals with polyurethane filler. I think the whole setup will work nicely.
 
when planing on fabricating a large bracket like that engine mount plate its frequently a good idea to buy , cut and test fit
a pattern made from dirt cheap clear plastic before starting on rather expensive steel or aluminum, to get all the necessary mods and clearances worked out, the huge advantage of clear plastic is you can easily see where you need bolt holes or some item that moves during operation (like suspension) or more easily let you recognize early in the fabrication process that theres always a compromise some place to be considered, parts like STARTERS , OIL FILTERS AND HEADERS that might become nearly impossible to work on if the brackets in place
http://www.homedepot.com/p/11-in-x-14-in-Non-glare-Styrene-Sheet-1S11143A/202771350
if youve built a real torque monster solid mid plate mounts might be a good idea
http://stores.channeladvisor.com/Summit ... s/CEE-4031
cee-4031.jpg

http://garage.grumpysperformance.co...ng-engine-accessory-brackets.8523/#post-29916
clearp.jpg
 
Last edited:
A front Motor plate is pretty much mandatory heavy drag racing.
When its mounted Solid bolted to the Frame and Coupled with Low rear diff gears 4.30-5.57 :1 Front Wheel stands 2-5 feet off the ground are possible .
Solid Axle Rear Diff used too.
 
5.0 Stangs don't need motor plates.
The motor mounts are unlike any GM.
 
Why such a big cutout (C Section) where the trans bolts to the mount?
To go around the outside casting of the bellhousing. I am not going to mount it between the tranny and engine, it will mount behind the tranny. I am looking at a place here in town to get some studs that have a set of threads on both sides to mount the midmount to the tranny. Rick its also a attempt to keep the weight down also, the cutout I mean.
 
Last edited:
Grumpy said : Let you recognize early in the fabrication process that there's always a compromise some place to be considered, parts like STARTERS , OIL FILTERS AND HEADERS that might become nearly impossible to work on if the brackets in place.

This it why I want the brackets to be removable with the 2 sided stud in the tranny bellhousing.
 
I did a basic mock up and looks like there are two options, I can mount them the way in the first two pictures, or for more clearance I can invert them like in the second set of pictures. If I do the first method, there is a little trimming and with the second method I will have to trim the diagonal part of the mount to clear the exhaust. I was unable to do a good mockup due to it raining today, so when it clears I will get out a head and header and bolt them to the mockup block and then into the frame of the car.

raw midmount passenger side.jpg

raw midmount drivers side.jpg

inverted passenger side midmount.jpg

inverted drivers side midmount.jpg
 
Yeah, if I use option 2 the frame mount will be about 3 3/4 inches higher on the frame. I will have to see what happens when I mockup the block, heads, headers and exhaust. I am hoping that option 1 will be the best fit. There is less cutting to do in that option if any at all. Its going to be an adventure! I went to Fastenal little while ago, after some more mockups to get the correct lengths for the studs. I bought grade 8, 2 1/2 inch long studs, I will use aircraft nuts (nylon inserts) to bolt the brackets to the tranny housing, slide the bracket on then use what is called a top lock nuts(similar to OEM rocker nuts) to lock it all together. I will use loctite on the studs in the block. The studs came in 10 count lots, so I am going to use studs on the other two fasteners on the tranny, so I slid them in block and simulated the thickness of the bellhousing and put the studs in backwords and cut them 1/4 long after they were tightened. I will use aircraft nuts on them to fasten them down.
 
Last edited:
Okay, take off about 1 inch off the end of each mount. I left them long so I can trim them to fit once I decide which option will work the best. I bought another set of expandable freeze plugs for these mounts also, best 16 bux I have spent for motor mounts.
 
BTW, do you have two dowel pins that line up the bell housing and block. Just
checking since you have not mentioned them, that I can remember.
 
I don't have any pictures, but I put the mock up block back in and bolted up the midmounts. I have the driver's side head mocked up on the 305 block. I don't have the header on yet or the exhaust, but I am guessing I am going to have to do the same with the mid mounts as I did with front mounts. It looks like the drivers side will work the way I was hoping in method 1 mentioned, but I don't have the head on passenger yet, but I just have a funny feeling that side will have to be inverted to clear the header and exhaust.
 
I was thinking if I finish these mounts, I could crank the engine without the tranny in the car. With my financial situation, I could get the engine running and later put the tranny in to complete. Just a thought though, probably won't do it.
 
Lots of different opinions Bob.
Front & Rear Motor plates combined are usually done on 6-second ET Pro Mod cars.
Single front plate is Good for 9-7 seconds alone.
 
Back
Top