TBucket Engine Project (Dart SHP)

Drill a hole in the outer piece and then make a small plug weld. Just like body panels.

Does the OD at the base of your polylocks match the recess in your rocker arm? They are usually .550 or .600 inch.

Will have to see what I can work out with John and his TIG welder.

Didn't measure the OD of the locks, but they came with the girdle as one part number.

It's been a pretty expensive winter, so I plan on staying with the baffles that I have now. They can
always be replaced later.
 
learning to correctly TIG weld with a decent TIG welder will open your eyes,
too huge field of options, and a myriad of potential and until then un-dreamed of ideas
owning a decent MIG and TIG welder and a heavy duty drill press or better yet a MILL and lathe ,
leaves you open to the potential to build a huge assortment of custom, & unique and in most case's,
project's with a great deal more performance potential than your limited too buying components off the shelf.
 
The bottom diameter of the polylock must match the recess in your rocker arms.
http://jomarperformance.com/catalog/adjustment-help.php

adjustmentnut-help.jpg
 
learning to correctly TIG weld with a decent TIG welder will open your eyes,
too huge field of options, and a myriad of potential and until then un-dreamed of ideas
owning a decent MIG and TIG welder and a heavy duty drill press or better yet a MILL and lathe ,
leaves you open to the potential to build a huge assortment of custom, & unique and in most case's,
project's with a great deal more performance potential than your limited too buying components off the shelf.

BUT mistakes can be costly! I know from experience! Learning curve is huge when trying something new!
 
we all make mistakes, but if you never try anything new with out some risk,
you can never hope to learn or add skills, most of us learn by, hands on, experience.

and it helps if you watch, and learn from other people success and failures
you can significantly lower the risk by simply finding a knowledgeable mentor ,
(Ideally local) if its a skill that requires manual dexterity, or visual acuity,
that can point out the things you need to to look for,
in how the jobs done and the best tools required.(and what to avoid)
that has already made those mistakes and knows how to avoid most of them,
who might be willing to pass on those experiences and skills
 
Last edited:
we all make mistakes, but if you never try anything new with out some risk,
you can never hope to learn or add skills, most of us learn by, hands on, experience.

and it helps if you watch, and learn from other people success and failures
you can significantly lower the risk by simply finding a knowledgeable mentor ,
(Ideally local) if its a skill that requires manual dexterity, or visual acuity,
that can point out the things you need to to look for,
in how the jobs done and the best tools required.(and what to avoid)
that has already made those mistakes and knows how to avoid most of them,
who might be willing to pass on those experiences and skills
Some things are best left for the Pros on Ricks T Grumpy.
He will ruin his 2-piece valvecovers 1st time ever Tig welding aluminum.
 
Last edited by a moderator:
if your unsure of your skills, with a drill press and welder,
you should obviously, either have a pro weldor with experience do the job,
( fast short term answer and you get the job done well, but you'll tend too learn little)
or practice on some similar scrap aluminum ,with your welder,
until your 100% confident you can do a decent job using the tools you have access too.
(obviously takes longer, youll learn a new skill and in the long term , its by far the better route to take)
(besides it will tend to make you both much more skilled and eventually the owner of a used or new TIG welder)
what tool junky, engine or t-bucket owner or hot rodder would think thats a bad idea??

http://garage.grumpysperformance.com/index.php?threads/shield-gas-selection-for-welding.1108/

http://garage.grumpysperformance.com/index.php?threads/teaching-yourself-to-weld.8086/

http://garage.grumpysperformance.co...sten-size-amp-chart-per-metal-thickness.9235/

http://garage.grumpysperformance.co...-gentlemen-feel-comfortable-tig-welding.3284/

http://garage.grumpysperformance.co...g-filler-rod-and-electrode-related-info.3414/
 
Last edited:
I would have expected the gap to be much closer. I may turn the girdle around so the pinch bolts
are towards the exhaust to make it easier to tighten.

FP25_HarlandSharpGirdle_00430.jpg

These polylocks fit better than the ones that came with my rockers. The Comp Cams polylocks
were 0.560 inches at the base and the rockers have a 0.615 diameter recess. The Harland Sharp
are 0.600 inches in diameter.

FP25_HarlandSharpPolylockDimensions_00432.jpg
 
as usual...damn impressive
photos..and contained useful info others can use!
THANK YOU RICK!
 
No problem Grumpy. Yea you certainly won't find all those dimensions anywhere else! I
couldn't even find where Comp Cams even made a polylock with a 0.560 base to fit their
own Ultra Magnum Rockers
 
.
Going back to the Harland Sharp Girdle PN: 1100, the description said Spring Loaded for Easy Installation/Removal.
For me that was not obvious what that meant, but today the light came on brightly. At first(1 second) it looked like the
threads were coming out, but there was NO bolt in that location, what the hell. (2 seconds later) So when I looked
closer it was a spring, that's when the light came on !@!

FP26_GridleSpring_00441.jpg

For the baffle in the valve cover to girdle clearance, I needed to re-install the baffle after grinding. I drilled
two holes per baffle and installed 2 sheet metal screws per baffle.

FP26_ValveCoverBaffleModification_00435.jpg

With RED 262 Loctite !!!


FP26_ValveCoverBaffleModification_00433.jpg

.
 
yeah! know its just me....Rick!
but if you read the instructions on RED loc-tite it says........ too loose or weaken the bond heat the loc-tite on the screw up,
don’t believe the myths… red threadlocker can be disassembled with the right technique.

When disassembling red threadlocker the process is a little different than for other threadlockers. The key is to apply localized heat greater than 550° F. Then, once the threaded assembly is hot, the bolt can be unthreaded. Without applying heat to the assembly, it’s likely that over time, a bolt would break before coming loose.


now it might be just me...
but a constant bath in 215F- 230F-240F hot engine oil, seems like that might qualify? yes I'm totally aware it states it takes 550F but experience has proven that even 240F will loosen the grip a bit compared too the bond at room temps.
thats a job of locking the baffle in the oil breather in the valve cover, is better done in 2 minutes with a MIG or TIG welder,
yeah you could BRAZE or
silver solder it with an oxygen/acetylene torch also.

if you prefer to use a screw Id suggest

10/32 screws with matching nyloc nuts or safety wire but trust me , braze or weld is preferable

http://garage.grumpysperformance.co...afety-wire-locking-fasteners.4306/#post-67524


http://www.superchevy.com/how-to/brakes/1408-how-to-safety-wire-your-bolts-tight/

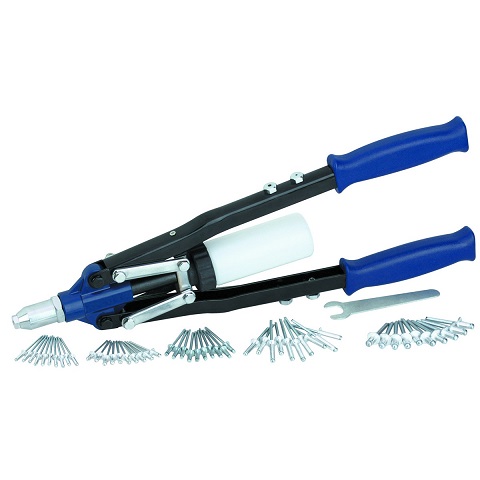
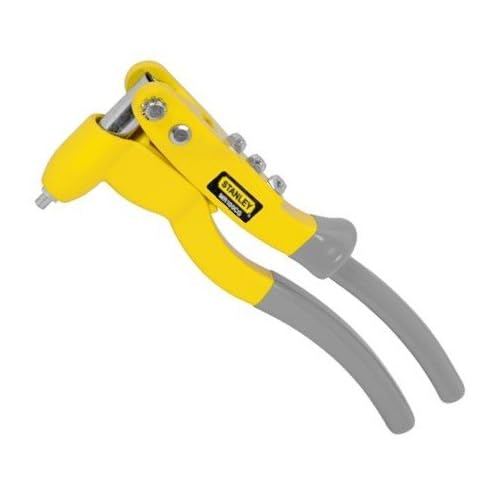
theres also an option of using a couple POP RIVETS
http://garage.grumpysperformance.com/index.php?threads/pop-rivet-tools.2750/#post-46136


http://www.harborfreight.com/heavy-duty ... 66422.html
poprivetz.jpg


http://www.amazon.com/Stanley-MR100CG-C ... 291&sr=8-1
31g99VJ48AL._SS500_.jpg
 
Last edited:
Best thing to do now is place a few of those Super Magnets inside of each baffle.
When the screws come out and they will the Magnets will hold the baffles in place.
Screws will end up in the engine valley.
Catch magnets there.
Hopefully catch them too.
 
I have seen $40,000 Dirt Track Racing engines destroyed when a single needle bearing from a Roller lifter failed.
Tiny needle bearings blasted the entire engine from inside.
Shooting the engine from 1 foot away with a 44 Magnum does less damage.
 
Back
Top