TBucket Engine Project (Dart SHP)

Thanks guys for the comments!

As for the solvent I'm using in the parts washer......it's from Tractor Supply. They seem to have a better price than the automotive supplies at $39.99 for 5 gallons.

http://www.tractorsupply.com/crown-reg- ... l--3893915

Solvent-TractorSupply.jpg

One other thing that just came to mind about Tractor Supply, they sell Grade 5 & 8 bolts by the pound.
.
 
Last edited:

I lost 4 days last week to a trip I had to take. Went to Houston for a wedding, so Thursday thru Sunday
I wasn't able to work on it.

Now that I'm back, I am cleaning the piston rings and bagging them one cylinder at a time. I should buy
stock in the Zip Lock bags, I'm sure using plenty of them. Many of them are still clean enough to be
used for food, although they are NOT clean enough for my engine parts! :D

Next I'm planning on assembling the pistons onto the rods. Believe I will wait on the rings and put
them on just before I put them in the cylinder.

Thanks busterrm for asking!
 
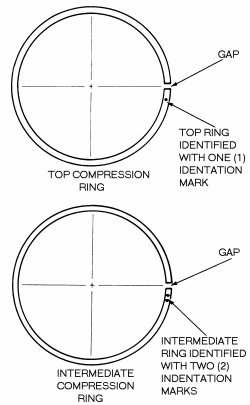
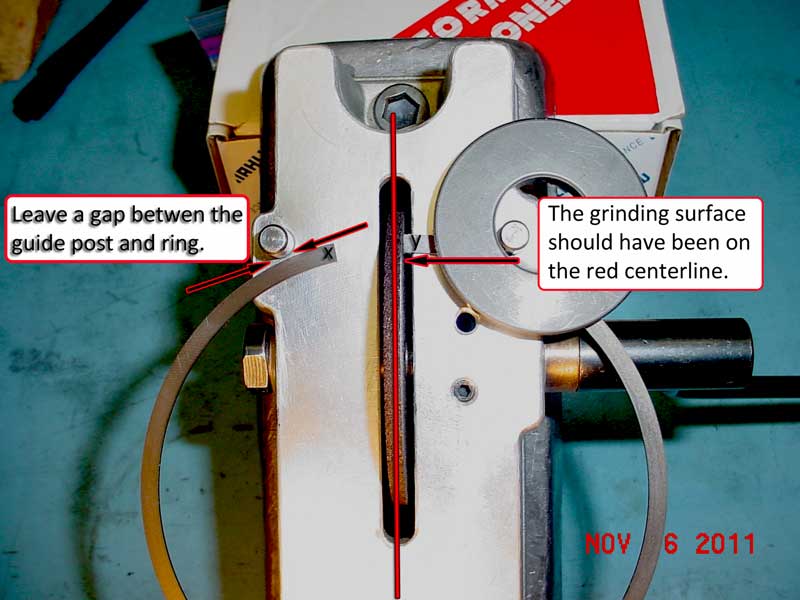
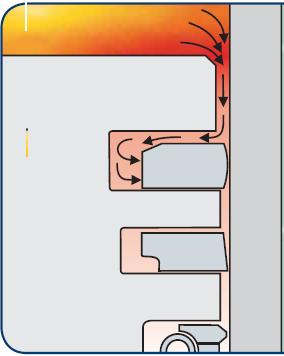
for anyone reading thru this thread, be aware that the piston rings have a side that faces up , its usually marked with a DOT but some rings have a beveled inner edge that faces up instead, get the rings installed upside down in the piston grooves and your guaranteed to have sealing and oil burning issues, most rings come packaged in separate packages , for top, second and oil rings, inspect them carefully as you don,t want second rings installed in top ring grooves or to have rings installed upside down or with the wrong end gaps
ringdot.jpg

RingInstallation1.jpg

RingFilerCorrection1420.jpg

ringsealw2.jpg

related threads

viewtopic.php?f=53&t=247

viewtopic.php?f=53&t=852

viewtopic.php?f=53&t=3897

viewtopic.php?f=53&t=5454

viewtopic.php?f=53&t=4630

viewtopic.php?f=53&t=509

viewtopic.php?f=53&t=3449

viewtopic.php?f=53&t=726

viewtopic.php?f=53&t=2795

viewtopic.php?f=53&t=2837

viewtopic.php?f=51&t=3774

viewtopic.php?f=51&t=588
 
Finished cleaning the last set of rings.

I used a brush to clean the expander since it has so many little spaces.


CleanExpanderRing_2216.jpg

For the flat rings I just used my hand to caress them and wash away any grit.

CleanTopRing_2217.jpg

BlowDryRings_2221.jpg

Used a Sharpie to put tally marks on all the rings, both sides.

MarkID_OnRings_2223.jpg
BagRings_2225.jpg

I thought I felt a sharp edge on the oil scraper ring during cleaning, so after blow drying the
rings, I took a closer look at that ring under magnification. Sure enough I missed an edge
while the filing the ends of the rings and setting the end gap. Now I couldn't see this edge
but I could feel it.


SharpEdgeMissed_2230.jpg

I got to wonder how many things get past you that you will never know about ???
.
 
Last edited:
Indycars said:

I got to wonder how many things get past you that you will never know about ???


probably more than any of us care to admit, but luckily, theres some tolerance in how things fit and function, in fact its amazing most guys first few engine builds even run, but we all learn as we gain experience, and most of us get that experience correcting our personal or friends mistakes
 
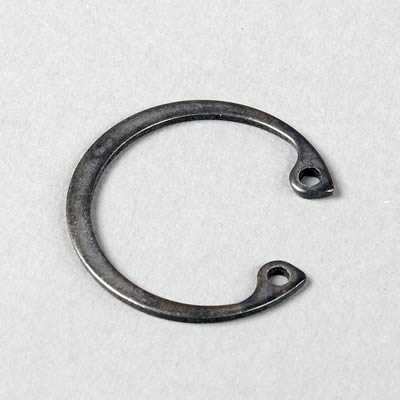
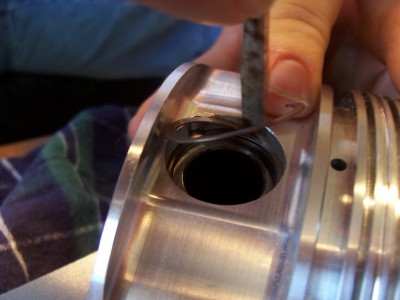
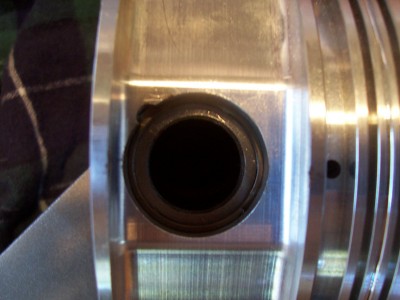
How does the C-Clip look, is it about right. The C-Clip gap should be top or bottom, but NOT on the side.....correct???

You can't move the C-Clip once it's installed. If the one end of the clip would end up in the pocket, should it be remove and a new one installed correctly???

C-ClipInstallation_2238.jpg
 
Last edited:
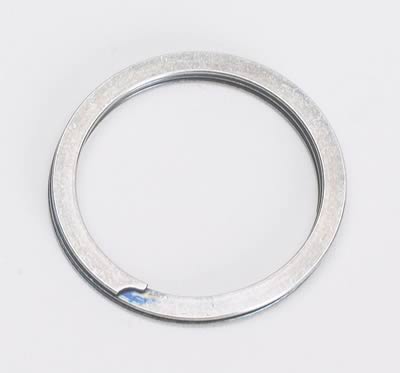
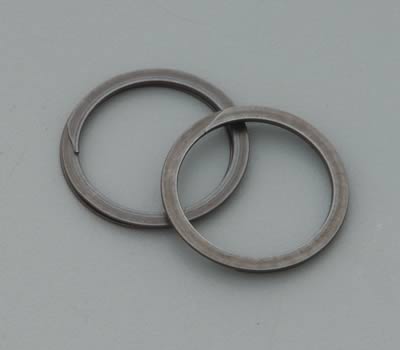
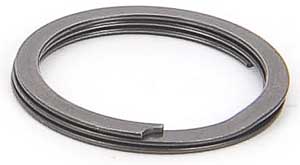
Ive used dual, back to back spirolocs on most of my engine builds , to retain the piston pins .Ive also used the true-arcs spring clips on a couple,engine builds, I,ve also used to use Teflon piston pin buttons but they don,t seem to be popular any longer but IVE never used the round wire locks you show, now that doesn,t mean they won,t work, ITs just not something I,M familiar with using, yes Ive seen them used, just never personally used them.

jep-094-050-ct.jpg

jep-927-073-as_w.jpg


http://www.cbperformance.com/catalog.asp?ProductID=172
http://www.kustom1warehouse.net/Wrist_p ... 1-2011.htm
http://www.ariaspistons.com/products/Arias.hardware.pdf


PLEASE read thru this link and sub links

viewtopic.php?f=53&t=978
 
Being that the Tru-Arcs and the Wire Locks both have an Open End, they should be installed in the same fashion. I can only find two articles that document their orientation when installed.

This book on page 124 says "Install Tru-Arcs with the open ends pointing up or down only and make sure the flat side (with the sharp corners) faces out."

HowToRebuildTheSBC_SA26.jpg

"Keep open end of lockring facing down"

KBPistonInstallation.jpg

The complete 4 page KB Piston document can be downloaded below:

.
 

Attachments

  • KBPistonInstallation01.pdf
    268.1 KB · Views: 7
Last edited:
THANKS! thats HELPFUL INFO, I,m sure will be very useful, most people don,t bother to do the research , thus they make mistakes,so they have at best mixed results, your helping many of the readers by posting or at least clearing up what you find and bring out the questions so few people bother to even think about, and its the little things that add up eventually to make for an exceptionally impressive or below average engine build
 

In hind sight I should have sacrificed a couple of locks months ago so I would have known
what the end play was going to be. I say sacrifice since they can't be used a second time.
But alas I was too cheap. [squeak, squeak] :)

I'm going to wait until Monday before I move forward on this. I need to talk with Mahle and
see what they say. Look dangerous to assemble the rods and pistons with this much end
play. Everything I've checked says .000 to .005" and sometimes as much as .008", but not
anywhere near .017".

WristPinEndPlay_2246.jpg
WristPinEndPlay.017Inches_2247.jpg

EDIT:
I pulled the wrist pin and measured it's length at 2.280". I then measure 4 other pins and they
all measure within .001". Wanted to rule out a short wrist pin giving me an incorrect measurement.


Last edited:
this is were the SPIROLOCS give you a noticeable advantage, they are basically a semi flat spring,with one flat side and one slightly micro-curved side, you pull them out to stretch them then spiral them into place (two slightly curved side BACK TO BACK) flat sides facing out, they act as mini springs taking up any residual space thus keeping the piston pin centered, and resisting any length wise travel.
spiro6.jpg

spiro7.jpg

spiro0.jpg

spiro1.jpg

spiro2.jpg

spiro3.jpg

spiro4.jpg

spiro5.jpg


related info

http://kb-silvolite.com/article.php?action=read&A_id=9

http://www.smalley.com/pdfs/spiral_reta ... emoval.pdf

http://webpages.charter.net/beckracing/page10.htm
viewtopic.php?f=53&t=978
http://www.ustream.tv/recorded/221556

http://www.angelfire.com/mech/danielspo ... rolox.html
 
I just got off the phone with Mahle Motorsports Technical Support.
1-888-255-1942 x2809 or x2823

John answered the phone (immediately, one ring) and I posed my question to him about having .017" wrist pin end play and he thought that was fine. He also said that most of the questions he gets are about the end play being too tight, so just to be on the safe side, he wanted to confirm with a engineer. In a minute he came back on the phone and said they are looking at .013" as a minimum, just so you can get the clip installed. The upper limit is .020".

He mentioned that some pins that were too short got installed in a 900 HP motor came out after a full cycle, but they had .040" wrist pin end play.


Looking at the picture below you can see why the c-clip needs more clearance that a Tru-Arc which
has flat sides, it's basically a snap ring. John at Mahle told me it needed at least .013" just so you
can get the c-clip in far enough for it to drop into the groove. When a wrist pin applies any force to
the c-clip during operation, it is forcing the c-clip tighter into the groove, making it even harder for
the wrist pin to get out. Kinda of a self policing design.

WristPinBevel01.jpg

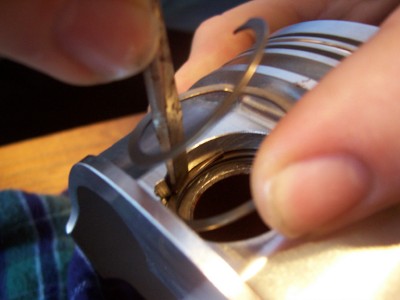
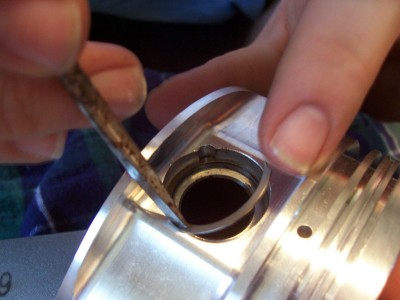
The tool I bought came with this installation clip to keep the wrist pin in while installing the first c-clip.


InstallationClip_2256.jpg

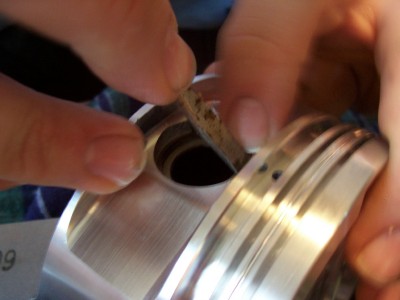
The next 4 pictures show the sequence to installing the c-clip.

You can view a video of the installation, done by the manufacture here:
http://www.lockintool.com/how-to-use/

C-ClipInstallation01_2251.jpg
C-ClipInstallation02_2252.jpg
C-ClipInstallation03_2253.jpg
C-ClipInstallation04_2254.jpg

I bought 4 extra c-clip when I bought the rotating assembly, thinking that a few of them will be taking
flight and landing in some unknown corner in the garage. Never to be found until right after the engine
has been assembled. Happy to say, not one of them got away from me. But I got so involved in the
installation of the c-clip and the wrist pin end play, that I forgot to lubricate the first 2 assemblies. Since
I had the extra c-clips I was able to take one out and slide the wrist pint out, lube everything and put
it back together. You are not suppose to reuse the c-clips. After all was said and done, I had one c-clip
left over.

All pistons and rods are assembled and ready for the rings just before they go in their cylinders.......yea !!!

Boxed01_2257.jpg
Boxed02_2258.jpg
Boxed03_2259.jpg
 
Last edited:
glad to see your still making progress on the engine assembly, and thanks for posting the informative link as Im sure many guys have never done that piston assembly with the tool or those retainers
 

Forgot to post the picture that I prepared of the final clearances for the wrist pin
end play, so here they are.


ClearanceDocumentationInExcell.JPG

.
 
Last edited:
Indycars said:

You can view a video of the installation, done by the manufacture here:
http://www.lockintool.com/how-to-use/

Great info! Thanks for sharing. I received my rotating assembly this week and it has SRP 279477 pistons with wire locks. The tool makes it look easy. I'm heads down cleaning and measuring but I will get a build thread started soon.
 
bytor said:
Great info! Thanks for sharing. I received my rotating assembly this week and it has SRP 279477 pistons with wire locks. The tool makes it look easy. I'm heads down cleaning and measuring but I will get a build thread started soon.
Get a few extra wire locks, unless you are willing to hold up the operation waiting on some extras to come in. They are about $2.50 each thou.

I will be curious to see what wrist pin end play you come up with???
 

This is what my Excel spreadsheet for determining what I have done, and what I need
to do,.... looks like now. A whole lot of GREEN, now I'm starting to get scared, since
that means I will have to assemble......and then start it someday....OH SHIT , now I'm getting
worried if I covered ALL my bases!!!

Go to page 40 to compare the last time I posted this graphic.


ComponentCheck-&-BuildSequence02.jpg

If you can't read the picture above, then you can download a PDF file below and
view it with Adobe Reader here:
.


Attachments

  • ComponentCheck-&-BuildSequence03.pdf
    485.6 KB · Views: 6
Last edited:
Back
Top