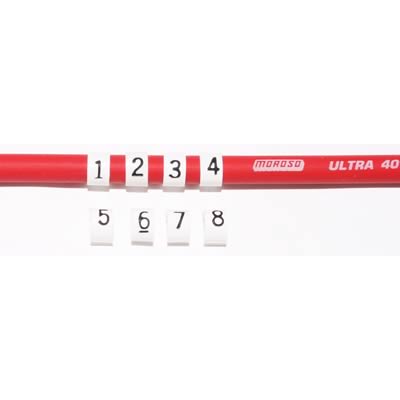
TBucket Engine Project (Dart SHP)

mathd said:
Nice, did you check the header to spark plug wire for clearance? i know you will anyway, just asking because they look very well routed right now :)

Thanks!

There shouldn't be any problem, every exhaust header comes straight out for 12".

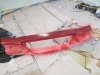
You can also see how close the firewall is and my reason for wanting more bolted support for the plug wires.

HeaderExit_0017.jpg
 
Last edited:
Hey Rick, I know your engine is mounted on the front, but is there a way to maybe move it forward say maybe a inch or so? Have seen a few photo's and it looks like there might be room between fan and radiator, maybe? On page 65 it shows you have a spacer between the fan and waterpump pulley, I was wondering if that spacer could be taken to machine shop and cut down by 1/2 to 3/4 inch, move the engine forward 1 inch you would only lose 1/4 -1/2 of fan clearance to the radiator. That would give you much more clearance for you dizzy and wiring at the back of the block. I was thinking your going to need some room for a tranny dipstick in that area aren't you? Just thinking out-loud here!
 
mathd said:
Nice, did you check the header to spark plug wire for clearance? i know you will anyway, just asking because they look very well routed right now :)
Ya know, you could get another set of those 4 wire looms and bend the brackets to bolt to the back intake bolts to keep the steady and away from the engine. I mean where the floating looms are located. Too late, I saw that your planning on putting in two more looms, did not see it in the first look at the photos.
 
busterrm said:
Hey Rick, I know your engine is mounted on the front, but is there a way to maybe move it forward say maybe a inch or so? Have seen a few photo's and it looks like there might be room between fan and radiator, maybe? On page 65 it shows you have a spacer between the fan and waterpump pulley, I was wondering if that spacer could be taken to machine shop and cut down by 1/2 to 3/4 inch, move the engine forward 1 inch you would only lose 1/4 -1/2 of fan clearance to the radiator. That would give you much more clearance for you dizzy and wiring at the back of the block. I was thinking your going to need some room for a tranny dipstick in that area aren't you? Just thinking out-loud here!

Maybe sometime in the future, when I have it apart during the winter. For now I'm trying to
complete the car so I can get in a few weeks of driving.

 
Have you pulled the old engine and tranny yet? Really it would be easy I think, with the engine and tranny out, just moving the motor mount brackets and the tranny mounts then get the spacer machined and your in business.
 
busterrm said:
Have you pulled the old engine and tranny yet? Really it would be easy I think, with the engine and tranny out, just moving the motor mount brackets and the tranny mounts then get the spacer machined and your in business.

Long time ago I pulled it apart to just a rolling chassis. Had the block bored, then found out I should
be concerned about the cylinder wall thickness. The thinnest wall was only .063" thick. That's when I
decided to go with the Dart SHP block and the rest is history.

This is what it looks like right now. I still have to modify the chassis to accept the new 200-4R transmission.

RollingChassis_0034.jpg
 
Last edited:
Indycars said:
busterrm said:
Have you pulled the old engine and tranny yet? Really it would be easy I think, with the engine and tranny out, just moving the motor mount brackets and the tranny mounts then get the spacer machined and your in business.

Long time ago I pulled it apart to just a rolling chassis. Had the block bored, then found out I should
be concerned about the cylinder wall thickness. The thinnest wall was only .063" thick. That's when I
decided to go with the Dart SHP block and the rest is history.

This is what it looks like right now. I still have to modify the chassis to accept the new 200-4R transmission.


Oh hell Rick, it would be even easier to do with it sitting like that, just layout the centers for the mounts to be moved to, and do the tranny mod at same time. Then just get the spacer machined and wallau! I am a steel fabricator by trade and I guess I can see it in my head easier.
 
Actually, with it like that setting up the tranny and motor at the same time would be really pretty simple. Weld 4 pieces of 3X3 angle iron in place and just sit the engine in, lift the tranny up with floor jack, bolt the cross member to the tranny and sit down on the angle iron. Get it set and aligned mark and drill the mounting holes. Wish I had the time to help I could do it in one day if I had a welder, grinder, power saw, and lady luck. As a matter of fact I have a portable band saw I could bring with me.

Really, I would love to help!
 
"Really, I would love to help!"
thats goes for me also, I wish several of you guys were located locally so we could help each other, theres so many times I see points in builds where I wish I could just drive over and help out as its obvious that a bit of experience and a few select tools would make things far easier. I spent almost all day yesterday replacing body work on the wife's mercury , and while that type of body works not overly difficult its very time intensive, usually goes far faster with two guys and matching paint is a P.I.T.A..
I still have several hours work to do yet.
 

Attachments

  • wife2a.jpg
    wife2a.jpg
    36.2 KB · Views: 81
  • wife1a.jpg
    wife1a.jpg
    22.5 KB · Views: 81
busterrm said:
Actually, with it like that setting up the tranny and motor at the same time would be really pretty simple. Weld 4 pieces of 3X3 angle iron in place and just sit the engine in, lift the tranny up with floor jack, bolt the cross member to the tranny and sit down on the angle iron. Get it set and aligned mark and drill the mounting holes. Wish I had the time to help I could do it in one day if I had a welder, grinder, power saw, and lady luck. As a matter of fact I have a portable band saw I could bring with me.

Really, I would love to help!
I would be more inclined to use some round or rectangular tubing. I'm just
as concerned about how trick it looks as well as being functional. My cold cutting saw is here and
have been using it for the transmission holding fixture. Will post more on that in a few days. All the
welds have to be ground so they are somewhat smooth and then filled with body filler, sanded and
then done again until it looks like one molded piece of material.

There are fuel lines and electrical wiring inside the frame to be concerned about.

 
grumpyvette said:
"Really, I would love to help!"
thats goes for me also, I wish several of you guys were located locally so we could help each other, theres so many times I see points in builds where I wish I could just drive over and help out as its obvious that a bit of experience and a few select tools would make things far easier. I spent almost all day yesterday replacing body work on the wife's mercury , and while that type of body works not overly difficult its very time intensive, usually goes far faster with two guys and matching paint is a P.I.T.A..
I still have several hours work to do yet.

It's a real shame we don't live closer together so help would be readily available! It would
also be more fun just to trade ideas on some projects. Besides it never hurts to know
someone with lots of tools. :)

I thought your accident was suppose to be a fender bender.......it looks to be a bit more than that! :D

 
Well, rectangle/square tubing is okay too! I was just going off what I saw on the motor mounts in some of the pictures, tubing would work better! I was just thinking out loud when I suggested moving the motor/tranny foreward. I just thought, hell the frame in open why not get it done and the motor/tranny won't have to be pulled again later.
 

I got started on the plug wires, but couldn’t finish until I ordered another set of wire looms. I
needed more support across the back of the engine. The metal brackets were much too long,
so I made some of my own.

Moroso_72183.jpg
4WireSeparator_2933.jpg


I was pleasantly surprises to see that Taylor had included 10 boots and 10 connectors, so I
had room for a couple of mistakes. Which I immediately made one cutting the first wire too
short, but I was able to swap the wires around and make it work. I also could see that stripping
the wire insulation was not going to work with the Taylor tool that I bought. In the end the
only thing I used the Taylor tool for, was crimping the connector onto the wire. Taylor does
make a more expensive tool if you have the money.

Taylor83251_2935.jpg
10Boot10Connectors_2938.jpg

Below you can see the internal construction of the wire.

InternalConstruction_2941.jpg
SpiralWoundCore_2973.jpg

After cutting the wire to the proper length, the best way to strip the insulation was to use
some scissors with very pointed tips to nibble very carefully around the outside. I tried the
Taylor tool and two different wire strippers I had, but nothing worked as well as the scissors.
Once you broke thru into the white inner liner it was easy to pull off the insulation with
NO NICKS in the wire conductor. I practiced this probably a dozen times before I did it on
the real plug wire.

StrippingWire.jpg

The crimping was best done in about 4 steps. The Taylor crimper was about ½ the width
of the connector, so I would start on one end and partially crimp the connector. Then
move to the other end and partially crimp again, then repeat until it looked right.

CrimpingConnector01_2978.jpg
CrimpingConnector02_2983.jpg

The Taylor instructions say to put the boot on first, but that meant that the wire would have
to extend thru the boot, making a nearly 90° bend before stripping the insulation. I tried, but
couldn’t get the wire thru the boot. I found it far easier to crimp the connector on first, and
then slide the boot on with some WD40. It was pretty easy this way.

SprayWD40SlideBootOn_2968_2971.jpg

I tested each wire as I made them, then I went back and measured again after I was
all done and recorded the values in Excel for later reference.

TestingPlugWire_2987.jpg

ExcelTable-WireResistance.JPG

Finally the finished product

Finished-RearView_2993.jpg
Finished-SideView_2994.jpg

.
 
Last edited:
as always darn impressive photographic skill! and impressive attention to detail, you may be one of the few old guys like me that uses a multi meter to verify OHMS resistance and that alone is impressive, but obviously from the pictures your taking the effort to do things correctly.
I would point out that Id be cautious about the ignition wire getting pinched between the block and bell housing on the transmission with the wire run like that, I know your highly unlikely to screw that up but Ive seen it happen several times with friends so Ill mention it just in case.
Id also label BOTH ends of each ignition wire, any decent label maker can produce sticky number tags far cheaper that the kits but even the kits are cheap
wirenum1.jpg

wirenum2.jpg

viewtopic.php?f=50&t=6098&p=18837&hilit=label#p18837
3M sells these really handy number tape tags


http://www.clarcorpindustrialsales.com/ ... -p/wmd.htm
at about $30- $45 for a fully loaded dispenser it seems expensive but its really a bargain

watch video
http://www.youtube.com/watch?v=UYGU7mTw ... r_embedded
 

Attachments

  • 12174.jpg
    12174.jpg
    26.6 KB · Views: 35

Good point!!! I will need to keep an eye on the wires when mating the transmission up to the
block. When it goes back together the first time there will be no body on, so I will have a good
view from the top to make sure the wires are ok. But if I have to drop the transmission later,
which could very likely happen after the trans rebuild, I won't have as good a view.

I did buy a second set of wire labels, but since the wires are in the looms I kinda decided not to
install them. But your right, I can't go wrong by putting them on both ends of the wire. Might
just save a mistake sometime when I'm in a hurry and not paying attention.

 
Am also using taylor plug wires for my engine, working flawlessly so far.
I did slide the wire into the boot before to crimp, i used the di-electric grease that was provided with the wire set.
 
Back
Top