any further progress and impressive pictures from your build?
You are using an out of date browser. It may not display this or other websites correctly.
You should upgrade or use an alternative browser.
You should upgrade or use an alternative browser.
TBucket Engine Project (Dart SHP)
- Thread starter Indycars
- Start date
I've been working on the water pump. Needed to smooth the casting and paint it. I'm not happy yet with how
the Por15 Engine Enamel is looking. I'm planning on thinning the paint to see if I can get rid of the lines from the
brush strokes. It's good practice before I get to painting the external surfaces of the block.
The shims from Fastenal for the MSD 8360 distributor have come in, so I will pick those up today. Then I can assemble
again and check/modify the new oil pump driveshaft to get the proper end play.
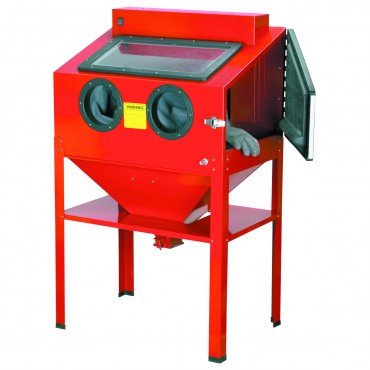
A few shop tools that come in really handy when making small parts look good when cleaning and painting
http://www.harborfreight.com/40-lb-capa ... 93608.html
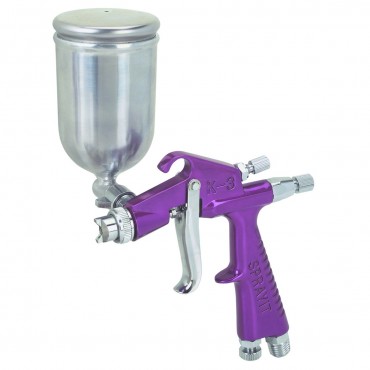
http://www.harborfreight.com/adjustable ... 92126.html

http://www.harborfreight.com/50-lbs-med ... 65929.html
http://www.harborfreight.com/9-ft-x-12- ... 95142.html
OR IF REALLY SERIOUS
http://www.eastwood.com/hotcoat-powder-coating.html
viewtopic.php?f=44&t=1519&p=3482&hilit=powder+coat#p3482
http://www.harborfreight.com/40-lb-capa ... 93608.html
http://www.harborfreight.com/adjustable ... 92126.html
http://www.harborfreight.com/50-lbs-med ... 65929.html
http://www.harborfreight.com/9-ft-x-12- ... 95142.html
OR IF REALLY SERIOUS
http://www.eastwood.com/hotcoat-powder-coating.html
viewtopic.php?f=44&t=1519&p=3482&hilit=powder+coat#p3482
Got all the pieces I need to check the gear mesh and the distributor shaft end play. I'm having a harder time seeing just where the gears are meshing, on some of the gear teeth and can see the pattern. I'm going to call it good.
Now at first I just assumed the distributor gear went on with the gear closest to the bottom, like I show it in the picture below. If I would have just listen to the clues I was getting, but I thought I was too smart to get it wrong. The clues that kept coming at me were the end play on the shaft, just didn't make sense. If I took .075" out at the top, then I should be able to add .075" at the bottom and nothing should change. But it was no where close, but that didn't stop me putting it together that way, I still was not accepting the hints. It was not until I tried to put the distributor in the engine and it would not go in until it seated on the intake manifold. I backup tried it again, same results. I look from the bottom end and I could see the gear was way past the cam gear and running into the block. I'm still puzzled for several minutes, then I got to wondering. I went back to my pictures and sure enough I had the gear on backwards.
So I turned it around. Now the end play was making sense. Every once in awhile, I have to learn this lesson again. LISTEN, LISTEN, LISTEN TO WHAT THE CLUES ARE TELLING ME !!!

Every gear picture below is approximately 90 degrees from each other.


After all was said and done, I ended up changing the end play from .015" to .010". MSD said the end play should be .008-.014"
Now I can take it apart again, clean it up and put it together with some assembly lube. Then bag it for safe keeping until I'm ready for final assembly.
Last edited:
WE HAVE HAD A WHOLE THREAD ON THIS FOR YEARS :mrgreen:
viewtopic.php?f=70&t=251&p=299&hilit=shims+distributor#p299
viewtopic.php?f=70&t=251&p=299&hilit=shims+distributor#p299
I installed the distributor that is now setup properly, the oil pump with the new longer 6.24" shaft. The distributor still lacked about 1/4 of seating on the intake manifold. I thought it would be closer, in an earlier post I guessed it would need to be 6.1".
I went back to the stock shaft that I measured to be 5.75". The end play was .137", but at least the drive shaft is NOT resting on the main cap like before. To obtain the necessary clearance of .020" to .050", I would need a shaft length of 5.837" to 5.867" or a 5-55/64" shaft.
It would be nice if I could purchase the correct shaft, but very few times have the manufactures posted the length, they always give you the application. The BBC pump in a SBC needs a 5.625" shaft. So I thought about this shaft with a raised cam, in this case I would need a shaft for a raised cam of .242".
Any ideas out there ???
Like you, Ive always felt there should either be, a standard length that FITS or a wide selection to pick from, but I generally find Im reduced to selecting the closest fitting slightly longer than required drive shaft length for the oil pump distributor drive, and shortening it, or fabricating some part carefully to the exact length required
At first I used a foam brush to paint my new water pump and got lots of runs. Also when I tried to touch up an area within minutes it would show brush strokes.DorianL said:I used the POR engine enamel and am quite happy with it. It needs several coats tho - and you need to thin it a little.
I got much better results with a real brush and thinned 10% like you experienced, but I'm still having trouble with the brush strokes showing. I'm probably expecting more since my car is a street rod and the engine is not covered. My block and water pump have been ground smooth, this would be more likely to show brush strokes.
I am very happy with the shine it has even after it dries. Will try to post some pictures of the water pump this evening.


Below are the directions from the Por15 company.
POR-15 ENGINE ENAMEL
Surface Preparation: Surfaces to be coated must be free
of grease, oil, grit, rust, and other foreign material that
might impede proper adhesion. Rough surfaces on engine
castings or other cast iron need no further preparation, but
smooth surfaces, especially shiny smooth surfaces, should
be treated with POR-15 Metal-Ready before painting. Do
not use this product to coat exhaust systems.
Application: Apply in well-ventilated area only. Ideal
ambient temperature for application is 70°F(22OC), but
an acceptable temperature range is between 50-80°F(12-
28OC). Mix POR-15 Engine Enamels by stirring only. Do
not shake.
Thinning Ratio: Do not thin more than 20% (1 part thinner
to 5 parts enamel). Thin with POR15 solvent. POR-15
Engine Enamels can usually be brushed without thinning. A
full coat will cover completely with excellent color depth. If a
second coat is desired, wait 24 hours before topcoating.
Dry Time: Allow 8 hours for enamel to dry tack-free. Wait
4-6 days before starting engine.
I'm starting to see a lot more green. Next week or next, I will probably take the rotating assembly
for balancing. Sorry for the very wide picture, but it was the only way to make it half way readable.
If you need a form for planning your build like the one below, the Excel form can be found
here: http://garage.grumpysperformance.com/index.php?threads/component-check-build-sequence-tracking.4894/

Presently in the garage I'm being side tracked by another project in preparation for painting. I'm
building an air dryer, since my hopes of painting the engine with a brush with Por15 Engine Enamel
didn't work out as planned. My plan is to build an air dryer called a "Franzinator", just Google it
and there will be plenty of hits or you can follow my progress in the thread below.
http://garage.grumpysperformance.com/index.php?threads/franzinator-air-dryer.6246/
Last edited:
I took the oil pump driveshaft to a automotive machine, but they couldn't work with the
hardened steel. They suggested another machine shop, he said..."there is couple of old guys
there and they like special projects." They seemed to be retired but staying busy for something
to do beside sitting on the couch.
I gave them this drawing......

This is how it looks now on the end they machined. I didn't specify the chamfers, but he did
them cause they were there originally.

Now my end play is .066", much better than the ~.150" I started with. Cost was $35 for the
machine work, plus the $22 for the Moroso 22077 driveshaft. That's $57 total.

hardened steel. They suggested another machine shop, he said..."there is couple of old guys
there and they like special projects." They seemed to be retired but staying busy for something
to do beside sitting on the couch.
I gave them this drawing......
This is how it looks now on the end they machined. I didn't specify the chamfers, but he did
them cause they were there originally.
Now my end play is .066", much better than the ~.150" I started with. Cost was $35 for the
machine work, plus the $22 for the Moroso 22077 driveshaft. That's $57 total.
Last edited:
looks great!
IM sure it will be fine , now and much better that just dropping in off the shelf parts that don,t really fit.
its all the attention to detail that usually pays off in better long term durability
IM sure it will be fine , now and much better that just dropping in off the shelf parts that don,t really fit.
its all the attention to detail that usually pays off in better long term durability

