TBucket Engine Project (Dart SHP)

grumpyvette said:
Im reasonably sure it could be made to function but holding the pump and running the drill and reading the gauge at the same time might be a problem and Im assuming your using a second pump body as the test tool so the bye-pass clearances might be slightly different than the actual pump and the component clearances being different the results you'll be getting will be very slightly different "
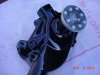
I'm using the actual pump that going in the motor.

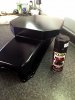
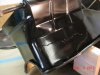
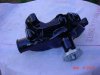
There wasn't much room to get three holes in the space required and the only copper washers I had
were 3/8". So I used 1/8" pipe thread and then adapted it to the 1/4" pipe for the gauge. The 3rd hole
was 1/16", the smallest drill bit I had.

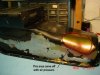
The first time I tested, when the solvent hit the bleed hole it looked like an injector nozzle, nearly
reaching the 8' ceiling. I was able to hold my finger over the hole when I tested with NO spacer. But
when I added the first spacer it was too much, so I put a sheet metal screw in the hole, it still would
bleed air since it was not a good seal.

Like you mentioned it was hard to get a good reading, but the difference were obvious between
each of the different tests. I didn't need good accuracy in this situation.


1st test with NO spacer - ..... 70 psi
2nd test with one spacer - ...100 psi
3rd test with two spacers - ..150 psi

TestFixture_1945.jpg
TestFixtureToPump_1946.jpg
TestFixturePipeThread_1952.jpg
TestSetup_1940.jpg

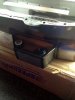
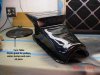
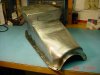
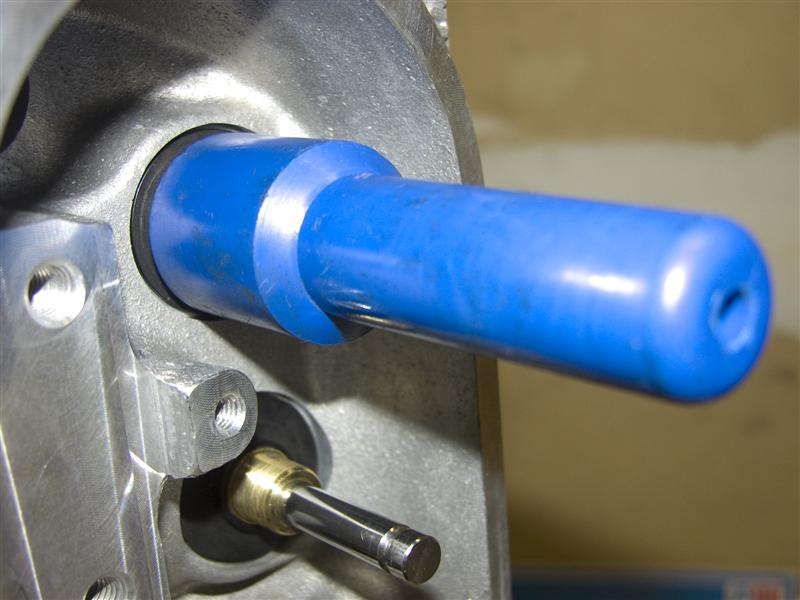
I sure am glad I posted that picture with the spacer sleeves and you questioned whether that was right. I have
to wonder how long it would have taken to trouble shoot this one with the motor in the car. But one nice thing
about this car, there is NOTHING under the oil pan. It would be very easy to drop the pan for a look.


.
 
Last edited:
well its obvious you dodged a potential problem, by, being observant and asking questions (always the best route) and that installing the pump with NO SPACER is the correct choice here!

BTW as always , your amazing me with your DAMN IMPRESSIVE PHOTO SKILLS AND ITS EQUALLY IMPRESSIVE THAT YOUR THINKING THRU THE BUILD, at each stage in the construction, because so many guys just take parts out of boxes and assemble parts , without measuring a darn thing and have nearly zero idea how things work or way
 
Well.......I have some good news and some bad news. First the bad news!

Painting the oil pan was a disaster. I cleaned it 4 times with 91% alcohol and 3 times with
DuPont 3608s thinner, while turning the rag to a new surface each time. I didn't want to get
the recommend Marine Clean and Metal Prep inside the pan, so that's why I skipped those
steps, besides I thought I had done a good job of cleaning.

I'm still trying to put too much paint on and got some pretty bad runs. Let it dry for 2 days,
but it just peeled off when I tried to sand it...... and when I used a air hose it just popped
it right off.

The only thing I could do was start completed over. So I scrapped and sanded until all the
paint was gone, took me about 3 hours. I emailed Por15 to find out if the Gold Iridated surface
needed any special preparation, they said just Marine Clean and Metal Prep.

To make sure I have a good mechanical bond this time, I used Wet r Dry 220 grit and sanded
until the gold iridated surface was gone. I will be painting it this afternoon.

PaintedOilPan_1972.jpg
PaintRun_1971.jpg
PaintSanded01_1974.jpg
Clean&Sanded_1980.jpg


Now for the good news!

This how the water pump turned out, now this makes me smile. I hoping for this kind of
smooth look for the engine block.


WaterPumpPainted01_1978.jpg
WaterPumpPainted02_1979.jpg

.
 
Last edited:
ok first the water pump looks great! congrats!

paint seldom adheres well to smooth steel, a slightly rough surface increases the chances of a firm grip on the surface, in the past Ive generally bead or sand blasted then cleaned and primed surfaces that I wanted to paint, but in reality your not going to be able to see the oil pan surface nearly as well as lets say the valve covers so while I would do the best you can , I certainly would not loose sleep if its only 90% perfect!
paint seems to work reasonably well if the surface its applied too or used on is properly cleaned and degreased before the paints applied, obviously you don,t want to be breathing the crap while you blast clean surfaces so do so someplace out side preferably in a well ventilated area where crap settles on the lawn as it can be washed into the soil with no long term damage,normally rust and glass beads have no potential damage unless you breath in the dust to an area or enviroment. so use a dust mask. and Id strongly suggest repeated pressure cleaning ,the oil pan and use of grease solvents between each pressure wash session,to be sure all the micro dust and craps removed as you sure don,t want that crap in the oil. I generally use a 50%/50% solution of TOLUENE, and methanol or acetone on a shop rag to degrease the outer surfaces, before painting, then air dry with high pressure air[/b]
disposableglove.jpg

http://www.napaglove.com/products/index ... duct_ID=79
DISPOSABLE GLOVES HELP
acetonec.jpg

alcohol.jpg

toluene.jpg

nozzle.gif

image_13512.jpg


http://www.harborfreight.com/21-oz-hopp ... 95793.html

image153.jpg


http://www.harborfreight.com/50-lbs-80- ... 30972.html


imaged380300.jpg


http://www.homedepot.com/webapp/catalog ... r=1&Ntpc=1
 
x2 on using acetone.
Its best to use glove, because its painfull to the finger after a few minute..

Seem like it will be hard for anything to stick on that gold plated finish.
 
I took a few tips from the post above and tackled painting my unfinished champ style pan. Went through a few rounds of cleaning, sanding and filing down the rough edges as recommended. Then I used the VHT Roll Bar & Chassis paint. Seems like tough stuff and went on easy, turned out nice..
 

Attachments

  • photo (5).JPG
    photo (5).JPG
    33.3 KB · Views: 72
  • photo (1).JPG
    photo (1).JPG
    121.8 KB · Views: 72
bytor said:
I took a few tips from the post above and tackled painting my unfinished champ style pan. Went through a few rounds of cleaning, sanding and filing down the rough edges as recommended. Then I used the VHT Roll Bar & Chassis paint. Seems like tough stuff and went on easy, turned out nice..
Hey thanks for posting a comment !!!

I guess the best way to put it is, I'm looking for something close to a show car paint. The engine in a TBucket is completely in the open and even the pan is very visible. I used JB Weld and filled all the welds and then sanded them smooth so even the welds would not be noticeable.


JBWeld02_1959.jpg
JBWeld01_1958.jpg
.
 
Last edited:
really nice detail work and attention to the small details few people bother to think about, yet that attention to detail raises the level of craftsmanship far above average
 
grumpyvette said:
really nice detail work and attention to the small details few people bother to think about, yet that attention to detail raises the level of craftsmanship far above average
I suppose that's what I'm hoping for, even when the average person see's the car at the 7-11.

When they say something, then I can say......"You should see the inside of the engine, it's even nicer !!! :eek:
 

I'm getting ready to assemble the heads and I needed something to install the Crane 99820 valve seals.
I made this tool out of 1/2" ID x 5/8" OD copper tubing.


SealSize_2037.jpg

DrillOperation_2022.jpg
SealToInstaller_2032.jpg
CompletedInstaller_2025.jpg
.
 
Last edited:
darn your a skilled little guy with a good deal of fabrication skills!

but ID suggest a TEE with two 2" sections of tubing sweated in for the handle , not the 90

wpt-06-3.jpg
 
grumpyvette said:
darn your a skilled little guy with a good deal of fabrication skills!
but ID suggest a TEE with two 2" sections of tubing sweated in for the handle , not the 90
wpt-06-3.jpg
I'm lucking in that I bought a Tap & Die Set from Sears around 1982. Therefore I also bought all the drill bits to go with each tap. The 37/64" drill bit was in that set.

I went looking for my TEE and found it, but it was too big, so I used the Elbow since I already had it.

But you are right, the TEE would be better. I think it would give a better feel for keeping it parallel with the valve stem.

But as you will see in the next post, I had too much force at my disposal.
 

I finished my 5th valve installation and remembered I needed to verify the valve seal to retainer clearance. As you can see from the pic below I only have about .037' of clearance. Which just didn't make sense ???

The heads from Brodix are suppose to be good to .575" lift, I have a theoretical lift of .567". Now I did change seals from the Brodix to the Crane 99820 seal, but when I compare them they both have nearly identical material above where it seats on the bronze guide.

RetainerToSealClr_2038.jpg

So I went back and removed all the springs I had installed to see how the others measured and there was a significant difference. The first valve (#2 Exhaust) has .088" of clearance (.655 - .567 = .088"). Then I started noticing the difference in the steel band on the seal where it clamps the seal to the valve guide.

I was visually looking at how far the seal was over the valve guide, so I would keep pushing the seal until it looked nearly the same.

After second or third valve I decided that it would be a good idea to add some assembly lube to the cavity inside the valve seal. That's where I went wrong, it provided a hydraulic lock, holding the seal up off the top of the valve guide. I would keep pushing until it looked similar to the other seals, but it was the steel band that was moving, not the white Teflon material.

SealInstalledWrong_2041.jpg
SealInstalledWrong_2042.jpg

It may not appear like good thing that I forgot to check the first valve, instead of waiting until I had already installed 5 valves. BUT if I had check the first valve I might have decided that I was good to go and never checked another seal.

You can never relax, just when you think you have everything under control......that's when you get bit. Moral of the story once again is ..... UNTIL YOU HAVE CHECK IT, YOU DON'T KNOW.

At least it will be cheap to back up and buy some more seals now, $20 I can easily afford. Better than the other possibility, starting the motor for the first time and seeing white smoke. Now what the HELL is wrong....DAMN.
.
 
Last edited:
Indycars said:
Well.......I have some good news and some bad news. First the bad news!

Painting the oil pan was a disaster. I cleaned it 4 times with 91% alcohol and 3 times with
DuPont 3608s thinner, while turning the rag to a new surface each time. I didn't want to get
the recommend Marine Clean and Metal Prep inside the pan, so that's why I skipped those
steps, besides I thought I had done a good job of cleaning.

I'm still trying to put too much paint on and got some pretty bad runs. Let it dry for 2 days,
but it just peeled off when I tried to sand it...... and when I used a air hose it just popped
it right off.

The only thing I could do was start completed over. So I scrapped and sanded until all the
paint was gone, took me about 3 hours. I emailed Por15 to find out if the Gold Iridated surface
needed any special preparation, they said just Marine Clean and Metal Prep.

When I painted the oil pan for my Nova, I took it to a buddy that has a soda blaster, he turned the pressure down enough to still get through the iradate. Then I sanded it down 100 %, then put a light coat of heat resistant primer, sanded it again then shot the paint on it in very light coats, it took about 4-5 coats but it turned out top shelf quality. busterrm

To make sure I have a good mechanical bond this time, I used Wet r Dry 220 grit and sanded
until the gold iridated surface was gone. I will be painting it this afternoon.


Now for the good news!

This how the water pump turned out, now this makes me smile. I hoping for this kind of
smooth look for the engine block.


Attachments

  • PaintedOilPan_1972.jpg
    PaintedOilPan_1972.jpg
    32.4 KB · Views: 31
  • PaintRun_1971.jpg
    PaintRun_1971.jpg
    27.1 KB · Views: 31
  • PaintSanded01_1974.jpg
    PaintSanded01_1974.jpg
    32 KB · Views: 31
  • Clean&Sanded_1980.jpg
    Clean&Sanded_1980.jpg
    25.6 KB · Views: 30
  • WaterPumpPainted01_1978.jpg
    WaterPumpPainted01_1978.jpg
    32.7 KB · Views: 30
  • WaterPumpPainted02_1979.jpg
    WaterPumpPainted02_1979.jpg
    27.9 KB · Views: 30
busterm said:
When I painted the oil pan for my Nova, I took it to a buddy that has a soda blaster, he turned the pressure down enough to still get through the iradate. Then I sanded it down 100 %, then put a light coat of heat resistant primer, sanded it again then shot the paint on it in very light coats, it took about 4-5 coats but it turned out top shelf quality. busterrm
Have you had trouble getting paint to stick to gold iradate coating ???

After putting on the final coat, did you have to sand it again with something like 1500 grit and then.... ???

The funny thing about Por15 Engine Enamel is, they don't recommend a primer first. I bought a high build Por15 primer, but I've yet to use it.

 
Indycars said:
After second or third valve I decided that it would be a good idea to add some assembly lube to the cavity inside the valve seal. That's where I went wrong, it provided a hydraulic lock, holding the seal up off the top of the valve guide. I would keep pushing until it looked similar to the other seals, but it was the steel band that was moving, not the white Teflon material.

I made this statement about 3 post earlier, which turns out to be wrong. The Teflon material is delicate and was stretching as I pushed the spring down over the valve guide. Trying to push the seal with the very same spring that's suppose to hold it on just was not going to work.

The Crane Teflon seal #99820 has a lip that is only .035" thick, which is not enough in this situation to push the seal over the valve guide with the spring attached. I found out it was very easy to remove the spring by pushing it off the seal, then I would install the seal over the valve stem with the plastic sleeve (Plastic sleeve comes with the seals) and then over the valve guide.

CraneSealDimensions_2046.jpg

Now without the spring on the seal it was easy to push the seal over the valve guide to the proper depth, using ONLY my hands.

To install the spring after the seal I needed something to spread the spring a very small amount so I could get it started and slip it over the seal. I found a bronze bushing that was just a few thousands bigger than the installed seal. To make it easier to get the spring over the bushing, I filed a taper on one end.

BronzeValveSealTool_2050.jpg
InstallSpring_2054.jpg

Once I had the spring started, it was possible to push it on by hand or sometimes I would use the copper tool I had made in an earlier post. Push it on until it is seated on the .035" lip of the seal. I measured the seal height after I installed it and it had stretched about .030", a lot less than with the previous method.

Now when I measure the spring retainer to valve seal clearance I have .090 - .100" of clearance.
.
 
Last edited:
very good info! and outstanding picture quality!

Ive used those seals before but always used the tool I purchased thats a bit different.
I picked my tool set up for $20 about 37 years ago it looks very similar to this tool set

vsit.jpg

vst2.jpg

vst1.jpg


Installing Valve Seals

1. Thoroughly lube up the new Seals with oil so as to not tear the Seal when seating it over the Valve Guide.

2. Again, most manuals will call for a special tool to install the Valve Seals. I think a wood or aluminum center dowel inserted in your tool of the correct length should get it functioning perfectly with the outer tube sized around Valve Seal and the inner dowel preventing the seal entering the tube more than about 1/4 inch depth.

3. Place the Valve Seal around the Valve Guide and push down as far as you can, while being sure to seat the seal as straight as you can. *WARNING* These seals are very fragile. Gently tap on the tool with a rubber hammer to seat the Valve Stem Seal. This is NOT the time to get aggressive. If for any reason it gets held up or stuck, then something is not right and you should abort what your doing. They should slide on to the valve guides with just minor force.
 
Indycars said:
busterm said:
When I painted the oil pan for my Nova, I took it to a buddy that has a soda blaster, he turned the pressure down enough to still get through the iradate. Then I sanded it down 100 %, then put a light coat of heat resistant primer, sanded it again then shot the paint on it in very light coats, it took about 4-5 coats but it turned out top shelf quality. busterrm
Have you had trouble getting paint to stick to gold iradate coating ???

After putting on the final coat, did you have to sand it again with something like 1500 grit and then.... ???

The funny thing about Por15 Engine Enamel is, they don't recommend a primer first. I bought a high build Por15 primer, but I've yet to use it.

1.Yes, I had that problem when I painted a timing cover, and it did the same thing as your oil pan did, so I got my buddy to do the same thing soda blasted it at low pressure and sanded the hell out of it.
2. Yes, I sanded with 2000 grit I think and used compound to polish it, then waxed it if I remember right. It worked great on both the timing cover and the oil pan on the nova.
3. Yeah, I know their paint doesn't suggest a primer, but that is a lesson I learned from my dad years ago. I remember him saying, "Just because they don't suggest it, does not mean it wont do a better job with a primer. " I used to watch him, he even showed me once on a piece of tin, He tapped down the middle, cleaned and sanded and painted with one brand that said no primer, let it dry, laid newspaper over it, sanded and primered, and painted with the same paint. Then the next day we went out to the garage and the difference was like night and day.
 
It really doesn't have to be a regular coat of primer, I always use a light coat myself. Just enough to smooth up a little with sandpaper and clean it real good and start spreading light coats of the paint. It took awhile to do it, I would let the first couple coats dry and smooth them with sandpaper also. That is my way though, some don't sand between the base coats. I let them dry hard, and buff them up and clean good and shoot another coat. I do it first two coats then I let it get tacky and shoot the next coat.
I noticed in a earlier post you said you were having problems with runs, my dad taught me this next process. Find a piece of scrap, and paint it adjusting your distance from the metal. He always told me each type, and even brand of paint has its own tricks. I have over the years kept agreeing with him, each brand or type sprays on top quality at different distances from the metal. I am thinking your probably about 2-3 inches too close to the metal. Thats my reason for doing it in several coats, it spreads more evenly and looks a lot better finishe product. Just my 2 cents worth. Bob
 
Back
Top