You are using an out of date browser. It may not display this or other websites correctly.
You should upgrade or use an alternative browser.
You should upgrade or use an alternative browser.
TBucket Engine Project (Dart SHP)
- Thread starter Indycars
- Start date
love the photo quality and info! WOW!
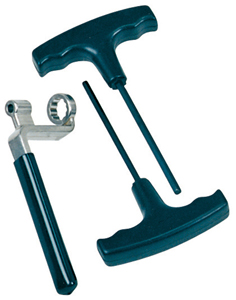
THIS IS FAILING TO GET THE ROLLER ROCKER AXLE INDEXED CORRECTLY <IS A VERY VERY COMMON mistake made by first time roller rocker installers

having the correct tools to lock the nuts sure helps also
THIS IS FAILING TO GET THE ROLLER ROCKER AXLE INDEXED CORRECTLY <IS A VERY VERY COMMON mistake made by first time roller rocker installers
having the correct tools to lock the nuts sure helps also
Installed the timing cover yesterday. I assumed the dowel pins would bottom out at the
right height, but no, the hole is deeper than the length of the dowel pin. I bought what
was suppose to be for a SBC, I didn't just get them at the hardware store. As you can
see I stopped just in time on the first dowel pin.
I also assumed that I had the right socket for this, but the ARP bolts are 5/16" - 12 point.
I couldn't find even a metric that would work and I had already applied the RTV sealer.
Luckily I had a 5/16" combination that was 12 point.
Thru on some old valve covers to keep dirt out for now.

.
Last edited:
yeah theres dozens of things in engine assembly procedures that we all assume should be designed to function correctly as a (no brainer ) that in fact require you to either use a bit of common sense or look into the assembly procedure to verify the correct way to do things,
there are a few parts that can be incorrectly installed
very easily , like
"PISTON RINGS,
and fuel pump push rods,
distributor gears,
bell housing alignment studs,
throw-out bearings,
clutch forks,
clutch discs,
JUST to NAME A FEW THAT RAPIDLY COME TO MIND"
and most of us learn this sad fact by screwing up the installs early in our lives
MURPHYS OUT THERE!
You laugh now, but your time is coming my friend!mathd said:rtv aplied and no 12 point socket to tighten hehehe :lol:
 :lol:
:lol: Installed the intake manifold today, getting ready to post some pics and comments within the hour!
It's so nice when you get one of those fun and quick jobs.....it only took me 8 hours to install the intake manifold. In my defense I did do more than most guy when installing an intake. In the picture you can the the line I drew that sticks above the manifold when installed, so I had to trim the excess gasket material so it wouldn't show.
I cleaned with 91% alcohol about 6 times, then I went to lacquer thinner and cleaned it another 6 times. Since I've been handling the gasket alot with the port matching that did early, I cleaned the gasket with alcohol also, but tried not to get it too wet.
I practiced several times putting the manifold on to get perfect alignment with the roll pins I used during the port matching process. I'm not worried how the rear seal looks, but the front one I took the time to use my finger and trowel it in and then clean off the excess the gets all over.

I guess all that practice paid off, the roll pins alignment is damn close.


.
And finally the finished product !!! Some one please get me a beer !!
Last edited:
busterrm
solid fixture here in the forum
What no water pump, no balancer, wait a minute fella. hahahahahahahahaha !!!!!!!Indycars said:
It's so nice when you get one of those fun and quick jobs.....it only took me 8 hours to install the intake manifold. In my defense I did do more than most guy when installing an intake. In the picture you can the the line I drew that sticks above the manifold when installed, so I had to trim the excess gasket material so it wouldn't show.
I cleaned with 91% alcohol about 6 times, then I went to lacquer thinner and cleaned it another 6 times. Since I've been handling the gasket alot with the port matching that did early, I cleaned the gasket with alcohol also, but tried not to get it too wet.
I practiced several times putting the manifold on to get perfect alignment with the roll pins I used during the port matching process. I'm not worried how the rear seal looks, but the front one I took the time to use my finger and trowel it in and then clean off the excess the gets all over.
I guess all that practice paid off, the roll pins alignment is damn close.
And finally the finished product !!! Some one please get me a beer !! :!: :!:
busterrm
solid fixture here in the forum
OMG your going to have a menios a troi (not sure on spelling) going on? Might be more like the bone song, ya know, " Lifter cup connected to the pushrod, pushrod connected to the rocker arm, rocker arm connected to valve stem, valve stem connected......... " Hahahahahahahaha!!!! Gearhead musicals going on here!!!!Indycars said:
I thought I had the pushrods clean, I had run them thru the parts washer (PW). Which
included holding the pushrod up to the nozzle and forcing all the flow thru the inside of
the pushrod. I did hold it up to the light and examine, looked pretty good to me. But how
can you be sure when trying to look thru 7.45" inside of a pushrod. My wife was out
running around, so I called her and asked for some pipe cleaners. Sure enough she found
some and just to satisfy my curiosity I immediately I pushed a pipe cleaner thru the inside
of a what I thought was a clean pushrod.
This is what it looked like.
So I used the pipe cleaner and the PW. After scrubbing the inside and then flushing with
the PW, I could see dirty cloud come out of the pushrod.....so much for that clean
pushrod that I though I had.
I wish I had taken a before picture, but this shows how shinny it looked internally after
cleaning with the pipe cleaner.
Thank god for wives that like to shop....even for pipe cleaners. :lol:
I wiped down 8 pushrods after going thru the PW twice, but there was still something
on the outside. Probably nothing to worry about. Just some something Trick Flow sprayed
on the outside to keep them from corroding while on the shelf for months.
Soap Opera to continue, tune in tomorrow and find out ...... will the pushrod and lifter get together
or will it be the pushrod and the rocker arm. It's pretty embarrassing from my view, they
both look pretty intimate. Maybe it's going to be a 3-way.....
TO BE CONTINUED.......
busterrm
solid fixture here in the forum
I didn't see your comment on intimacy in the valvetrain until tonight. Its late but, better than never!
Oh yeah, your not drinking a beer during any of the work? What's up with that? I usually drink one myself, especially when I get a lil frustration going on!
Oh yeah, your not drinking a beer during any of the work? What's up with that? I usually drink one myself, especially when I get a lil frustration going on!
mathd
solid fixture here in the forum
He need more that one beer if the dont drink while doing this stuff .
I drink some once in a while when working on the car. Today was one of this day (and i was not frustrated at all really nice day), wet sanding and polishing compound with some beer
I completly drained and removed my carb to tighten all the fuel bowl and accelerator pump screw and darn i hate hot sunny day with strong fuel smell lol.
.I drink some once in a while when working on the car. Today was one of this day (and i was not frustrated at all really nice day), wet sanding and polishing compound with some beer
I completly drained and removed my carb to tighten all the fuel bowl and accelerator pump screw and darn i hate hot sunny day with strong fuel smell lol.
I did that around last November. When I looked back I couldn't find where I described doing that operation specifically, but it must have been part of when I measured and plotted the lift curve. You can see on one of the graphs that I have labeled at 106 degrees here:busterrm said:Hey I must have missed it. Did you degree the cam? You never mentioned anything about it.
viewtopic.php?f=69&t=3814&hilit=degreeing&start=280 ....... [About 1/2 way down the page]
A few days ago I looking at the lift curves and noticed something that was wrong. Yes I made a mistake.....hard to believe I know. It has something to do with the exhaust lift curve.....can you find it??? I will be correcting it next week.
Below is where I recorded it in my documentation.

Last edited:
busterrm said:OMG your going to have a menios a troi (not sure on spelling) going on? Might be more like the bone song, ya know, " Lifter cup connected to the pushrod, pushrod connected to the rocker arm, rocker arm connected to valve stem, valve stem connected......... " Hahahahahahahaha!!!! Gearhead musicals going on here!!!!
Sounds like you've had few since you're starting to sing. I can sing solo............so low you can't here me! :lol:busterrm said:I didn't see your comment on intimacy in the valvetrain until tonight. Its late but, better than never!
Oh yeah, your not drinking a beer during any of the work? What's up with that? I usually drink one myself, especially when I get a lil frustration going on!
Now that's one I would have never thought of......mixing beer with the polishing compound. :lol:mathd said:He need more that one beer if the dont drink while doing this stuff
I drink some once in a while when working on the car. Today was one of this day (and i was not frustrated at all really nice day), wet sanding and polishing compound with some beer
I completly drained and removed my carb to tighten all the fuel bowl and accelerator pump screw and darn i hate hot sunny day with strong fuel smell lol.
:lol: Does it make it cut better ???mathd
solid fixture here in the forum
lol, little missunderstanding. i meant wet sanding and compound while drinking a beer. forgive my faulty writingIndycars said:Now that's one I would have never thought of......mixing beer with the polishing compound. :lol:mathd said:He need more that one beer if the dont drink while doing this stuff
I drink some once in a while when working on the car. Today was one of this day (and i was not frustrated at all really nice day), wet sanding and polishing compound with some beer
I completly drained and removed my carb to tighten all the fuel bowl and accelerator pump screw and darn i hate hot sunny day with strong fuel smell lol.
It does sound strange now that i re-read it lol, i used meguiars ultimate compound actually.
busterrm said:What no water pump, no balancer, wait a minute fella. hahahahahahahahaha !!!!!!!
Well not finished as in a complete motor, but putting the intake manifold is complete. It
was a relief to get that done, I was not sure just how well I could get it all lined up.
I didn't mention in my post, but I left the roll pins in the head. I could NOT use a roll pin
long enough that would extend thru the intake when installed, it was impossible to
install it since the pins are not parallel. I beveled the under side of the intake surface
and enlarged the hole a little in the intake, but was not enough to allow the pins get
thru the intake when they were already installed in the head.
busterrm
solid fixture here in the forum
LOL, how low can you go? Nah, I wasn't drinking beer, just saw your comment about I need a beer! Hahahahaha! Just givin ya the biznus!Indycars said:busterrm said:OMG your going to have a menios a troi (not sure on spelling) going on? Might be more like the bone song, ya know, " Lifter cup connected to the pushrod, pushrod connected to the rocker arm, rocker arm connected to valve stem, valve stem connected......... " Hahahahahahahaha!!!! Gearhead musicals going on here!!!!Sounds like you've had few since you're starting to sing. I can sing solo............so low you can't here me! :lol:busterrm said:I didn't see your comment on intimacy in the valvetrain until tonight. Its late but, better than never!
Oh yeah, your not drinking a beer during any of the work? What's up with that? I usually drink one myself, especially when I get a lil frustration going on!
I finally got around to putting up a intro in the "Introduce Yourself" section. Its titled Texas Hotrodder and has a few pictures of my project. Its not the fancy T bucket like yours but its my toy. I have done a lot since buying it a few years ago.
busterrm
solid fixture here in the forum
I would have had to watch you degree it, I don't understand it when someone is talking about it. I would if I were to watch it being done. I did notice your documentation and was wondering about the centerline column. Isn't the centerline After Bottom Dead Center? I noticed it says ATDC. I was thinking its just a typo.Indycars said:I did that around last November. When I looked back I couldn't find where I described doing that operation specifically, but it must have been part of when I measured and plotted the lift curve. You can see on one of the graphs that I have labeled at 106 degrees here:busterrm said:Hey I must have missed it. Did you degree the cam? You never mentioned anything about it.
viewtopic.php?f=69&t=3814&hilit=degreeing&start=280 ....... [About 1/2 way down the page]
A few days ago I looking at the lift curves and noticed something that was wrong. Yes I made a mistake.....hard to believe I know. It has something to do with the exhaust lift curve.....can you find it??? I will be correcting it next week.
Below is where I recorded it in my documentation.
Okay, I read your posts on degreeing, where did you degree it in? Advance? Retarded? My nova is set up 4 degrees advance.